Editor’s note: This article was last updated by Ikeh Akinyemi on 30 May 2024 to discuss using refs with Vue’s reactivity system and using Vue watchers to watch refs and reactive state.

In this tutorial, we’ll demonstrate how to reference HTML elements in your Vue.js components. Vue.js is a progressive JavaScript framework that focuses on the view layer, and refs are an important feature in Vue that allows you to easily interact with and manipulate DOM elements. This tutorial is suited for all levels of Vue experience, including beginners.
Here are a few prerequisites before we get started:
node -v in your terminal/command promptnpm uninstall -g vue-cli, then install the new one using npm install -g @vue/clinpm install to keep all the dependencies up to dateRefs are Vue.js instance properties used to register or indicate a reference to HTML elements or child elements in the template of your application.
If a ref attribute is added to an HTML element in your Vue template, you’ll be able to reference that element or even a child element in your Vue instance. You can also access the DOM element directly; it is a read-only attribute and returns an object.
Vue’s ref helps you “reference” DOM elements more efficiently than JavaScript’s getElementById, which is known to create performance issues.
The ref attribute makes a DOM element selectable by serving as the key in the parent $ref attribute. Putting a ref attribute in an input element, for example, will expose the parent DOM node as this.$refs.input, or you can format it as this.refs["input"].
For a visual guide on referencing with $refs in Vue.js, check out this video tutorial.
this.refs in VueYou can manipulate a DOM element by defining methods on the element’s reference. For example, you could focus on an input element using this:
this.$refs["input"].focus()
In this way, refs can be used just like the document.querySelector('.element') in JavaScript or the $('.element') in jQuery. While document.querySelector() performs some of the same functions as refs, refs are more efficient because they give you direct access to the specific element you need. On the other hand, document.querySelector() simply returns the first element in your DOM that matches the selector you specified.
$refs can be accessed both inside the Vue.js instance and outside of it. However, they are not data properties, so they are not reactive. On template inspection in your browser, $refs does not show up at all because it is not an HTML attribute; it is only a Vue template attribute.
If you followed this post from the start, you should have downloaded the Vue starter project and opened it up on VS Code. Open the components folder and copy this into the test.vue file:
<template>
  <div>
    <h2>Hello this is for refs man!</h2>
    <p>You have counted {{this.counter}} times</p>
    <input type="text" ref="input">
    <button @click="submit">Add 1 to counter</button>
  </div>
</template>
<script>
export default {
  name: 'Test',
  data(){
    return {
      counter: 0
    }
  },
  methods: {
    submit(){
      this.counter++;
      console.log(this.ref)
    }
  }
}
</script>
After copying the provided code into your test.vue file, run the following command in your terminal to start the development server:
npm run serve
Once the development server is running, open your browser and navigate to the provided local URL (e.g., http://localhost:8080). You should see a simpler counter application with an input field and a button. You will see that the counter gets updated on click, but when you open your developer tools in the browser, you will notice that it logs undefined:
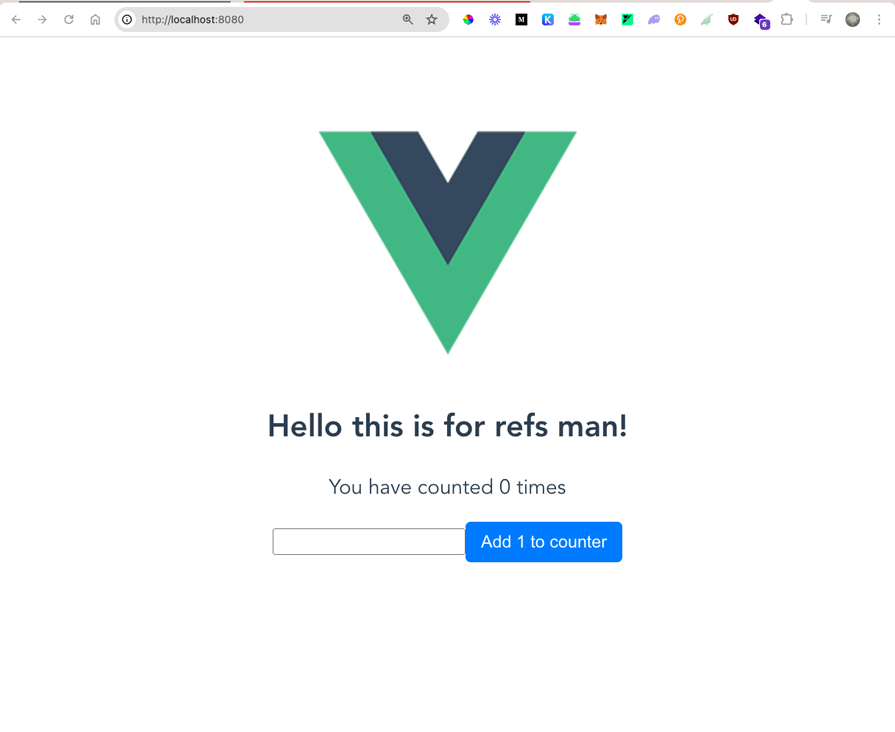
It is important to get the syntax right when accessing refs in Vue. In the code example above, when we log this.ref inside the submit method, it returns undefined. This means that Vue doesn’t raise an error for this.ref, even though it is incorrect syntax.
Copy the code below into the test.vue file:
<template>
  <div>
    <h2>Hello this is for refs man!</h2>
    <p>You have counted {{this.counter}} times</p>
    <input type="text" ref="input">
    <button @click="submit">Add 1 to counter</button>
  </div>
</template>
<script>
export default {
  name: 'Test',
  data(){
    return {
      counter: 0
    }
  },
  methods: {
    submit(){
      this.counter++;
      console.log(this.$refs)
    }
  }
}
</script>
When you run restart the development server and inspect the result of the new code implementation, you will notice that it now returns an object:
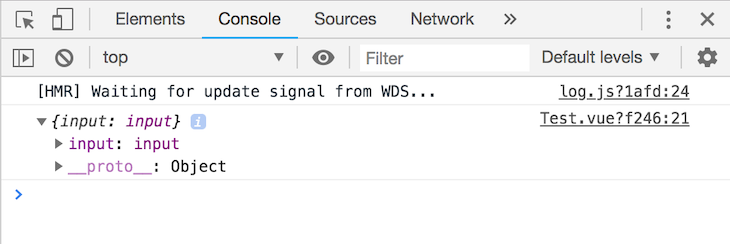
A quick look at the code block will reveal the correct syntax: inside the template, it is called ref, but when we referred to it inside the script, it was called $refs. This is important to note so we don’t get an undefined return.
The ref syntax that is used inside the template is an attribute given to an element. $refs, on the other hand, is a collection of the elements in your application that have been given the ref attribute. You can access every single possible property of the referenced element, including the element, as it is in the template.
ref in the Composition APIIn Vue 3’s Composition API, you can create refs using the ref function. By using refs in the Composition API, you can easily access and manipulate DOM elements, store reactive values, and integrate with other Composition API features like watch and computed.
In Vue 3, the reactivity system is built on top of the reactive and ref functions. Both reactive and ref allow you to create reactive state in your components, but they have some differences in their usage and behavior.
Here’s an example that demonstrates the usage of ref and reactive in a component:
<template>
  <div>
    <p>Count: {{ count }}</p>
    <p>Message: {{ state.message }}</p>
    <button @click="increment">Increment</button>
  </div>
</template>

<script>
import { ref, reactive } from 'vue';

export default {
  setup() {
    const count = ref(0);
    const state = reactive({
      message: 'Hello',
    });

    function increment() {
      count.value++;
    }

    return {
      count,
      state,
      increment,
    };
  },
};
</script>
The ref function takes an initial value and returns a reactive reference to that value. And the refs can hold any value type, including primitives, objects, and arrays:
<template>
  <div>
    <input type="text" ref="input" v-model="inputValue" />
    <button @click="focusInput">Focus Input</button>
    <p>Input value: {{ inputValue }}</p>
  </div>
</template>

<script>
import { ref, onMounted } from 'vue';

export default {
  setup() {
    const input = ref(null);
    const inputValue = ref('');

    onMounted(() => {
      input.value.focus();
    });

    function focusInput() {
      input.value.focus();
    }

    return {
      input,
      inputValue,
      focusInput,
    };
  },
};
</script>
In the above example, we used ref="input" in the template to create a reference to the <input> element. Then, in the setup function, we used const input = ref(null) to create a ref that would store the reference to the <input> element.
Next, we have const inputValue = ref(''), which creates another ref that is used to store the value of the <input> element and is bound to the v-model directive in the template. With these two references, you can automatically call input.value.focus() inside the onMounted lifecycle Hook, focusing the <input> element when the component is mounted. Then the focusInput function is defined to programmatically focus the <input> element when the button is clicked.
Let’s try logging some of the properties that might be of interest to us. Your test.vue file should look like this:
<template>
  <div>
    <h2>Hello this is for refs man!</h2>
    <p>You have counted {{this.counter}} times</p>
    <input type="text" ref="input">
    <button @click="submit">Add 1 to counter</button>
  </div>
</template>
<script>
export default {
  name: 'Test',
  data(){
    return {
      counter: 0
    }
  },
  methods: {
    submit(){
      this.counter++;
      console.log(this.$refs)
    }
  }
}
</script>
<style scoped>
p , input, button{
  font-size: 30px;
}
input, button{
  font-size: 20px;
}
ul {
  list-style-type: none;
  padding: 0;
}
li {
  display: inline-block;
  margin: 0 10px;
}
a {
  color: #42b983;
}
</style>
The application on your browser should look like this:

To display the HTML element as it is in the DOM, go into the submit method and change the methods code to the following:
methods: {
    submit(){
      this.counter++;
      console.log(this.$refs.input)
    }
  }
The input here is the reference name you created earlier inside the element (ref="input"). It can be any name of your choice.
To display the HTML element input value — the string that was typed into the text box in the user interface — go into the submit method and change the code like so:
methods: {
    submit(){
      this.counter++;
      console.log(this.$refs.input.value)
    }
  }
This displays exactly the string you type in, demonstrating functionality similar to what can be achieved using querySelector in vanilla JavaScript or jQuery’s selector methods.
The webpage in which the element can be found is also one of the many things that can be displayed with the Vue ref. Go into the submit method and change the code to this:
methods: {
    submit(){
      this.counter++;
      console.log(this.$refs.input.baseURI)
 }
}
There are many other things you can both access and log with the ref just by the information on the returned object.
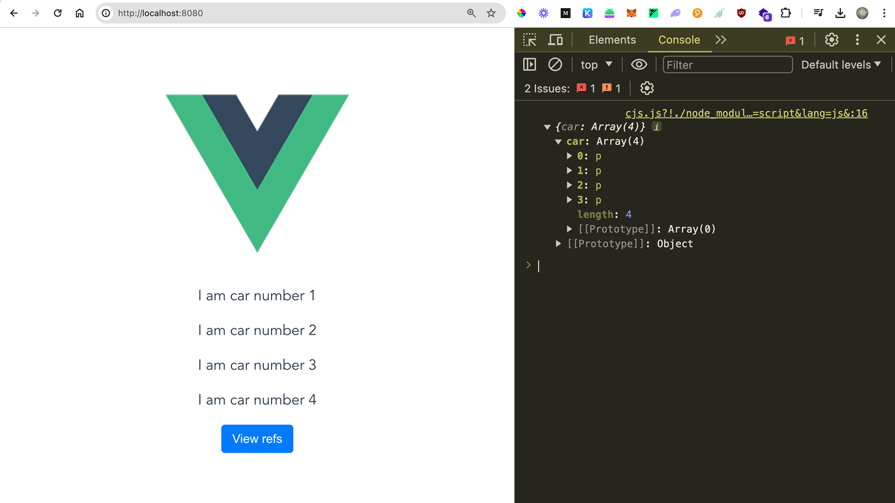
Vue.js refs can also be used inside elements that generate multiple items in the DOM, like conditional statements where v-for directives are used. Instead of returning a single object, refs return an array of the items when called. To illustrate this, let’s create a simple list:
<template>
  <div>
    <p v-for="car in 4" v-bind:key="car" ref="car"> I am car number {{car}}</p>
    <button @click="submit">View refs</button>
  </div>
</template>
<script>
export default {
  name: 'Test',
  data(){
    return {
    }
  },
  methods: {
    submit(){
      console.log(this.$refs)
    }
  }
}
</script>
When you run it in the development server again, it will look like this:
Vue watchers allow you to observe changes in reactive data and perform actions based on those changes. In Vue 3, you can use the watch function to watch refs and reactive state.
To watch a ref, you can pass the ref directly as the first argument to the watch function. Here’s an example:
<template>
  <div>
    <input type="text" v-model="message" />
    <p>Reversed Message: {{ reversedMessage }}</p>
  </div>
</template>

<script>
import { ref, watch } from 'vue';

export default {
  setup() {
    const message = ref('');
    const reversedMessage = ref('');

    watch(message, (newValue) => {
      reversedMessage.value = newValue.split('').reverse().join('');
    });

    return {
      message,
      reversedMessage,
    };
  },
};
</script>
In this example, we have a message ref that is bound to an input field using v-model. We also have a reversedMessage ref that will display the reversed version of the message.
We use the watch function to watch the message ref. Whenever the value of message changes, the callback function is triggered, and it reverses the message and assigns it to reversedMessage. You can also watch multiple refs or a combination of refs and reactive state by passing an array to the watch function:
watch([ref1, ref2, reactiveState], ([newRef1, newRef2, newReactiveState]) => {
  // Callback function triggered when any of the watched values change
});
watch with refsHere’s an example that demonstrates using a watcher for data synchronization:
<template>
  <div>
    <select v-model="selectedOption">
      <option value="A">Option A</option>
      <option value="B">Option B</option>
      <option value="C">Option C</option>
    </select>
    <p>Selected: {{ selectedOption }}</p>
    <p>Message: {{ message }}</p>
  </div>
</template>

<script>
import { ref, watch } from 'vue';

export default {
  setup() {
    const selectedOption = ref('A');
    const message = ref('');

    watch(selectedOption, (newValue) => {
      switch (newValue) {
        case 'A':
          message.value = 'You selected Option A';
          break;
        case 'B':
          message.value = 'You selected Option B';
          break;
        case 'C':
          message.value = 'You selected Option C';
          break;
        default:
          message.value = '';
      }
    });

    return {
      selectedOption,
      message,
    };
  },
};
</script>
In this example, we have a selectedOption ref bound to a select dropdown using v-model. We also have a message ref that will display a message based on the selected option. We use a watcher to watch the selectedOption ref. Whenever the selected option changes, the watcher callback function is triggered and updates the message ref based on the selected value.
By integrating refs with watchers, you can perform reactive updates and trigger actions based on changes in your component’s state. Watchers provide a powerful way to observe and respond to data changes in Vue 3.
Let’s see some changes and improvements introduced in Vue 3 that changed the ways we use refs:
setup(): setup() is considered the best way to use refs. To use the Composition API, setup() acts as your point of entry whereby you can define your component’s reactive state and methodsref() function and expose it to the template.value property to the ref object, it results in a reactive update inside the component, causing the automatic re-render of respective parts of the templateconst count = ref<number>(0);This article explored referencing HTML elements in your DOM in Vue.js. You can now access and log these elements by all the element properties, including value, child node, data attributes, and even the base URL that houses it.
It is important to note that refs get populated after the Vue instance has initialized and the component has been rendered, so using refs in computed properties is discouraged because it can directly manipulate child nodes.
Happy hacking!
Debugging Vue.js applications can be difficult, especially when users experience issues that are difficult to reproduce. If you’re interested in monitoring and tracking Vue mutations and actions for all of your users in production, try LogRocket.
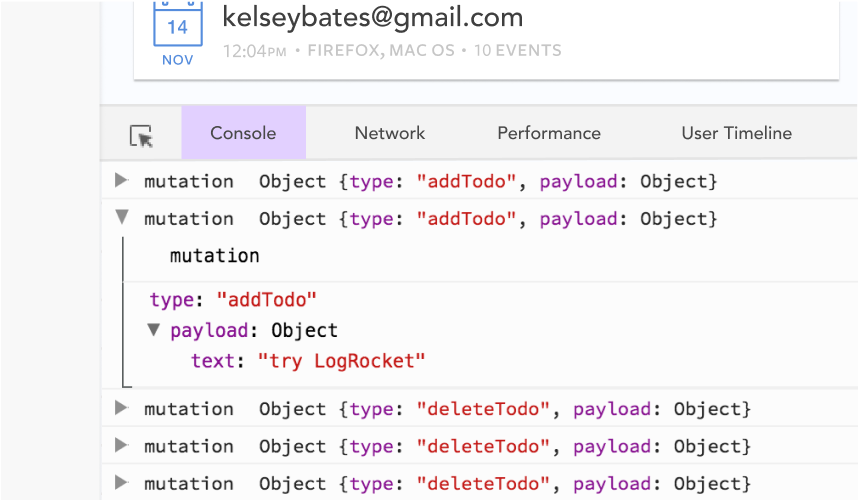
LogRocket lets you replay user sessions, eliminating guesswork by showing exactly what users experienced. It captures console logs, errors, network requests, and pixel-perfect DOM recordings — compatible with all frameworks.
With Galileo AI, you can instantly identify and explain user struggles with automated monitoring of your entire product experience.
Modernize how you debug your Vue apps — start monitoring for free.

Can AI refactor legacy CSS without breaking your layout? We benchmarked 5 top AI assistants across cascade order, specificity ties, and stacking traps.

Learn how to offload long-running Gemini AI requests to Trigger.dev background jobs in Next.js using Server Actions and real-time React hooks.

Learn how to use Google’s LiteRT.js to build a browser-based OCR receipt scanner with WebGPU acceleration and on-device LLM structuring via LiteRT-LM.

Learn how to use the TypeScript Compiler API and AST traversal to extract imports and build a file dependency graph CLI.
Hey there, want to help make our blog better?
Join LogRocket’s Content Advisory Board. You’ll help inform the type of content we create and get access to exclusive meetups, social accreditation, and swag.
Sign up now



 Learn more →