In Vue, we manage states using libraries like Vuex, Redux, and Pinia, which serve as a central store for component states. However, these libraries are single-tree state management systems that are difficult to use for the relational data structure. Thankfully, with the Vuex ORM, it is possible for developers to handle the state as a database while still keeping it in a normalized form.

For example, in a component, we could have a state called user, which would contain the user’s full name, age, gender, and email address. Because this data is well structured, we can easily perform basic CRUD, create, read, update, and delete operations.
In this tutorial, we’ll explore the features of Vuex ORM, demonstrating how to use them to perform basic CRUD operations on our Vue application states. We’ll also learn how to use Vuex ORM lifecycle hooks. Let’s get started!
Jump ahead:
Vuex ORM is a Vuex state management pattern and library for Vue applications. Vuex ORM enables object-relational mapping (ORM) in Vue applications, allowing developers to work with models and manage their relationships more efficiently.
ORM offers a simple method to interact with the Vue application’s data as an object rather than as raw data. Therefore, you can write code that is simpler to understand and easier to maintain.
To follow along with this tutorial, you’ll need the following:
Application performance and maintenance is important, especially when working on large-scale projects. Let’s explore some benefits of using Vuex ORM over plain-state storage.
Vuex ORM makes it easy to work with data in Vuex stores. By providing an ORM layer that allows developers to define data models and work with the application’s data as objects, Vuex ORM reduces the need for boilerplate and repetitive code.
Vuex ORM makes data manipulation easier by introducing data query features for filtering, updating, and deleting data from the database. Therefore, Vuex ORM is suitable for large data applications.
Vuex ORM is a useful tool for managing application state. It helps to improve the application’s performance and scalability by providing an efficient and organized way to work with Vuex store data.
Before we get started, let’s create a simple Vue project with the following commands:
npm create vite@latest vue-app --template vue
cd vue-app
npm install
Install Vuex ORM in your Vue application using the command below:
# using npm
npm install vue vuex @vuex-orm/core --save
We can use Vuex ORM’s model to define the fields and relationships of our database entities. To better understand Vuex ORM’s model, we’ll create a simple book model.
From the application root directory, navigate to the src folder and create a store/models folder. Inside the models folder, create a book.js file and add the following code:
// src/store/models/book.js
import { Model } from "@vuex-orm/core";

export default class Book extends Model {
 static entity = "books";

 static fields() {
   return {
    bookTitle: this.string(""),
     bookCover: this.string("https://github.com/popoolatopzy/upload/raw/main/cover1.jpeg"),
     bookPrice: this.string("1000"),
   };
 }
}
To access the model, we must first create a Vuex ORM database and then register it with Vuex using the Vuex ORM install method. From your project’s root directory, open main.js and replace it with the following code:
import { createApp } from "vue";
import Vuex from "vuex";
import App from "./App.vue";
import VuexORM from "@vuex-orm/core";
import Book from "./store/models/Book";

const database = new VuexORM.Database();
database.register(Book);

const store = new Vuex.Store({
 plugins: [VuexORM.install(database)],
});

createApp(App).use(store).mount("#app");
Let’s create a component called favourite.vue that enables users to enter details about their favorite book and store them in the Vuex ORM database. Inside the src/components folder, create the favourite.vue file and add the following code:
<script>
import Book from "../store/models/book";

export default {
 data() {
   return {
     form: {
       title: "",
       url: "",
       price: "",
     },
   };
 },
 methods: {

 },
};
</script>
<template>
 <div>
   <link
     href="https://cdn.jsdelivr.net/npm/[email protected]/dist/css/bootstrap.min.css"
     rel="stylesheet"
   />
   <center>
     <div
       style="width: 70%; height: 60px  margin-bottom: 20px;  margin-top: 100px;"
     >
       <label for="">Book Title</label>
       <input v-model="form.title" />
       <label for="">Book Cover URL</label>
       <input v-model="form.url" />
       <label for="">Book Price</label>
       <input v-model="form.price" /><br /><br />
       <button @click="addItem" class="btn-primary" style="border-radius: 12%">
         Add favorite book
       </button>
     </div>
   </center>
 </div>
</template>
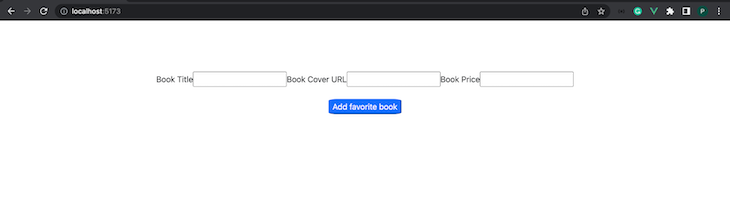
Add the component above to app.vue and run the application. We should see the component displayed on the page, as shown below:
Now that we’ve created the book model and registered it as a Vuex ORM database, let’s explore how we can perform basic CRUD operations on the database.
We can use the Vuex ORM insert() method to add new records to the Vuex store. We’ll pass the data we want to add to the Vuex store as an object along with the INSERT method. The code below will add the user’s favorite book to the database:
 // src/components/favourite.vue
// . . .
methods: {
   addItem() {
     const favourite = [
       {
         bookTitle: this.form.title,
         bookCover: this.form.url,
         bookPrice: this.form.price,
       },
     ];
     Book.insert({ data: favourite });
   },
 },
// . . .
There are various methods of retrieving data from the Vuex store; let’s review some methods for filtering data from the Vuex store.
The Vuex ORM all() method retrieves all records from the database. We can use it inside the Vue method as follows:
// get all books
const books = Book.all();
We can use the Vuex ORM find() method to get the value of a single record from the database. We can get the value of a record with an ID of 3 from the database using the code below:
// get Book with the id of 3
const book = Book.find(3);
Now that we know how to retrieve data from the Vuex ORM database, we can fetch all the books from the database by adding the following code to the favourite.vue script:
<script>
import Book from "../store/models/book";

export default {
 computed: {
   books: () => Book.all(),
 },
 data() {
   return {
     form: {
       title: "",
       url: "",
       price: "",
     },
   };
 },


// . . .
};
</script>
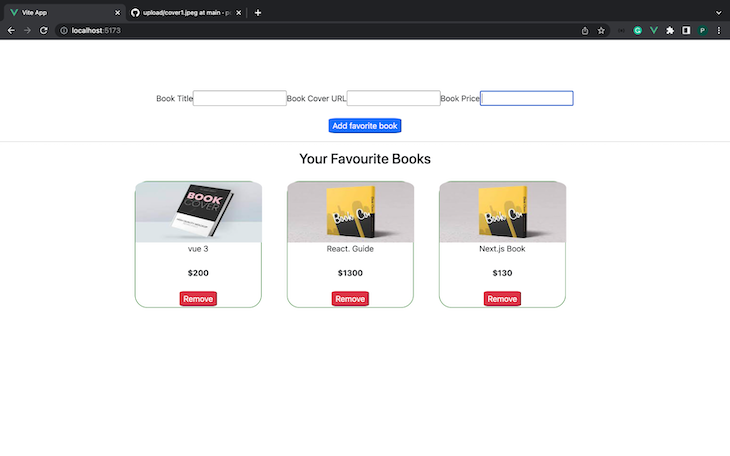
Next, let’s display all the books from the database to the user by adding the following code to the favourite.vue template:
[code]
Refresh the application, and you should see the following output:
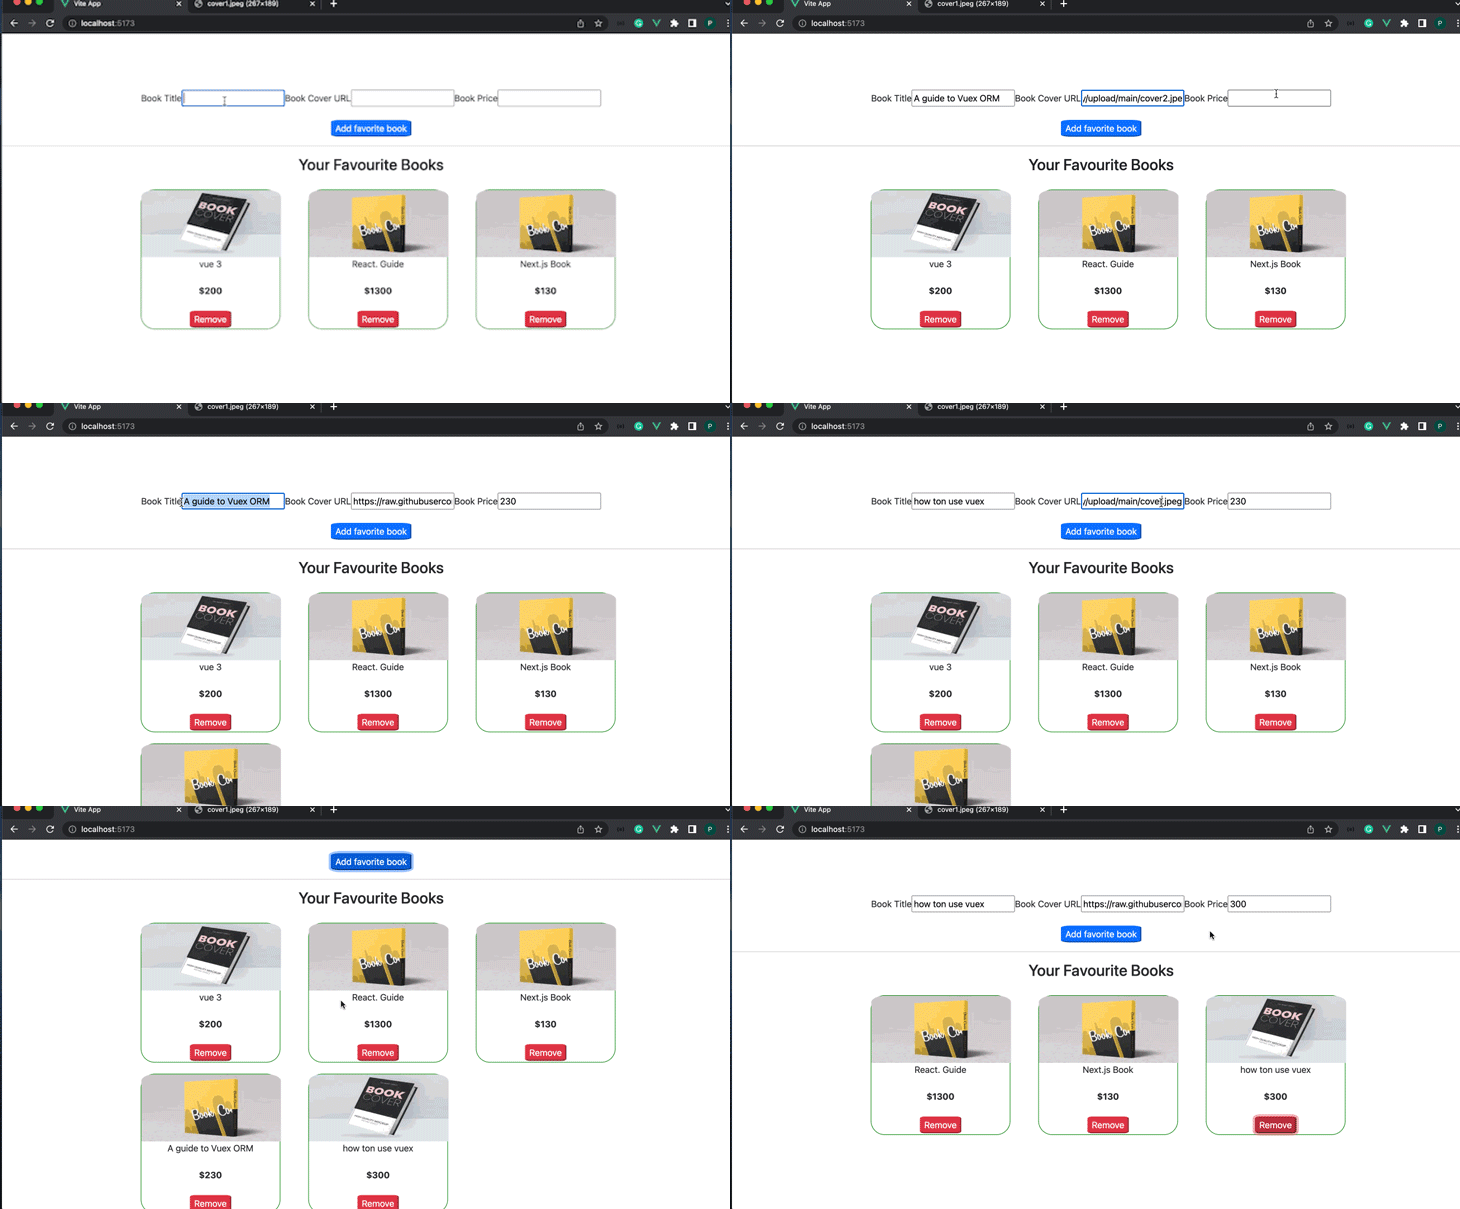
To delete a record from the Vuex ORM database, we’ll use the delete()method. The primary ID of the target record is passed into the method as an augment. We can add delete functionality by updating the favourite.vue with the following code:
 // . . .
methods: {
   addItem() {
     const posts = [
       {
         bookTitle: this.form.title,
         bookCover: this.form.url,
         bookPrice: this.form.price,
       },
     ];

     Book.insert({ data: posts });
     // console.log(this.form.title);
   },
   deleteItem(itemID) {
     Book.delete(itemID);
     console.log(itemID);
   },
 },
};
</script>
Once we save the code above and refresh our browser, we should have the following result:
We can use Vuex ORM lifecycle hooks to perform automatic actions whenever a specific record is saved, changed, or retrieved from the Vuex ORM database. The Vuex ORM lifecycle is divided into two categories, select lifecycle hooks and mutation lifecycle hooks.
Select lifecycle hooks are triggered when we retrieve data from the Vuex store. A few examples of select hooks include beforeSelect, afterWhere, afterOrderBy, and afterLimit. In our book model, we can filter records using beforeSelect to return books with prices above 130:
// src/models/book.js
import { Model } from "@vuex-orm/core";

export default class Book extends Model {
 static entity = "books";

 static fields() {
   return {
     bookTitle: this.string(""),
     bookCover: this.string("https://github.com/popoolatopzy/upload/raw/main/cover1.jpeg"),
     bookPrice: this.string("1000"),
   };
 }
 static beforeSelect(books) {
   return books.filter((book) => book.bookPrice >= "130");
 }
}
Mutation lifecycle hooks are triggered when we alter data in the Vuex store. Mutation lifecycle hooks include beforeCreate, afterCreate, beforeUpdate, afterUpdate, beforeDelete, and afterDelete:
// src/models/book.js
    import { Model } from "@vuex-orm/core";

export default class Book extends Model {
 static entity = "books";

 static fields() {
   // . . .
 }
 static beforeSelect(books) {
   return books.filter((book) => book.bookPrice >= "130");
 }
 static beforeCreate(model) {
   model.published = true;
 }
}
Vuex ORM is a powerful Vuex plugin that allows developers to easily manage and manipulate data in Vue applications. Vuex ORM offers a simple interface for interacting with the Vuex store as a database, making it easy to store, retrieve, and update data within a Vue application.
In this tutorial, we learned how to configure and use the Vuex ORM database in a Vue application. For more information, be sure to check out the official docs. I hope you enjoyed this tutorial, and be sure to leave a comment if you have any questions. Happy coding!
Debugging Vue.js applications can be difficult, especially when users experience issues that are difficult to reproduce. If you’re interested in monitoring and tracking Vue mutations and actions for all of your users in production, try LogRocket.
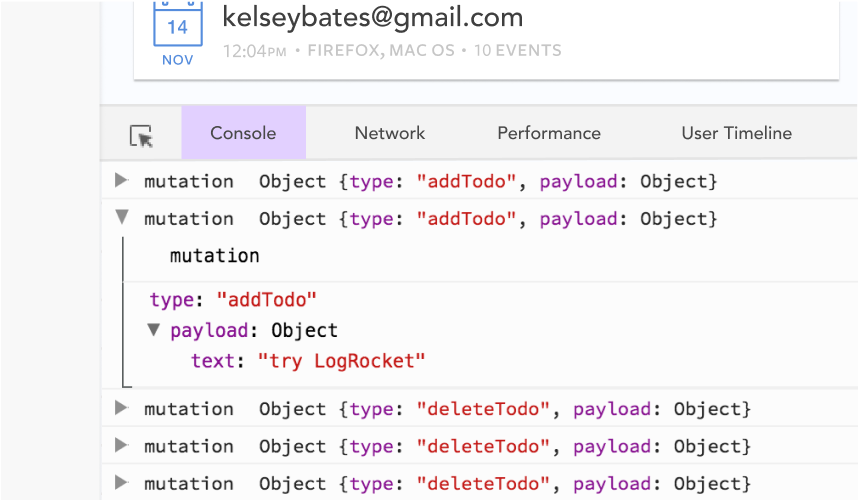
LogRocket lets you replay user sessions, eliminating guesswork by showing exactly what users experienced. It captures console logs, errors, network requests, and pixel-perfect DOM recordings — compatible with all frameworks.
With Galileo AI, you can instantly identify and explain user struggles with automated monitoring of your entire product experience.
Modernize how you debug your Vue apps — start monitoring for free.

Can AI refactor legacy CSS without breaking your layout? We benchmarked 5 top AI assistants across cascade order, specificity ties, and stacking traps.

Learn how to offload long-running Gemini AI requests to Trigger.dev background jobs in Next.js using Server Actions and real-time React hooks.

Learn how to use Google’s LiteRT.js to build a browser-based OCR receipt scanner with WebGPU acceleration and on-device LLM structuring via LiteRT-LM.

Learn how to use the TypeScript Compiler API and AST traversal to extract imports and build a file dependency graph CLI.
Hey there, want to help make our blog better?
Join LogRocket’s Content Advisory Board. You’ll help inform the type of content we create and get access to exclusive meetups, social accreditation, and swag.
Sign up now


 Learn more →