Editor’s note: This article was updated by Oscar Jite-Orimiono on 16 May 2024 to include information about Chrome’s relatively new support of the standard, which overrides the old pseudo-elements; the latest CSS properties related to scrollbars; accessibility considerations; ideas for further experimenting with scrollbars; and more.
The default browser scrollbar works fine in most cases. However, leaving it as is can make even the most beautiful websites look incomplete and unpolished.
Styling the scrollbar allows you to create a more visually appealing site that better aligns with your brand or design. In this tutorial, we’ll explore a few different ways to style CSS scrollbars.
The scrollbar is a frequently overlooked element in web design. While it may seem like a small detail, it plays an essential role in website navigation. The default scrollbar is often dull and might look out of place, detracting from the overall aesthetic of your website or web app.
Fortunately, you can easily customize the scrollbar using CSS. To do so you’ll need to write two sets of CSS rules — one to cover Webkit browsers, like Chrome, Edge, and Safari, and another to cover Firefox and offshoots.
Before diving into the code, let’s ensure we understand a scrollbar’s structure. Knowing this is helpful when styling it with CSS because you can use different properties to target specific scrollbar parts. Below are the elements that make up a scrollbar:
Webkit browsers allow scrollbar styling using pseudo-elements like :: -webkit-scrollbar, ::-webkit-scrollbar-button, ::-webkit-scrollbar-thumb, ::-webkit-scrollbar-track, and more. Each of these targets different parts of the scrollbar, as listed above.
Here’s how to use these elements. In your HTML file, write the following:
<body>
  <div class='container'>
    <img
      src='image.jpg' />
  </div>
</body>
Then, add the following to your CSS file:
.container {
  width: 600px;
  height: 400px;
  margin: 30px auto;
  box-shadow: 0 0 2px gray;
  padding: 20px;
  overflow: scroll;
}

/* Define the scrollbar style */
.container::-webkit-scrollbar {
  width: 10px;
  height: 10px;
}
/* Define the thumb style */
.container::-webkit-scrollbar-thumb {
  background: #4d7fff;
  border-radius: 5px;
}
/* Define the track style */
.container::-webkit-scrollbar-track {
  background-color: #ddd;
  border: 1px solid #ccc;
}
/* Define the button style */
.container::-webkit-scrollbar-button {
  background-color: #4d7fff;
  border-radius: 5px;
}
/* Define the button style when being hovered over */
.container::-webkit-scrollbar-button:hover {
  background-color: #999999;
}
In the code above, we’ve displayed both the vertical and horizontal scrollbars. However, in most cases, we’d only display one.
To do so, we can modify the overflow property — which is responsible for the visibility of the scrollbar — to either overflow-x or overflow-y, depending on which axis we will display the scrollbar. However, this wouldn’t be enough for the example above unless we make the image responsive by setting its width and height to 100%.
Here’s how your scrollbars should look on all Webkit browsers:
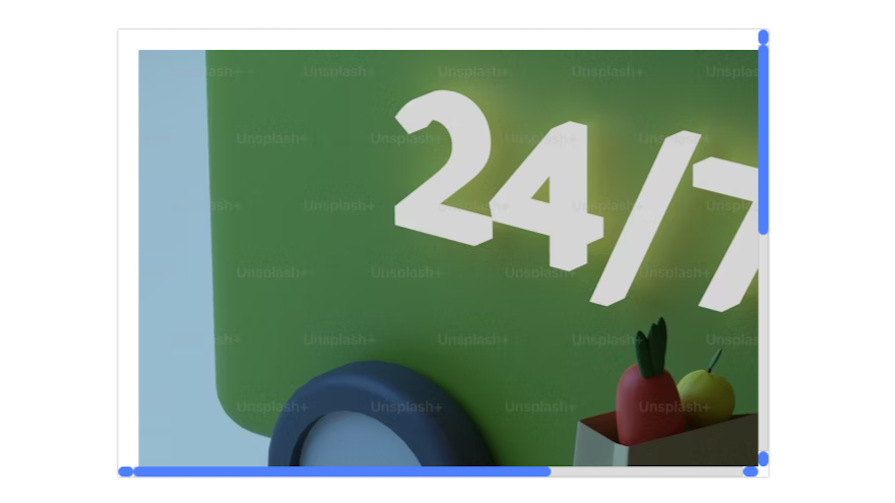
The CodePen below shows an example of a styled scrollbar using the pseudo-elements above:
See the Pen Webkit scrollbar style by Taminoturoko Briggs (@tammibriggs)
on CodePen.
To create a more customized design, you can target specific scrollbar elements and style them by adding a pseudo-class to each pseudo-element. Below are some of the most common pseudo-classes:
:horizontal: Used to style the horizontal scrollbar differently from the vertical scrollbar. For example, you can set a different width or color for the horizontal scrollbar:vertical: Used to style the vertical scrollbar differently from the horizontal scrollbar:decrement: Applies to the arrow buttons at the beginning of the scrollbar. It is used to style the decrement button or the up arrow for a vertical scrollbar and the left arrow for a horizontal scrollbar:increment: Applies to the arrow button at the end of the scrollbar. It is used to style the increment button or the down arrow for a vertical scrollbar and the right arrow for a horizontal scrollbar:start: Applies to the first buttons and first track piece of the scrollbar, which are at the top or left side of a vertical or horizontal scrollbar, respectively:end: Applies to the last track piece of the scrollbar, which is at the bottom or right side of a vertical or horizontal scrollbar, respectivelyBelow is an example that uses the :horizontal pseudo-classes to give the vertical scrollbar a different look:
/* Style the beginning section of the scrollbar track */
.container::-webkit-scrollbar-track-piece:vertical:start {
  background-color: #4d7fff;
}
/* Style the end section of the scrollbar track */
.container::-webkit-scrollbar-track-piece:vertical:end {
  background-color: green;
}
/* Define the button style */
.container::-webkit-scrollbar-button:vertical {
 background-color: #4d7fff;
 background-repeat: no-repeat;
 background-size: 50%;
 background-position: center;
}
.container::-webkit-scrollbar-button:vertical:decrement {
 background-image: url("data:image/svg+xml,%3Csvg xmlns='http://www.w3.org/2000/svg' width='64' height='64' fill='%23000000' viewBox='0 0 256 256'%3E%3Cpath d='M213.66,165.66a8,8,0,0,1-11.32,0L128,91.31,53.66,165.66a8,8,0,0,1-11.32-11.32l80-80a8,8,0,0,1,11.32,0l80,80A8,8,0,0,1,213.66,165.66Z'%3E%3C/path%3E%3C/svg%3E");
}
.container::-webkit-scrollbar-button:vertical:increment {
  background-image: url("data:image/svg+xml,%3Csvg xmlns='http://www.w3.org/2000/svg' width='64' height='64' fill='%23000000' viewBox='0 0 256 256'%3E%3Cpath d='M213.66,101.66l-80,80a8,8,0,0,1-11.32,0l-80-80A8,8,0,0,1,53.66,90.34L128,164.69l74.34-74.35a8,8,0,0,1,11.32,11.32Z'%3E%3C/path%3E%3C/svg%3E");
}
Here’s a screenshot of how it should look:

And here’s a CodePen for the example above:
See the Pen Webkit scrollbar vertical pseudo-class by Taminoturoko Briggs (@tammibriggs)
on CodePen.
Remember, we’re still working with Webkit browsers, so you won’t get the same result if you’re using Firefox.
The example below uses the :horizontal pseudo-class to insert a shadow onto the horizontal scrollbar’s track:
.container::-webkit-scrollbar-track:horizontal {
  background-color: white;
  box-shadow: inset 0 0 2px 2px gainsboro;
}
Here’s a screenshot:

While the Webkit specifications for styling a scrollbar work fine at the time of writing, W3C has officially abandoned this specification, and it’s expected to be phased out gradually.
Firefox doesn’t offer any advanced styling methods like the Webkit browsers. The major properties you need are scrollbar-width and scrollbar-color.
The scrollbar-width property styles a scrollbar’s width and only accepts three keywords — auto, thin, and none. It doesn’t accept numerical or length values like px, rem or em.
A scrollbar’s thumb, track, and arrow buttons are all styled with scrollbar-color. It takes two color values. The first color styles the thumb (and buttons, depending on the browser), and the second styles the track:
.container{
  scrollbar-width: auto;
  scrollbar-color: #1a56ff #add8e6;
}
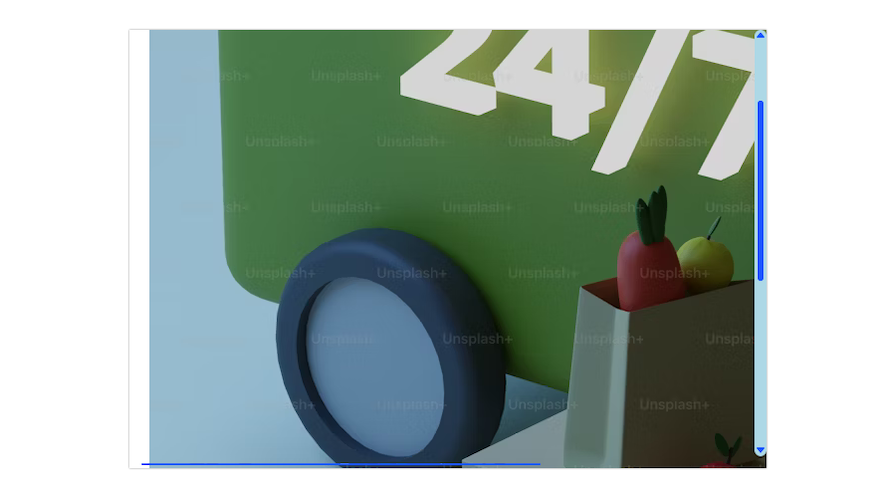
Here’s a screenshot from a Firefox browser. You’ll have to hover on it to see the complete scrollbar:
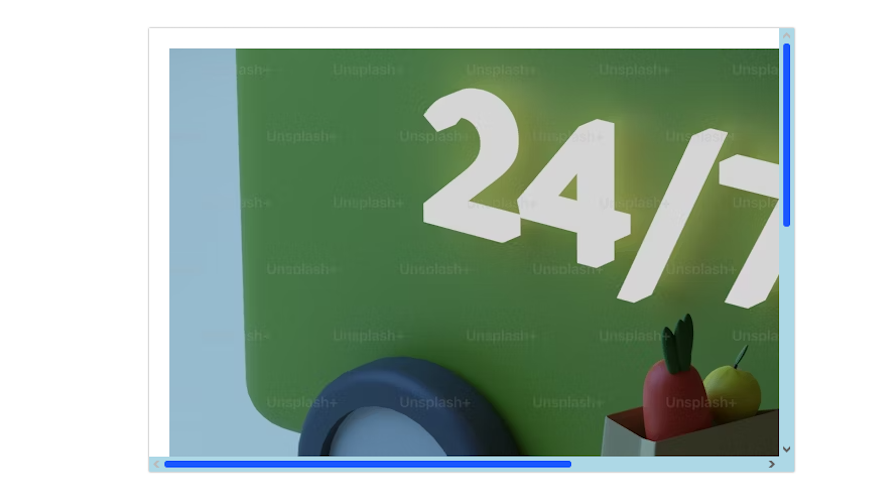
You can now style scrollbars on Webkit browsers without using any vendor prefix. However, it’ll look different depending on the browser.
We’ve already seen how it looks on Firefox. Here’s how it looks with the same code on Opera:
Meanwhile, on Chrome:
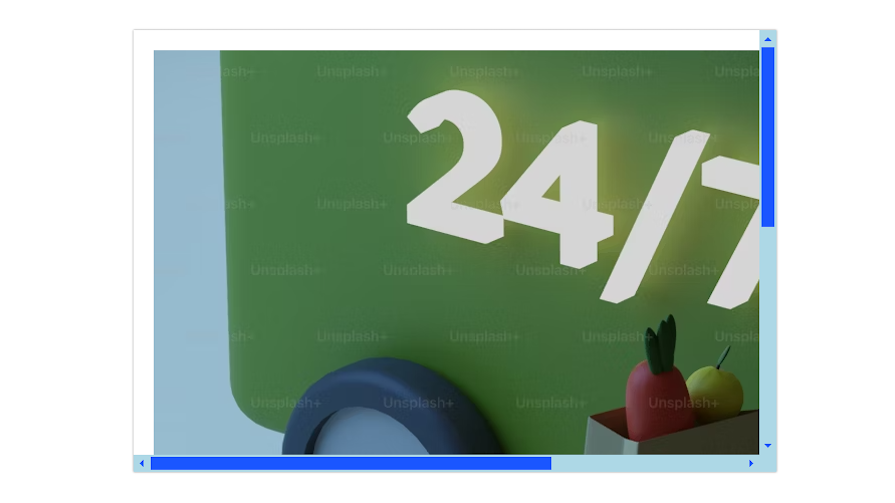
Here’s a CodePen for this example:
See the Pen Scrollbar styling by Oscar Jite-Orimiono (@oscar-jite)
on CodePen.
Note that there are no advanced styling methods like with Webkit browsers.
Here’s a table highlighting the differences in styling across the major browsers:
| FEATURES | Chrome | Firefox | Opera | Edge |
|---|---|---|---|---|
| Default style | Classic | Overlay | Classic | Classic |
| Customization | Possible with webkit-scrollbar | Limited to standardized properties | Possible with webkit-scrollbar | Possible with webkit-scrollbar |
| Corners | Rounded | Rounded | Square | Rounded |
When styling a scrollbar, combining the Webkit and W3C CSS scrollbar specifications is recommended to cover more browsers, especially older ones.
Previously, the code below would have been enough:
.container::-webkit-scrollbar {
  width: 10px;
  height: 10px;
}
.container::-webkit-scrollbar-thumb {
  background: #4d7fff;
  border-radius: 5px;
}
.container::-webkit-scrollbar-track {
  background-color: #ddd;
  border: 1px solid #ccc;
}
.container::-webkit-scrollbar-button {
  background-color: #4d7fff;
  border-radius: 5px;
}
.container::-webkit-scrollbar-button:hover {
  background-color: #999999;
}
.container{
  scrollbar-width: auto;
  scrollbar-color: #1a56ff #add8e6;
}
However, the standardized properties, scrollbar-width and scrollbar-color now override the Webkit specifications. This means your scrollbars won’t have any custom styling.
If you want to keep both, you must implement feature queries. We can create feature queries using the @supports rule:
@supports not selector(::-webkit-scrollbar){
.container{
  scrollbar-width: auto;
  scrollbar-color: #1a56ff #add8e6;
}
}
So, if the browser doesn’t support -webkit-scrollbar, it will use the standardized properties. The downside is that you’ll have limited styling options.
You can use a third CSS property to style a scrollbar: scrollbar-gutter. This reserves room for a potential scrollbar, like additional padding. It accepts two keywords, stable and both-edges:
* {
  scrollbar-width: auto;
  scrollbar-color: #553c9a #301934;
  scrollbar-gutter: stable both-edges;
}
Here’s a screenshot from Opera showing a gutter on the left side of a webpage:
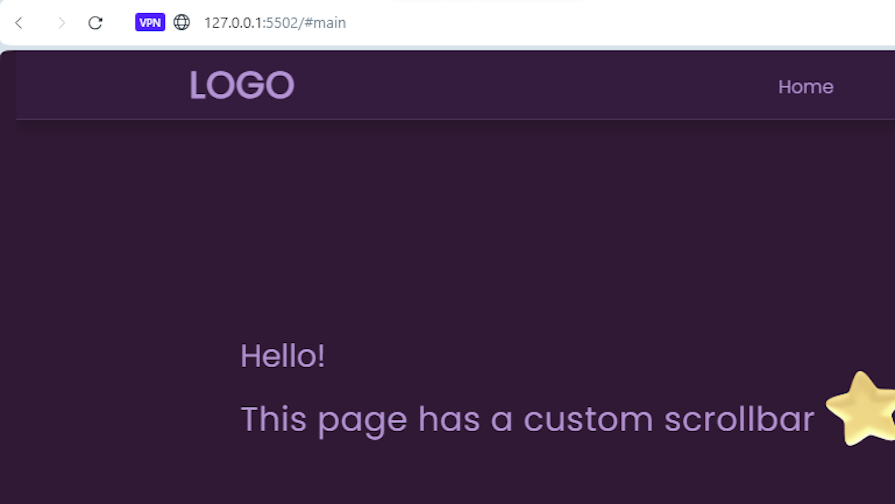
Using stable adds the gutter on the right, where you’d normally expect to have a scrollbar. Adding both-edges puts a gutter on both sides of the page. This property only works on browsers that have classic scrollbars.
Some things are worth remembering when styling scrollbars with the standard properties or webkit-scrollbar.
First, you can’t use them on the body HTML element. If you want to style the main scrollbar on a webpage, here’s how:
* {
  box-sizing: border-box;
  scroll-behavior: smooth;
  scrollbar-width: auto;
  scrollbar-color: #553c9a #301934;
When using the standard properties, you target the universal property, *. Then when using webkit-scrollbar you don’t link it to any property:
::-webkit-scrollbar {
  width: 10px;
  height: 10px;
}
::-webkit-scrollbar-thumb {
  background: #4d7fff;
  border-radius: 5px;
}
::-webkit-scrollbar-track {
  background-color: #ddd;
  border: 1px solid #ccc;
}
::-webkit-scrollbar-button {
  background-color: #4d7fff;
  border-radius: 5px;
}
::-webkit-scrollbar-button:hover {
  background-color: #999999;
}
Or you could wrap all the elements on the page in a secondary tag inside body. This includes tags like article, section, or the tried and trusted div.
You can’t have custom styling without some level of experimentation. One benefit of having custom scrollbars is that you can tie their styles to your site’s design theme. You can differentiate your brand or product by incorporating its color scheme or logo into the scrollbar design.
Check out the scrollbar on this webpage:
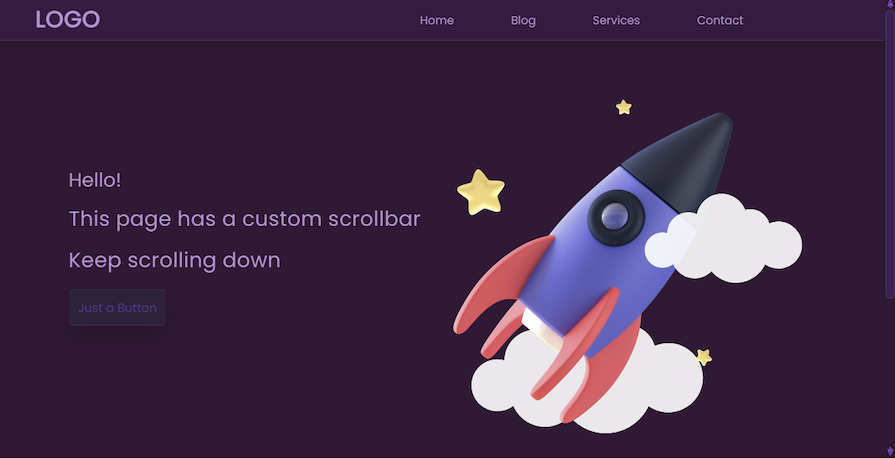
The thumb is the same style as the navbar — and who needs boring arrows when you can have tiny rockets? You can accomplish this customization like so:
::-webkit-scrollbar {
  width: 13px;
}
::-webkit-scrollbar-thumb {
  background: rgba(85, 60, 154, 0.3);
  border-radius: 10px;
  border: 1px solid rgba(255, 255, 255, 0.1);
}
::-webkit-scrollbar-track {
  background-color: #301934;
  border: 5px solid #301934;
}
::-webkit-scrollbar-button {
  background-color: #301934;
  background-repeat: no-repeat;
  background-size: 100%;
  background-position: center;
 }
::-webkit-scrollbar-button:decrement {
  background-image: url("../images/rocket\ up.png");
 }
::-webkit-scrollbar-button:increment {
  background-image: url("../images/rocket\ down.png");
}
Here’s a CodePen:
See the Pen Custom scrollbars with LogRocket buttons by Oscar Jite-Orimiono (@oscar-jite)
on CodePen.
Note that the customizations are only visible on browsers that support webkit-scrollbar. Look away, Firefox users.
Speaking of themes, you might have multiple themes for your webpage and want your scrollbar to also change according to the active theme. As you must have observed, custom scrollbars involve a sizable amount of CSS. To make your job a little bit easier, consider using CSS variables:
:root {
  --background: #e0ffff;
  --text: #22232e;
  --heading: #022f31;
  --scroll-thumb-button: #40e0d0;
  --scroll-track: #00008b;
}
.dark {
  --background: #22232e;
  --text: #e0ffff;
  --heading: #00c2cb;
  --scroll-thumb-button: #22232e;
  --scroll-track: #40e0d0;
}
@supports not selector(::-webkit-scrollbar) {
  * {
    scrollbar-width: auto;
    scrollbar-color: var(--scroll-thumb-button) var(--scroll-track);
  }
}
::-webkit-scrollbar {
  width: 13px;
}
::-webkit-scrollbar-thumb {
  background: var(--scroll-thumb-button);
  border-radius: 5px;
}
::-webkit-scrollbar-track {
  background-color: var(--scroll-track);
  border-radius: 5px solid #000;
}
::-webkit-scrollbar-button{
  background-color: var(--scroll-thumb-button);
  border-radius: 5px;
 }
You can have variables for other properties, like width, and to change colors on hover.
Styling a scrollbar makes a site look more polished. However, it is recommended not to style your scrollbar too far from its original look and feel so as not to make it unfamiliar to users and reduce the user experience. This is always the case on browsers like Firefox, but you can bring custom scrollbars to those that support it.
I hope you enjoyed this article, and be sure to comment if you have any questions. Happy coding!
As web frontends get increasingly complex, resource-greedy features demand more and more from the browser. If you’re interested in monitoring and tracking client-side CPU usage, memory usage, and more for all of your users in production, try LogRocket.
LogRocket lets you replay user sessions, eliminating guesswork around why bugs happen by showing exactly what users experienced. It captures console logs, errors, network requests, and pixel-perfect DOM recordings — compatible with all frameworks.
LogRocket's Galileo AI watches sessions for you, instantly identifying and explaining user struggles with automated monitoring of your entire product experience.
Modernize how you debug web and mobile apps — start monitoring for free.

Learn how to offload long-running Gemini AI requests to Trigger.dev background jobs in Next.js using Server Actions and real-time React hooks.

Learn how to use Google’s LiteRT.js to build a browser-based OCR receipt scanner with WebGPU acceleration and on-device LLM structuring via LiteRT-LM.

Learn how to use the TypeScript Compiler API and AST traversal to extract imports and build a file dependency graph CLI.

Stop generating AI slop with Claude Code. Discover 5 actionable developer tips to manage context windows, enforce rules with hooks, and improve code quality.
Hey there, want to help make our blog better?
Join LogRocket’s Content Advisory Board. You’ll help inform the type of content we create and get access to exclusive meetups, social accreditation, and swag.
Sign up now



 Learn more →