Markdown has become a standard for many modern content management systems, especially among those targeted for developer use. It’s a short, convenient, and easy-to-write content format for HTML generation.

Despite the many benefits of using Markdown, it also comes with challenges. Managing and maintaining hundreds or thousands of different Markdown and MDX files can be a daunting task. Keeping Markdown’s frontmatter data consistent and complete is not easy, either.
Astro 2.0 aims to tackle these problems by introducing the Content Collections API, an easy and elegant way to organize content, keep data integrity, and make Markdown files type-safe.
In this tutorial, we’ll explore Astro’s Content Collections API by building a simple project. Jump ahead:
Check out the GitHub repository containing the final project files and get ready to follow along.
Let’s start by creating a new, empty Astro project. Run the following in your terminal:
npm create astro@latest
The CLI will guide you through the installation process. Please make sure that you’ve selected the following options:
astro-blogEmptyIf you’ve made all your selections correctly, you should see something like the below:
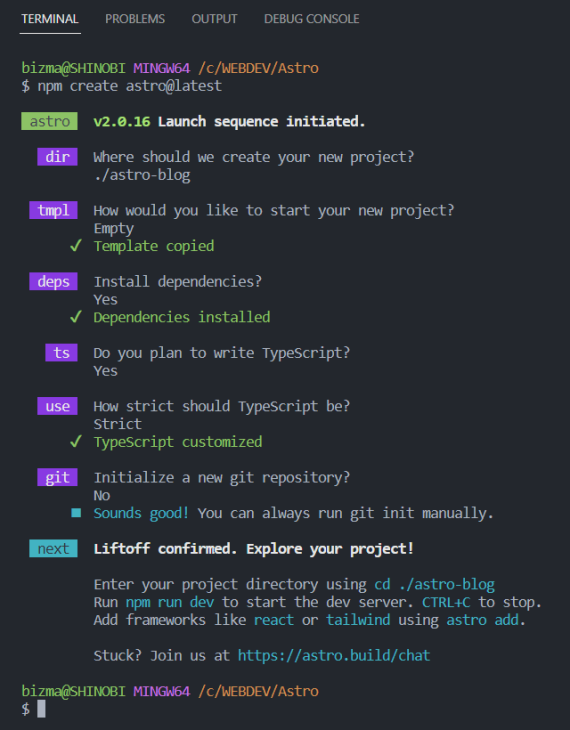
Once the project’s scaffolding is done, run the following commands:
cd astro-blog
npm run dev
Then, when you open up localhost:3000 in your browser, you should see the following:
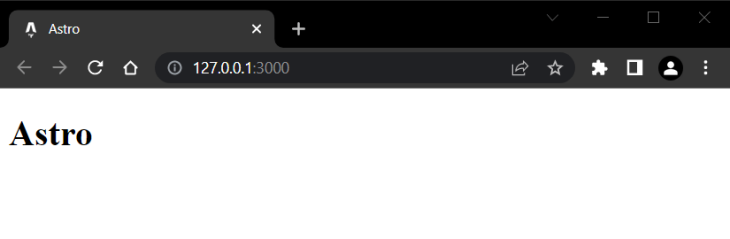
Now, we’re ready to move on to the fun part.
In this section, we’ll build a minimal blog example to demonstrate the benefits and capabilities of Astro’s Content Collections API. You can find the files for the final project in this GitHub repo.
Our simple blog will include listings for all published posts and all blog authors. We will also be able to view single posts and author profiles.
Here is what we need to create:
blog and authors collectionsYou can use the jump links above to navigate to specific steps. Otherwise, let’s get started.
The first thing we’re going to create is a schema describing the Markdown frontmatter properties we want to include in the content files for posts and authors. Having a schema will ensure that all of the frontmatter properties will meet our requirements every time.
Note that Astro uses Zod, a validation library for TypeScript.
To use Astro’s Content Collections API, we first need to create a src/content directory. Then, to create a collection, we just create a subdirectory with the name of the collection.
Before we begin using the Content Collections API, let’s create a config.ts file inside the content folder with the following content:
import { defineCollection, z } from 'astro:content';

const blog = defineCollection({
  schema: z.object({
    title: z.string(),
    description: z.string(),
    tags: z.array(z.string()),
    author: z.enum(['David', 'Monica']),
    isDraft: z.boolean().default(false),
    pubDate: z.string().transform((str) => new Date(str)),
    image: z.string().optional(),
  }),
});

const authors = defineCollection({
  schema: z.object({
    name: z.string(),
    email: z.string().email(),
    Twitter: z.string().optional(),
    GitHub: z.string().optional(),
  }),
});

export const collections = { blog, authors };
If your editor complains about astro:content — which can occur when the editor doesn’t recognize it as a module — restart the server or manually update the types by running the following command:
npx astro sync
This command is also run automatically along with the astro dev, astro build, or astro check commands. It sets up a src/env.d.ts file for type inferencing and declares the astro:content module.
The config.ts file is not mandatory, but to access the best features of the Content Collections API — like frontmatter schema validation or automatic TypeScript typings — you’ll definitely want to include it.
In the code above, we defined a collection by using defineCollection() function. Then, we used the z utility to create a schema for the frontmatter. In our case, we have two collections defined — blog and authors.
For each post in the blog collection, we want to include information such as the title, description, list of tags, author, whether the post is a draft, a publication date, and an optional image.
We can define all these properties by using Zod’s data types. For some properties, we also use Zod’s schema methods — for example:
default() to set the default value for the isDraft propertytransform() to transform the pubDate string into a JavaScript Date objectoptional() to mark the image property setting as optionalNote that optional() is necessary for the image property because, in Zod, everything is required unless it’s explicitly marked as optional.
In a similar way, for the authors collection, we defined name and email properties for each author, using the email() validation helper for the email property. We also provided optional properties for the author’s Twitter and GitHub accounts.
Lastly, we exported the collections for future use by using the export statement.
blog and authors collectionsLet’s now create the content files for our collections. First, create a blog folder in the src/content directory. Inside this folder, create a first-post.md file with the following content:
---
title: "First post"
description: "Lorem ipsum dolor sit amet"
tags: ["lorem", "ipsum"]
pubDate: "2022-07-08"
author: "David"
---

Lorem ipsum dolor sit amet, consectetur adipiscing elit, sed do eiusmod tempor incididunt ut labore et dolore magna aliqua. Vitae ultricies leo integer malesuada nunc vel risus commodo viverra. Adipiscing enim eu turpis egestas pretium. Euismod elementum nisi quis eleifend quam adipiscing. In hac habitasse platea dictumst vestibulum. Sagittis purus sit amet volutpat. Netus et malesuada fames ac turpis egestas. Eget magna fermentum iaculis eu non diam phasellus vestibulum lorem. Varius sit amet mattis vulputate enim. Habitasse platea dictumst quisque sagittis. Integer quis auctor elit sed vulputate mi. Dictumst quisque sagittis purus sit amet.
Additionally, create a second-post.md file with the following content:
---
title: "Second post"
description: "Lorem ipsum dolor sit amet"
tags: ["lorem", "ipsum"]
pubDate: "2022-07-18"
author: "Monica"
---

Lorem ipsum dolor sit amet, consectetur adipiscing elit, sed do eiusmod tempor incididunt ut labore et dolore magna aliqua. Vitae ultricies leo integer malesuada nunc vel risus commodo viverra. Adipiscing enim eu turpis egestas pretium. Euismod elementum nisi quis eleifend quam adipiscing. In hac habitasse platea dictumst vestibulum. Sagittis purus sit amet volutpat. Netus et malesuada fames ac turpis egestas. Eget magna fermentum iaculis eu non diam phasellus vestibulum lorem. Varius sit amet mattis vulputate enim. Habitasse platea dictumst quisque sagittis. Integer quis auctor elit sed vulputate mi. Dictumst quisque sagittis purus sit amet.
Now, create an authors folder in the src/content directory. In the authors folder, create a sample author file called david.md with the following content:
---
name: "David Davidson"
email: "[email protected]"
---

David's bio.
We’ll also create a second author file called monica.md with the following content:
---
name: "Monica Davidson"
email: "[email protected]"
---
Monica's bio.
Now we need to create a base layout shared across all blog pages. Create a layouts folder in the src directory. Add a BaseLayout.astro file inside with the following content:
<html lang="en">
  <head>
    <meta charset="utf-8" />
    <link rel="icon" type="image/svg+xml" href="/favicon.svg" />
    <meta name="viewport" content="width=device-width" />
    <meta name="generator" content={Astro.generator} />
    <title>Astro Blog</title>
  </head>
  <body>
    <header>
      <nav>
        <a href="/">Blog</a> -
        <a href="/authors">Authors</a>
      </nav>
    </header>
    <main>
      <slot />
    </main>
  </body>
</html>
This markup sets the base HTML structure of our blog. We added links for the blog post and author listings. We also used the <slot /> component to define where the content of the pages will be injected.
After all the preparation work we’ve done so far, it’s time to create a list of blog posts. To do so, open the index.astro file inside the src/pages directory and replace its content with the following:
---
import { getCollection } from 'astro:content';
import BaseLayout from '../layouts/BaseLayout.astro';

const posts = (await getCollection('blog', ({ data }) => {
  return data.isDraft !== true;
})).sort(
  (a, b) => b.data.pubDate.valueOf() - a.data.pubDate.valueOf()
);
---

<BaseLayout>
  <section>
    <ul>
      {
        posts.map((post) => (
          <li>
            <a href={`/blog/${post.slug}/`}>{post.data.title}</a>
            <p>by <a href={`/authors/${post.data.author.toLowerCase()}/`}>{post.data.author}</a>,
              published {post.data.pubDate.toDateString()},
              tags: <strong>{post.data.tags.join(", ")}</strong>
            </p>
            <p>{post.data.description}</p>
          </li>
        ))
      }
    </ul>
  </section>
</BaseLayout>
Here, we first used the getCollection() function to retrieve the blog collection.
We also used the “filter” callback function to filter the collection to include only posts which are published. The data property in the callback represents all properties in the frontmatter.
Then, we sorted the posts in reverse order so the last post shows first.
Next, we used the base layout component we created earlier to wrap the list of the posts. After, we created the list by iterating over the posts.
For each post, we‘re including a title, a byline containing the author name, publication date, and tags, and a description that we get from the post.data prop. To create a link for each post, we’re using the post.slug prop.
Now, if you open your browser you should see a list of the posts as expected:
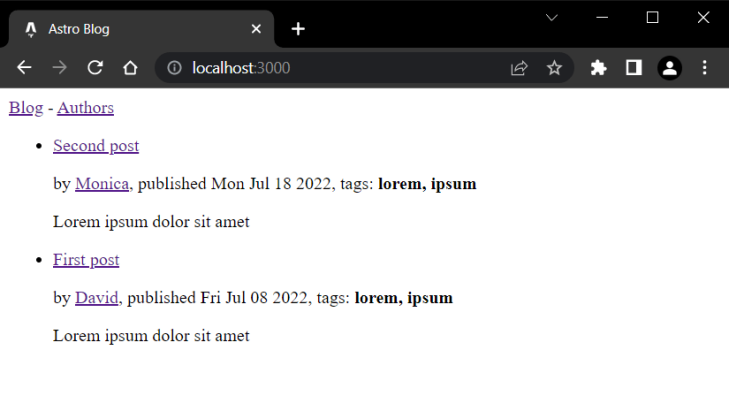
Great! However, if you click on individual post links, you’ll get a 404 error page. This is because to preview individual posts, we need to create dynamic routes for each one of them.
For files inside src/pages, routes are created automatically by default, but for collection files inside src/content, we need to create the routes manually.
To do so, create a blog folder inside the src/pages directory and put a […slug].astro file in it with the following content:
---
import { CollectionEntry, getCollection } from 'astro:content';
import BaseLayout from '../../layouts/BaseLayout.astro';

export async function getStaticPaths() {
  const posts = await getCollection('blog');
  return posts.map((post) => ({
    params: { slug: post.slug },
    props: post,
  }));
}

type Props = CollectionEntry<'blog'>;
const post = Astro.props;
const { Content } = await post.render();
---

<BaseLayout>
  <article>
    <h1 class="title">{post.data.title}</h1>
    <p>by <a href={`/authors/${post.data.author.toLowerCase()}/`}>{post.data.author}</a>,
      published {post.data.pubDate.toDateString()},
      tags: <strong>{post.data.tags.join(", ")}</strong>
    </p>
    <hr />
    <Content />
  </article>
</BaseLayout>
To create multiple pages from a single component inside src/pages, we use the getStaticPaths() function. In our case above, we queried the content of the blog collection and then iterated over its entries to create URL paths by using the slug property.
Next, we got the collection’s entry from the Astro props. Then, we rendered the entry’s content by using the render() function. In the HTML template, we used the post prop to display the necessary post’s details, along with the <Content /> component to render the post’s content.
Now, if you click on an individual post link, you should see it displayed correctly as in the screenshot below:
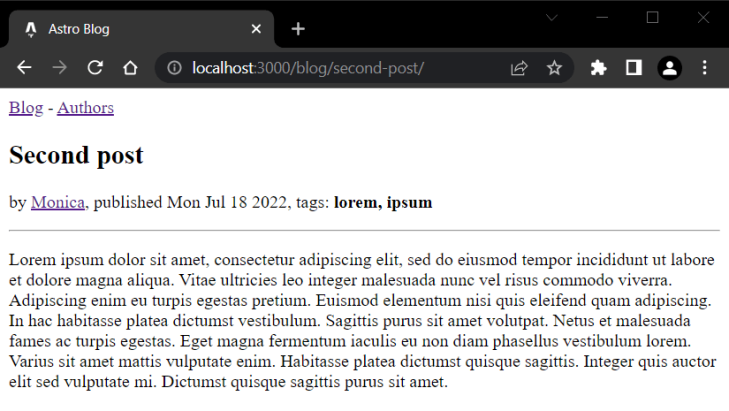
Now it’s time to do the same job for the authors collection.
Let’s start by creating an authors folder inside the src/pages directory and adding an index.astro file in it with the following content:
---
import { getCollection } from 'astro:content';
import BaseLayout from '../../layouts/BaseLayout.astro';

const authors = await getCollection('authors');
---

<BaseLayout>
  <section>
    <ul>
      {
        authors.map((author) => (
          <li>
            <a href={`/authors/${author.slug}/`}>{author.data.name}</a>
            <p>{author.data.email}</p>
          </li>
        ))
      }
    </ul>
  </section>
</BaseLayout>
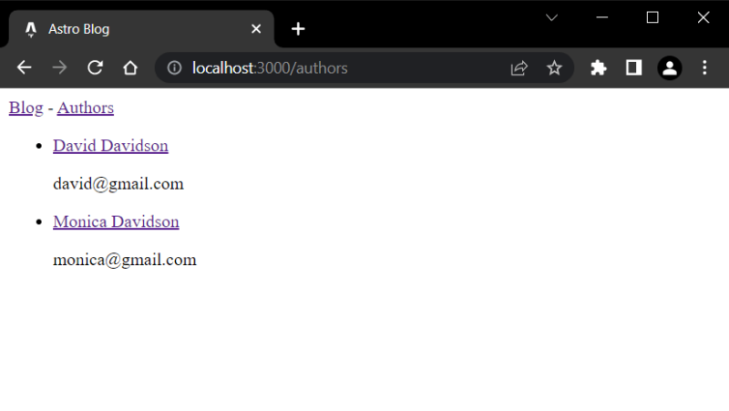
Here, we are querying the authors collection, then iterating over its entries to create the list of the authors.
Here is how the list should look:
Next, we will repeat the same steps from the blog collection to create dynamic routes for the authors collection entries.
In the src/pages/authors directory, add a [...slug].astro file with the following content:
---
import { CollectionEntry, getCollection } from 'astro:content';
import BaseLayout from '../../layouts/BaseLayout.astro';

export async function getStaticPaths() {
  const authors = await getCollection('authors');
  return authors.map((author) => ({
    params: { slug: author.slug },
    props: author,
  }));
}

type Props = CollectionEntry<'authors'>;
const author = Astro.props;
const { Content } = await author.render();
---

<BaseLayout>
  <article>
    <h1 class="title">{author.data.name}</h1>
    <hr />
    <Content />
  </article>
</BaseLayout>
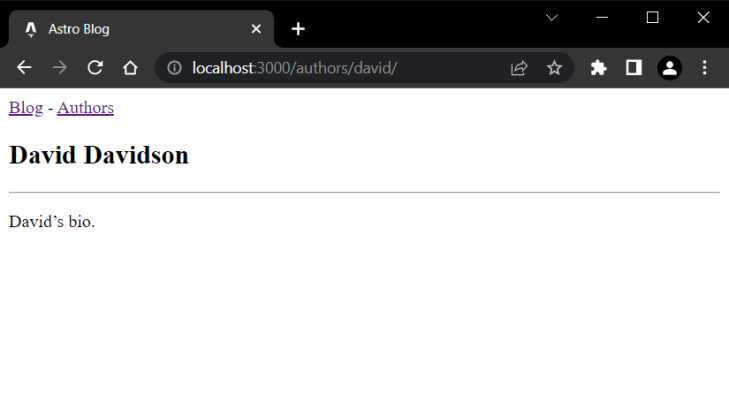
Here is how an author profile should now look:
For the sake of simplicity, I have not used any CSS styling in the above examples. But in a real-world app, you’ll definitely need some kind of styling. For more information about how you can implement CSS in your app, check the official Astro CSS styling guide.
One of the biggest advantages of Astro’s Content Collections API is how errors are handled.
To demonstrate this, open second-post.md and delete the author property. When you do so, you’ll get the following error:
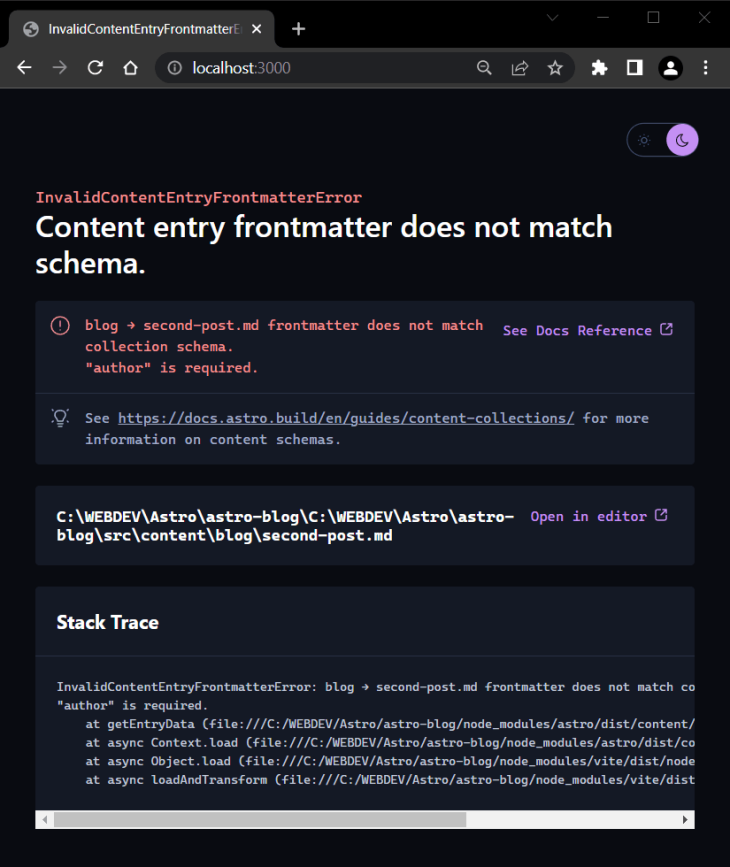
As you can see, the error is pretty descriptive and specific, displayed in a beautiful error overlay with the following useful details:
With this information, you should be able to quickly understand and resolve the error.
In this article, we explored the Astro Content Collections API by building a simple, minimal blog. We saw how easy the Content Collections API is to use — and how powerful it actually is.
To summarize its main benefits and advantages, Astro’s Content Collections API provides:
For more information and practical uses, visit the official Astro Content Collections guide. If you have any questions, feel free to comment below!
There’s no doubt that frontends are getting more complex. As you add new JavaScript libraries and other dependencies to your app, you’ll need more visibility to ensure your users don’t run into unknown issues.
LogRocket is a frontend application monitoring solution that lets you replay JavaScript errors as if they happened in your own browser so you can react to bugs more effectively.
LogRocket works perfectly with any app, regardless of framework, and has plugins to log additional context from Redux, Vuex, and @ngrx/store. Instead of guessing why problems happen, you can aggregate and report on what state your application was in when an issue occurred. LogRocket also monitors your app’s performance, reporting metrics like client CPU load, client memory usage, and more.
Build confidently — start monitoring for free.

Learn how to offload long-running Gemini AI requests to Trigger.dev background jobs in Next.js using Server Actions and real-time React hooks.

Learn how to use Google’s LiteRT.js to build a browser-based OCR receipt scanner with WebGPU acceleration and on-device LLM structuring via LiteRT-LM.

Learn how to use the TypeScript Compiler API and AST traversal to extract imports and build a file dependency graph CLI.

Stop generating AI slop with Claude Code. Discover 5 actionable developer tips to manage context windows, enforce rules with hooks, and improve code quality.
Would you be interested in joining LogRocket's developer community?
Join LogRocket’s Content Advisory Board. You’ll help inform the type of content we create and get access to exclusive meetups, social accreditation, and swag.
Sign up now


 Learn more →