When starting a new project, CSS is easy to write. However, as the project grows in scale and the number of components, style sheets, and lines of code increases, CSS becomes a nightmare to maintain. Luckily, CSS methodologies create guidelines for writing modular, reusable, and scalable code.
There are a few popular methodologies, including Atomic Design, BEM, SMACSS, and OOCSS. In this article, we will focus on Atomic Design, learn its principles, and apply them to create a basic blog page in a Next.js application.
Jump ahead:
To follow along with this tutorial, you’ll need knowledge of Next.js, CSS, SCSS, and the Atomic Design methodology.
Atomic Design is a CSS methodology created by Brad Frost. It provides direction for creating scalable systems, reusable components, and design systems. Atomic Design was inspired by chemistry, which is why the building blocks are called atoms, molecules, organisms, templates, and pages.
Atoms are the smallest building blocks and are composed of HTML tags and HTML elements. Examples of atoms include inputs, buttons, and headings.
Similar to their chemical inspiration, Atomic Design’s molecules are a combination of atoms. For example, a form is a molecule because it combines the label, input, and button elements.
When we combine molecules or atoms, we get organisms. Organisms are groups of molecules and atoms joined to form relatively complex, distinct UI components and sections of an interface.
Continuing with the chemical theme, templates are made up of organisms. They are the structure of the content and are used to create a page’s layouts, blueprints, and wireframes.
Finally, pages are the final product. In the architectural world, for example, a template would be the blueprint of a building, and a page would be the completed building.
Now, let’s build the Next.js application.
First, create a new Next.js project by running this command in the terminal:
npx create-next-app atomic-next-app
Next, we navigate into the project directory:
cd atomic-next-app
We will use Sass for styling, so install that below:
npm install --save-dev sass
Then, run the command to start the application:
npm run dev
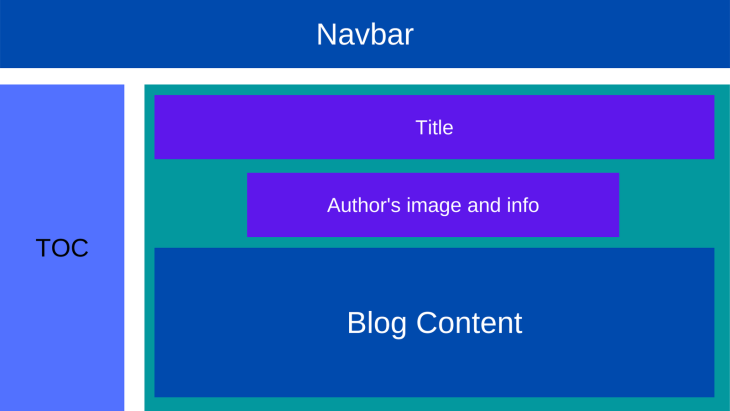
We will create a basic blog page with a navigation bar, a table of contents, blog content, and the author’s details. Our title will be the only atom we create, while the navbar, table of contents, author’s details, and blog content will be our molecules. The blog container will consist of those molecules and will be our organism. The structure of the blog should look like this:
The folder structure for the project should look like this:
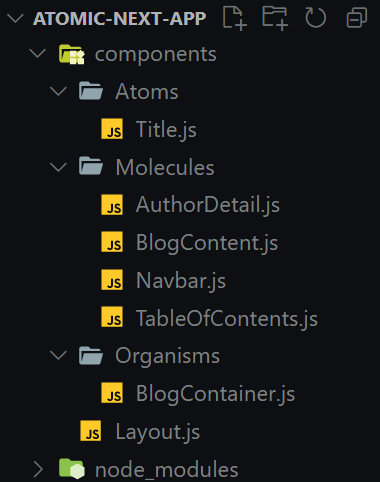
Now that we’ve defined the atoms, molecules, organisms, templates, and pages, let’s create the components. You can use any component library, CSS processor, or tool. For this article, we will use Sass and CSS Modules.
We’ll set our blog page title using the title atom. As an atom, it will only have one h1 element. To create the title, add a components/Title.js file to the application’s root and paste this code:
import styles from "../../styles/title.module.scss";

export default function Title() {
  return (
    <h1 className={styles.blogTitle}>
      How to Monitor Your Frontend and Perform Product Analysis with LogRocket
    </h1>
  );
}
Then, for styling, add a title.module.scss file to the styles folder and enter the styles below:
.blogTitle {
  font-size: 2.5rem;
  font-weight: 500;
  margin-bottom: 1rem;
  display: inline-block;
}
The navbar molecule comprises the nav, an a HTML element, and Next.js’ Link component.
Create a components/Navbar.js file and paste the code:
import styles from "../../styles/navbar.module.scss";
import Link from "next/link";

export default function Navbar() {
  return (
    <nav className={styles.navbarContainer}>
      <Link href="#">
        <a>The Coolest Blog Ever</a>
      </Link>
    </nav>
  );
}
To edit the styling, add a navbar.module.scss file to styles and paste the styles below:
.navbarContainer {
  padding: 1.6rem;
  background-color: #8652ff;
  box-shadow: 0 4px 16px 0 rgba(41, 0, 135, 0.12);
  background-image: linear-gradient(150deg, rgba(99, 31, 255, 0.6), #8652ff);

  a {
    color: rgb(241, 235, 255);
    font-size: 2rem;
  }
}
Like the navbar molecule, this molecule consists of the nav, ul, the a HTML elements, and Link components.
To set it up, create a components/TableOfContents.js file and paste the code below:
import styles from "../../styles/tableOfContents.module.scss";
import Link from "next/link";

const TableofContentRoutes = [
  { label: "Introduction", href: "#" },
  { label: "Getting Started", href: "#" },
  { label: "What is LogRocket", href: "#" },
  { label: "How to Monitor Frontend with LogRocket", href: "#" },
  { label: "How to Perform Product Analysis with LogRocket", href: "#" },
  { label: "Why LogRocket is Awesome", href: "#" },
  { label: "Conclusion", href: "#" },
];

export default function TableOfContents() {
  return (
    <div className={styles.tableOfContentsContainer}>
      <h2>Table of Contents</h2>
      <nav>
        <ul>
          {TableofContentRoutes.map((route) => (
            <Link href={route.href} key={route.label}>
              <a>{route.label}</a>
            </Link>
          ))}
        </ul>
      </nav>
    </div>
  );
}
We created a TableofContentRoutes array in the code above with label and href. Then, we mapped through the TableofContentRoutes routes and rendered a link for each one.
Now, for styling, add a tableOfContents.module.scss file to styles and insert the styles:
.tableOfContentsContainer {
  ul {
    display: flex;
    flex-direction: column;
    list-style: none;
    a {
      color: inherit;
      text-decoration: underline;
    }
  }

  @media (min-width: 768px) {
    width: 300px;
  }
}
The author’s molecule will contain the author’s image and name. In this tutorial, we will name our author John Doe. We’ll use the Image component and a span tag to set this up.
First, add an Author.js file to the components folder and insert the following code:
import styles from "../../styles/authorDetail.module.scss";
import Image from "next/image";

export default function AuthorDetail() {
  return (
    <div className={styles.authorDetailContainer}>
      <div className="img-box">
        <Image
          alt="Author's avatar"
          src="/author.jpg"
          width="50px"
          height="50px"
        />
      </div>
      <span>John Doe</span>
    </div>
  );
}
To edit the styling, add authorDetail.module.scss to styles and paste the styles below:
.authorDetailContainer {
  display: flex;
  gap: 0.5rem;
  margin-bottom: 2rem;

  .img-box {
    position: relative;
    border-radius: 50%;
  }
}
Next, we’ll set up the blog content molecule to house the blog’s texts, which are a collection of p tags. For this, add BlogContent.js to the components folder:
import styles from "../../styles/blogContent.module.scss";

export default function BlogContent() {
  return (
    <div className={styles.blogContentContainer}>
      <p>
        Eu amet nostrud aliqua in eiusmod consequat amet duis culpa dolor.
        Excepteur commodo proident aliquip aliquip fugiat ex exercitation amet
        velit. Mollit id cupidatat duis incididunt. Excepteur irure deserunt
        fugiat cillum id. Aliquip nulla pariatur sunt ex. Nulla id ut minim
        cupidatat laboris culpa laboris. Anim consectetur veniam ipsum
        exercitation ipsum consequat magna quis pariatur adipisicing.
      </p>
    </div>
  );
}
Now that we’ve set up the molecule for our text, we need to edit the styling. To do this, add a blogContent.module.scss file to styles and include the following code:
.blogContentContainer {
  p {
    margin-bottom: 1rem;
    font-size: 1rem;
  }
}
We set up all of our blog page’s molecules in the steps above. To create the blog container organism, we will combine the Title, Author, and BlogContent components. For this, add a BlogContainer.js file to the components folder:
import Title from "../Atoms/Title";
import AuthorDetail from "../Molecules/AuthorDetail";
import BlogContent from "../Molecules/BlogContent";

export default function BlogContainer() {
  return (
    <div className="blog-container">
      <Title />
      <AuthorDetail />
      <BlogContent />
    </div>
  );
}
Here, we imported Title, AuthorDetail, and BlogContent and plugged them into BlogContainer. As you can see, no styling is required for this component. Now, we’ll build the layout template!
The layout template is where we define the positioning of every other component on the page. To set it up, create a Layout.js file in the components folder:
import styles from "../styles/layout.module.scss";
import Navbar from "../components/Molecules/Navbar";
import TableOfContents from "../components/Molecules/TableOfContents";
import BlogContainer from "../components/Organisms/BlogContainer";

export default function Layout() {
  return (
    <div className={styles.layoutContainer}>
      <header>
        <Navbar />
      </header>
      <main>
        <aside>
          <TableOfContents />
        </aside>
        <article>
          <BlogContainer />
        </article>
      </main>
    </div>
  );
}
Here, we imported the Navbar, TableOfContents, and BlogContainer components and plugged them into the Layout component.
Next, for the styling, add a layout.module.scss to styles and paste the styles below:
.layoutContainer {
  main {
    display: flex;
    flex-direction: column;
    gap: 2rem;
    padding: 1.6rem;

    @media (min-width: 768px) {
      flex-direction: row;
      justify-content: space-between;
    }
  }
}
To finish up, we will put Layout into the index.js file to create the page.
import Head from "next/head";
import Layout from "../components/Layout";

export default function Home() {
  return (
    <div>
      <Head>
        <title>The Coolest Blog Ever</title>
      </Head>
      <Layout />
    </div>
  );
}
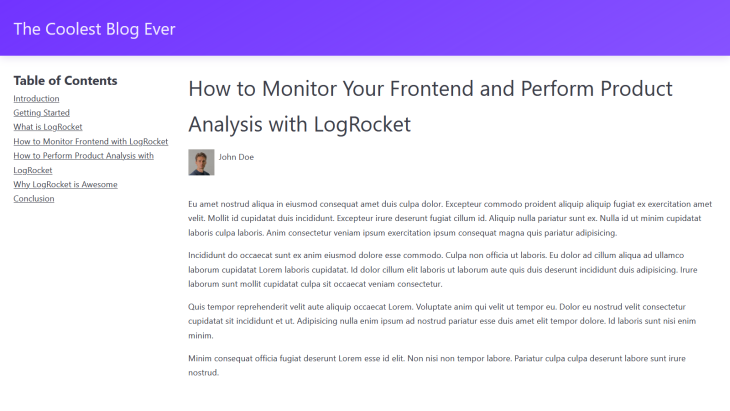
With that, we have successfully applied the principles of Atomic Design to create a blog in Next.js. Our blog will look like this:
In this article, we applied the principles of Atomic Design to create the UI of a Next.js blog. By breaking web pages into separate components, Atomic Design prevents repetition and promotes consistency and scalability.
While we applied Atomic Design to a web development project in this article, its principles can also create design systems for UI/UX design.
Debugging Next applications can be difficult, especially when users experience issues that are difficult to reproduce. If you’re interested in monitoring and tracking state, automatically surfacing JavaScript errors, and tracking slow network requests and component load time, try LogRocket.
LogRocket captures console logs, errors, network requests, and pixel-perfect DOM recordings from user sessions and lets you replay them as users saw it, eliminating guesswork around why bugs happen — compatible with all frameworks.
LogRocket's Galileo AI watches sessions for you, instantly identifying and explaining user struggles with automated monitoring of your entire product experience.
The LogRocket Redux middleware package adds an extra layer of visibility into your user sessions. LogRocket logs all actions and state from your Redux stores.

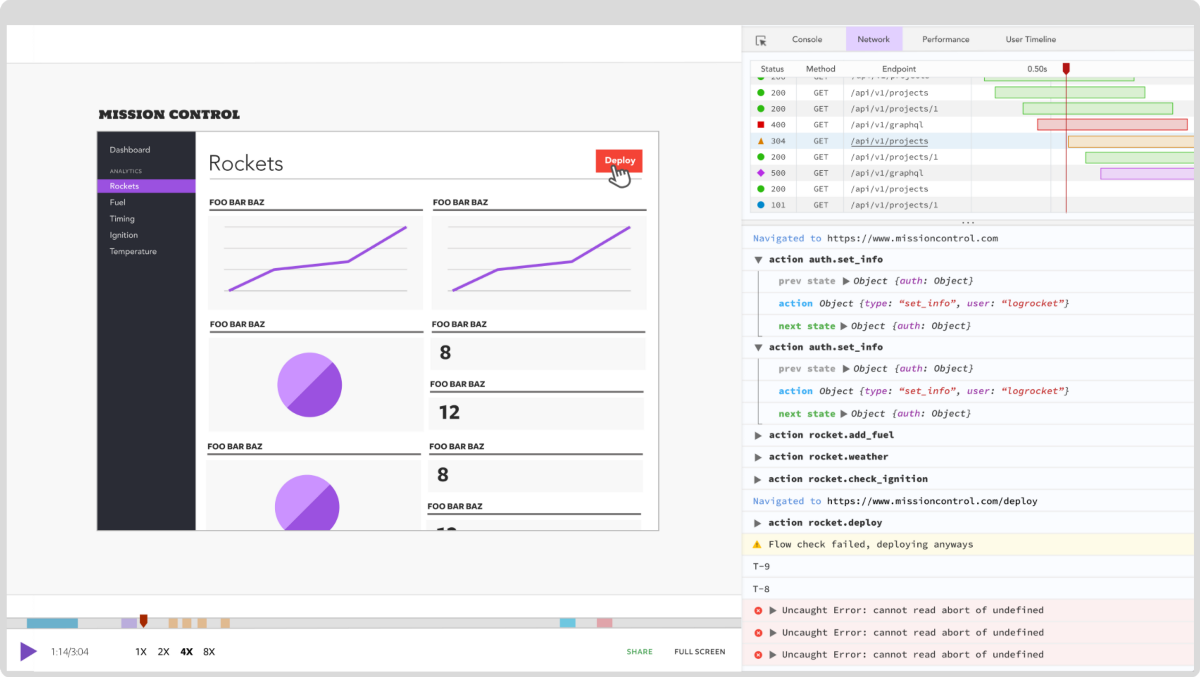
Modernize how you debug your Next.js apps — start monitoring for free.

Learn how to offload long-running Gemini AI requests to Trigger.dev background jobs in Next.js using Server Actions and real-time React hooks.

Learn how to use Google’s LiteRT.js to build a browser-based OCR receipt scanner with WebGPU acceleration and on-device LLM structuring via LiteRT-LM.

Learn how to use the TypeScript Compiler API and AST traversal to extract imports and build a file dependency graph CLI.

Stop generating AI slop with Claude Code. Discover 5 actionable developer tips to manage context windows, enforce rules with hooks, and improve code quality.
Hey there, want to help make our blog better?
Join LogRocket’s Content Advisory Board. You’ll help inform the type of content we create and get access to exclusive meetups, social accreditation, and swag.
Sign up now



 Learn more →