

Sentiment Analysis is a popular technique in Natural Language Processing (NLP) used to identify the emotional tone behind a body of text. Whether it’s a movie review, a tweet, or customer feedback, sentiment analysis helps computers understand opinions and emotions.
What is Sentiment Analysis?
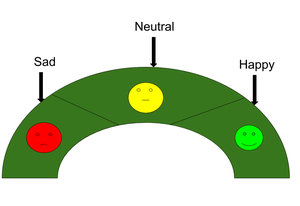
Sentiment analysis is the process of determining whether a piece of text is positive, negative, or neutral. It is widely used in applications like:
- Customer feedback analysis
- Product review classification
- Social media monitoring
- Political opinion mining
This classification problem is best tackled by models that understand word sequences, making LSTMs a great fit.
What is LSTM?
LSTM (Long Short-Term Memory) is an advanced version of RNN designed to remember information for long periods. Unlike traditional RNNs, LSTMs can retain context over longer sequences, making them ideal for text-related tasks.
Why Use LSTM for Sentiment Analysis?
- Captures Word Order and Context: Unlike traditional models, LSTM understands the order of words, which is crucial in text like “not good” vs. “good.”
- Remembers Long-Term Dependencies: LSTM can retain important information from earlier words in a sentence that may affect the sentiment, like in "Although the movie was slow, the ending was fantastic."
- Handles Variable-Length Input: Whether the review is 5 words or 50, LSTM can process sequences of different lengths effectively.
- Solves RNN's Shortcomings: Traditional RNNs often forget earlier words in long sentences. LSTM solves this with memory cells and gates that selectively remember and forget.
- Performs Well on Sequence Data: Sentences are sequences. LSTM, being a sequence-based model, naturally fits NLP tasks like sentiment analysis.
Key Components of LSTM
- Forget Gate: Decides what information to discard.
- Input Gate: Decides which new information to store.
- Output Gate: Determines the output based on the cell state.
Implementing Sentiment Analysis using LSTM in Python
Let's build a sentiment analysis model using LSTM with the IMDb dataset (available in Keras). We’ll use TensorFlow and Keras for implementation.
Step 1: Importing necessary Libraries
import pandas as pd
import tensorflow as tf
from tensorflow.keras.models import Sequential
from tensorflow.keras.layers import Embedding, LSTM, Dense
from tensorflow.keras.preprocessing.text import Tokenizer
from tensorflow.keras.preprocessing.sequence import pad_sequences
from sklearn.model_selection import train_test_split
Explanation: We import necessary modules to handle data loading, preprocessing, and building the model.
Step 2: Load and Prepare Data
We use the IMDb Movie Review Dataset, which is directly available through the Keras API. It contains 25,000 labeled training and 25,000 labeled test movie reviews.
#Loading dataset
df = pd.read_csv('twitter_training.csv.zip', names=['ID', 'Entity', 'Sentiment', 'Text'], skiprows=1)
print("\n Sample of Raw Dataset:\n")
print(df.sample(5).to_string(index=False))
df = df[['Text', 'Sentiment']].dropna()
Output:

Step 3: Preprocessing data
# Preprocess data
texts = df['Text'].astype(str).values
labels = df['Sentiment'].map({'Positive': 1, 'Negative': 0, 'Neutral': 0}).values

# Tokenize and Pad
vocab_size = 10000
maxlen = 100
tokenizer = Tokenizer(num_words=vocab_size, oov_token="<OOV>")
tokenizer.fit_on_texts(texts)
sequences = tokenizer.texts_to_sequences(texts)
padded = pad_sequences(sequences, maxlen=maxlen)

# Train-Test Split
x_train, x_test, y_train, y_test = train_test_split(padded, labels, test_size=0.2, random_state=42)

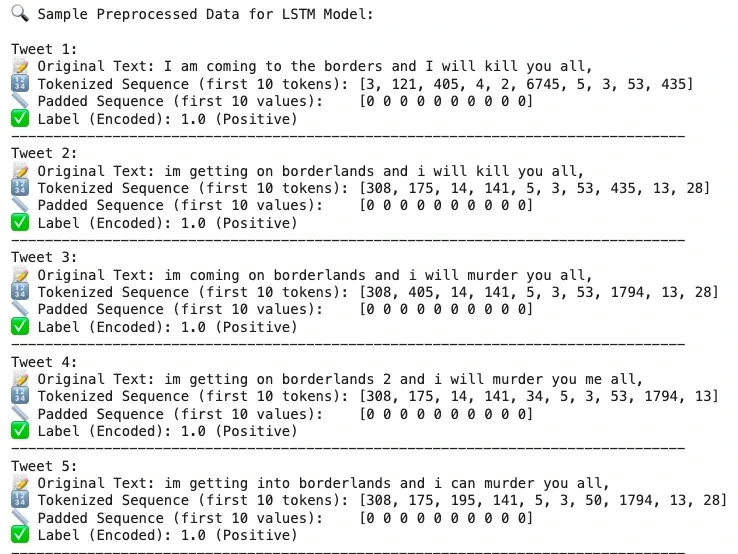
print("\nSample Preprocessed Data for LSTM Model:\n")

# Display first 5 examples
for i in range(5):
    print(f"Tweet {i+1}:")
    print(f"Original Text: {texts[i][:150]}")
    print(f"Tokenized Sequence (first 10 tokens): {sequences[i][:10]}")
    print(f"Padded Sequence (first 10 values):    {padded[i][:10]}")
    sentiment = "Positive" if labels[i] == 1 else "Negative"
    print(f"Label (Encoded): {labels[i]} ({sentiment})")
    print("-" * 80)
Output:
Step 4: Build the model
model = Sequential()
model.add(Embedding(vocab_size, 128, input_length=maxlen))
model.add(LSTM(64))
model.add(Dense(1, activation='sigmoid'))

model.compile(loss='binary_crossentropy', optimizer='adam', metrics=['accuracy'])
model.summary()
Output:
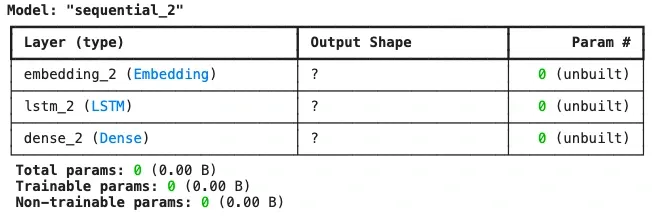
Explanation:
- Embedding Layer: Converts each word into a dense vector.
- LSTM Layer: Learns sequential dependencies in the reviews.
- Dense Layer: Outputs sentiment (1 = positive, 0 = negative).
Step 5: Train the Model
model.fit(x_train, y_train, epochs=3, batch_size=64, validation_split=0.2)
Output:

Explanation: The model is trained using binary cross-entropy loss with the Adam optimizer for 3 epochs.
Step 6: Evaluate the accuracy of model
loss, accuracy = model.evaluate(x_test, y_test)
print(f"Test Accuracy: {accuracy * 100:.2f}%")
Explanation: We evaluate the model’s performance on the test dataset.
Step 7: Tokenizing
def predict_sentiment(text):
    seq = tokenizer.texts_to_sequences([text])
    padded_seq = pad_sequences(seq, maxlen=maxlen)
    pred = model.predict(padded_seq)[0][0]
    return "Positive" if pred >= 0.5 else "Negative"
Explanation: We tokenize and encode a custom review, pad it to the required length, and predict the sentiment using the trained model.
Step 8: Sentiment prediction loop
while True:
    user_input = input("\nEnter a tweet (or 'exit' to quit): ")
    if user_input.lower() == 'exit':
        break
    print(f"Predicted Sentiment: {predict_sentiment(user_input)}")
Output:

Real-World Applications
- E-commerce: Analyze product reviews to improve customer experience.
- Social Media: Monitor public sentiment on trending topics.
- Healthcare: Understand patient feedback in clinical trials.
- Finance: Predict market sentiment from news headlines.
