Active Directory (AD) is one of the most important components in enterprise environments and understanding how it works is essential for both system administrators and cybersecurity professionals. After gaining initial access to a system, attackers often target Active Directory for privilege escalation, credential access, lateral movement, persistence and domain-wide control.
Requirements for Active Directory Lab
To build the lab environment, you need the following virtual machines and software:
- VirtualBox.
- Windows 10 - PC 1.
- Windows 10 - PC 2.
- Windows Server 2019 - Domain Controller.
- Kali Linux.
Lab User Structure
Your set-up user list should look like the reference shown below. I have also provided the username and password that I used in my setup for your reference. The setup includes:
- Standard domain users.
- Administrative users.
- Service accounts.
- Shared folders.
- Domain-connected Windows clients.
Setting Up the Active Directory Lab
We assume VirtualBox and Kali Linux are already installed. The next step is configuring the Windows systems and domain controller.
Installing Windows 10 Virtual Machines
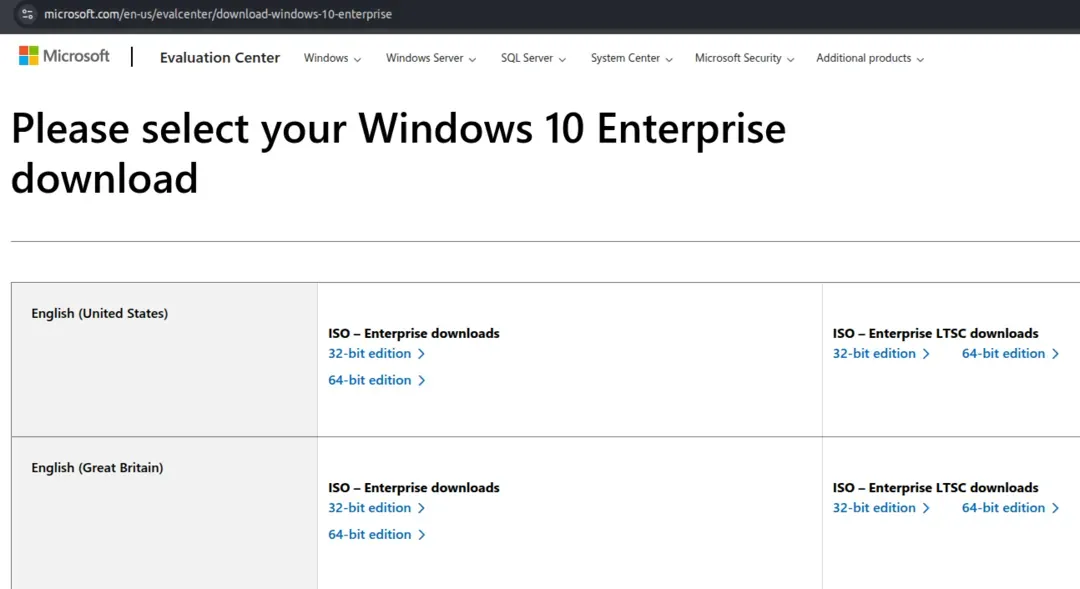
- Download Windows 10 Enterprise ISO from the official Microsoft website.
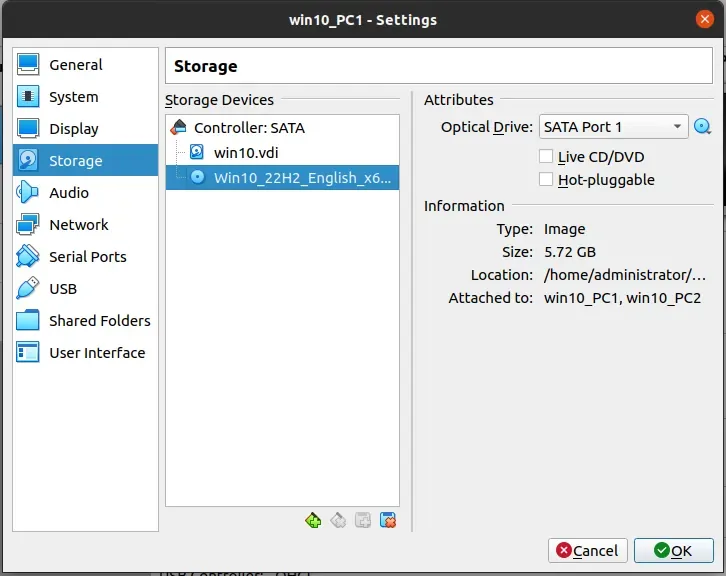
- After downloading the ISO create a new virtual machine in VirtualBox. Name it PC 1 and assign the Windows 10 ISO file as the disk image.
- Allocate 10–15 GB of storage and 4 GB of RAM for the installation process (you can later reduce the RAM allocation to 2 GB after installationis complete).
- In the process of installation keep everything default, do not use any sign in options using Microsoft account and try to skip almost every possible steps.
- After completing the installation, repeat the same process to create another Windows 10 virtual machine and name it PC 2.
Installing Windows Server 2019
- Download Windows Server 2019 from the Microsoft Evaluation Center.
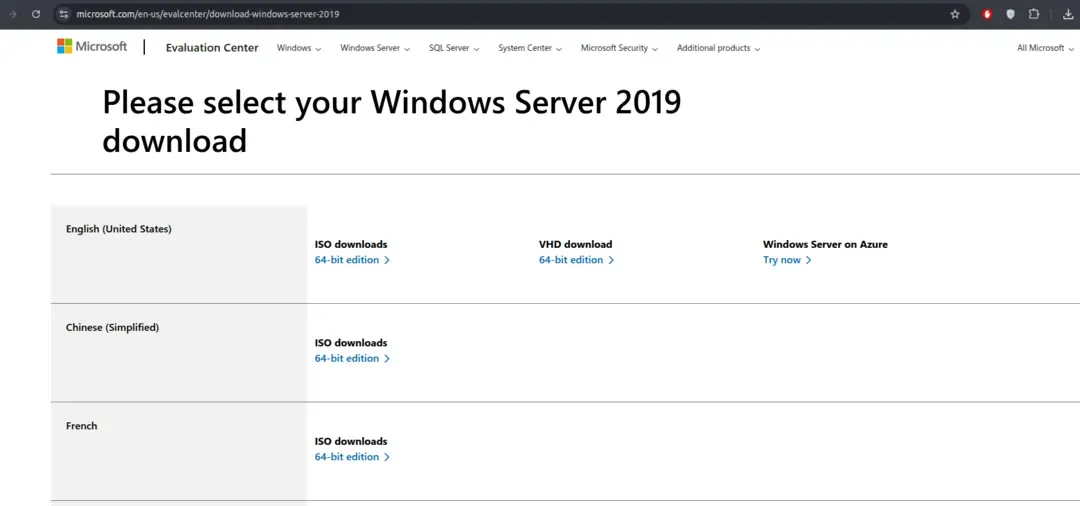
- After downloading, assign the .iso file to the new machine and name it Windows Server.
- Install the server with the GUI package, as this will make the setup and later processes easier to manage Host-Only.
Configuring VirtualBox Network
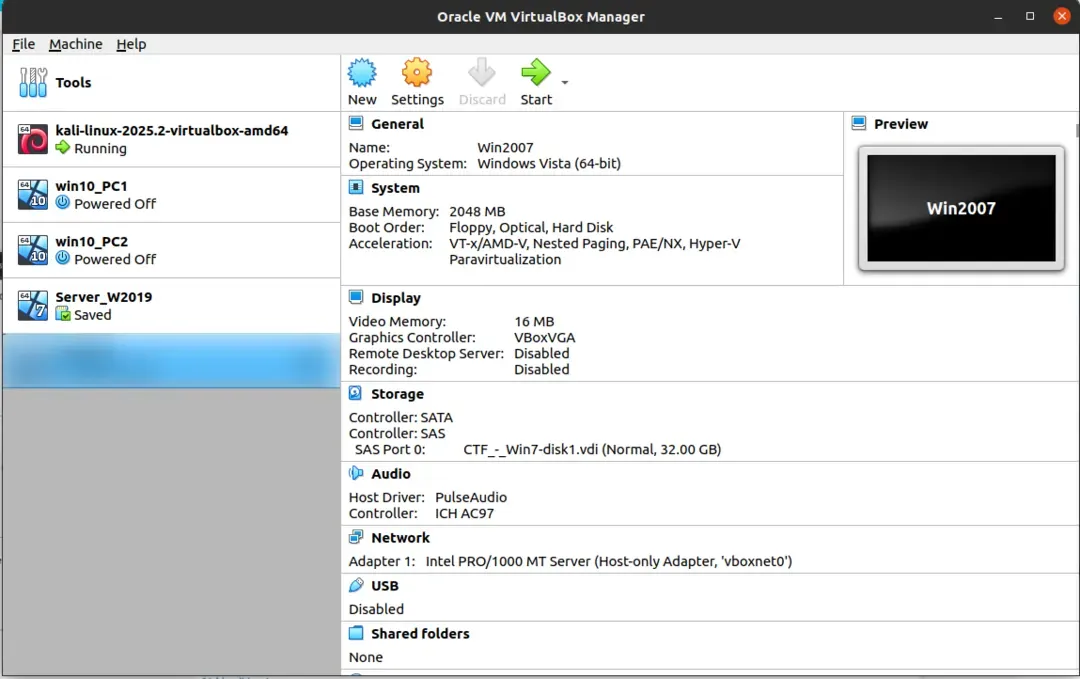
Your final lab machines should look like this and ensure the network adapter is set to Adapter. This allows all machines to communicate internally inside the lab network.
Renaming the Domain Controller
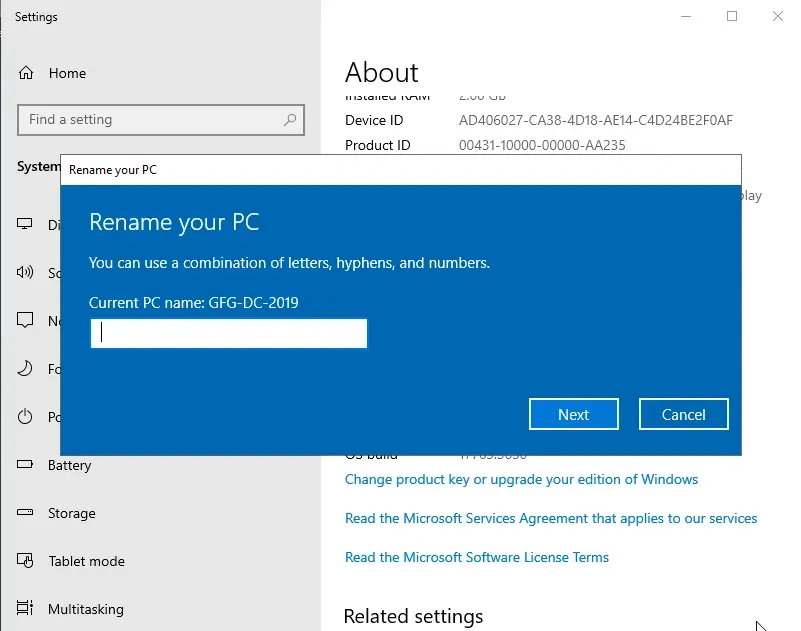
- After installing the windows server, open the computer settings and search view PC name and change the PC name to anything as per your preference (This will be the domain controller name). Restart the PC after renaming.
- After the restart you will notice whenever you log in into this system Server Management Interface will pop up.
Installing Active Directory Domain Services (AD DS)
- We will set up a domain over here. Click Manage and Add roles and features.
- Click Next and Select Role-Based installation, then again click next until server roles category where we will choose the Active Directory Domain Service and Active Directory Certificate Services.
- Server Manager > Manage > Add Roles and Features > Click Next until Server Roles > Toggle on Active Directory Certificate Services & Active Directory Domain Services.
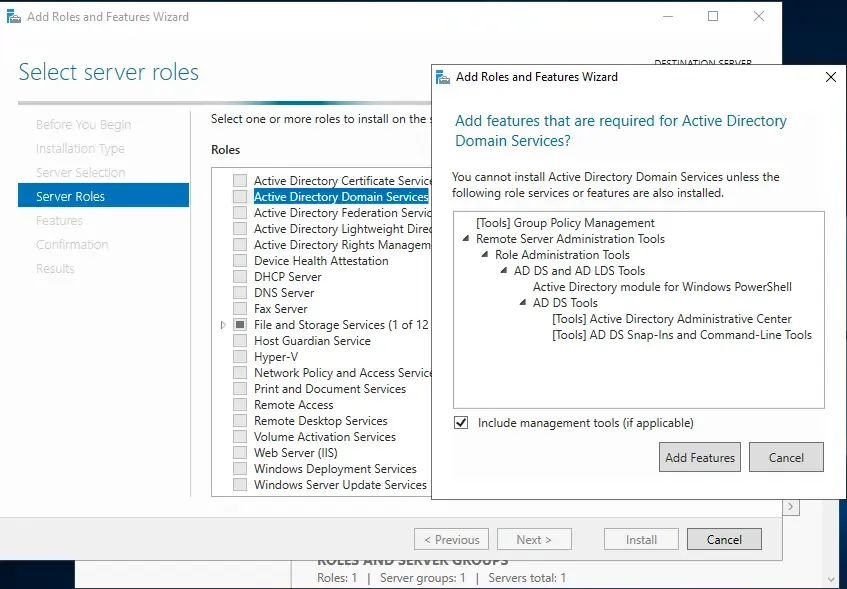
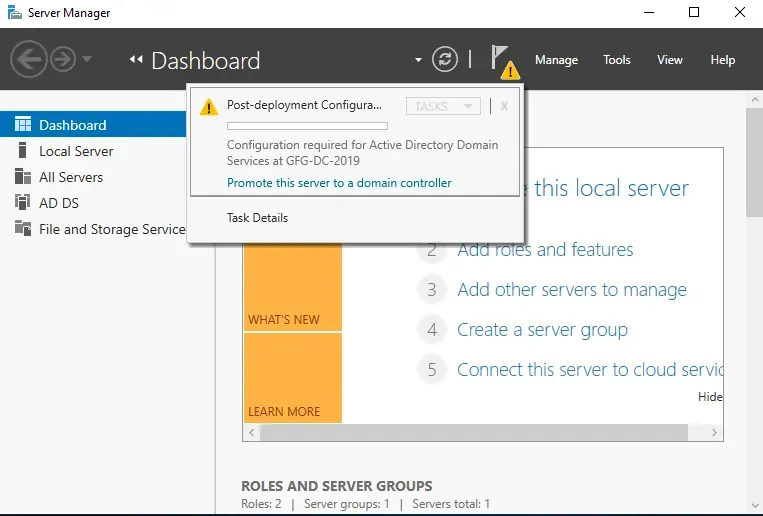
- After the installation of the domain controller you may notice an alert symbol in the notification bar, open the notification and continue with the post deployment configuration.
Promoting the Server to Domain Controller
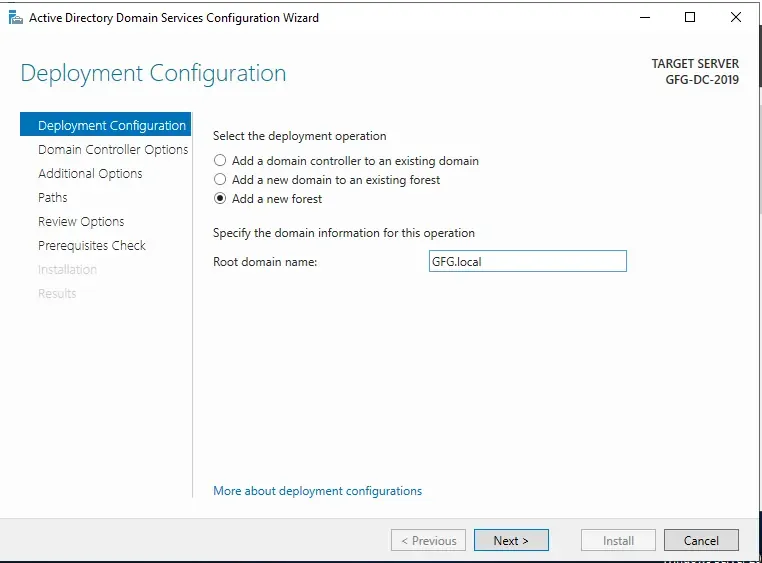
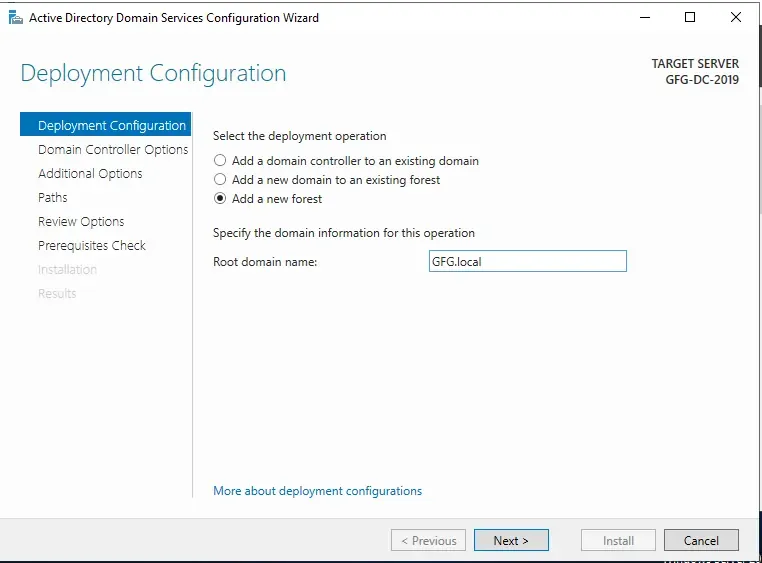
- In the Configuration window, select " Add a new forest " as the deployment operation. Then name the domain as per your preference but make sure to put local at the end which will be our Top Level Domain(TLD).
- Click next > Enter the password > Click Next
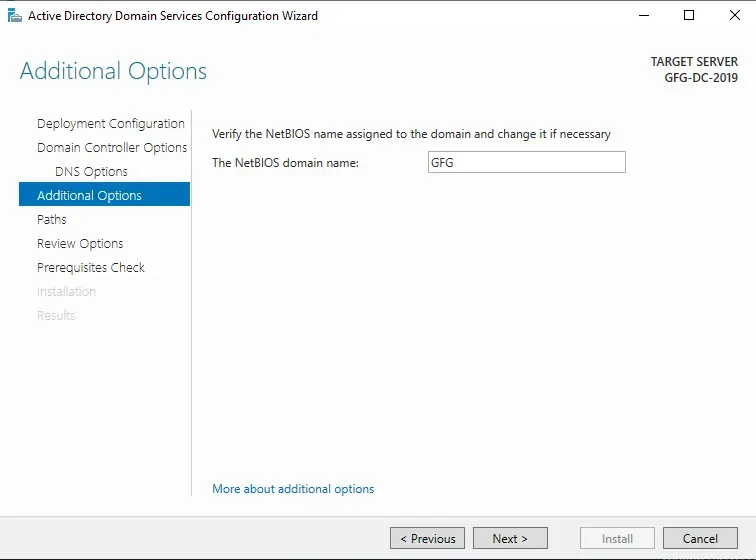
- Enter the NetBOIS name.
- Similarly click next and proceed with installation at the end. After the installation the system will automatically restart.
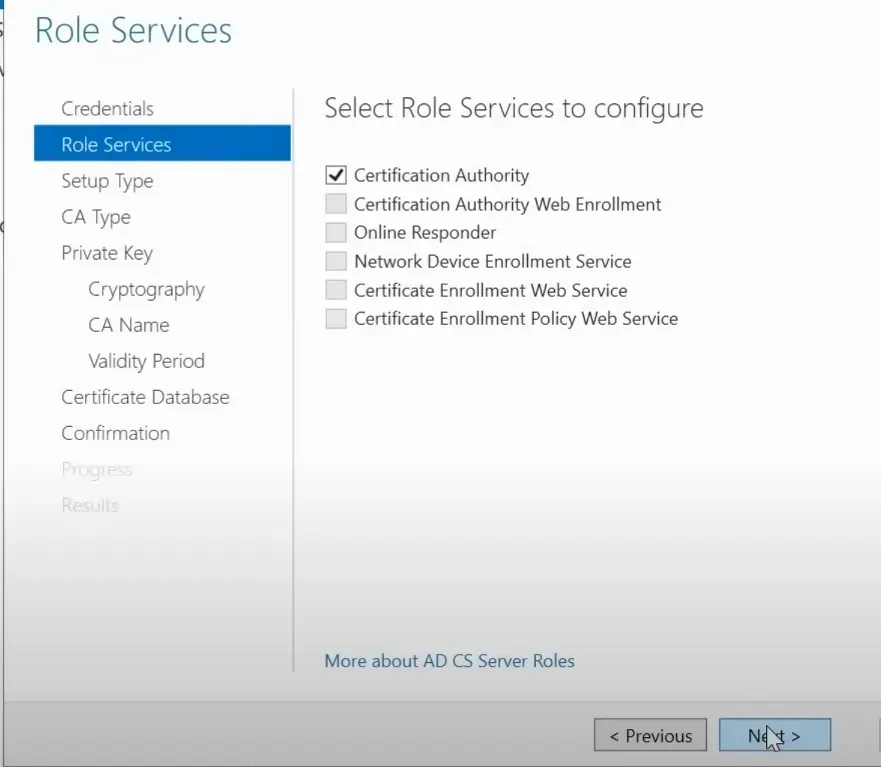
- After the restart you will notice an Alert flag click on that and proceed with everything default except the Role Services "Click on Certificate Authority" and then press NEXT.
Managing Users and Groups
Now Lets Add and manage the Users, Groups and Policies of the Domain Controller
- Click on Tools > Active Directory Users and Computers > GFG.local
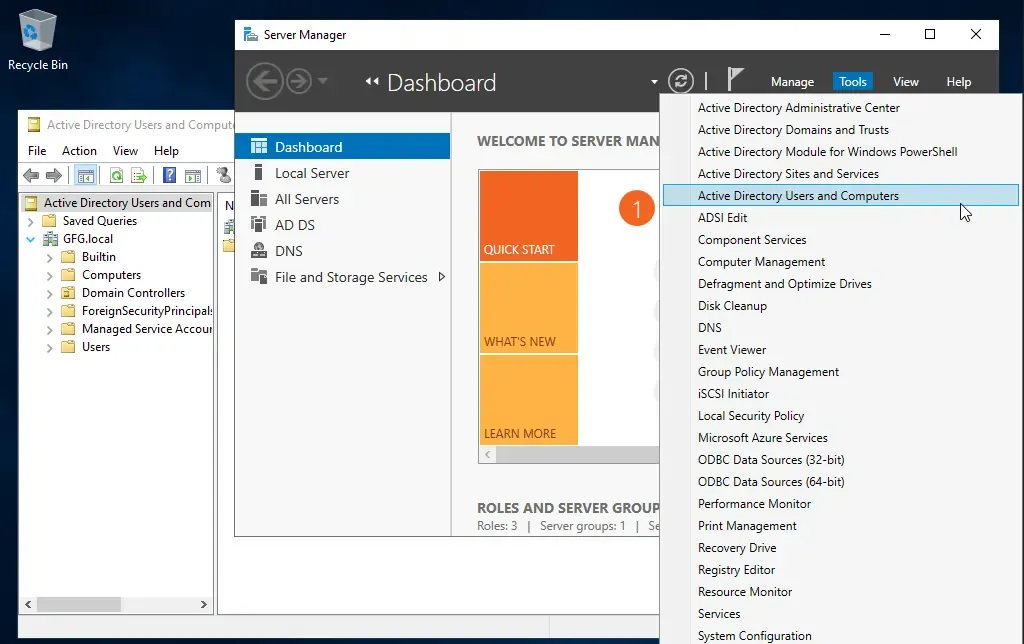
- Builtin: Holds default security groups with predefined rights in the domain.
- Computers: Default container for computer accounts when they join the domain.
- Domain Controllers: Contains computer accounts of all domain controllers.
- Foreign Security Principals: References external users/groups from trusted domains.
- Managed Service Accounts: Special accounts for services with auto-managed passwords.
- Users: Default container for user accounts and built-in security groups.
- Creating a new Group: Left click on GFG.local > New > Organisational Unit
- Name it "Groups".
- Drag and move all the users from the "Users" to "Groups" except the Administrator and Guest users.
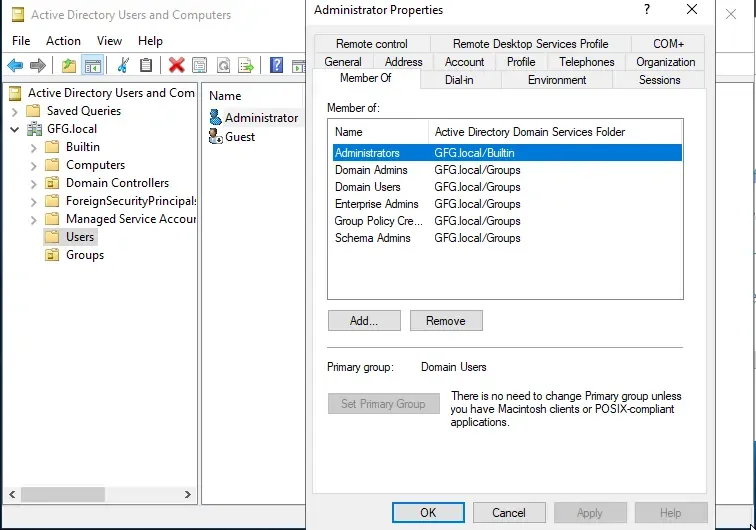
- Now inside the Users Directory you will see two Users only. We will add our own users over here.
- Right click > New > User.
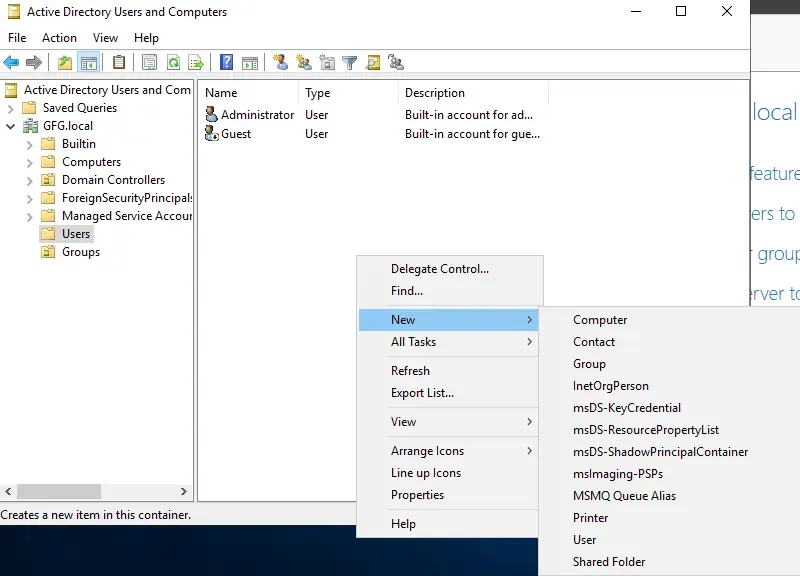
- We will create 2 normal users, 1 duplicate of user of Administrator with any name and 1 SQL service user.
- Create a new user named Franklin and change the password settings to "never expires".
- Similarly create other users.
- To make duplicate administrator right click on the Administrator > Copy > Enter Name.
- Similarly duplicate Administrator one more time to create a SQL Service Account and add the password in the description from the properties of that User made.
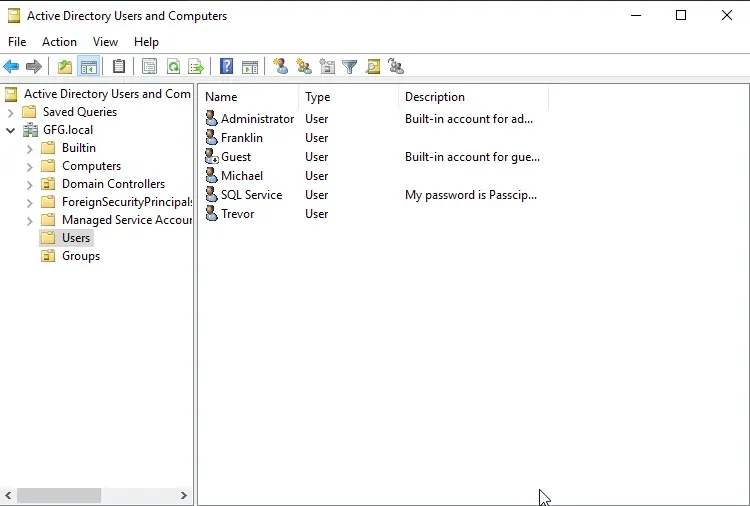
- At the end the list of Users should look like this.
- Now lets set up file sharing. On your dashboard of server management click File and Storage services > Shares > Tasks > New Share.
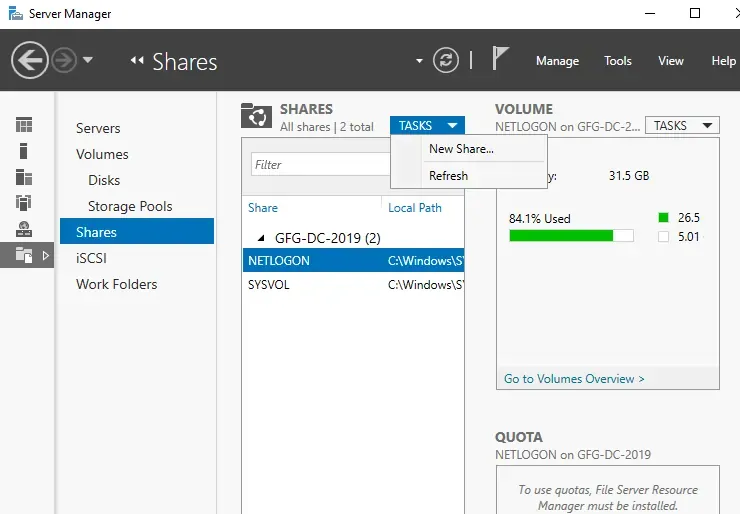
- Create SMB Share - Quick > Select the default location > Enter Share name "Steal" > Allow Caching of Share > Keep default Permissions > Create.
- This file sharing will help us enable SMB ports.
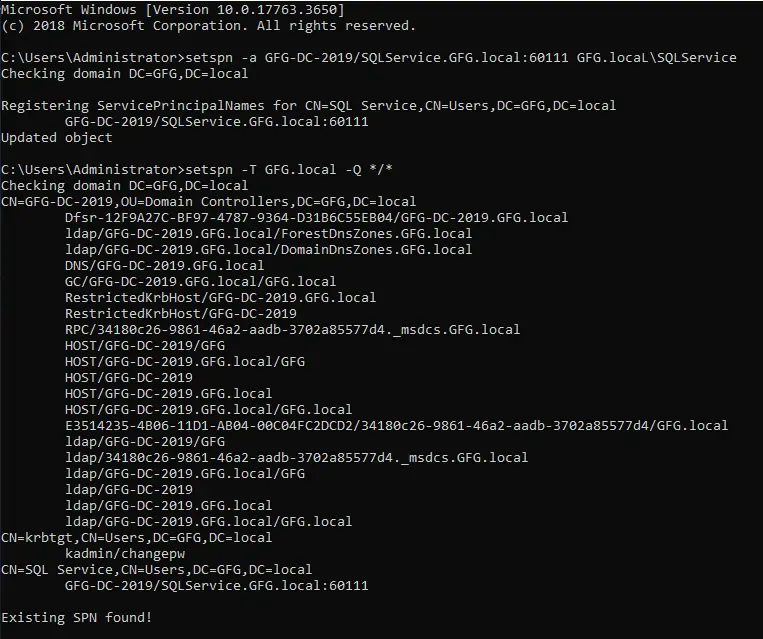
- Open Command Prompt (Administrator) and Enter these commands :
setspn -a GFG-DC-2019/SQLService.GFG.local:60111 GFG\SQLService

setspn -T GFG.local -Q */*                  #To verify the service
Policies Management
We will create and manage the Group Policies in the Domain Controller.
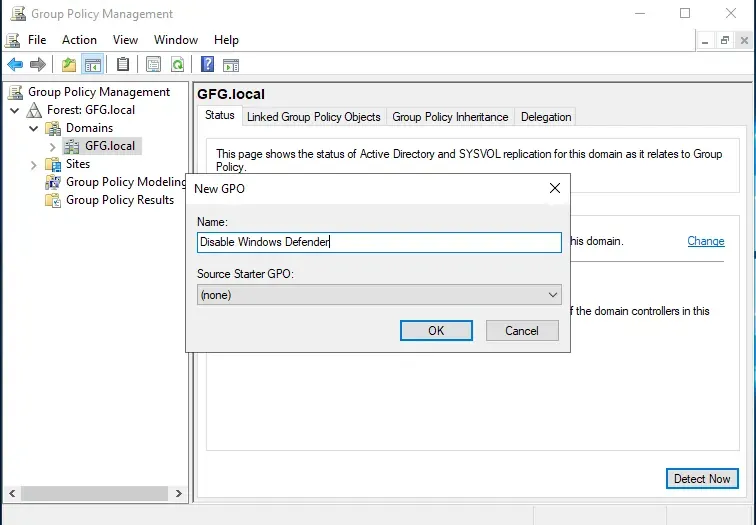
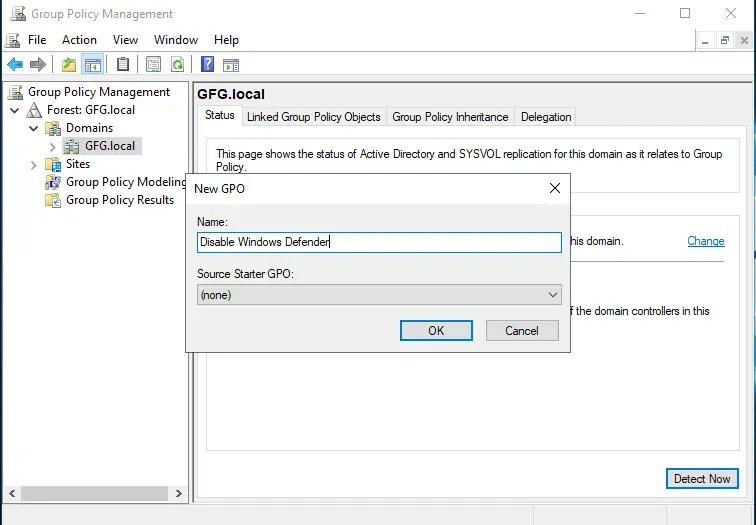
- Open settings > Group Policy Management > Forest: GFG.local > Domains > GFG.local (Right click) > Create a GPO in this domain and Link it here.
- Enter Disable Windows Defender > OK
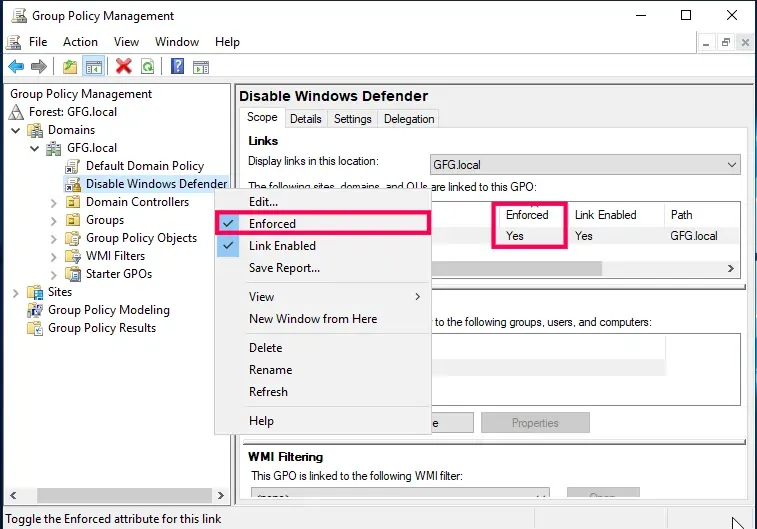
- Under GFG.local > Right Click on Disable Windows Defender > Toggle Enforced.
- Under GFG.local > Right Click on Disable Windows Defender > Computer Configuration > Policies > Administrative Templates > Windows Components
- Under Windows Components > Open Windows Defender Antivirus > Select Turn off Windows Defender Antivirus.
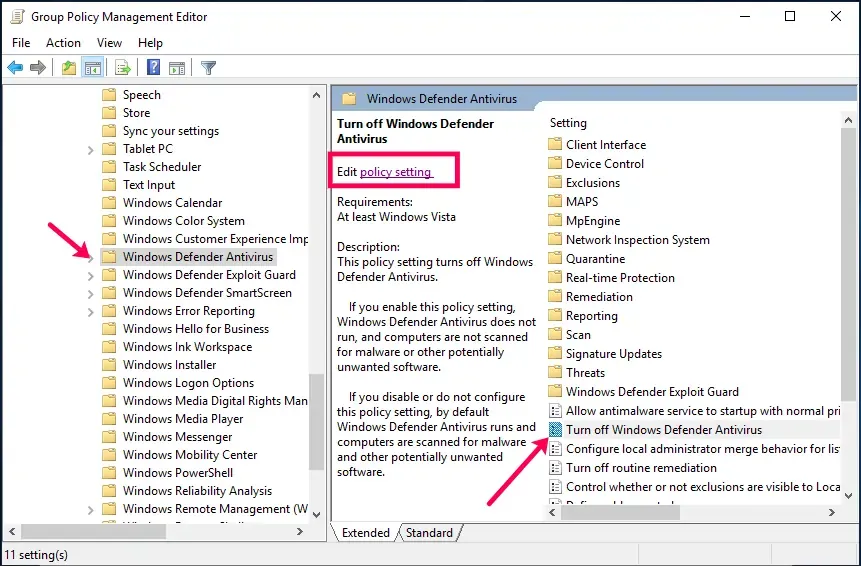
- Click on Edit Policy Settings > Toggle Enable option > Hit Apply.
Creating a Share folder in Windows 10
I want you to create the similar sharing folder for both the windows, below I have demonstrated with our PC1 for your understanding.
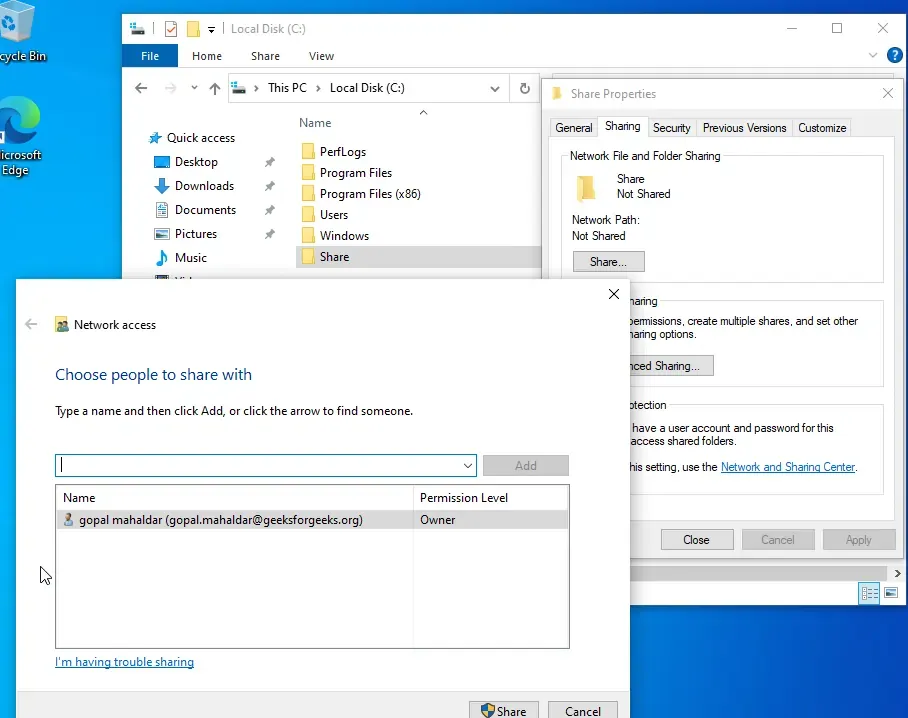
- Open file explorer > Right Click > New > Folder > Name it "Share".
- Share Folder Properties > Sharing > Share.
Connecting Computers To Domain Controller
Here we will configure the DNS of both PC1 and PC2. Later we will add the Administrator and Users in Domain Controller of the respective PCs.
- Now we have to join this to our domain.
- Open the terminal of Domain controller.
- Check the IP address of the domain controller using "ipconfig" command.
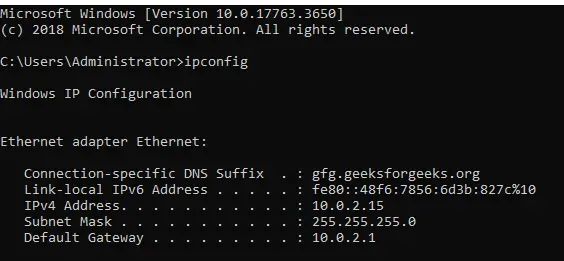
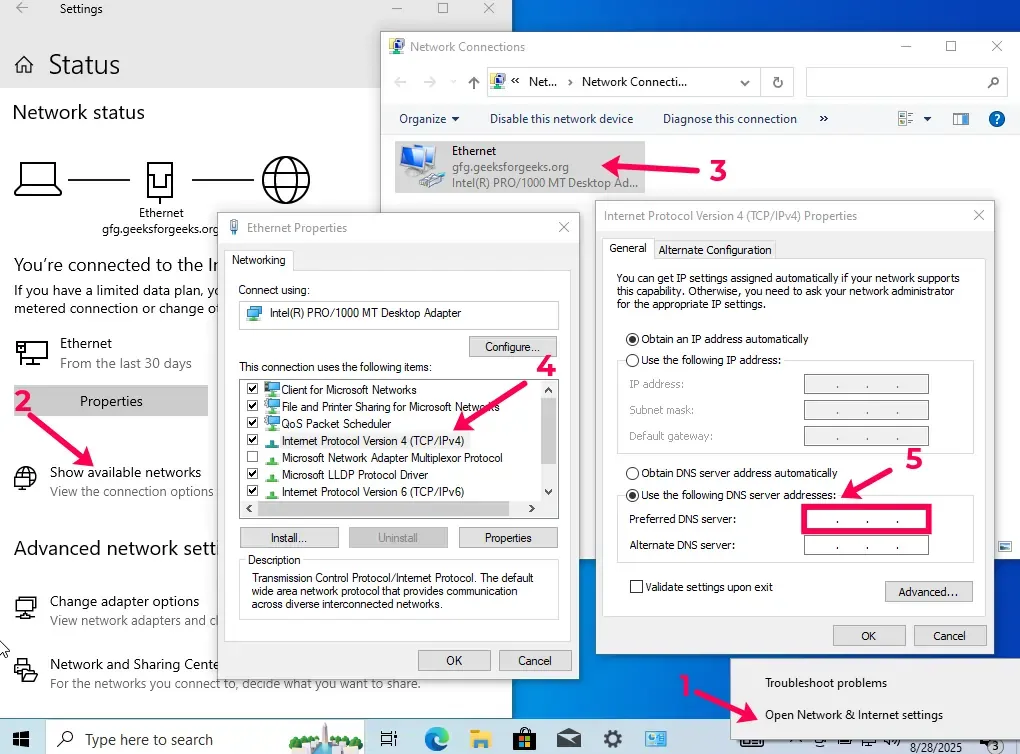
- Open the "Network & Internet Settings" Windows 10 PC1.
- Click on "Show Available Networks" > Open "Ethernet Properties" > Double click on "IPv4" > Select "Use the following DNS Server address" > Enter the IP address of the domain controller in the Preferred DNS server Box.
- Now open the Windows Settings and search for "Access work or school".
- Click Connect > "Join this device to a local Active Directory Domain".
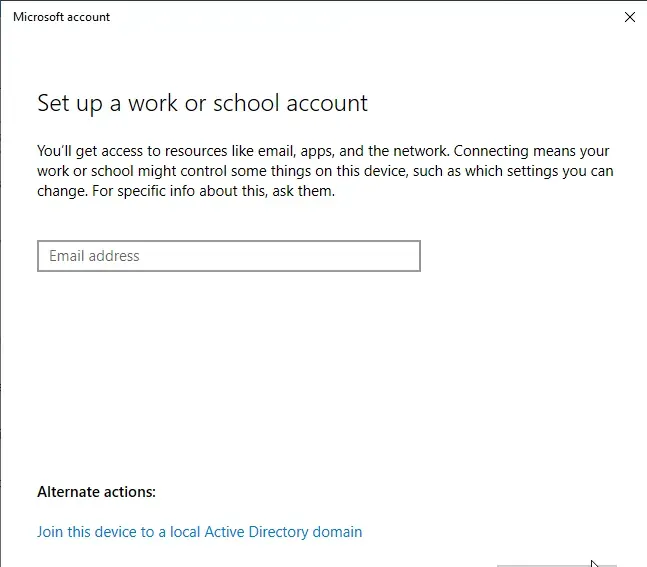
- Enter "GFG.local" in the domain name and then Enter the Username as "Administrator" and respective password of Domain Controller > Skip the "User type" setting > Restart Now.
- After the restart at the time of log in option choose "Other user" and enter username "Franklin" and respective password.
- After Login we need to change few settings again for which we need to sign out and then again login as the Administrator account. Sign in > Other User > "GFG\Administrator" > log in.
- Open computer management > Local Users and Groups > Double Click Groups > Double Click Administrator > Click Add > Enter Franklin > Check Names > Apply
- Similarly Add "GFG.local" in the PC2 and Add Administrator User to it > Restart.
- Log in with GFG\Administrator in PC2.
- Open Computer Management in PC2 > Local Users and Groups > Double Click on Groups > Double Click on Administrator.
- Add Trevor and Franklin to the domain as an Administrator.
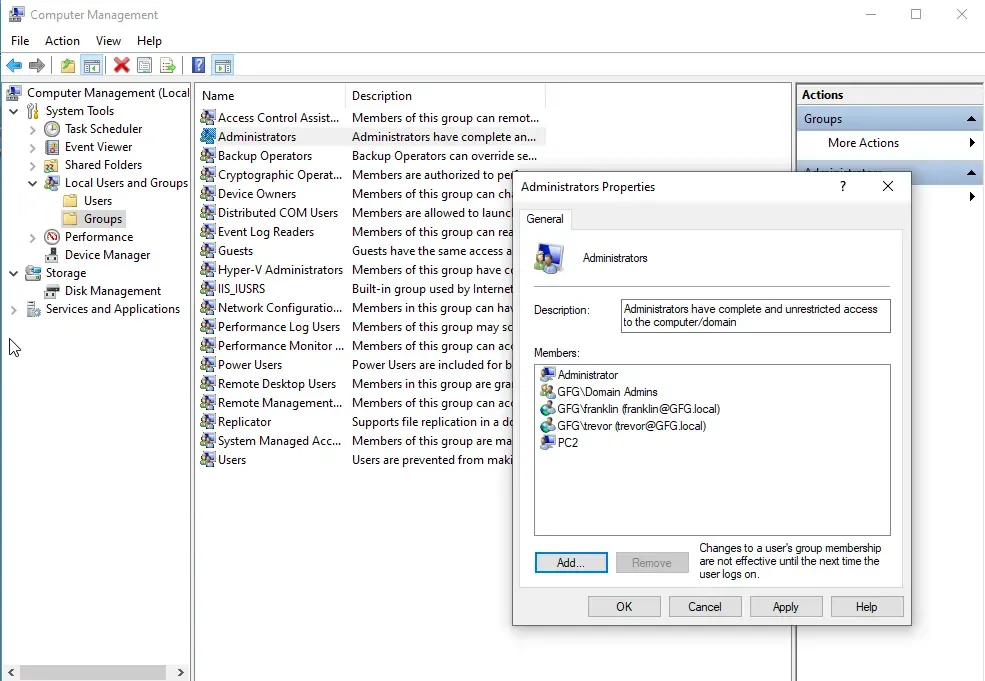
Now we as per our set up we have made:
- Franklin as an Administrator on PC1 and PC2.
- Created Trevor as an Administrator on PC2 only.
- Both the PC1 and PC2 are connected to Domain Controller locally.
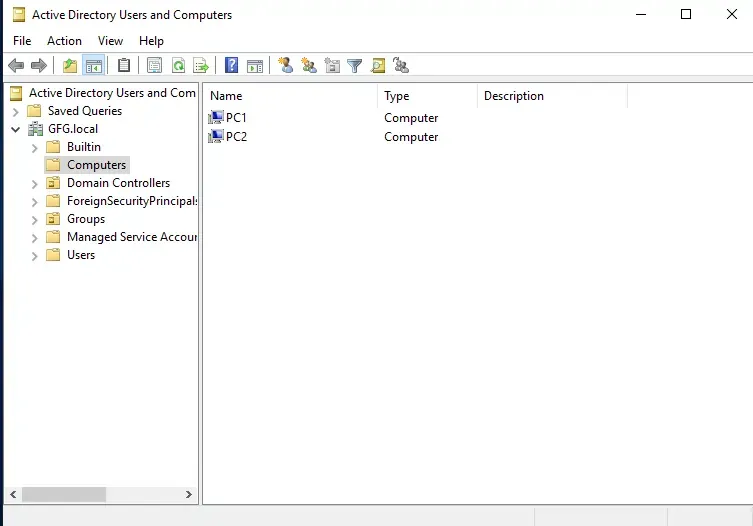
Additional Network Discovery Configuration
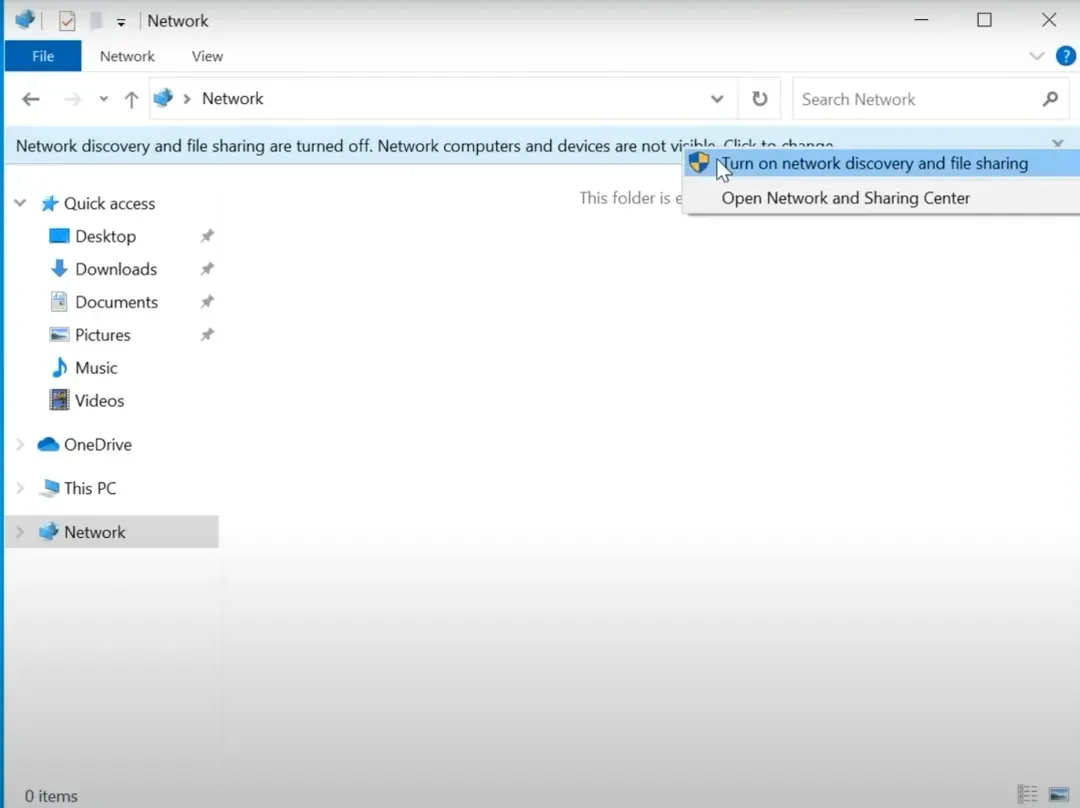
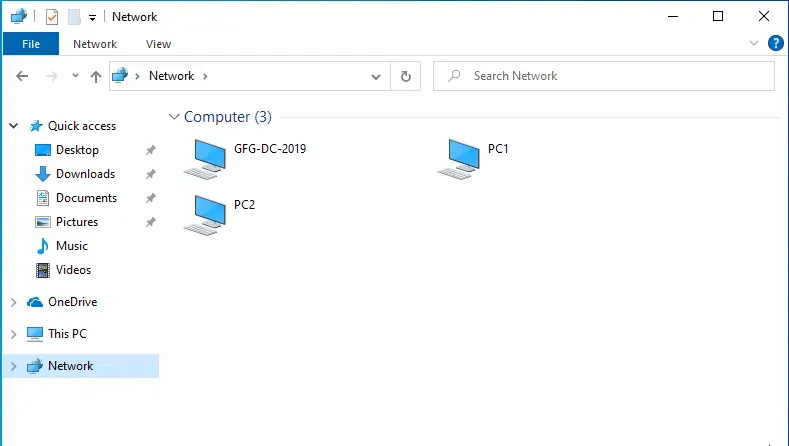
Open the file explorer in all your Window's PC and Server > Go to Network Tab > Allow PC to be discoverable on local network > Give the permission. (You should see Windows Server and PC in Network Tab).