



可以dlib直接做人脸检测和识别,也可以使用python的一个简单开源库face_recognition(底层实现还是dlib)
1、使用dlib直接实现人脸检测
#coding:utf-8
'''
脸部检测
'''
import sys
import dlib
from skimage import io
import cv2

# 加载并初始化检测器,可以分为cnn方式和机器学习的方式
#1)cnn
# 模型下载地址http://dlib.net/files/mmod_human_face_detector.dat.bz2
cnn_face_detector = dlib.cnn_face_detection_model_v1('temp/dlib/mmod_human_face_detector.dat')

#2)机器学习
#face_detector = dlib.get_frontal_face_detector()

camera = cv2.VideoCapture(0)
if not camera.isOpened():
    print("cannot open camear")
    exit(0)

while True:
    ret,frame = camera.read()

    if not ret:
        continue
    frame_new = cv2.cvtColor(frame,cv2.COLOR_BGR2RGB)
    # 检测脸部
    dets = cnn_face_detector(frame_new, 1)
    print("Number of faces detected: {}".format(len(dets)))
    # 查找脸部位置
    for i, face in enumerate(dets):
        print("Detection {}: Left: {} Top: {} Right: {} Bottom: {} Confidence: {}".format(
            i, face.rect.left(), face.rect.top(), face.rect.right(), face.rect.bottom(), face.confidence))
        # 标注脸部位置
        cv2.rectangle(frame, (face.rect.left(), face.rect.top()), (face.rect.right(), face.rect.bottom()), (0, 255, 0), 3)
    cv2.imshow("Camera",frame)

    key = cv2.waitKey(1)
    if key == 27:
        break

cv2.destroyAllWindows()
2、使用face_recognition实现人脸检测和识别
# -*- coding: utf-8 -*-

import face_recognition
import cv2
from PIL import Image, ImageDraw, ImageFont
import numpy as np

video_capture = cv2.VideoCapture(0)

obama_image = face_recognition.load_image_file("obama.jpg")
obama_face_encoding = face_recognition.face_encodings(obama_image)[0]

# Create arrays of known face encodings and their names
# 脸部特征数据的集合
known_face_encodings = [
    xjp_face_encoding,
]

# 人物名称的集合
# 显示中文
known_face_names = [
    "奥巴马",
]

# 显示英文
# known_face_names = [
#     "obama",
# ]

face_locations = []
face_encodings = []
face_names = []
process_this_frame = True

while True:
    # 读取摄像头画面
    ret, frame = video_capture.read()

    # 改变摄像头图像的大小,图像小,所做的计算就少
    small_frame = cv2.resize(frame, (0, 0), fx=0.25, fy=0.25)

    # opencv的图像是BGR格式的,而我们需要是的RGB格式的,因此需要进行一个转换。
    rgb_small_frame = small_frame[:, :, ::-1]

    # Only process every other frame of video to save time
    if process_this_frame:
        # 根据encoding来判断是不是同一个人,是就输出true,不是为flase
        face_locations = face_recognition.face_locations(
            rgb_small_frame, model='cnn')
        face_encodings = face_recognition.face_encodings(
            rgb_small_frame, face_locations)

        face_names = []
        for face_encoding in face_encodings:
            # 默认为unknown
            matches = face_recognition.compare_faces(
                known_face_encodings, face_encoding, tolerance=0.4)
            name = "Unknown"

            # if match[0]:
            #     name = "michong"
            # If a match was found in known_face_encodings, just use the first one.
            if True in matches:
                first_match_index = matches.index(True)
                name = known_face_names[first_match_index]
            face_names.append(name)

    process_this_frame = not process_this_frame

    # 将捕捉到的人脸显示出来
    for (top, right, bottom, left), name in zip(face_locations, face_names):
        # Scale back up face locations since the frame we detected in was scaled to 1/4 size
        top *= 4
        right *= 4
        bottom *= 4
        left *= 4

        # 矩形框
        cv2.rectangle(frame, (left, top), (right, bottom), (0, 0, 255), 2)

        # 加上标签
        cv2.rectangle(frame, (left, bottom - 35),
                      (right, bottom), (0, 0, 255), cv2.FILLED)

        # opencv不支持中文写入
        # font = cv2.FONT_HERSHEY_DUPLEX
        # cv2.putText(frame, name, (left + 6, bottom - 6),
        #             font, 1.0, (255, 255, 255), 1)

        # 图片上写入中文 begin
        # 图像从OpenCV格式转换成PIL格式
        img_PIL = Image.fromarray(cv2.cvtColor(frame, cv2.COLOR_BGR2RGB))
        # 字体  字体*.ttc的存放路径一般是: /usr/share/fonts/opentype/noto/ 查找指令locate *.ttc
        font = ImageFont.truetype('NotoSansCJK-Black.ttc', 40)
        # 字体颜色
        fillColor = (255, 255, 255)
        # 文字输出位置
        position = (left + 6, bottom - 6)

        # 需要先把输出的中文字符转换成Unicode编码形式
        if not isinstance(name, str):
            name = name.decode('utf8')

        draw = ImageDraw.Draw(img_PIL)
        draw.text(position, name, font=font, fill=fillColor)
        # 转换回OpenCV格式
        frame = cv2.cvtColor(np.asarray(img_PIL), cv2.COLOR_RGB2BGR)
        # end

    # Display
    cv2.imshow('monitor', frame)

    # 按Q退出
    if cv2.waitKey(1) & 0xFF == ord('q'):
        break

video_capture.release()
cv2.destroyAllWindows()
3、训练dlib的face detector
1)数据集制作
dlib官方源码中提供了imglab工具,可以用于标注,在从github上下载的源码中,文件路径为:dlib/tools/imglab
进入目录,输入以下指令:
mkdir build
cd build
cmake ..
cmake --build . --config Release
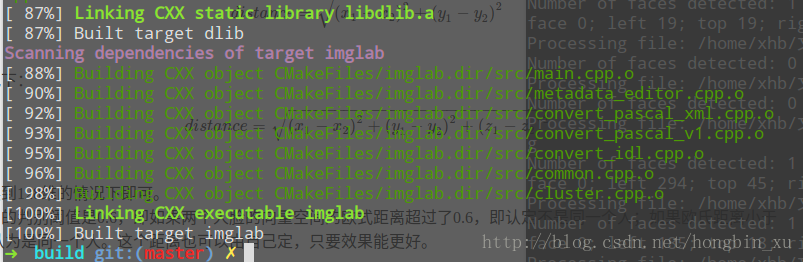
sudo make install
安装完成之后可以直接在console里使用imglab指令调用
开始标注,数据集的照片需要自己收集,或者去用一些公开的数据集照片。
使用imglab先创建要用来记录标签的xml文件
进入到当前目录下:
imglab -c mydata.xml ./
mydata:这个是xml文件的名字,随便取一个
./:这个是你数据集的目录,根据自己的情况而定
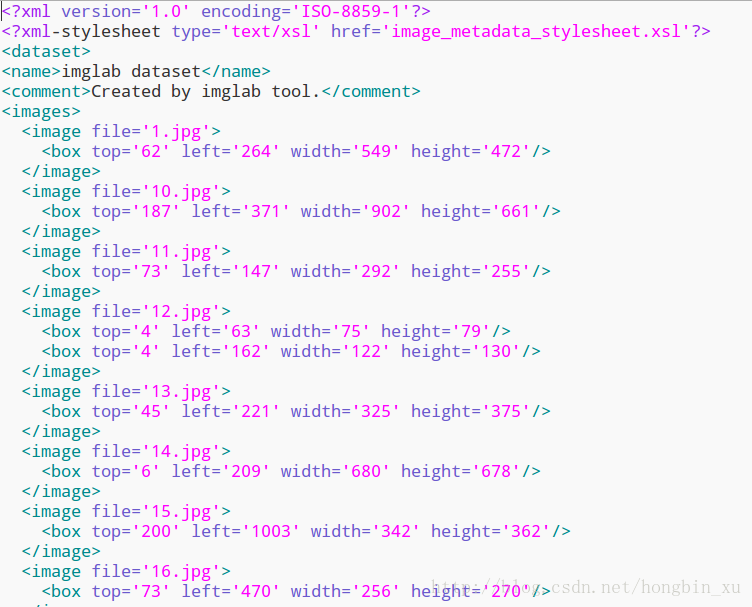
之后文件夹中会生成两个文件:一个xml文件,一个xsl文件。
接下来,打开这个xml文件:
imglab mydata.xml
随后会启动工具软件,接下来一张一张图片打标签吧。

操作很简单,按下shift键后,鼠标左键拖动就会画出框;先松开左键,就会记录这个框,若先松开shift键,则不记录操作。
最后,打开你的xml文件,里面已经标注好了标签的信息
2)训练机器学习版本
# -*- coding: utf-8 -*-
import os
import sys
import glob
import dlib
import cv2

# options用于设置训练的参数和模式
options = dlib.simple_object_detector_training_options()
# Since faces are left/right symmetric we can tell the trainer to train a
# symmetric detector.  This helps it get the most value out of the training
# data.
options.add_left_right_image_flips = True
# 支持向量机的C参数,通常默认取为5.自己适当更改参数以达到最好的效果
options.C = 5
# 线程数,你电脑有4核的话就填4
options.num_threads = 4
options.be_verbose = True

# 获取路径
current_path = os.getcwd()
train_folder = current_path + '/train/'
test_folder = current_path + '/test/'
train_xml_path = train_folder + 'train.xml'
test_xml_path = test_folder + 'test.xml'


# 开始训练
print("start training:")
dlib.train_simple_object_detector(train_xml_path, 'detector.pkl', options)
print("Training accuracy: {}".format(
    dlib.test_simple_object_detector(train_xml_path, "detector.pkl")))
print("Testing accuracy: {}".format(
    dlib.test_simple_object_detector(test_xml_path, "detector.pkl")))
3)训练cnn模型
必须得使用c++的版本,训练得到.dat模型。
主要参考dnn_mmod_ex.cpp这个文件
4)dlib的各类文件(例如:模型,数据集,各个版本的源码包)下载地址:http://dlib.net/files/
后续持续更新中~


 扫一扫
扫一扫


 6112
6112

 被折叠的 条评论
为什么被折叠?
被折叠的 条评论
为什么被折叠?
 到【灌水乐园】发言


