使用Ollama私有化部署本地大模型方案

安装Ollama

​ Ollama 是一个用于运行和管理大型语言模型的工具,它是一个轻量级服务,可在本地环境中实现对模型的使用和管理,保证了数据的隐私和安全性。

​ Ollama 支持多种大型语言模型,例如 llama、phi、mistral、gemma 等,具有较强的功能扩展性,例如支持模型的下载、删除、更新等操作,方便用户对模型进行管理。同时,它还支持与其他工具和平台的集成,如 OpenAI 兼容的 API,进一步扩展了其应用范围和功能。

下载

​ 访问 Ollama 官网,点击 “Windows” 按钮下载安装程序,然后双击安装程序进行安装。
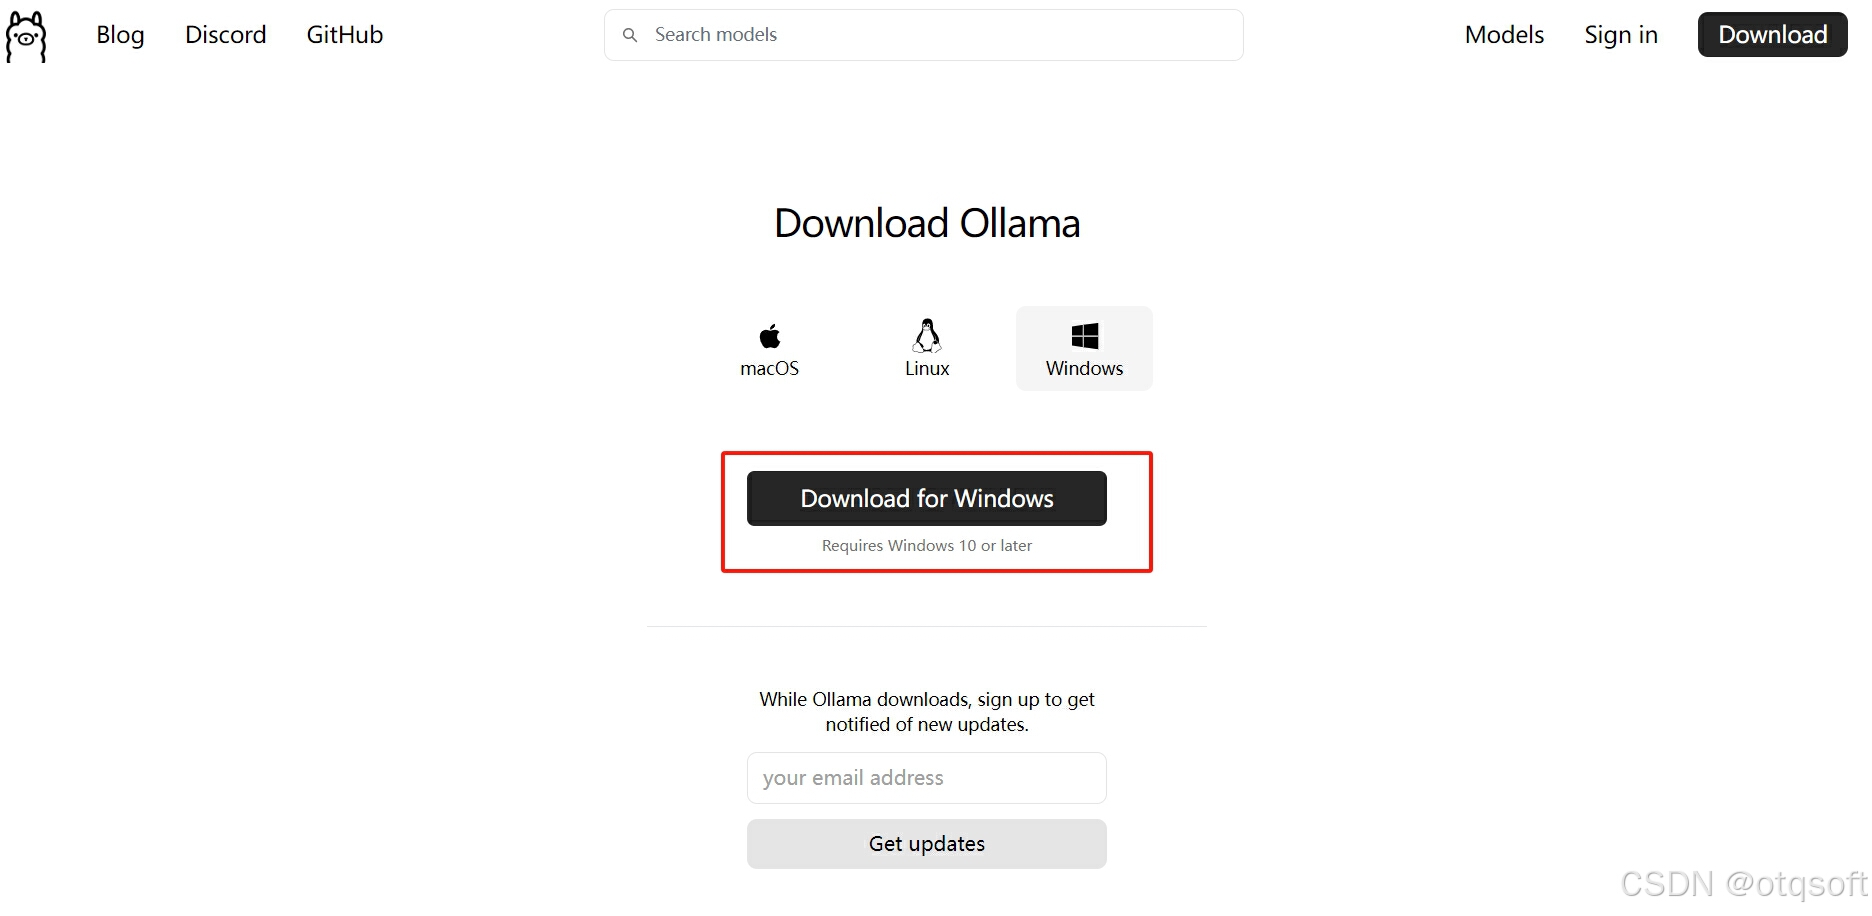
在这里插入图片描述

安装完成后,打开 Windows 的命令提示符(PowerShell 等),输入 ollama -v(ollama --version) 查看安装版本。

在这里插入图片描述在这里插入图片描述

若出现版本信息就代表ollama安装成功了。

配置

​ 打开系统环境变量配置,添加一个环境变量 OLLAMA_MODELS,将其值设置为你指定的文件夹路径(例如 D:\ollama_model),这样可以避免模型文件自动保存在 C 盘(C:\Users\用户\.ollama\models)导致 C 盘空间不足。修改后在这里插入图片描述
重启终端(如PowerShell或CMD)以使更改生效。

模型安装

Ollama支持的模型列表

模型参数模型大小安装
Llama 3.23B2.0GBollama run llama3.2
Llama 38B4.7GBollama run llama3
Llama 370B40GBollama run llama3:70b
Phi-33.8B2.3GBollama run phi3
Mistral7B4.1GBollama run mistral
Neural Chat7B4.1GBollama run neural-chat
Starling7B4.1GBollama run starling-lm
Code Llama7B3.8GBollama run codellama
Llama 2 Uncensored7B3.8GBollama run llama2-uncensored
LLaVA7B4.5GBollama run llava
Gemma2B1.4GBollama run gemma:2b
Gemma7B4.8GBollama run gemma:7b
Solar10.7B6.1GBollama run solar

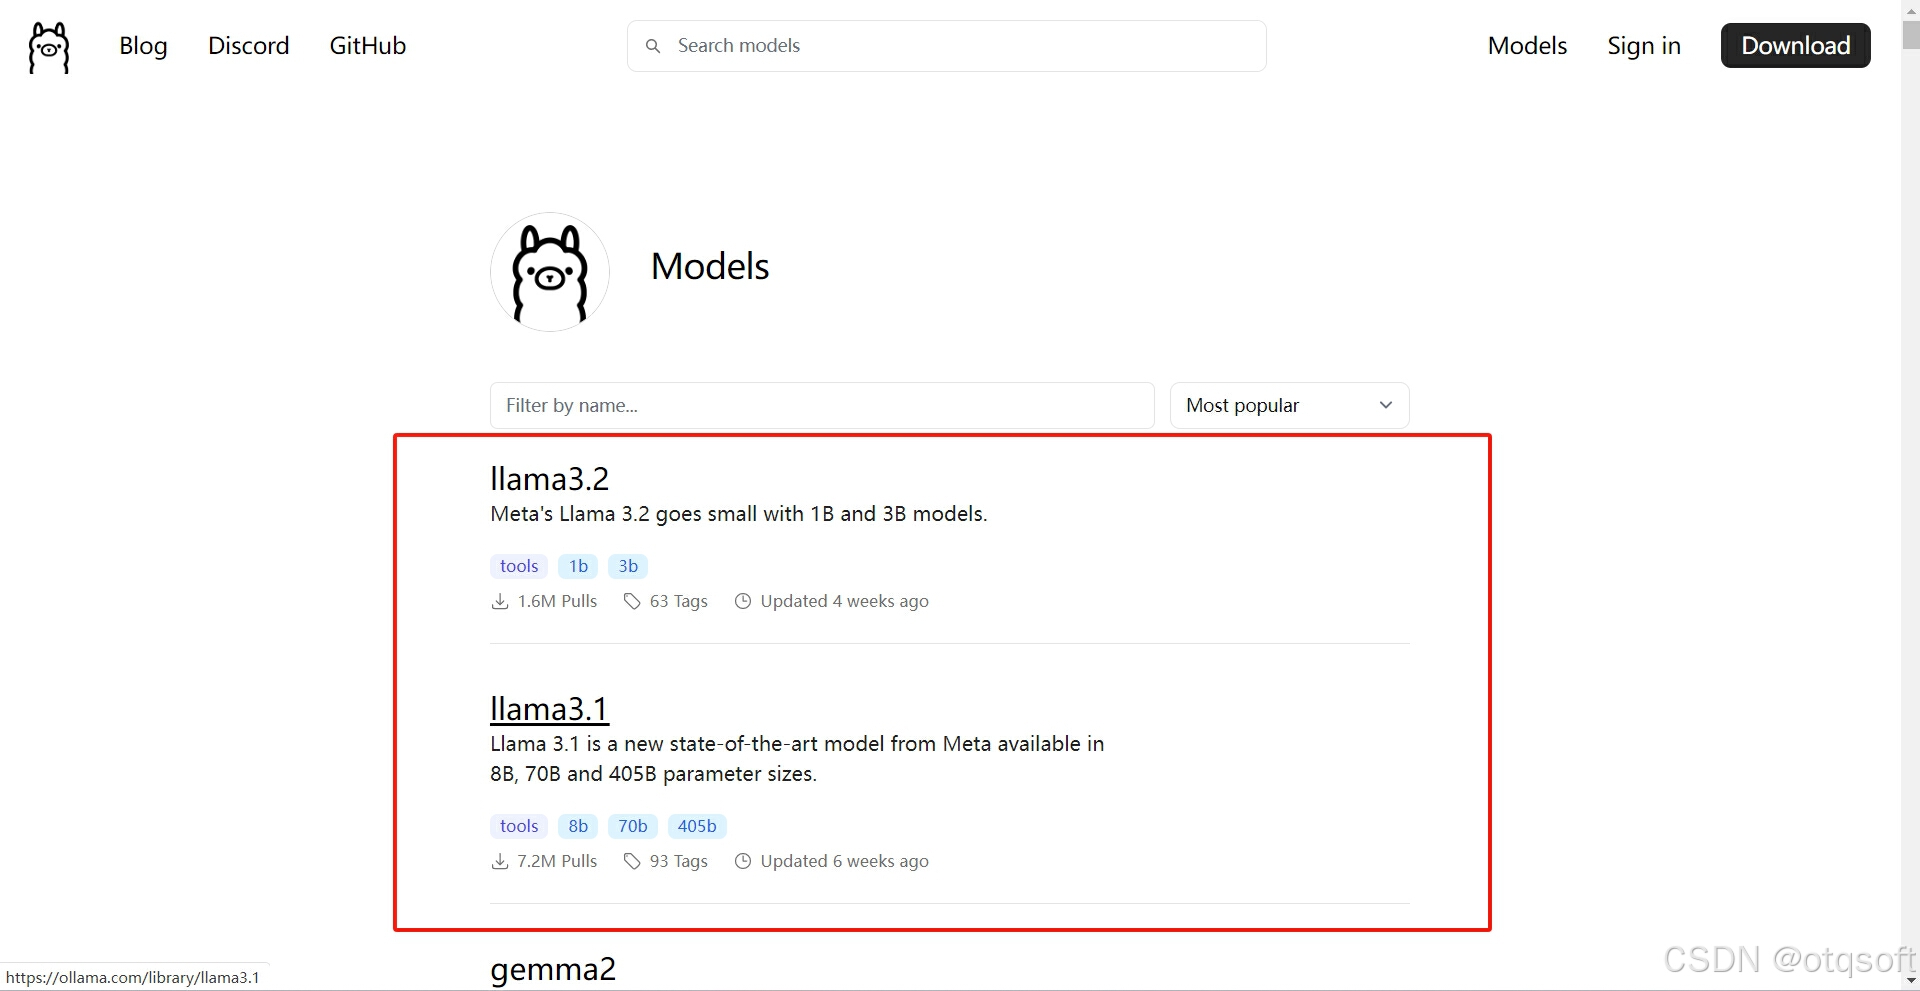
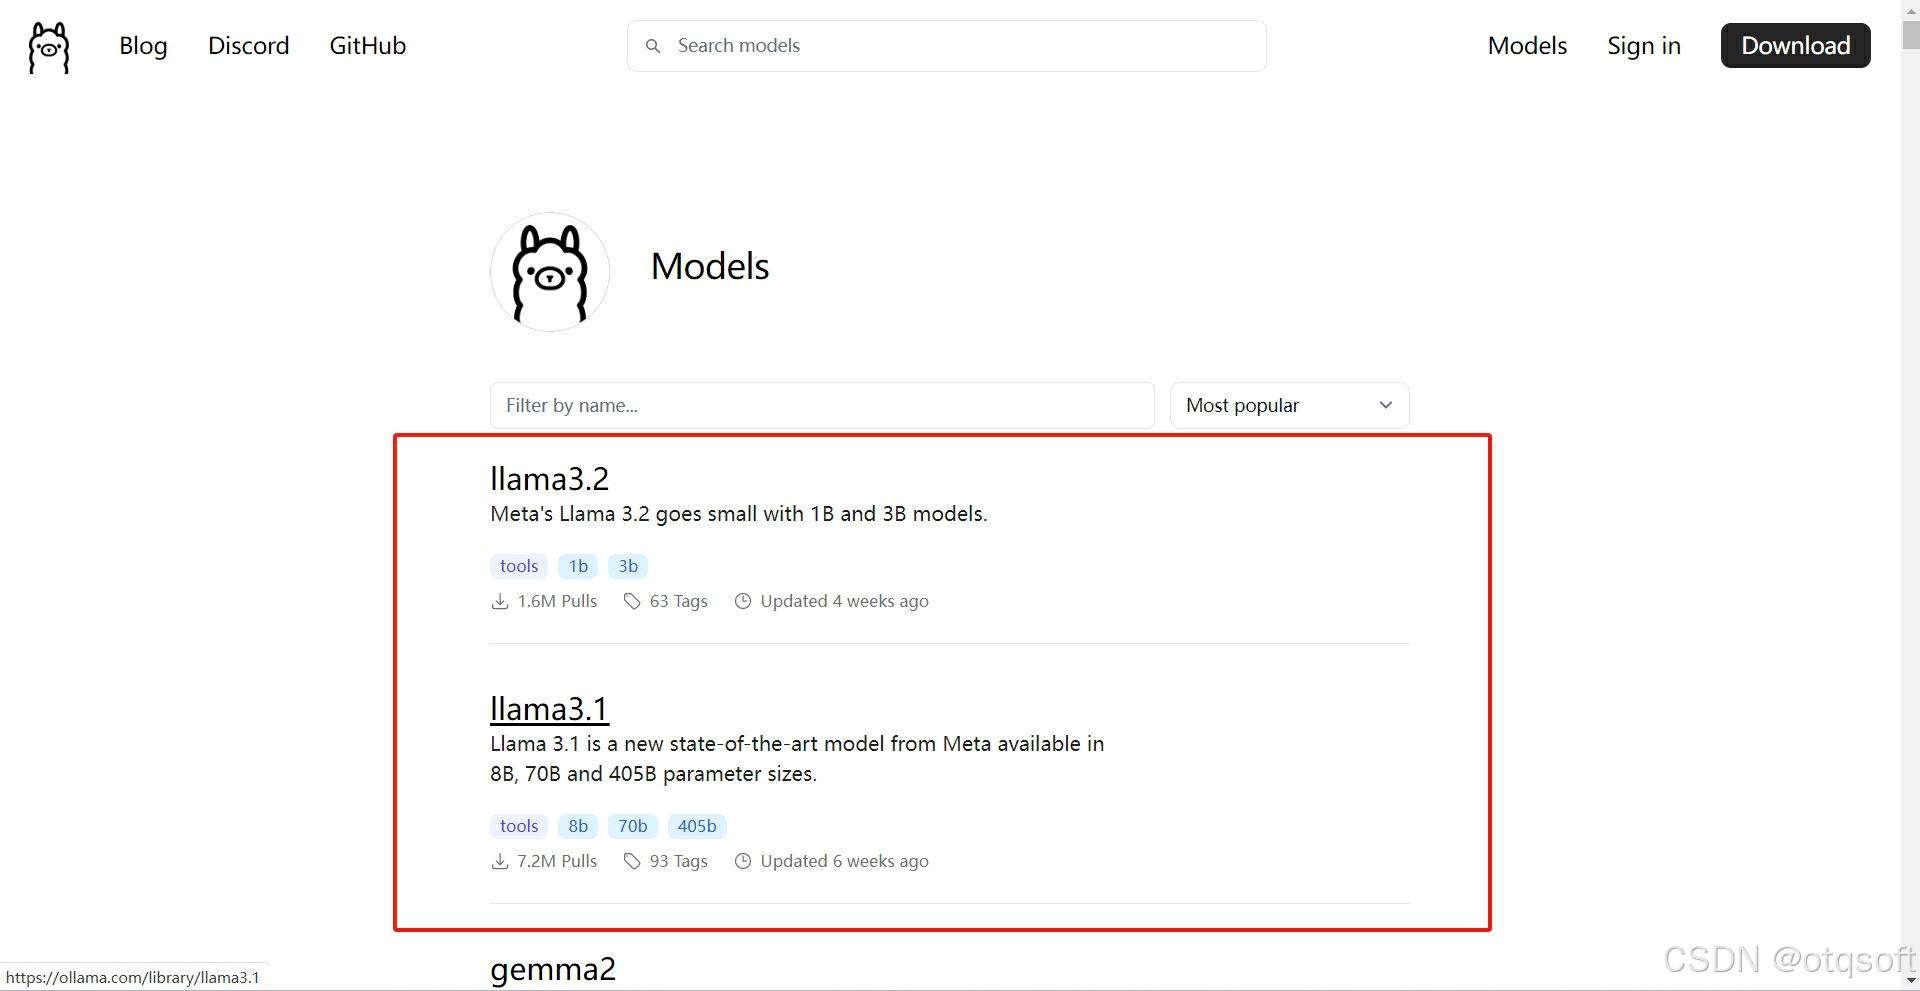
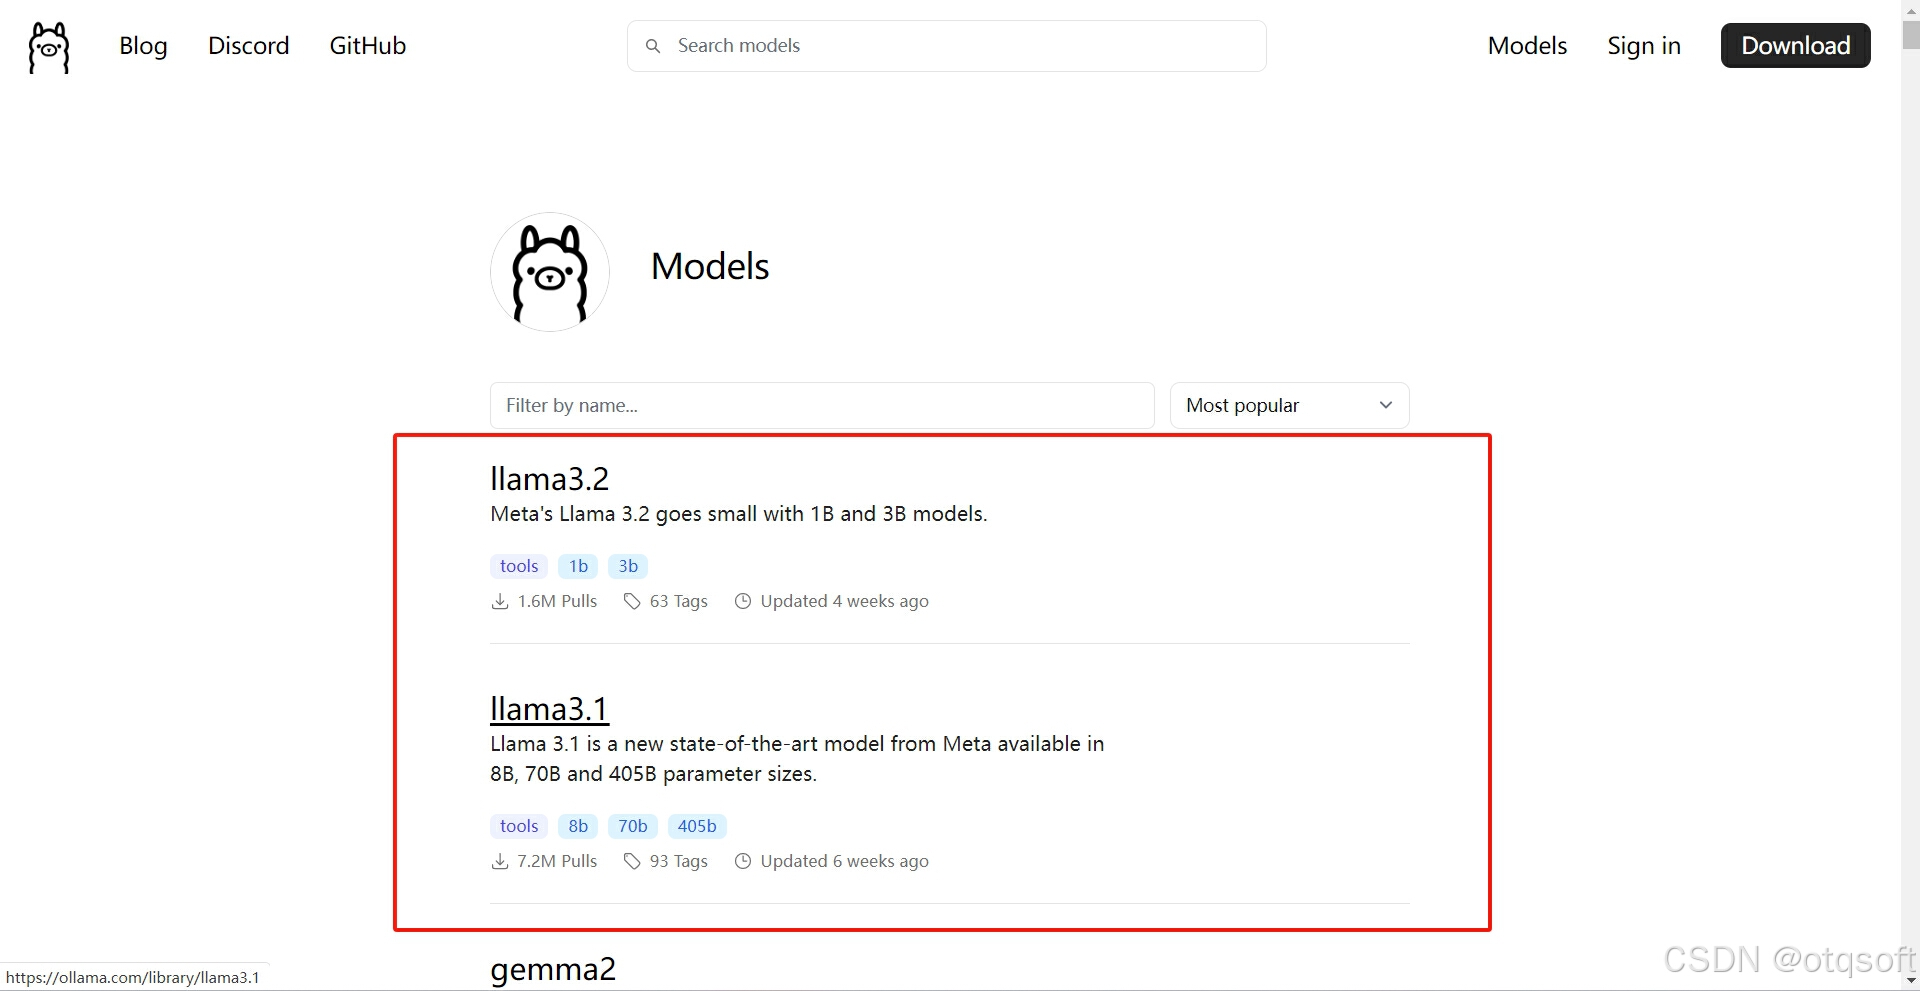
可以访问 Ollama 模型仓库,查看具体支持所有模型
在这里插入图片描述
​

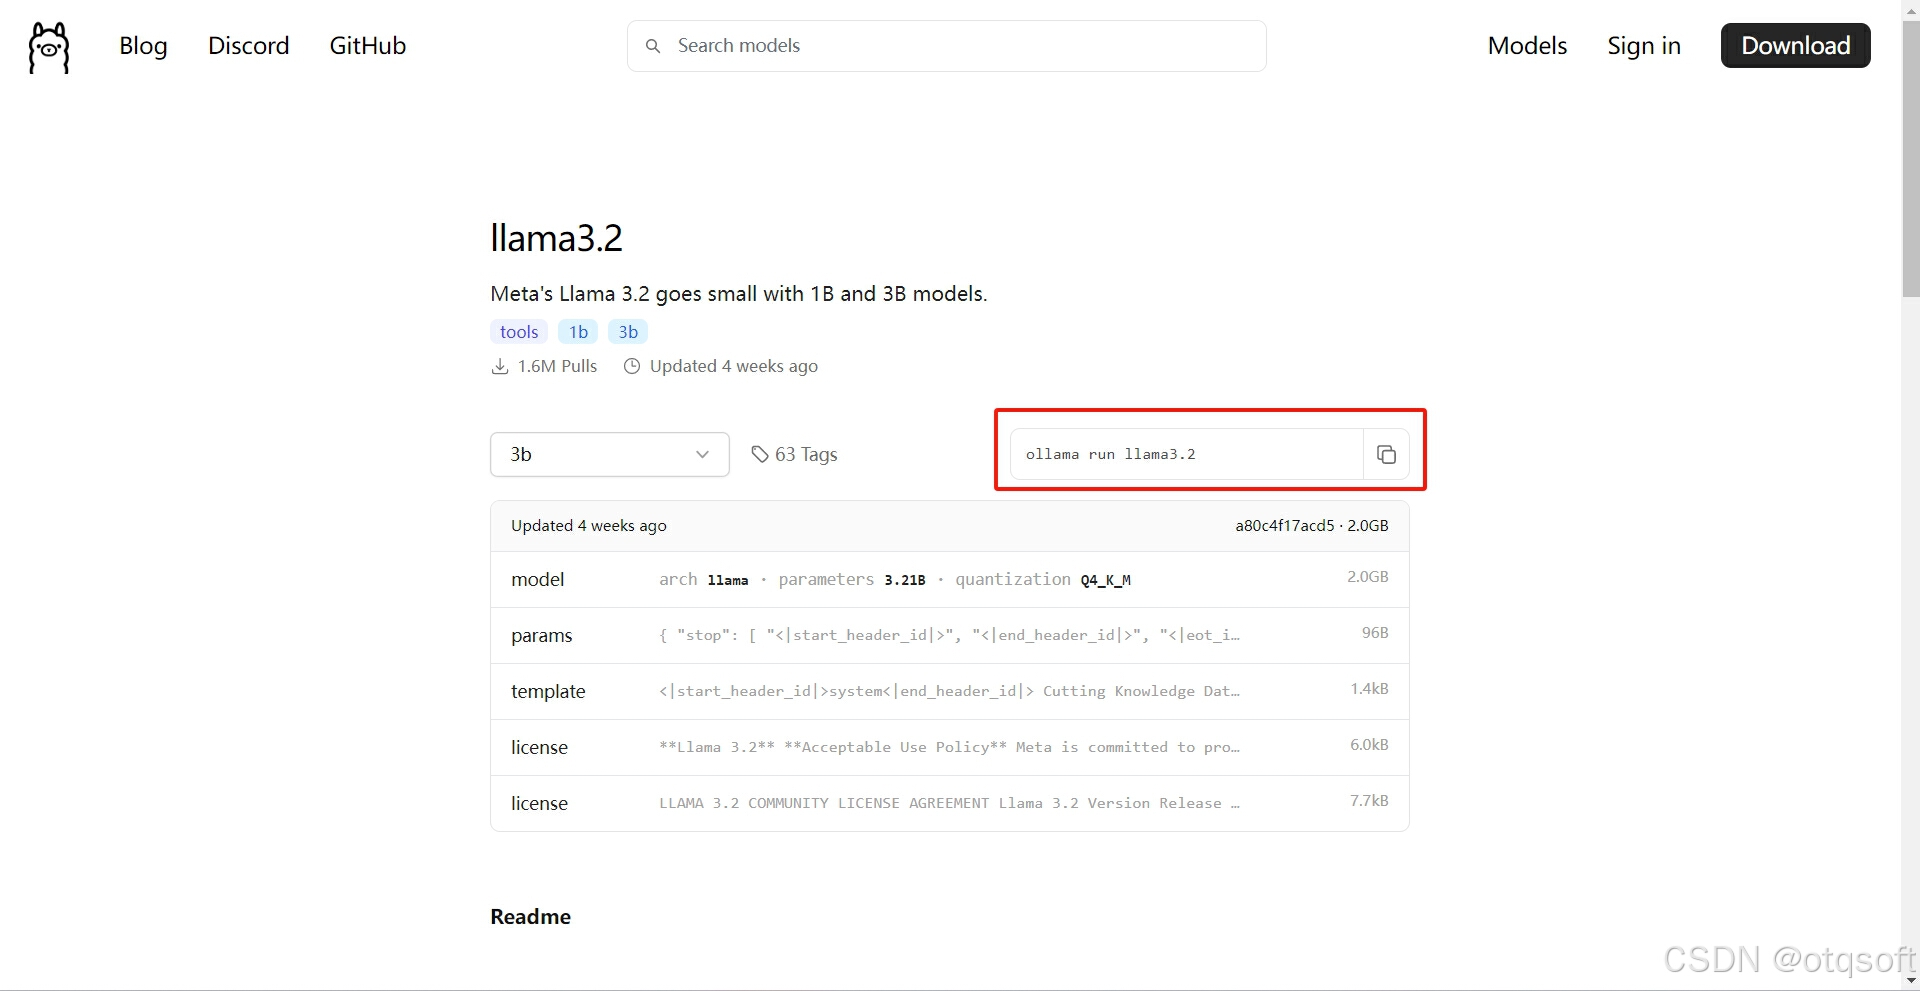
如需安装llama3.2点击进入
在这里插入图片描述

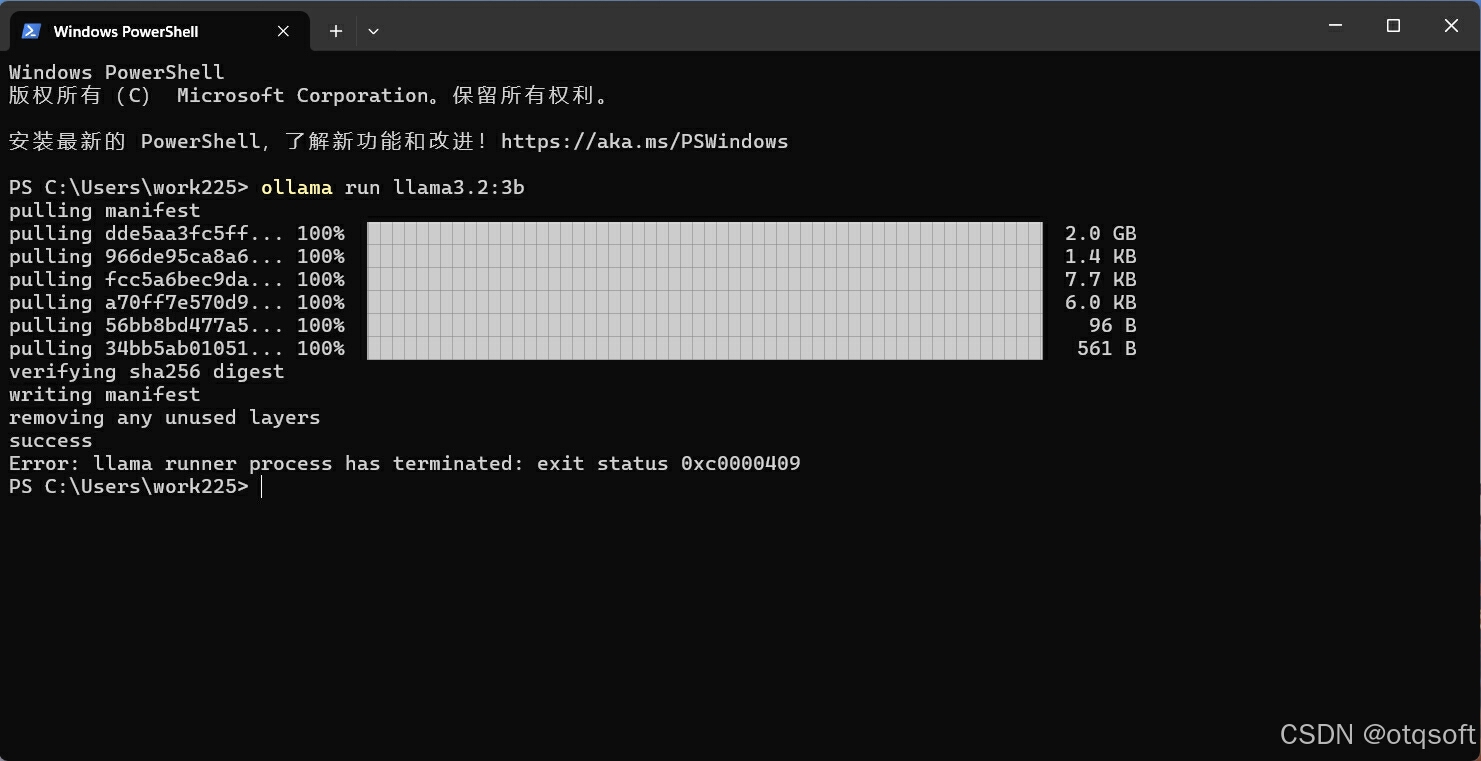
在命令行窗口中录入指令 ollama run llama3.2安装
在这里插入图片描述

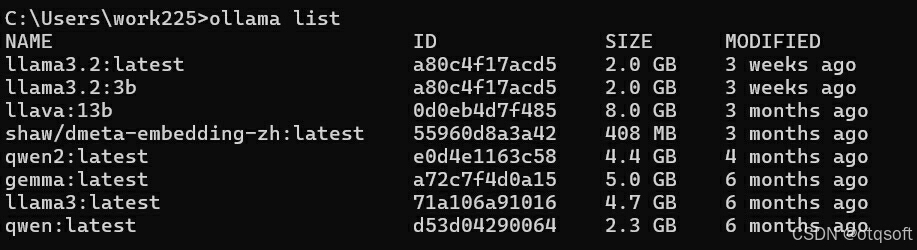
安装完成后,使用命令ollama list来查看已下载的模型列表。

在这里插入图片描述

模型运行

​ 模型的运行和安装指令一样,都是ollama run 模型名称,如果模型未安装会自动安装。

在这里插入图片描述

​ 使用/bye退出

API调用

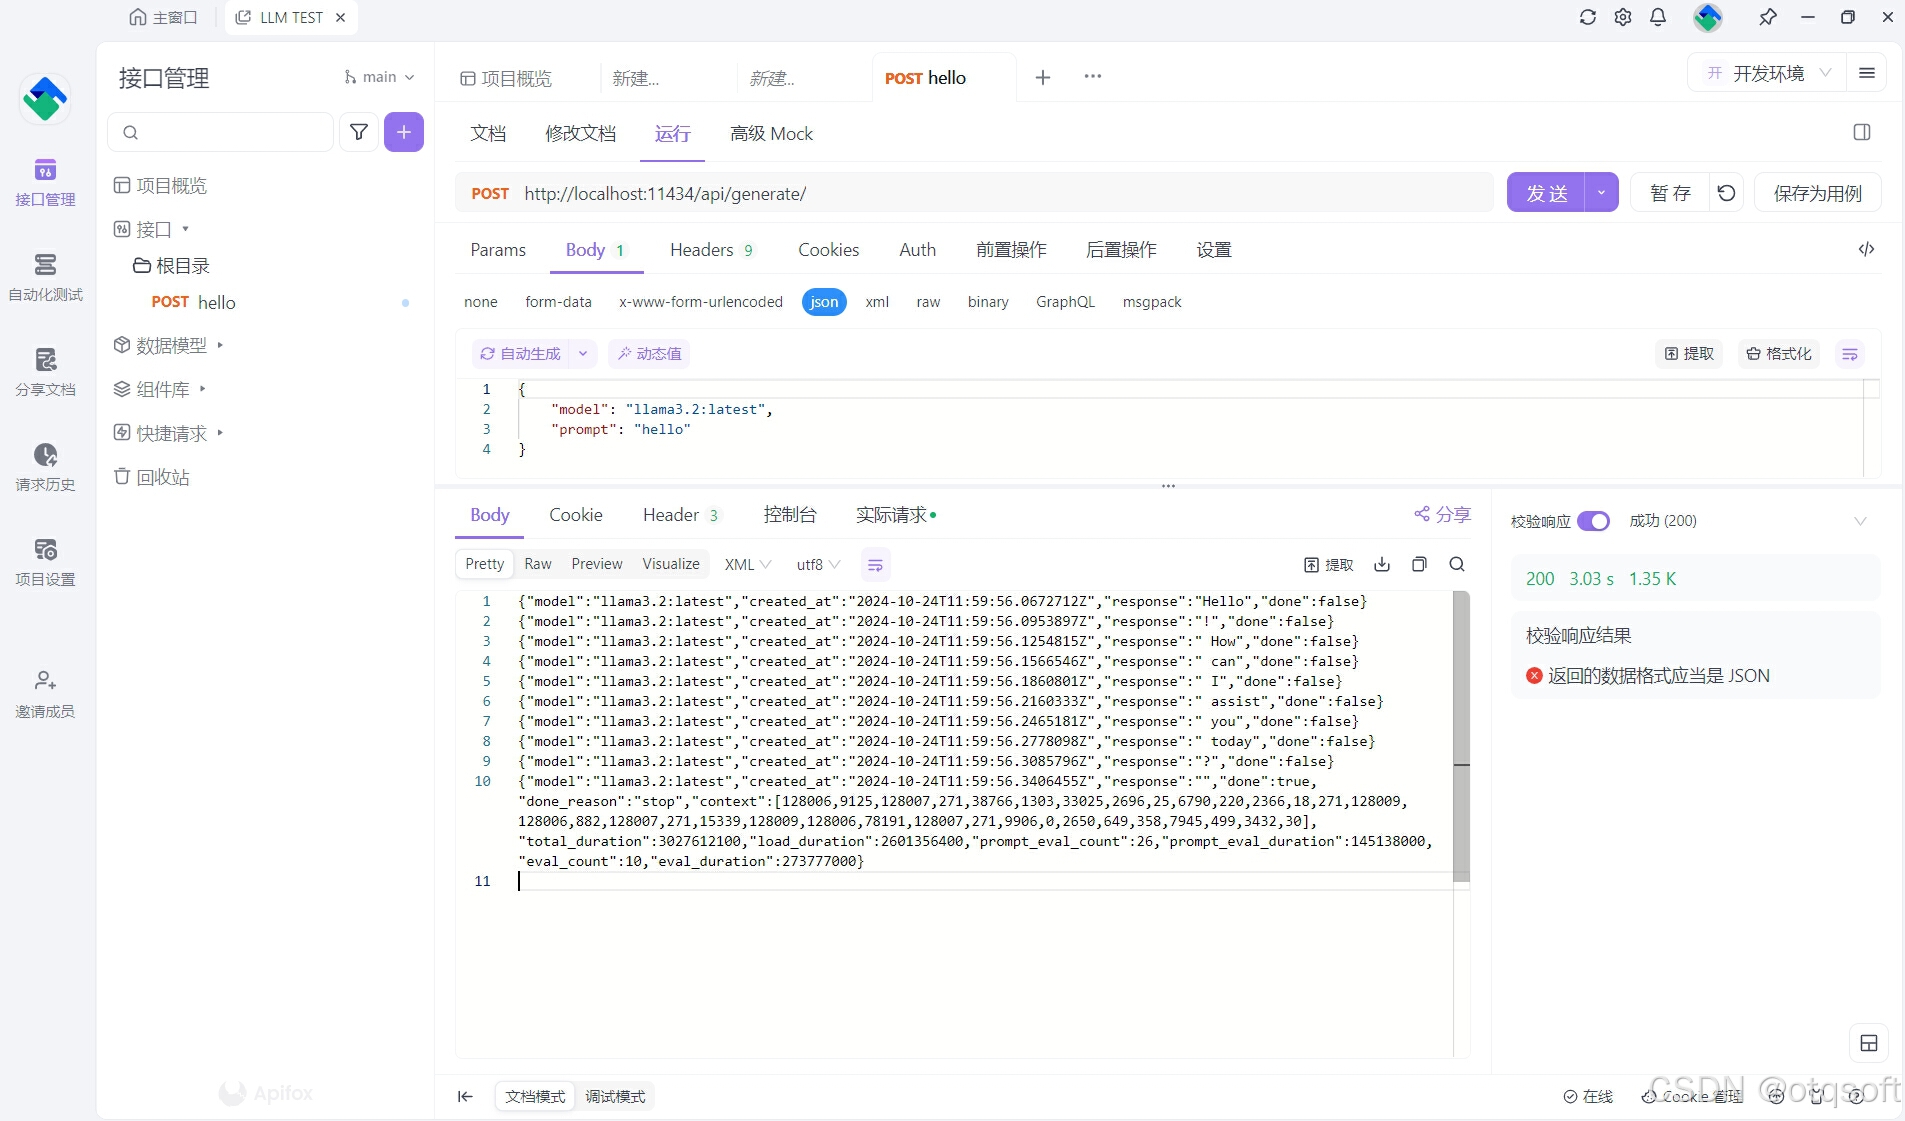
​ Ollama服务启动后可以用API访问,默认API地址是http://localhost:11434/api/generate

​ llama3 API访问文档 ollama/docs/api.md at main · ollama/ollama (github.com)

请求参数

Body 参数application/json

{
    "model": "llama3.2:latest",
    "prompt": "hello"
}

参数解释如下:

  • model(必需):模型名称。
  • prompt:用于生成响应的提示文本。
  • images(可选):包含多媒体模型(如llava)的图像的base64编码列表。

高级参数(可选):

  • format:返回响应的格式。目前仅支持json格式。
  • options:模型文件文档中列出的其他模型参数,如温度(temperature)。
  • system:系统消息,用于覆盖模型文件中定义的系统消息。
  • template:要使用的提示模板,覆盖模型文件中定义的模板。
  • context:从先前的/generate请求返回的上下文参数,可以用于保持简短的对话记忆。
  • stream:如果为false,则响应将作为单个响应对象返回,而不是一系列对象流。
  • raw:如果为true,则不会对提示文本应用任何格式。如果在请求API时指定了完整的模板化提示文本,则可以使用raw参数。
  • keep_alive:控制模型在请求后保持加载到内存中的时间(默认为5分钟)
返回响应
{
    "model": "llama3.2:latest",
    "created_at": "2024-10-24T11:59:56.0672712Z",
    "response": "Hello",
    "done": false
}
{
    "model": "llama3.2:latest",
    "created_at": "2024-10-24T11:59:56.0953897Z",
    "response": "!",
    "done": false
}
{
    "model": "llama3.2:latest",
    "created_at": "2024-10-24T11:59:56.1254815Z",
    "response": " How",
    "done": false
}
{
    "model": "llama3.2:latest",
    "created_at": "2024-10-24T11:59:56.1566546Z",
    "response": " can",
    "done": false
}
{
    "model": "llama3.2:latest",
    "created_at": "2024-10-24T11:59:56.1860801Z",
    "response": " I",
    "done": false
}
{
    "model": "llama3.2:latest",
    "created_at": "2024-10-24T11:59:56.2160333Z",
    "response": " assist",
    "done": false
}
{
    "model": "llama3.2:latest",
    "created_at": "2024-10-24T11:59:56.2465181Z",
    "response": " you",
    "done": false
}
{
    "model": "llama3.2:latest",
    "created_at": "2024-10-24T11:59:56.2778098Z",
    "response": " today",
    "done": false
}
{
    "model": "llama3.2:latest",
    "created_at": "2024-10-24T11:59:56.3085796Z",
    "response": "?",
    "done": false
}
{
    "model": "llama3.2:latest",
    "created_at": "2024-10-24T11:59:56.3406455Z",
    "response": "",
    "done": true,
    "done_reason": "stop",
    "context": [...],
    "total_duration": 3027612100,
    "load_duration": 2601356400,
    "prompt_eval_count": 26,
    "prompt_eval_duration": 145138000,
    "eval_count": 10,
    "eval_duration": 273777000
}

返回值的解释如下:

  • total_duration:生成响应所花费的总时间。
  • load_duration:以纳秒为单位加载模型所花费的时间。
  • prompt_eval_count:提示文本中的标记(tokens)数量。
  • prompt_eval_duration:以纳秒为单位评估提示文本所花费的时间。
  • eval_count:生成响应中的标记数量。
  • eval_duration:以纳秒为单位生成响应所花费的时间。
  • context:用于此响应中的对话编码,可以在下一个请求中发送,以保持对话记忆。
  • response:如果响应是以流的形式返回的,则为空;如果不是以流的形式返回,则包含完整的响应。
在这里插入图片描述

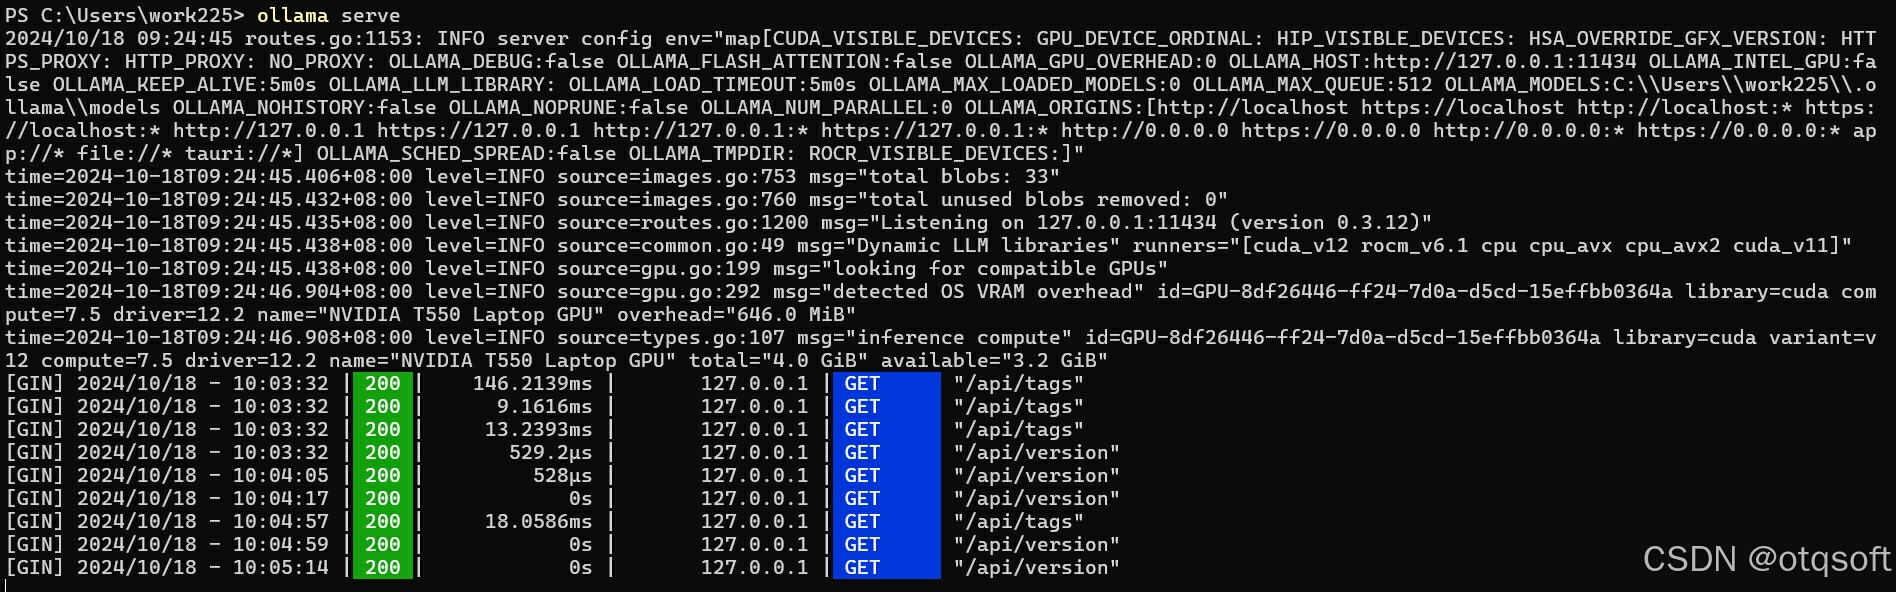
如果Ollama服务未启动,可通过指令ollama serve启动服务

在这里插入图片描述

安装Open WebUI

​ 由于Ollama运行模型是基于命令行窗口,操作不方便,通过安装Open WebUI可实现类似ChatGPT的方式与模型交互,提供友好的聊天体验。

​ Open WebUI 是一个功能丰富、用户友好的自托管 Web 用户界面,具有高性能和响应性,能够快速处理用户的请求并返回准确的答案,增强代码的可读性,对于开发者或涉及代码交流的场景非常有用。另外,Open WebUI支持检索增强生成(RAG),将文档交互无缝地集成到聊天体验中,用户可以直接将文档加载到聊天中或添加文件到文档库,并在提示符中使用特定命令访问。

前提

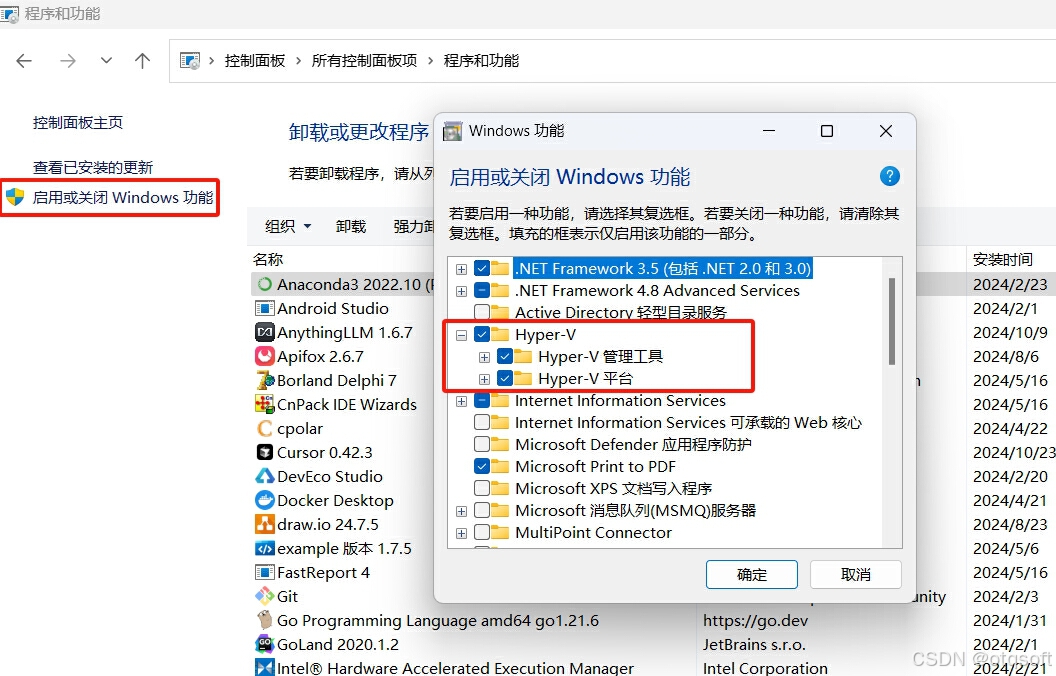
启用 Hyper-V 和容器功能
  • 打开 “控制面板”,选择 “程序”>“程序和功能”。
  • 在左侧选择 “启用或关闭 Windows 功能”。
  • 勾选 “Hyper-V” 和 “适用于 Linux 的 Windows 子系统” 以及 “容器”,然后点击 “确定”,等待系统配置完成并重启电脑(如果该功能不可用,需开启BIOS中的虚拟化功能)。
    在这里插入图片描述
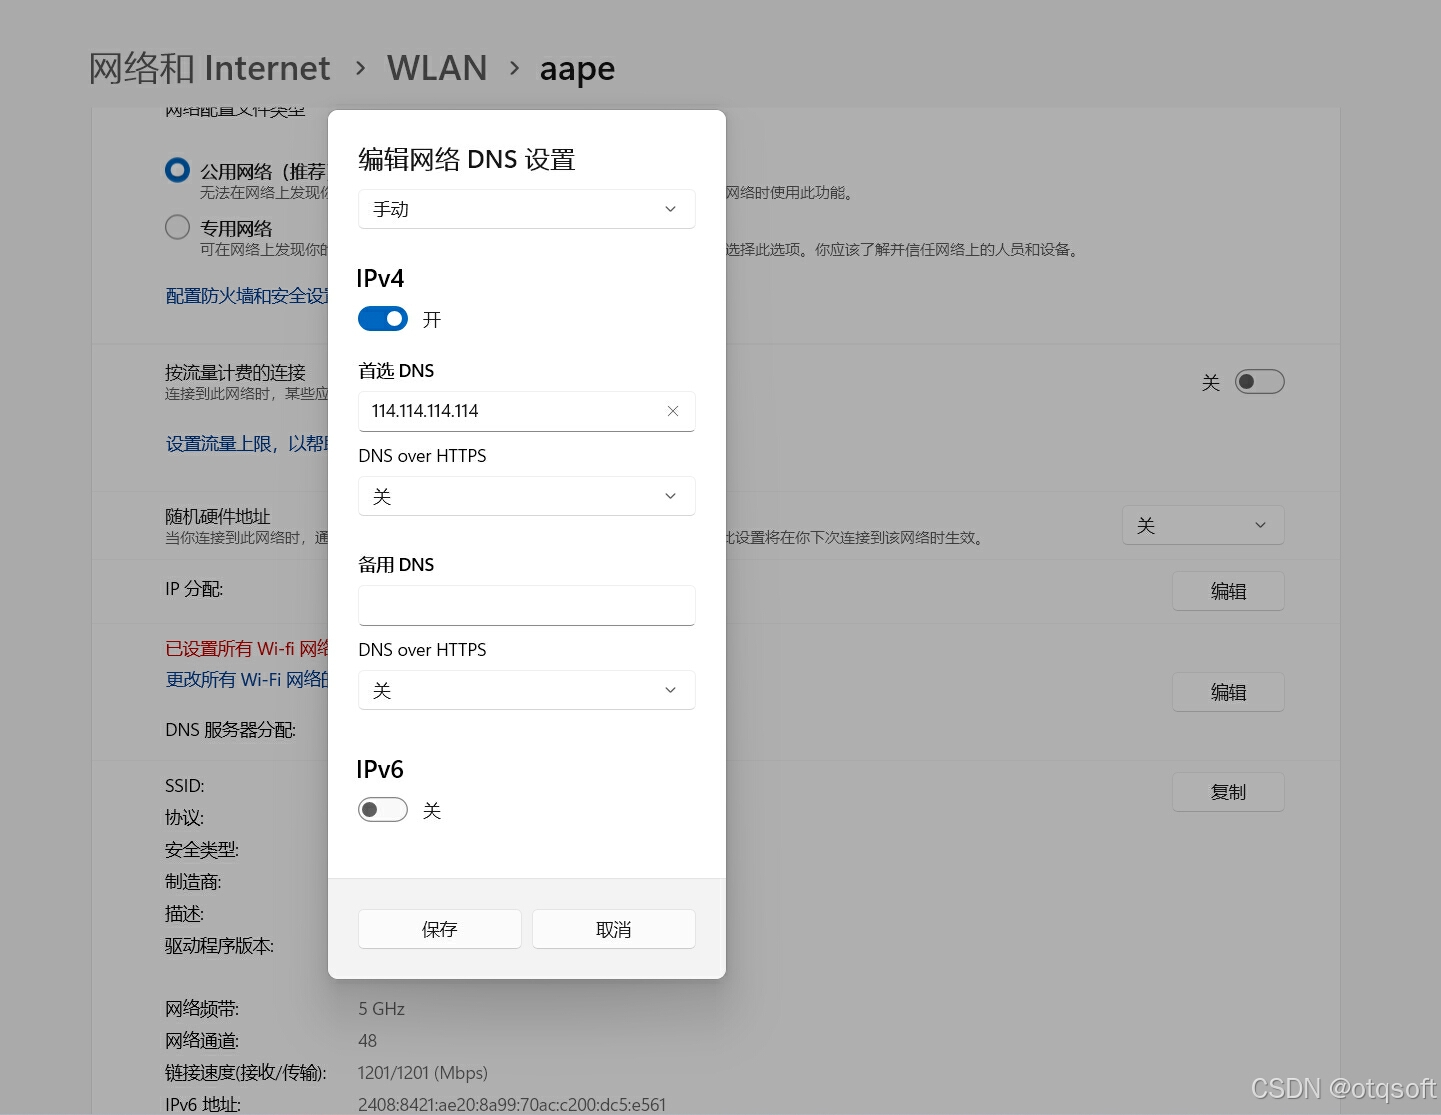
设置DNS

将DNS的首选项设置成114.114.114.114
在这里插入图片描述

安装Docker

下载

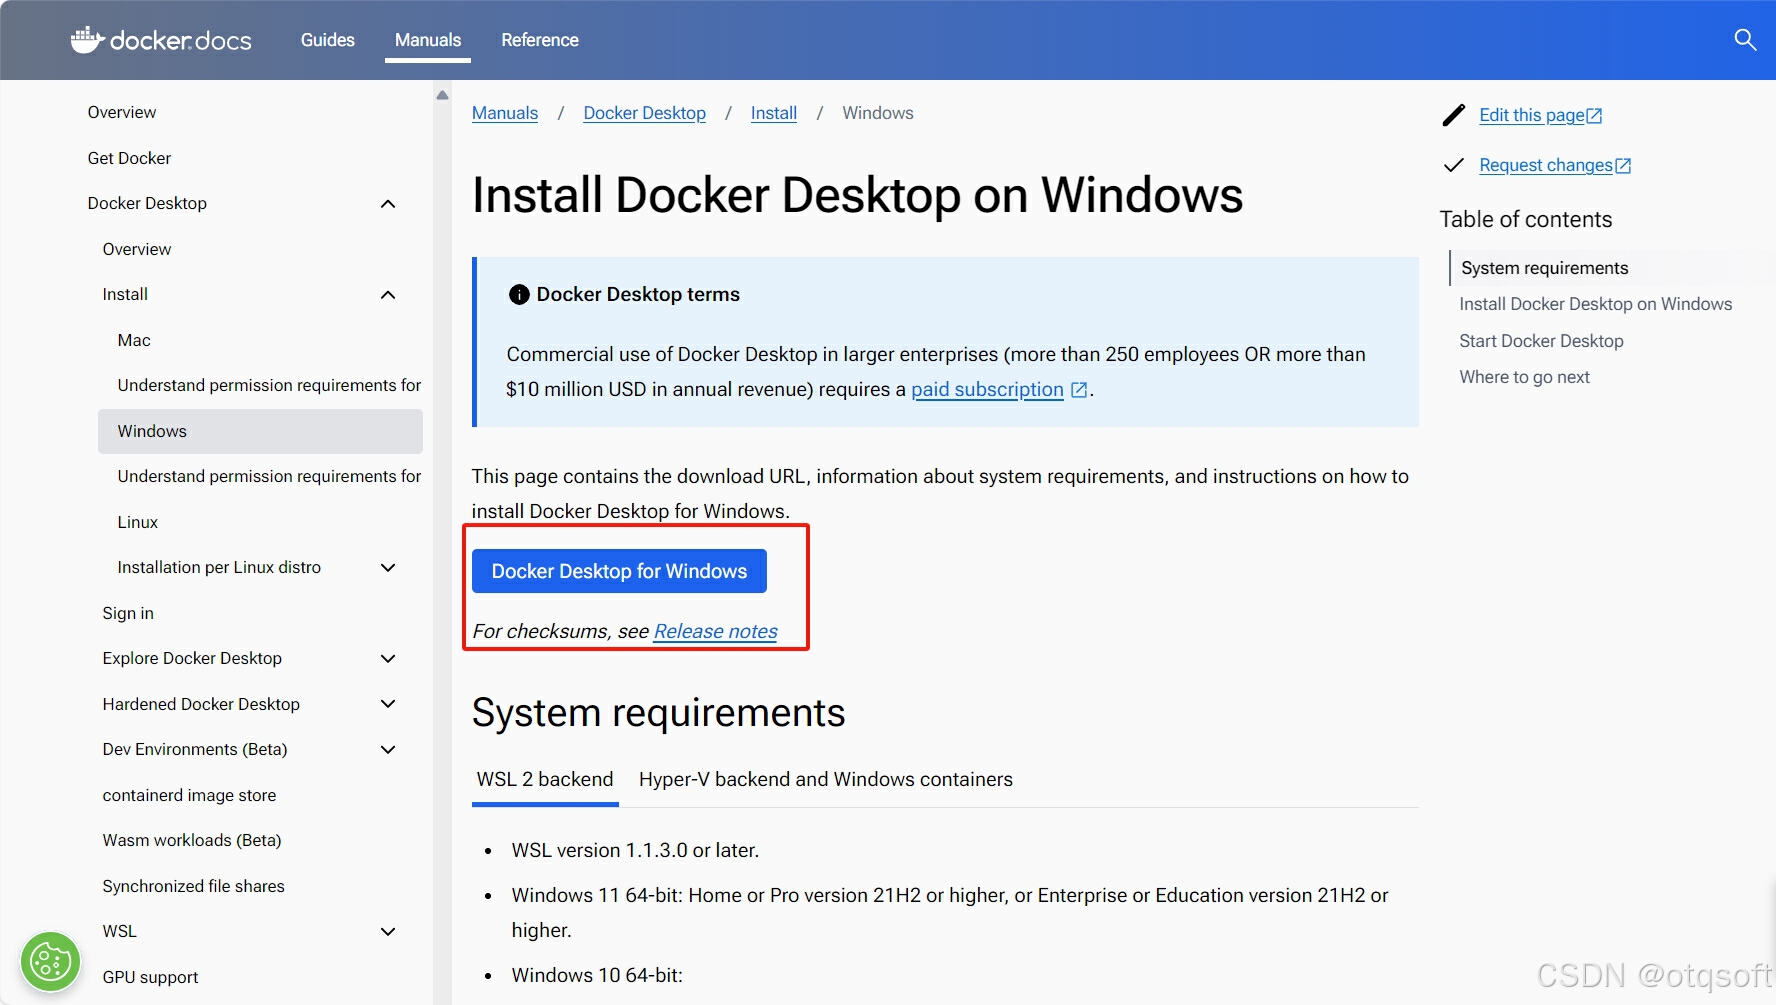
访问 Docker 官网,选择适合你的 Windows 系统版本进行下载并安装,安装过程中可能会遇到一些问题,如网络问题导致下载缓慢、权限问题等。如果遇到问题,可以参考 Docker 官方文档或在相关技术论坛上寻求帮助。
在这里插入图片描述

验证

在命令行窗口输入docker -v(docker --version),如果能显示docker的版本信息代表安装成功了。

在这里插入图片描述

安装WebUI

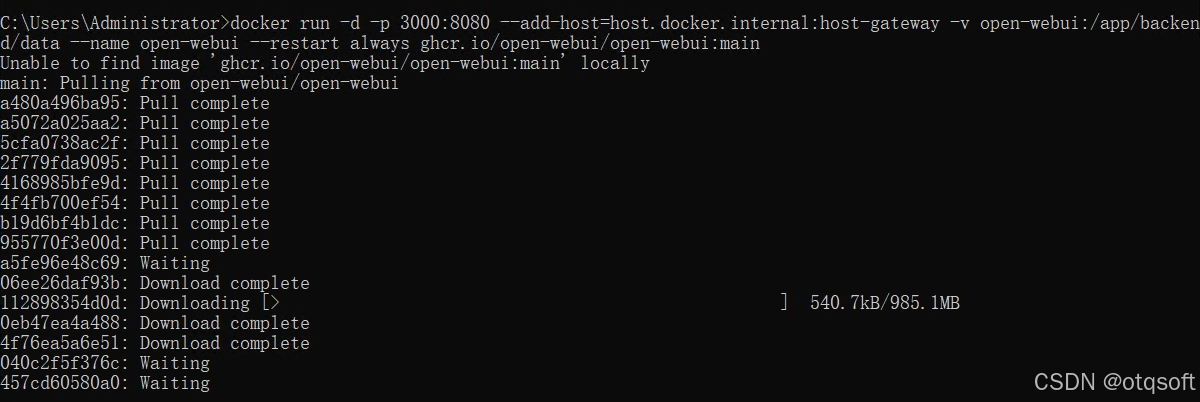
打开命令提示符或 PowerShell,输入

docker run -d -p 3000:8080 --add-host=host.docker.internal:host-gateway -v open-webui:/app/backend/data --name open-webui --restart always ghcr.io/open-webui/open-webui:main

该命令中:

  • -d:表示在后台运行容器。
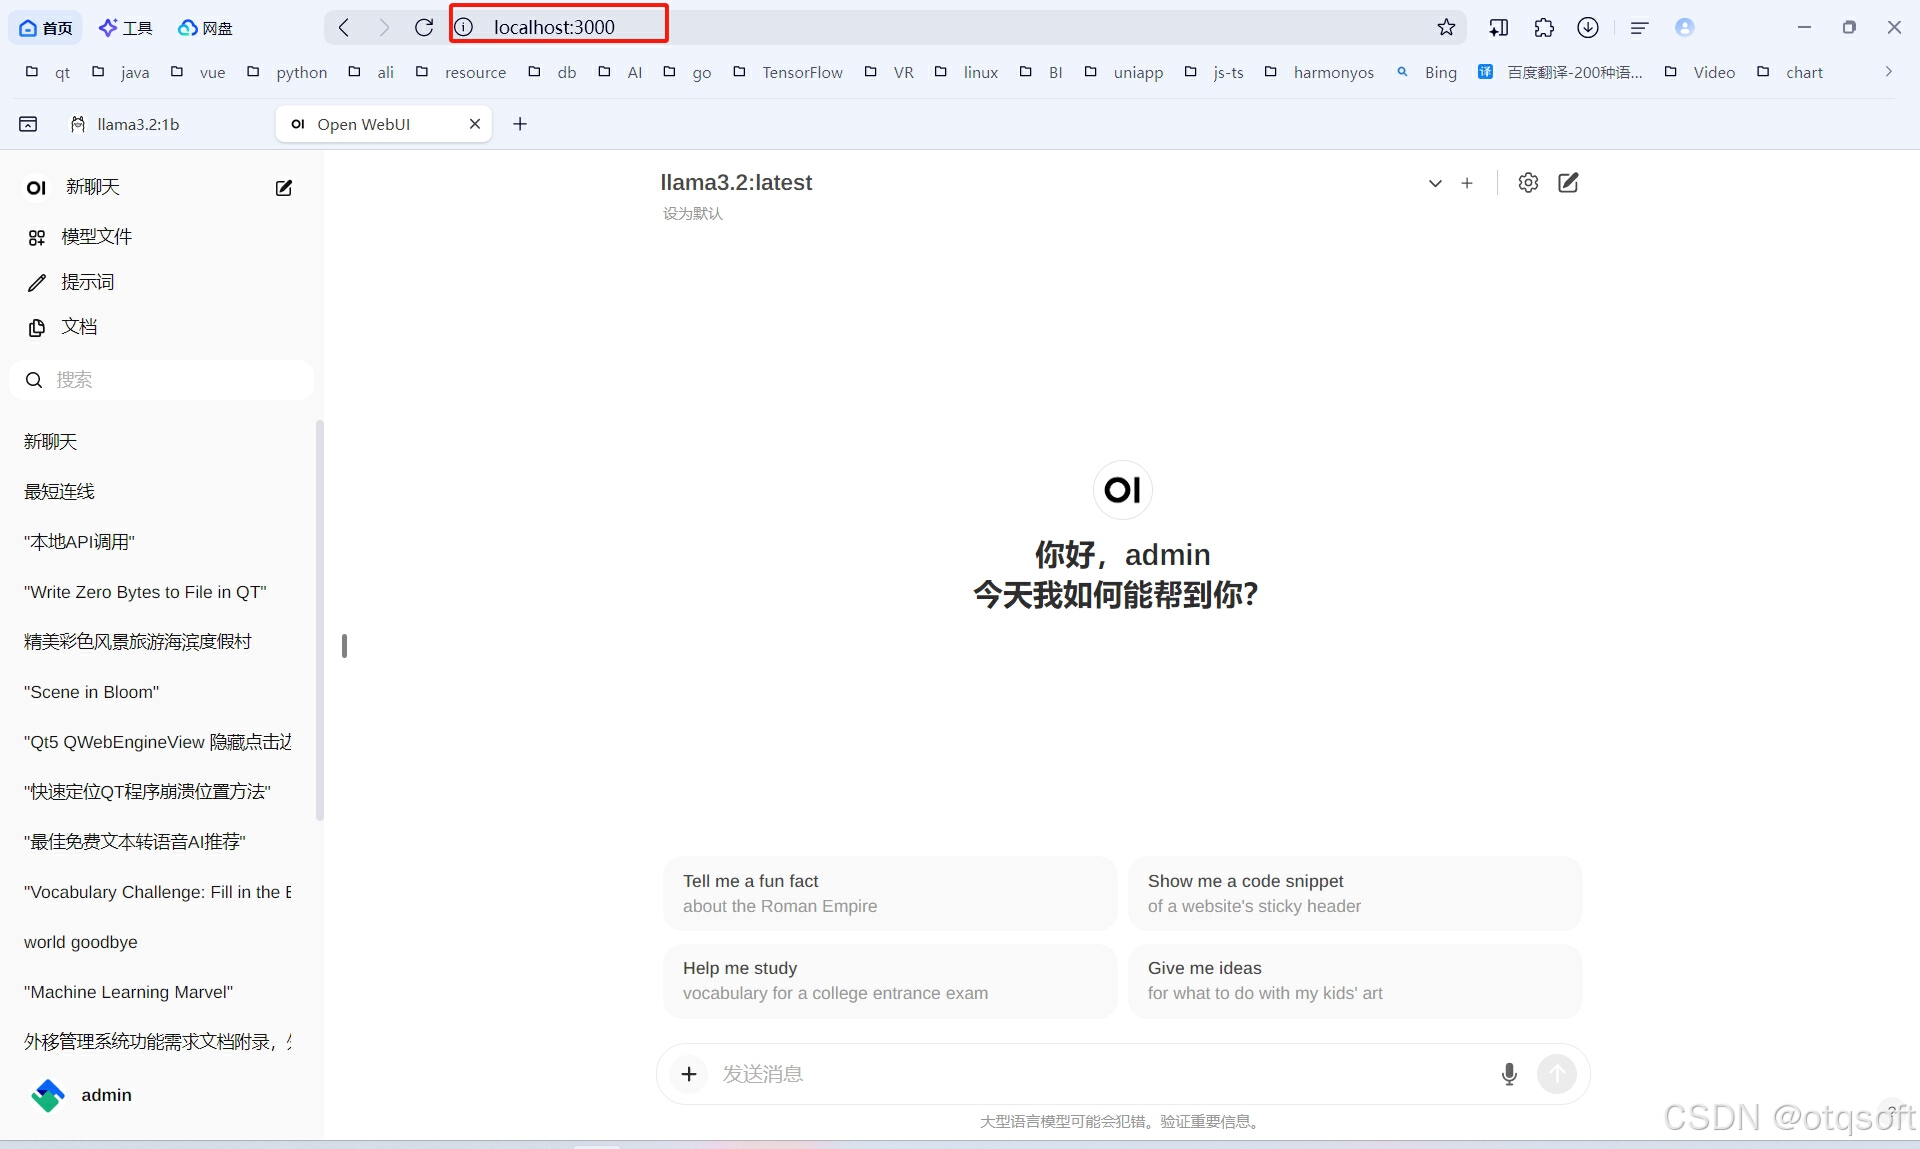
  • -p 3000:8080:将容器的 8080 端口映射到主机的 3000 端口,这样你可以通过 http://localhost:3000 访问 Open WebUI。
  • --add-host=host.docker.internal:host-gateway:添加一个主机名到容器的 /etc/hosts 文件中,以便容器可以访问主机。
  • -v open-webui:/app/backend/data:将主机上的 open-webui 目录挂载到容器的 /app/backend/data 目录,确保数据库正确安装并防止数据丢失。
  • --name open-webui:为容器命名为 open-webui。
  • --restart always:设置容器在退出或重启时自动重新启动。

在这里插入图片描述

安装完成之后,在浏览器中访问 http://localhost:3000。如果一切正常,你应该能看到 Open WebUI 的界面。
在这里插入图片描述

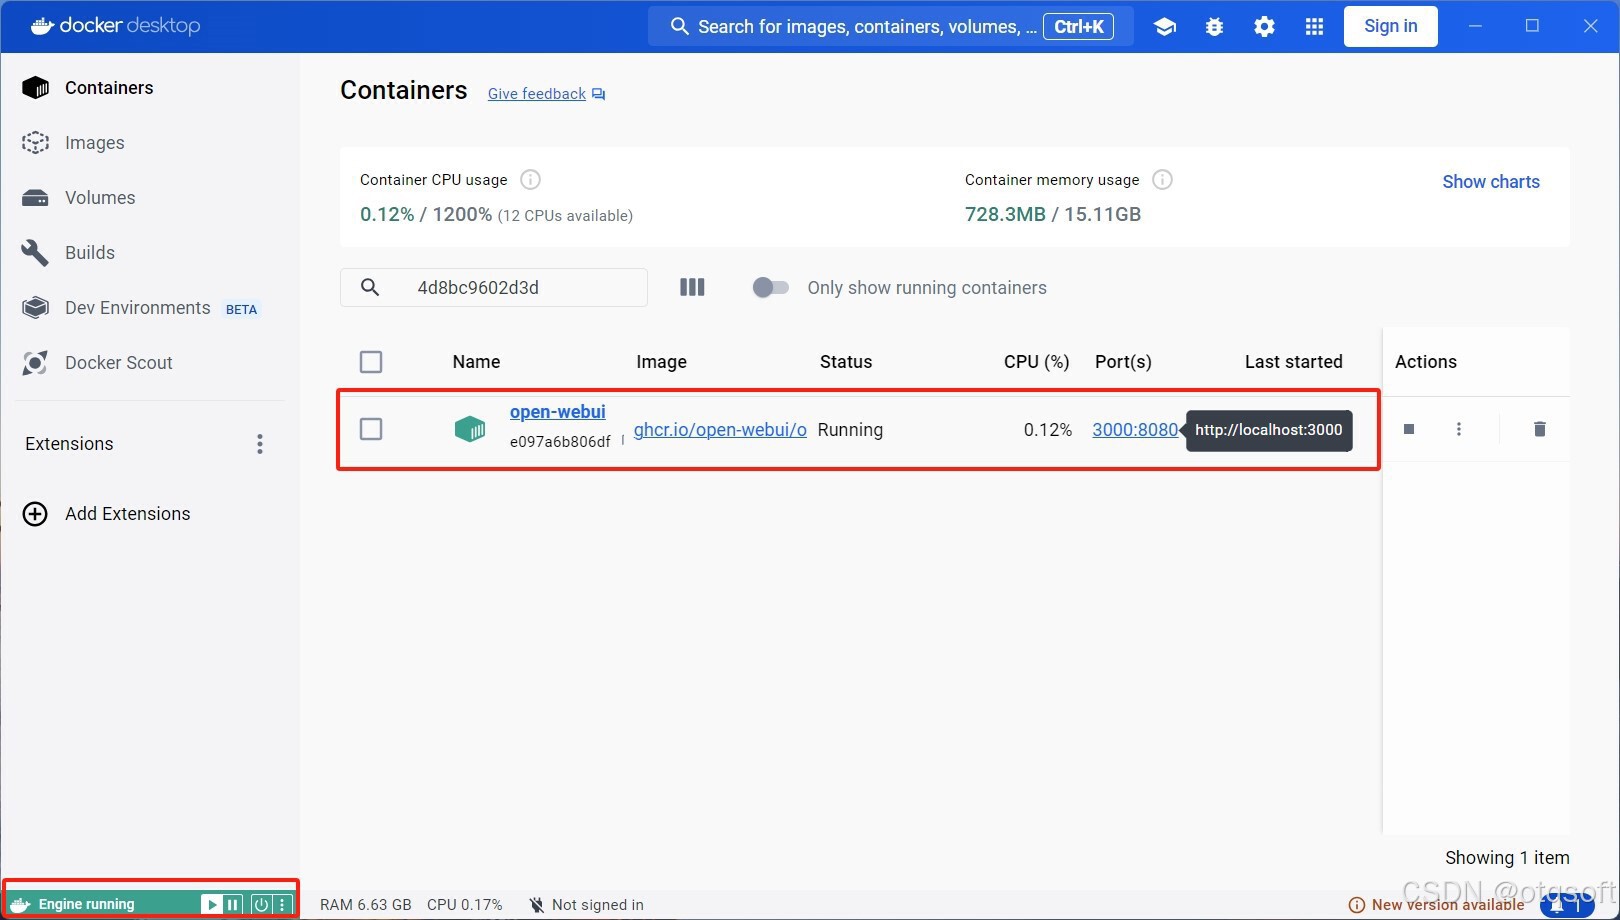
或在docker容器看到open-webui就代表安装成功并可以正常使用了。
在这里插入图片描述

配置

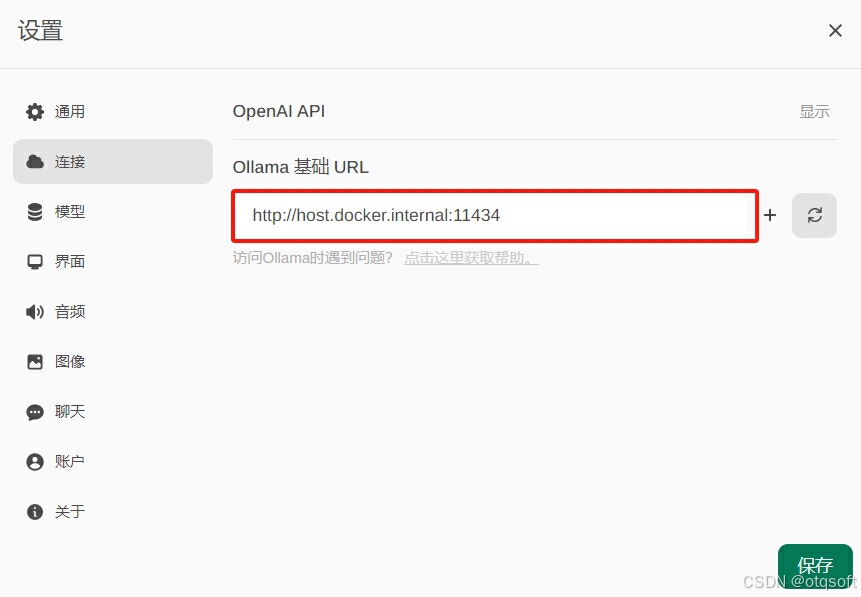
Open WebUI安装完成,基本不需要配置,会自动加载本机安装的Ollama环境,如果本机装的有stable-diffusion-webui环境,在图像设置里也会自动加载。
在这里插入图片描述

如果需要启用新用户注册功能,可在管理员面板中开启。

深度学习工具包Deprecation notice.-----This toolbox is outdated and no longer maintained.There are much better tools available for deep learning than this toolbox, e.g. [Theano](http://deeplearning.net/software/theano/), [torch](http://torch.ch/) or [tensorflow](http://www.tensorflow.org/)I would suggest you use one of the tools mentioned above rather than use this toolbox.Best, Rasmus.DeepLearnToolbox================A Matlab toolbox for Deep Learning.Deep Learning is a new subfield of machine learning that focuses on learning deep hierarchical models of data.It is inspired by the human brain's apparent deep (layered, hierarchical) architecture.A good overview of the theory of Deep Learning theory is[Learning Deep Architectures for AI](http://www.iro.umontreal.ca/~bengioy/papers/ftml_book.pdf)For a more informal introduction, see the following videos by Geoffrey Hinton and Andrew Ng.* [The Next Generation of Neural Networks](http://www.youtube.com/watch?v=AyzOUbkUf3M) (Hinton, 2007)* [Recent Developments in Deep Learning](http://www.youtube.com/watch?v=VdIURAu1-aU) (Hinton, 2010)* [Unsupervised Feature Learning and Deep Learning](http://www.youtube.com/watch?v=ZmNOAtZIgIk) (Ng, 2011)If you use this toolbox in your research please cite [Prediction as a candidate for learning deep hierarchical models of data](http://www2.imm.dtu.dk/pubdb/views/publication_details.php?id=6284)```@MASTERSTHESIS\{IMM2012-06284, author = "R. B. Palm", title = "Prediction as a candidate for learning deep hierarchical models of data", year = "2012",}```Contact: rasmusbergpalm at gmail dot comDirectories included in the toolbox-----------------------------------`NN/` - A library for Feedforward Backpropagation Neural Networks`CNN/` - A library for Convolutional Neural Networks`DBN/` - A library for Deep Belief Networks`SAE/` - A library for Stacked Auto-Encoders`CAE/` - A library for Convolutional Auto-Encoders`util/` - Utility functions used by the libraries`data/` - Data used by the examples`tests/` - unit tests to verify toolbox is workingFor references on each library check REFS.mdSetup-----1. Download.2. addpath(genpath('DeepLearnToolbox'));Example: Deep Belief Network---------------------```matlabfunction test_example_DBNload mnist_uint8;train_x = double(train_x) / 255;test_x = double(test_x) / 255;train_y = double(train_y);test_y = double(test_y);%% ex1 train a 100 hidden unit RBM and visualize its weightsrand('state',0)dbn.sizes = [100];opts.numepochs = 1;opts.batchsize = 100;opts.momentum = 0;opts.alpha = 1;dbn = dbnsetup(dbn, train_x, opts);dbn = dbntrain(dbn, train_x, opts);figure; visualize(dbn.rbm{1}.W'); % Visualize the RBM weights%% ex2 train a 100-100 hidden unit DBN and use its weights to initialize a NNrand('state',0)%train dbndbn.sizes = [100 100];opts.numepochs = 1;opts.batchsize = 100;opts.momentum = 0;opts.alpha = 1;dbn = dbnsetup(dbn, train_x, opts);dbn = dbntrain(dbn, train_x, opts);%unfold dbn to nnnn = dbnunfoldtonn(dbn, 10);nn.activation_function = 'sigm';%train nnopts.numepochs = 1;opts.batchsize = 100;nn = nntrain(nn, train_x, train_y, opts);[er, bad] = nntest(nn, test_x, test_y);assert(er < 0.10, 'Too big error');```Example: Stacked Auto-Encoders---------------------```matlabfunction test_example_SAEload mnist_uint8;train_x = double(train_x)/255;test_x = double(test_x)/255;train_y = double(train_y);test_y = double(test_y);%% ex1 train a 100 hidden unit SDAE and use it to initialize a FFNN% Setup and train a stacked denoising autoencoder (SDAE)rand('state',0)sae = saesetup([784 100]);sae.ae{1}.activation_function = 'sigm';sae.ae{1}.learningRate = 1;sae.ae{1}.inputZeroMaskedFraction = 0.5;opts.numepochs = 1;opts.batchsize = 100;sae = saetrain(sae, train_x, opts);visualize(sae.ae{1}.W{1}(:,2:end)')% Use the SDAE to initialize a FFNNnn = nnsetup([784 100 10]);nn.activation_function = 'sigm';nn.learningRate = 1;nn.W{1} = sae.ae{1}.W{1};% Train the FFNNopts.numepochs = 1;opts.batchsize = 100;nn = nntrain(nn, train_x, train_y, opts);[er, bad] = nntest(nn, test_x, test_y);assert(er < 0.16, 'Too big error');```Example: Convolutional Neural Nets---------------------```matlabfunction test_example_CNNload mnist_uint8;train_x = double(reshape(train_x',28,28,60000))/255;test_x = double(reshape(test_x',28,28,10000))/255;train_y = double(train_y');test_y = double(test_y');%% ex1 Train a 6c-2s-12c-2s Convolutional neural network %will run 1 epoch in about 200 second and get around 11% error. %With 100 epochs you'll get around 1.2% errorrand('state',0)cnn.layers = { struct('type', 'i') %input layer struct('type', 'c', 'outputmaps', 6, 'kernelsize', 5) %convolution layer struct('type', 's', 'scale', 2) %sub sampling layer struct('type', 'c', 'outputmaps', 12, 'kernelsize', 5) %convolution layer struct('type', 's', 'scale', 2) %subsampling layer};cnn = cnnsetup(cnn, train_x, train_y);opts.alpha = 1;opts.batchsize = 50;opts.numepochs = 1;cnn = cnntrain(cnn, train_x, train_y, opts);[er, bad] = cnntest(cnn, test_x, test_y);%plot mean squared errorfigure; plot(cnn.rL);assert(er<0.12, 'Too big error');```Example: Neural Networks---------------------```matlabfunction test_example_NNload mnist_uint8;train_x = double(train_x) / 255;test_x = double(test_x) / 255;train_y = double(train_y);test_y = double(test_y);% normalize[train_x, mu, sigma] = zscore(train_x);test_x = normalize(test_x, mu, sigma);%% ex1 vanilla neural netrand('state',0)nn = nnsetup([784 100 10]);opts.numepochs = 1; % Number of full sweeps through dataopts.batchsize = 100; % Take a mean gradient step over this many samples[nn, L] = nntrain(nn, train_x, train_y, opts);[er, bad] = nntest(nn, test_x, test_y);assert(er < 0.08, 'Too big error');%% ex2 neural net with L2 weight decayrand('state',0)nn = nnsetup([784 100 10]);nn.weightPenaltyL2 = 1e-4; % L2 weight decayopts.numepochs = 1; % Number of full sweeps through dataopts.batchsize = 100; % Take a mean gradient step over this many samplesnn = nntrain(nn, train_x, train_y, opts);[er, bad] = nntest(nn, test_x, test_y);assert(er < 0.1, 'Too big error');%% ex3 neural net with dropoutrand('state',0)nn = nnsetup([784 100 10]);nn.dropoutFraction = 0.5; % Dropout fraction opts.numepochs = 1; % Number of full sweeps through dataopts.batchsize = 100; % Take a mean gradient step over this many samplesnn = nntrain(nn, train_x, train_y, opts);[er, bad] = nntest(nn, test_x, test_y);assert(er < 0.1, 'Too big error');%% ex4 neural net with sigmoid activation functionrand('state',0)nn = nnsetup([784 100 10]);nn.activation_function = 'sigm'; % Sigmoid activation functionnn.learningRate = 1; % Sigm require a lower learning rateopts.numepochs = 1; % Number of full sweeps through dataopts.batchsize = 100; % Take a mean gradient step over this many samplesnn = nntrain(nn, train_x, train_y, opts);[er, bad] = nntest(nn, test_x, test_y);assert(er < 0.1, 'Too big error');%% ex5 plotting functionalityrand('state',0)nn = nnsetup([784 20 10]);opts.numepochs = 5; % Number of full sweeps through datann.output = 'softmax'; % use softmax outputopts.batchsize = 1000; % Take a mean gradient step over this many samplesopts.plot = 1; % enable plottingnn = nntrain(nn, train_x, train_y, opts);[er, bad] = nntest(nn, test_x, test_y);assert(er < 0.1, 'Too big error');%% ex6 neural net with sigmoid activation and plotting of validation and training error% split training data into training and validation datavx = train_x(1:10000,:);tx = train_x(10001:end,:);vy = train_y(1:10000,:);ty = train_y(10001:end,:);rand('state',0)nn = nnsetup([784 20 10]); nn.output = 'softmax'; % use softmax outputopts.numepochs = 5; % Number of full sweeps through dataopts.batchsize = 1000; % Take a mean gradient step over this many samplesopts.plot = 1; % enable plottingnn = nntrain(nn, tx, ty, opts, vx, vy); % nntrain takes validation set as last two arguments (optionally)[er, bad] = nntest(nn, test_x, test_y);assert(er < 0.1, 'Too big error');```[![Bitdeli Badge](https://d2weczhvl823v0.cloudfront.net/rasmusbergpalm/deeplearntoolbox/trend.png)](https://bitdeli.com/free "Bitdeli Badge")
评论
成就一亿技术人!
拼手气红包6.0元
还能输入1000个字符
 
 条评论被折叠 查看
添加红包

请填写红包祝福语或标题

个

红包个数最小为10个

元

红包金额最低5元

当前余额3.43元 前往充值 >
需支付:10.00元
成就一亿技术人!
领取后你会自动成为博主和红包主的粉丝 规则
hope_wisdom
发出的红包
实付元
使用余额支付
点击重新获取
扫码支付
钱包余额 0

抵扣说明:

1.余额是钱包充值的虚拟货币,按照1:1的比例进行支付金额的抵扣。
2.余额无法直接购买下载,可以购买VIP、付费专栏及课程。

余额充值