Manila User's Guide
Download PDF version of the guide (1 MB) or view the print-friendly HTML page.
Introduction
During the set-up you will see references to Frontier. Frontier is the technology core behind both Manila and Radio UserLand. Its a powerful Web content management system, built around an object database, scripting language, script editor and debugger, outliner, multi-threaded runtime, and integrated HTTP server.
Manila is an application built on Frontier technology that makes is easy for you to create, edit, and publish web pages. Our goal is to make the software do the tedious and repetitive work, so that you can be creative and more productive.
Table of Contents
System Requirements
Installing Frontier
Setting up Frontier
Default Manila sites
Support
Creating a new site
Logging into your site
Editing the home page
Flipping the home page
Adding a picture
Adding a story
Posting to your discussion group
Using shortcuts
Changing your password
Signing out
Organizing your home page
Customizing a site
Editorial roles
Discussion group
Changing the site's appearance
Choosing language for your site
Navigation links
Browser-based editor
News Items
Comments
TrackBack
Viewing site stats
Macros
Site Administration
Managing members
Bulletins
Site structure
Syndicating your home page
Syndicating your discussion group
Site News Aggregator
Robots.txt
Site access restrictions
Searching a site
Static rendering of your site
Posting a gem
Mail-to-Weblog
Print-Friendly versions of Manila pages
Using Radio with your Manila site
Editors Only site
Custody
Downloading a copy of your Manila site
Frontier Admin website
Site-level administrative pages
Getting updates to Frontier and Manila
Backups
Server maintenance
Membership
Hosting
Setting up additional hosting sites
Static rendering
Static pictures
Gems
Domains
Security
Themes
Creating a theme
HTTP logging
Managing Plugins
Legal Macros
Database Subscriptions
Home page updates and most-read sites
MIME Types
keepFrontierRunning
Using Frontier alongside other web servers
Flipping the Manila Sites Database
Moving a Manila website
Customizing Manila
Frontier and IIS, 2 IP Addresses (Windows)
Frontier and Apache, 2 IP Addresses (MacOS X)
Migrating Frontier from Mac Classic to MacOS X
Search Engine
ServerMonitor
Radio Community Server
WebEdit
Referer error
Can't login to a site
Restore default template
Reset webmaster password for Frontier Admin site
Buttons not appearing in the WYSIWYG editor
Server performance
Programming pointers
Known Issues
Text-editing cheat sheet
Installation and Setup 
System Requirements
Windows NT 4.0 with SP4 or later, Windows 2000, Windows XP, Windows 2003
Intel Pentium III or higher processor
128 MB RAM
10 MB of hard disk space for installation
MacOS 7.5.5 or greater
PowerPC processor
64 MB RAM
10 MB of hard disk space for installation
Mac OS X
Power Mac G3, PowerBook G3 or higher; iMac, iBook computer
128 MB RAM
10 MB of hard disk space for installation
Internet connection and Microsoft or Netscape Web browser required for installation
Frontier is built around an integrated object database and doesn't require any additional database software to run. Frontier also has an built-in Web server, but can also work with IIS, Apache and other Web servers using static rendering in Manila.
Installing Frontier
After downloading the Manila software package, you can follow the instructions below to complete the install.
Pre-installation
You should install Manila to a drive with enough free disk space to save your websites and other data. It's not advised to move Frontier to another path/drive once it's installed.
If you have another web server running on the machine you plan to install Manila on, please read the Using Manila alongside other web servers section of the guide.
Windows
Run the installer and follow the instructions in the setup dialogs.
At the end of the installation process, the installer will (optionally) launch the program for you.
To uninstall: From the Start menu, choose Programs->UserLand->UserLand Frontier Uninstaller, and click Yes in the confirmation dialog.
Macintosh OS X
Extract the downloaded archive, double-click the extracted disk image to mount it on your desktop, and copy the Frontier folder into the Applications folder.
Make sure that your web browser is running, and then double-click the UserLand Frontier application icon.
To Uninstall: Drag the UserLand Frontier folder to the Trash.
MacOS Classic
Unstuff the archive if it hasn't been unstuffed automatically, and launch UserLand Frontier 9.0 Installer. Follow the instructions in the installer. At the end of the installation process, it will (optionally) launch the program for you.
To Uninstall: Drag the UserLand Frontier folder to the Trash.
Setting up Frontier
After installing, launch the Frontier application and your Web browser will open with the Frontier Setup page.
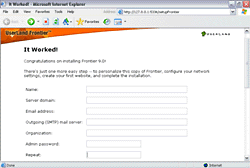 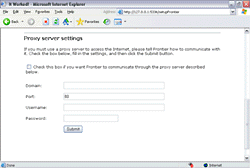
If your server is behind a proxy server, you should first complete the form at the bottom of the setup page with your proxy server details.
Enter the contact information for the webmaster, server domain or IP address, SMTP server that Frontier/Manila will use for sending mail and the administrator password. Click the Submit button.
If your server is running Mac OS X, you will go to another page to configure port-forwarding before you login to the Frontier Admin Site.
Login to the Frontier Admin Site
You will then be asked to login to the Frontier Admin website at http://127.0.0.1:5336/, enter the webmaster's email address and the admin password.
If you aren't at the machine running Frontier, you can replace 127.0.0.1 with the host name or IP address of the server to access the Frontier Admin site remotely.
Default Manila sites
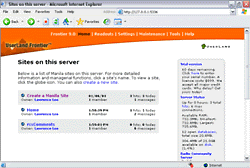
After setting up Frontier, your server will automatically be setup with three default Manila sites: the Home site, the Frontier Admin website and the Create a Manila Site.
Home site
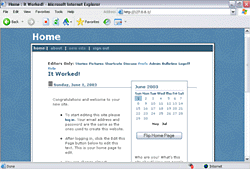
This is your default Manila site that serves as the top-level homepage to your server. You can edit the site and make it an informational site for users using your server.
Frontier Admin site
The Frontier Admin website is where you can manage and check the status of your server.
Create a Manila Site
The Create a Manila site is where your users can create new sites.
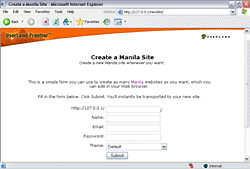
Note: You can restrict who can create new Manila sites by choosing Settings and then the Hosting settings link in the Admin Site.
Support
This page links to related UserLand.Com sites that help Manila users get the information they need and to stay up to date.
Documentation
All the documentation for Manila is available in the Frontier directory. Also be sure to check out the search page, it covers all the Manila documentation, discussion groups and mailing lists.
The Manila's User Guide contains documentation on creating/maintaining a Manila website and configuring/administering a Manila server.
Mail list and discussion group
The Frontier-Users List is an active mailing list of professionals who work with Manila and UserLand staffers.
Most of the same people use the Manila Discussion Group. You may ask for help in either of these places, which one you choose to use depends only on your personal preference.
For Manila developers, there's the Manila-Dev List which is used to share code and techniques using the Manila content management system. Changes to Manila and betas are posted to this list.
If you have a question as an editor of a Manila site, you can ask on the Manila-Newbies List or in the Manila Newbies Discussion Group.
News pages
The UserLand Product news page links to all major developments in the Manila community.
Major versions
A few times a year we release new versions of the complete Manila package.
You can always get a fresh copy of the latest version of Manila from the download page. When we release a new version, we also release a package that upgrades an existing installation of Manila to the new version.
Interim features/fixes
In between full releases of Manila, we release updates to Frontier.root, manila.root mainResponder.root.
How do I report a bug?
Send bug reports to frontier-bugs@userland.com or post them on the Manila Discussion Group.
If you suspect a security problem in Manila, send email to security@userland.com.
Important: Do not post notices of suspected security issues on public forums.
Manila Basics
Creating a new site
You can create new Manila sites by logging into the Admin Site or by going to the Create a Manila Site which was created when you setup Frontier.
Steps
1. Open the Admin Site and at the top of the page you should see a link: "create a new site." Click it.
2. From there, you can choose the name of your site, enter your name, email address and password and choose a Theme for your site.
You can also preview the different Themes from this page.
Finding the Create a Manila Site
You can invite your users to visit this page to create their site by filling out the form.
To find the Create a Manila Site, go to the Admin Site home page and then click the globe icon to the left of the Create a Manila Site link.
Logging into your site
Manila includes a built-in membership system that lets you maintain a database of members to send out email bulletins, restrict posting access to the discussion group and to allow selected members to become editors of the site.
To start editing and configuring your Manila site, you need to login.
Steps
1. After you create your new site, your browser will open your new site.
2. Click the Login link.
3. Enter your email address and password you entered when you created the site. Click the Login button.
Notes
If you forgot your password, you can just enter your email address and leave the password field blank. Manila will send a copy of your password in an email.
Editing the home page
After you have logged into your site, you will see several new links and buttons on your home page since you are a Managing Editor.
From the Editors Only menu at the top of the page, you can create new stories, post pictures or configure your site.
Below the home page text, you will see the Edit this Page button where you can edit the text on the page.
Steps
1. Click the Edit this Page button.
2. You can edit the title of the page or change the text. When you are finished editing, click the Post Changes button.
3. The home page will load in your browser with any modifications you made.
Posting a news item
If you see a News link in the Editors Only menu, then you have the News Items feature enabled on your site.
Instead of having a story or discusion group used for your home page, you can click the News link at the top of the page to create a News Item and then post it to your home page.
Steps
1. Click the News link in the Editors Only menu.
2. Click the Create a News Item link.
3. You can edit the title of the page, enter a URL (used to create a link for the title) and the Description.
4. Click the Create News Item button.
5. You are then brought to a page where you can review your News Item before you post it to home page. When you are finished editing, click the Post to Home Page button.
If you visit your homepage, you should see the News Item.
Flipping the home page
If the home page has a calendar, the current home page story can be archived and a new, empty one created in a single operation. This is called "flipping" the home page.
Steps
1. Click the Flip Home Page button.
2. Click OK to confirm that you want to flip the home page..
3. When Home Page appears, it will have the same Title as before but it will be empty.
4. To add new content, use the Edit This Page button or the Update Home Page button if you have an editing form on your home page.
Adding a picture
Follow the steps below to add a picture to your Manila site.
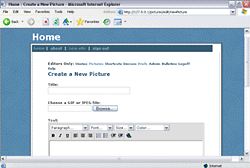
Steps
1. Click the Pictures link in the Editors Only menu at the top of the page.
2. Click the Create a New Picture link at the bottom of the pictures list.
3. Choose a title for your picture.
4. Click the Browse button and locate the image on your computer
5. You can add some text to describe the image, which will be used for the ALT tag to be more accessible for people with disabilities.
6. Click the Submit button.
Adding a story
Follow the steps below to add a story to your Manila site. Each story can be a different page on your site like the default story that has the text for your About page.
Steps
1. Click the Stories link in the Editors Only menu at the top of the page.
2. Click the Create a New Story link at the bottom of the stories list.
3. Choose a title for your story.
4. You can then add the text for your story.
5. When you are finished, click the Post New Story button.
Posting to your discussion group
Follow the steps below to add a new topic to your Manila site. You can use the discussion group to exchange notes with other editors or with members of your site.
Steps
1. Click the Discuss link in the Editors Only menu at the top of the page.
2. Click the Create a new topic link at the bottom of the discussion group page.
3. Choose a title for your topic.
4. You can then add the text for your discussion group topic.
5. When you are finished, click the Post New Message button.
Using shortcuts
Shortcuts are an easy way to include links and pictures in your pages. Instead of having to find the URL, you can add a link or include a picture in a page by enclosing its shortcut name inside "double quotes".
When you create a story, post a gem or add a picture, Manila is enabled by default to automatically create shortcuts for them using the title.
Managing shortcuts
The managing editor for the site can also add and delete shortcuts from the Shortcuts page. When you manually add a shortcut, you can also enter any URL that you would like to use with the shortcut.
Changing your password
Follow the steps below to change your password for your membership to your Manila site.
Steps
1. You can view the change password page for your site by adding "/member/changePassword" to the URL of your Manila site:
eg. http://yourdomain.com/mysite/member/changePassword
2. Enter your current password into the Password field, and your new password into the New Password and Repeat fields.
3. Click the Change Password button.
Signing out
There may be times when you want to sign out of a Manila site, either because you're using a public location to work on the site or perhaps you want to see what it looks like to a visitor.
From any page you can click on the Sign Out link or if you are an editor you can click the Logoff link in the Editors Only menu. Click Sign Out to confirm that you want to, and Manila will return you to the page you were just looking at.
But now you'll see the page without the Editors Only links, Edit This Page buttons and so on. When you're ready to edit the site again, just login and you're away.
Site Administration
Organizing your home page
Although the home page may look like an ordinary Manila story, it's really a container for stories or News Items. The way you set up your home page depends on the kind of site you want to run. There are three main modes:
1. Single Story- One story at a time appears on the home page; useful for posting essays or for sites with fixed home pages.
2. Multiple News- Days A configurable number of Stories (one per day) appear on the home page
3. News Items- A configurable number of News Items appear on the home page; useful for weblogs.
Single story
This is the simplest mode, and it's usually the default for a new Manila site. One story is designated as the home page story, where it looks and acts like any other story.
If it's a fixed home page that doesn't update frequently, you can just use the Edit This Page button to edit the content on the home page.
Or you can setup your site based around the publication of a new story that causes the old home page story to be archived.
First, create a new story from the Stories link in the Editors Only menu so you can work on the story before you promote the story to your home page.
When the piece is ready for publication, scroll to the end of the bottom of the stories page and choose the radio button to "Make this the home page?" and click on Submit which then causes the existing home page to be archived in the calendar.
Multiple News Days
The Multiple News Days mode allows several Stories to appear on the home page. When a story on the home page is replaced by another, it moves into an archive. The Multiple News Days feature simply displays the current home page story along with a selected number of the most recent ones from the archive.
You can configure this by increasing the number of news days displayed on the home page on the Appearance preferences page for your site.
News Items
The third mode doesn't use Stories at all, but rather a different kind of Manila content called a News Item. There are many ways to use News Items, but the general idea is to open up the home page to a steady flow of information from a variety of authors. If this feature is enabled, you'll see a new link in the Editors Only menu bar called News.
For example, a site could be configured so any Member can create a News Item which, following the Managing Editor's approval, shows up on the home page. A News Items consists of a title, a URL and a description. News Items appear on the home page in reverse chronological order (newest to oldest) and are limited in number as part of the setup.
There is also a preference available to organize your News Items home page by days and can be configured on the News Items preferences page. The number of days displayed is overrided by the number of items you have set to appear on the home page.
Calendar
When a Home Page Story is replaced, it moves into an archive. This happens you use the Flip Home Page command (which creates a new, blank Home Page Story for you to edit) or when another Story is promoted to Home Page. The Calendar is a tool for browsing an archive of previous home page.
Promoting a discussion group message
Along with making a story the home page, there is a similar option in the Admin box for taking a discussion group message and making it into the home page.
Editing form on home page
You can enable the "Do you want an editing form on the home page?" preference on the Appearance preferences page so you can directly make edits from the home page. The editing form to update your home page will appear at the bottom of your home page.
Flipping your home page
If you have a calendar on your home page, you can click the Flip Home Page button under the calendar which automatically creates a new, blank home page story for you to edit. Instead of having to create a story/discussion group message and promoting it to the home page.
Customizing a site
From the Prefs menu on your Manila site, you can customize all aspects of your Manila site. If you don't see some preferences on your own Manila site, it's because some preferences require it be enabled on the server by the server admin.
Appearance
This is where you make changes to the basic look of a Manila site, such as the Site Name, the Tag Line, many of the colors (background, text and so on), whether or not a Calendar appears on the Home Page, whether or not Bylines appear beneath Stories and whether there's a Create New Topic link on the DG page.
Editorial
This is where you set up who the Managing and Contributing Editors will be, when email notifications are sent and to who, and whether Shortcuts are created automatically for new Stories.
Legal Tags
Manila lets you decide how much HTML your Members and Editors can use. In the Legal Tags Preferences you can disable HTML tags and they'll be converted to ordinary text instead of changing the look of your pages.
When a tag is enabled, Manila passes it into the Story or Message text. If a tag is disabled, Manila replaces the first angle bracket (<) of the tag with the matching HTML entity (<) when posting. This causes the browser to display the tag as text rather than treating it as HTML. Any tags not in the Legal Macros list are automatically disabled this way.
Check the box to the left of the tag on the Legal Tags preferences page to enable it or uncheck to disable it. Click the Submit buttom at the bottom of the page to save your changes.
Searching
A Manila site can be made searchable by setting up information about the search engine server. (Note: no search engine servers are available yet).
Syndication
One powerful way to reach a larger audience is through syndication. In simple terms, Manila can automatically create a simple outline of the news on your Home Page whenever it changes. If you register your site with another site that supports syndication, your news will appear on their site. The Syndication Preference is where you set up the news outline for your site.
Subscriptions
This is where you can choose what feeds are included on their site's aggregator page
Membership
This Preference is where you enable Membership for the site, set up what kind of access Members and visitors have, layout what your plain text and HTML email Bulletins will look like and change where the Membership pages, such as Login and Profiles, are found.
Confirmation
The Confirmation Preference is where you set up the email and welcome page that new Members see when they join.
Outlines
You can allow Radio UserLand to edit messages, stories, and templates on your Manila site. You can also customize the templates for directories and slides that can be generated on your site using Radio.
Rendering
You can choose to turn on static rendering for your site to the file system or to a remote server using FTP. If you don't turn on static rendering, your site will be dynamic only.
News Items
News Items are a new way of working on a Manila home page. Instead of working on individual days, you create, edit, and post individual News Items. If you enable this feature, instead of saying how many days are displayed on a home page, you say how many News Items are.
Plug-ins
The Plug-ins Preference is where you control custom features on your your Manila site. A plug-in is a separate program that works with Manila to give it new capabilities. Because they're not part of Manila, the plug-ins you have depends on the Manila host you're using. You can enable and disable plug-ins, learn more about them and configure them from this page.
Themes
You can use themes to easily change the appearance of your entire site. UserLand and other designers have released pre-built themes which contain customized templates and other settings.
Discussion Group
This Preference is where you can customize the appearance and some setting on how the discussion group on your Manila site works.
Discussion Group Themes
Like the themes feature for your Manila site, you can change the appearance of your discussion group using a discussion group theme.
Radio Hosting
Your Manila site's discussion group can serve as a host for a community of Radio users. If you enable this feature, Radio weblog authors can to use your discussion group for comments.
Advanced
Last but certainly not least, the Advanced Preference is where the power user tools are found. From here you control the following:
Navigation - automated navigation links
Template - the master Web page that all pages are built from
Home Page Template - you can use a second template that is only used for your home page
Print-Friendly Template - you can customize the appearance of print-friendly pages
Cascading Style Sheet - CSS code added to all your pages
External Style Sheet - the external style sheet is served as a separate file. To include this style sheet in your template, add the linkToStyleSheet macro to your template
JavaScript - JavaScript code added to all your pages
Site Structure - readable URLs, automated TOCs and Next/Prev links
Custom Prefs - select the Member registration information
News Day Template - the look of the Home Page when more than one Home Page Story is shown
Navigation Appearance - the appearance of the Navigation links
Calendar Appearance - the design of the Calendar
Join Now Members Box - the design of the Members Box before login
Sign Out Members Box - the design of the Members Box after login
Theme - you can choose to share the design of your site as a Theme that other Manila users can download
Robots.txt - you an configure which paths you want to prevent web crawlers and search engines from visiting on your site
Editorial roles
Members of a Manila site can be assigned an editorial role if you want to grant them access to write stories or modify the appearance of your site. The site owner is automatically added as a Managing editor of the site and you can have as many editors as you like for each site.
Managing Editor
Managing Editors are Members with the same privileges as the original site owner with the complete Editor's Only links, including the Prefs, Admin and Bulletins links.
Contributing Editor
When Contributing editors log in, they see a limited version of the Editor's Only links, without the Prefs, Admin and Bulletins links. Other than those areas, and not being able to edit other people's Messages and Stories, they have the same access as a Managing Editor.
Content Editor
The Content Editor, is mid-way between the managing and contributing editor roles. The Content Editor can edit all the stories, pictures, and messages on a site like a Managing Editor but can't edit templates and set the various site preferences
Unlike contributing editors, they can edit content written by other people.
Discussion group
The discussion group is a place where you can exchange messages between editors and members of your Manila site.
When a Manila site is created, it's usually set up so anyone can look at your discussion group but only members and editors can post messages.
A discussion group is made up of messages, and each message is either a new topic or a response to another message. The discussion group index page lists the latest messages and can be viewed in either chronological or topics view. You can use the calendar to browse older discussion group messages.
Customizing the appearance
You can choose from one of the pre-built DG themes from the Discussion Group Themes preferences page. Or you can make changes to the templates and other preferences from the Discussion Group preferences page.
Restricting access to the discussion group
On the Membership preferences page for your site, you can configure two preferences to restrict access to the discussion group.
If you would only like editors of the site to have posting access to the discussion group, set the "Is the discussion group open to all members?" preference to No.
If you would like to prevent any public visitor from viewing your discussion group, you can set the: "Can everybody read discussion group messages?" preference to No.
Changing the site's appearance
You can customize the colors and template for a site from the Preferences page or you can choose a pre-built Theme.
From the Preferences page you can change everything that defines the look of a Manila site, including the templates, Cascading Style Sheet, JavaScript, colors, and so on.
A theme takes all the appearance settings for a site and saves them to a theme file so that other people can apply to their sites.
If you decide to apply a theme, you can still edit your templates and preferences -- you can choose a theme that's a good starting point, and then make changes.
Steps
1. If you want to see what a theme looks like, click the name of the theme -- it's a link to the site that the theme comes from. Click the Back button in your browser to come back to the Themes page.
The radio button next to the last theme you applied is always checked. If you've never applied a theme, the Default theme will be checked.
3. To choose a theme for your site, click the radio button next to the theme, then click the Apply Theme button. Your site will then look like that theme.
Important Note
When you apply a theme, your templates and colors are over-written with those of the theme.
You can then go ahead and edit your templates and site prefs normally, but now they're based on the theme's templates and prefs.
Choosing language for your site
You can choose a language to use when displaying pages in your site. This setting determines how to display dates and times, what language to use in the preferences and admin pages, and what language to use when displaying calendars
Steps
1. Click the Prefs link in the Editors Only menu at the top of the page.
2. Click the Appearance link.
3. Scroll down to the Language section half-way down the page.
4. Choose the language you prefer, then click Submit at the bottom of the page.
When the page refreshes, you'll see that the text is displayed using the selected language.
What is translated
Everything generated by Manila is translated. Your Editors only links, date and time strings, headers in your discussion group, calendars, and so on. If you browse through your site for a couple minutes, you'll quickly see what is translated and what isn't.
Navigation links
The Navigation links lets you create a set of site wide links to keep visitors oriented and make it easier for them to move around.
Steps
When you're logged on to your site, and if you are a content editor or managing editor of the site, you will see an Edit button beneath your Navigation Links.
Click on the Edit button, and a page is displayed showing the names and URLs of the links, where you can edit them; or delete them, or move a link up or down.
To change the text or URLs of one or more links, make the changes, and then click on the Update button.
To delete one or more links, click in the checkbox to the right of the item, and then click on Update.
To move a link up, click on the upper arrow to the left of the item; to move it down click on the down arrow.
Navigation appearance
If you scroll further down the Advanced prefs page, you will find the Navigation Appearance section that gives you control over how the links created by the Navigation feature are formatted.
There are two fields where you can set:
- Item Format HTML and the
{item} macro to format each link
- Separator Format HTML to appear between each link
Shortcuts and Pictures won't work in either of these fields.
Example
- Item Format
<font face="Geneva, Arial"><strong>{item}</strong></font>
- Separator Format
<hr width="3">
Which would change the font and insert a horizontal rule between the navigation links. It's possible to have the links presented horizontally if you use a separator that doesn't create a new line or paragraph.
Notes
In your templates the Navigation Links appear where the {navigatorLinks} macro is called.
The Navigation Links editor supports links specified by shortcut name or message number. To specify a link by shortcut name, type the shortcut name into the URL field. To specify a link by message number, type the message number into the URL field.
Advanced: Navigation XML
The following is only of interest if you want to learn how to learn the XML inteface for editing Navigation Links.
Let's look a little closer at the XML you can use to create Navigation links. There is one XML element - navigator - that contains all of the link information. It begins with a <navigator> tag and ends with a </navigator> tag. If more than one navigator element appears in this XML, it's ignored.
Inside the navigator element, you can have as many item elements as you need. Unlike the navigator element, the item element requires only one tag: <item/> (note the closing "/" before last angle bracket).
Each item can describe a link with one of the following formats:
<item name="abc" pagename="xyz"/>
<item name="abc" shortcut="xyz"/>
<item name="abc" msgnum="xyz"/>
Where "abc" is the text (with or without spaces) you want to appear as the link, and "xyz" is one of the following:
- Page Name A relative or absolute address (URL). For example, "/discuss/", "/my/custom/page" or "http://weblogs.userland.com/manilaNewbies". Unless there's a location in the Manila database that matches the relative address (like "/discuss/"), you'll have to create one using the Site Structure feature.
- Shortcut The name of a Shortcut, which can point to a location on your site or to another site.
- Message Number (msgnum) The Message number for the destination Story. If you use the number of a DG Message that's not a Story, the link is created but won't work.
Example
The following shows what you would see on the Navigation prefs page and the actual links on your pages.
	<navigator>

<item name="Home" pagename="/siteName/"/>

<item name="FAQ" pagename="/siteName/faq"/>

<item name="Feedback" pagename="/siteName/feedback"/>

</navigator>
The links below show what this XML would produce when viewed from the Home page itself.
Home
FAQ
Feedback
The Home text is not linked to show visitors where they are and to keep them from selecting a link that would call up the page they're on.
Steps
1. Click the Prefs link in the Editors Only menu at the top of the page.
2. Click the Advanced link.
3. Scroll down to the Navigation section at the top of the page.
4. In between the <navigator> and </navigator> tags, you can add a new navigtation link.
5. Click the Submit button.
Pictures Instead Of Text
If you want to have Pictures instead of text for your Navigation links, use one of the following formats:
<item name="abc" picture="def" pagename="xyz"/>
<item name="abc" picture="def" shortcut="xyz"/>
<item name="abc" picture="def" msgnum="xyz"/>
Where "def" is the name of a Picture on your site.
Picture Rollovers
To have the Picture change when a visitor moves their cursor over it, use one of the following formats:
<item name="abc" picture="def" rollover="ghi" pagename="xyz"/>
<item name="abc" picture="def" rollover="ghi" shortcut="xyz"/>
<item name="abc" picture="def" rollover="ghi" msgnum="xyz"/>
Where "ghi" is the name of the Picture that should appear when the cursor is over the link. To have a third Picture displayed on the linked page, use one of the following formats:
<item name="abc" picture="def" rollover="ghi" disabled="jkf" pagename="xyz"/>
<item name="abc" picture="def" rollover="ghi" disabled="jkf" shortcut="xyz"/>
<item name="abc" picture="def" rollover="ghi" disabled="jkf" msgnum="xyz"/>
Where "jkf" is a Picture name.
XML Syntax Errors
If there's a syntax error in your XML, Manila returns the form with an error above the field. No changes are made to the Navigation links when this happens. The most common errors are forgetting to use "/>" at the end of an item element and leaving out the navigator element.
Browser-based editor
Manila by default enables support for a WYSIWYG browser-based editing tool that is available to users using Microsoft Internet Explorer 5 or greater on Windows or using Mozilla 1.3b or later on all platforms.
You can also choose to use the HTML Tags editor which includes a formatting toolbar but displays the HTML tags in the text area or the plain text area if you are more comfortable writing your own HTML by hand.
Steps
1. Click the Prefs link in the Editors Only menu at the top of the page.
2. Click the Editorial link.
3. Scroll down to "Editing Tool" and choose which editing tool you want to use in the drop down box.
4. Click the Submit button at the bottom of the page.
Notes
The editing tool chosen on the Editorial preferences pages applies to all members of the site.
The WYSIWYG editor hides the HTML tags. The HTML Tags editor does not hide the HTML, but it provides a toolbar to make HTML easier to edit. If you choose None, then there is no formatting toolbar at all.
Anyone not using MSIE 5/6 for Windows or Mozilla 1.3 or greater gets a plain text area to write in.
News Items
News Items are a new way of working on a Manila home page. Instead of working on individual days, you create, edit, and post individual News Items. If you enable this feature, instead of saying how many days are displayed on a home page, you say how many News Items are.
The News Items feature promotes collaboration -- you can choose who can create News Items and who can approve them for posting on the home page. For instance, you could run a very open site where members of the site can create News Items and post them to the home page. Further, News Items promote syndication as they are a perfect fit with RSS format.
Workflow
A News Item goes through a few stages before it gets posted to the home page. There are four main tasks involved when using News Items on your site: creating, releasing, posting and editing.
First a News Item is created: you type in a title and URL to link to, choose a department, and write a description.
Once created, you see a preview of what the News Item would look like on the home page. It can then be edited some more, and previewed again.
If you have the power to post the News Item to the home page, you get a Post to Home Page button. If you click it, the News Item will appear at the top of the home page.
If you don't have the power to post to the home page, instead you get a Release button. Clicking this button means you're releasing custody -- you're finished editing it, now you want someone else to post it to the home page. Then an editor can edit your News Item and approve it or not.
Manila gives the Managing Editor control over who can create News Items (Members, All Editors, Content Editors or Managing Editors) and post them (same choices). The other two activities, releasing and editing, are determined by role and how far along the News Item has gone in the workflow.
Enabling the News Items feature
Click the Prefs link in the Editors Only menu and then choose News Items. This is where you configure your News Items preferences.
If you click Yes, then your home page will display News Items rather than news days. Right at first, your home page will be blank, since you don't have any News Items posted yet. So it's a good idea to configure first and enable last.
If you turn on News Items, you don't lose your old home pages, they're still available through the calendar. And at any time you can switch back from News Items to editing your home pages directly, and your News Items will be available through the home page calendar.
Appearance
The Appearance section of the News Items prefs page asks how many items should appear on the home page. Recent items appear at the top.
The News Item Template allows you to specify the formatting of News Items. There are several special macros you can use here. You don't have to use all of them, of course, but the default template does contain all of them.
{title} is the title of the News Item.
{url} is the URL the News Item links to.
{description} is the News Item's description.
{link} is a link to the News Item, but just displays the title if the URL is empty.
{department} is the name of the department the News Item belongs to.
{itemPostTime} is the time the News Item was posted to the home page.
{author} is a link to the profile of the original author.
{discussLink} is a link to the discussion group for this News Item. (Each News Item starts another discussion group thread.)
{editLink} links to the editing form -- if you're a Managing Editor, you can edit News Items even after they've been posted to the home page. The edit link appears only if the person viewing the News Item can edit it.
{picture} displays the picture that's associated with the department the News Item belongs to. Clicking on a picture takes you to a page listing the most recent News Items in that department.
{commentLink} generates a comment link to to that particular News Item
{encodedPermalinkUrl} generates an encoded permalink URL to to that particular News Item. Makes it possible to create Technorati cosmos links, ala BoingBoing's cosmos links.
{enclosureLink} is a link to the enclosure by filename
{enclosureName} is the the filename of the enclosure
{enclosureUrl} is the URL of the enclosure
{enclosureSize} is the size of the enclosure (in bytes, K or MB depending on size)
{enclosureIcon} is the icon representing the enclosure, based on its type
You can find a full description and instructions on using thse macros at Macros.UserLand.Com.
Editorial Access
Here is where you specify who can do what.
By default, all editors -- Managing Editors, Content Editors and Contributing Editors -- can create News Items. You could limit it to just managing editors, or you could allow all members of your site to create News Items.
The second question specifies who can approve a News Item for posting to the home page. Creating a News Item doesn't mean it gets posted to the home page -- only certain people can approve a News Item for posting. By default, it's only Managing Editors, but you can extend this to, content editors, all editors, or even allow all members of your site to approve items for posting to the home page.
Posting your first News Item
After you've configured News Items, make sure you've enabled the feature. (Go back to the top of the News Items prefs page, click Yes to the first question, and click the Submit button at the bottom of the page.)
Your home page is now blank -- you need to post a News Item to give it some content.
From the Editors only menu, choose News.
There you'll see a list of pending News Items. There aren't any, since you're just getting started. At the bottom is a link: Create a News Item. Click that link.
Then type in a title and URL. Choose a department. Write a description. Click the Create News Item button.
Next page includes a preview of the News Item. Below the preview is the editing form, already filled out. You can edit it as much as you like.
Assuming you're the Managing Editor, you can post the News Item to the home page whenever you want, you don't have to release it first. When it's ready, click the Post to Home Page button.
The next page you'll see is your home page, with one News Item at the top.
Deleting a News Item
In the Editors Only menu at the top of the screen, click on Discuss.
Locate the discussion group message corresponding to the item you want to delete. Click on its title in the "Subject" column.
Now, scroll down to the bottom of the page to the Admin box. It should have an item asking if you want to "Delete this news item?" Select itand click on the Submit button.
A confirmation dialog appears and click Yes to delete the news item.
Enclosures
Manila's Enclosures feature allows you to specify a file to be used as an Enclosure in your site's RSS feed. Enclosures are the basis for Podcasting, where people who subscribe to your RSS feed can have enclosed files automatically downloaded to their computer, MP3 player or other media device.
When the Enclosures feature is enabled, you can upload a file or type the URL for an enclosure when editing or creating news items.
How to enable the Enclosures feature
1. Go to your site's News Items Prefs page.
2. Scroll down to the Enclosures section, and click Yes to Enable the Enclosures feature.
3. If you prefer to upload files as you create or edit news items, choose Upload a File next to the question, How do you want to add Enclosures. If you want to link to files on another site instead, choose Type a Shortcut name or URL instead.
4. Click the Submit button at the bottom of the page.
Add an Enclosure
Here's how to add an enclosure to a news item in your site:
1. Either create a new news item by clicking the News link and then clicking Create a News Item, or edit an existing news item by clicking its Edit link on your home page.
2. If you've chosen to upload files to create enclosures, click the Choose File button in the news item editing page, pick a file from your local disk.
If you've chosen to use a Shortcut name or URL, type the URL or the name of a shortcut into the Enclosure field.
3. Click the Post button.
That's it. When this news item appears in your site's RSS feed, it will have an enclosure which links to the file you uploaded, or to the URL you typed in the Enclosure field.
Enclosures and Department RSS feeds
Enclosures also appear in the RSS feed for the department which contains the news item. You might want to create a department specifically for publishing enclosures. (This could be considered to be a Podcast.)
Departments
Every News Item is part of a department. When you create a News Item, you choose the department. You can go back and change it later, of course.
To create a new department, type in the field next to the Add a Department prompt. Click the Submit button at the bottom of the page.
Then you need to associate a picture with that department. Most of the time you'll want something small, icon-sized. If you don't have a suitable picture already uploaded, go ahead and upload a new picture via the Pictures page. There's a link to the Pictures page from the News Items prefs page.
Then, to associate a picture with a department, choose a department from the pop-up menu next to the Associate a Picture prompt. In the space to the right of the pop-up menu, type the shortcut name of a picture. Do not include the quotes around the name, just type the name. Then click the Submit button.
Department list page
The department list page provides a list of all departments in your site, with links to each department's home page, RSS feed, and edit-department page, if you're logged in as a managing editor. (Screenshot.)
It's linked to from the News Items page -- Click the News link in the Editors Only menu, and then click the department list link at the bottom of the page.
When logged in as a managing editor, the globe icon next to each department links to the department's home page, and the department's name links to the department-editor page for the department. The rightmost column contains XML icons, which link to each department's RSS feed.
To edit a department's name or description, click its name. To create a new department, click the Create a New Department link at the bottom of the department list page.
To delete a department, check the box to the left of its name, and then click the Delete button at the bottom of the page.
Department editor
The department editor includes some previously unavailable preferences. (Screenshot.)
Departments can now have a description. This text is used for the tagline on the department's home page, and for the description in the department's RSS feed.
Departments may also specify a language for use in their RSS feeds. (You can also choose to not specify a language.)
Department RSS feeds
Department RSS feeds make it easy for people who use news readers like Radio UserLand to follow posts in a specific department, without having to manually filter through other posts on your site.
For any given department, its RSS feed will have a URL like the following:
http://www.example.com/newsItems/departments/myDepartment.xml
You can find the RSS URL for any department in your site using the department list page -- see below.
Email Notification
Stories and pictures are simpler than News Items: you create them and edit them.
But with News Items you have four events: creating, editing, releasing, and posting to the home page.
You can turn on and off email notification for each event. The notification list -- the list of people who get email notification -- is configured on the Editorial site prefs page.
RSS
If you're using News Items, and you syndicate your site, you'll find that the generated RSS matches the News Items structure. News Items and RSS are structured the same way: for each item there's a title, link, and description. You can still use the scriptingNews2.xml format if you prefer, both are available and both work.
Notes
If your site's template includes the rssLink macro for creating a link to your site's RSS feed, then the news items department page will link to the department's RSS feed, rather than the site's RSS feed.
If a department has no description, then the site's tagline (edited on the Appearance Prefs page) is used for the description in the department's RSS feed.
Comments
The comments feature adds a link next to each news item on your home page which, when clicked, opens a new window with a form for posting comments and reading comments posted by others.
An optional counter displays the number of comments that have been posted in response to each news item.
Comments are stored as responses to the discussion group message that contains the news item, so they're visible both in the comments popup window, and in the discussion group.
Steps
1. Enable the Radio Hosting feature: Go to the Radio Hosting preferences page and click Yes next to the question, do you want Radio Hosting enabled, and then click the Submit button.
2. Go to the News Items prefs page, add a {commentLink} macro to the News Item Template where you want the comment link to appear, and click Submit.
3. Go to your site's home page. You'll see a comment link for each news item.
Post your first comment
Click on one of the comment links on your home page. A new browser window will open with a form you can use to post a comment.
Fill in the fields and click the Submit button. When the browser refreshes, you'll see your comment, along with a link to the news item that the comment is in response to.
As more comments are created, they'll appear below existing comments, in chronological order.
Changing the comment link's appearance
The text of the comment links is customizable using the comment link template on the News Items prefs page. The {commentCount} macro is replaced with a count of the number of comments.
You can also use a shortcut to a picture in the comment link template.
Deleting a comment
To delete a comment, check the box below it in the comment pop-up window, and then click the Delete Checked Comments button at the bottom of the window.
Comment notification via email
If the feature is enabled, whenever a new comment is posted to your Manila site, an email will be sent to to your notification list, notifying you that a new comment was posted.
Steps
Here's how to enable comment notification in your Manila site:
1. Go to your site's Editorial Prefs page: Click Prefs in the Editors Only menu, and then click the Editorial link.
2. Scroll down to the Email Notification section, and click Yes next to the question, Do you want notification sent when a new comment is posted.
3. Click the Submit button at the bottom of the page.
Comment notification is now enabled for your site. When new comments are posted, you will receive email notification.
Notes
The notification feature is for sites which have news items enabled, and which have the comments feature enabled.
For non-news-items sites, use the new discussion group message notification preference, which is also on the Editorial Prefs page.
TrackBack
TrackBack is a set of specifications published by SixApart, the company that develops Movable Type. It's used notify another site that a post points to a post on the other site. The notification is called a ping.
Often TrackBack pings will be displayed in a pop-up window linked next to the post that received the ping.
Manila's TrackBack implementation is part of the News Items feature. Here's a news item in a Manila site which has a pop-up window that displays incoming TrackBack pings.
Manila supports both outgoing and incoming pings. Outgoing pings can be made automatically, or manually.
Steps
1. Go to your site's News Items Prefs page -- click Prefs in the Editors Only menu, and then click the News Items link.
2. Add the following macro to your News Item Template, where you want the TrackBack pop-up window link and counter to appear:
{trackbackLink}
3. Also on the News Items Prefs page, scroll down to the TrackBack section, and click Yes to enable TrackBack. If you want Manila to send outgoing TrackBack pings automatically, click Yes to send outgoing pings automatically. (screenshot)
4. Click the Submit button at the bottom of the page.
TrackBack is now enabled, and news items will appear with a TrackBack link, which opens a pop-up window displaying incoming pings.
Deleting a TrackBack ping
To delete a ping, check the box below it in the TrackBack pop-up window, and then click the Delete Checked Trackbacks button at the bottom of the window.
How to ping
If you have set the preference to send outgoing pings automatically, then you don't have to do anything. Manila will look for links in news items you post, and send pings to sites you've linked to if they support TrackBack.
If automatic pings are turned off, you can still send pings when you create or edit a news item. Just paste the permalink URL for the post you want to ping into the URLs to Ping field at the bottom of the news item editing page, and post the news item. (screenshot)
You can also use the URLs to Ping field to send pings to sites which are not linked to directly by your news item.
See also
Manila Newbies: News Items
Benjamin and Mena Trott: TrackBack Specification
Macros
Macros provide a way for you to include calculated elements in your Manila web pages and templates.
Example
If you include {10 * 10} in a page on your Manila site, you see 100
Macros don't just do math
They can do lots of other kinds of calculations too, like manipulating pieces of text, counting the number of words in a sentence, or displaying a greeting message.
Let's say you wanted to display a customized greeting message for any user who is currently logged in to your site. You could use a macro to do this. Here's how:
Copy and paste the following text into your homepage:
{if whoAmI != "" {return ("Hi there, " + string.nthField (whoAmI, ' ', 1) + "!")} else {return ("")}}
This will display the text "Hi there, Jake!" in the page, whenever a user whose first name is "Jake" is logged in.
How does this work?
Manila sites already included the macro, {whoAmI}. It returns some text that looks like this: "Jake Savin is logged in." When the user is not logged in, {whoAmI} returns nothing (the empty string).
But we only wanted to get the user's first name, and include that in our own customized message. We didn't want the whole sentence. So we used the string.nthField (whoAmI, ' ', 1) to extract the first word of the sentence -- the user's first name.
string.nthField is one of the newly legal Frontier verbs. If you're already familiar with Frontier, the syntax should be familiar to you.
What's a verb?
Like verbs in a spoken language, a verb in macro performs an action.
You give (pass) it some information, it does something with it, and it returns the result to you.
In the example above, we passed three things to the string.nthField verb: the string of text, "Jake Savin is logged in." from the whoAmI macro; a space character represented as ' ', which is used to determine how to break the string into words; and the number 1 representing which word -- which field -- we wanted to extract from the string.
string.nthField returned the first word, "Jake".
How if ... else ... and curly braces work
The first curly brace, {, signals the begining of your macro. The last one, }, signals the end. The ones inside your macro delimit blocks of code that if and else apply to.
When you use an "if" statement, you specify what happens if the condition is true, and optionally what happens if it's not true. The first pair of braces after the if statement encloses the part of your macro which will be evaluated if the condition is true, and the second pair after the "else" encloses the part which will be evaluated if the condition is not true.
In this example, we test to see if whoAmI contains some text -- that it does not equal (!=) the empty string (""). If the test is true, the first code block which returns the welcome message gets evaulated. If the test is false, the second block gets evaluated, returning the empty string.
How quotes characters work
The quote characters (") inside macros are different from the quote characters used for shortcuts.
They represent the begining and ending of a string of text. In the example above, we used quote characters to represent the start and end of the string, "Hi there, ". (Note the trailing space in the example.) We also used quotes to delimit the exclamation point, and the empty string that's returned if noone is logged in.
If you want to use a quote character inside a string, you escape the quote character using a backslash like this: \"
Say for example, that you don't want a greeting like "Hi there, Jake!", but you want a message like this:
"Jake" is the current user.
(Note the quotation marks around the user's name.)
Your macro would look like this:
{if whoAmI != "" {return ("\"" + string.nthField (whoAmI, ' ', 1) + "\" is the current user.")} else {return ("")}}
Single characters are enclosed in single quote marks (the key next to the enter or return key on most keyboards). In this example, the space character is represented by ' '. A comma character would be represented represented by ','.
Text strings of more than one character are always enclosed in double-quotes, for instance: "a string of text".
A second example: dynamic copyright messages
Say you've got a site that was started in the year 2000, and you want to place a copyright message at the bottom of every page. You want the copyright message to say "© 2000" until the year changes to 2001, after which you want the message to say "© 2000-2001".
It's easy to write a macro which does this.
Copy and paste the following text into your template:
{if year == 2000 {return ("© 2000")} else {return ("© 2000-" + year)}
This macro takes advantage of the fact that like whoAmI, year is a legal macro. It returns the current year.
The macro in this example tests to see if the year is still 2000. If it is, the macro returns the string, "© 2000", and otherwise it returns a string like this: "© 2000-2001".
Looking closely, you can see that when the year changes from 2001 to 2002, what you'll see on your pages is "© 2000-2002", because after the year 2000, the macro includes the current year after the '-'.
Can I use Frontier or Radio UserLand to edit macros?
Yes you can. You can create a script in Frontier or Radio, and paste it into your site.
The pasted text of the script will automatically be formatted correctly, including curly braces that define code blocks.
Keep in mind that you will need to put curly braces around the whole script after you paste it in, or else it won't be evaluated as a macro. If you don't do this, you may see strange results -- statements outside code blocks will end up as text in your page, and statements inside code blocks will be evaluated as macros since they're inside curly braces. If we'd forgotten the braces around the copyright example, here's what we'd see in the page during the year 2000:
if year == 2000 © 2000 else © 2000-2000
Remember that macros are powerful. When you write one, you're writing a little program, and as with writing any program, it has to be just right, or you'll get unexpected results.
Can I use carriage returns, spaces and tab characters to format my macro so that it's easier to read?
Yes you can. In fact, if you paste a Frontier or Radio UserLand script into your site, it will contain the carriage returns and tab characters that correspond to the formatting in the outline-based script editor.
You also get the curly braces which define code blocks.
See also
Macros.UserLand.Com
Viewing site stats
Along with the option of logging of all HTTP traffic on your server, Manila logs stats for each site on your server: Hourly Hits, Members, Most Read Messages and Referers.
Steps
1. You can view a list of all the stats page for your site by adding "/stats" to the URL of your Manila site:
eg. http://yourdomain.com/mysite/stats
Hourly Hits
Shows the hits per hour for the last 24 hours.
Members
A list of all members of the site. You can make the members list private, viewable only by managing editors, on the Membership prefs page.
If you are logged in as a managing editor you can also easily block, un-block or delete a member by checking the box to the left of the member and clicking the appropriate button at the bottom of the page.
If the members list is public, visitors will only see the members column with a link to the member's profile.
Most Read Messages
Shows the top fifty most read messages on your site.
Referers
Shows referers to your site for the last 24 hours. A referer is the URL of a page that links to a page on your site. When someone follows a link to visit your site, that person's browser sends the URL of the page they were on to your site.
See also
ManilaNewbies: Referer stats
ManilaNewbies: Hits by Hours stats
Site Administration
Along with the Editors Only menu, the Managing Editor of a site can administer their site from the Admin page and admin boxes.
Admin page
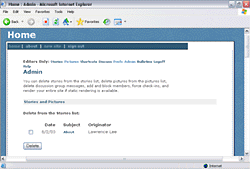 
Choosing Admin from the Editors Only menu, the editor has access to the following functions:
Deleting an entry from the stories list
Deleting an entry from the pictures list
Deleting a discussion group message
Adding a discussion group message to the stories list
Adding a member
Adding multiple members
Blocking a member (from accessing the site)
Unblocking a member
Deleting a member
Forcing a check-in of a message being edited by another member
Rendering the entire site or render a set of archived home pages, if static rendering is enabled
Admin box
The Admin box shows up in a page so the Managing Editor can do some administrative task with that page. You will see a different Admin box depending if you are viewing a story, picture or discussion group message.
Stories
Delete this story?
Remove this story from the stories list?
Make this the home page?
Turn off the byline for this story?
Set a relative path for this message?
Picture
Delete this picture?
Remove this picture from the pictures list?
Discussion group message
Delete this message?
Make this message a story?
Make this the home page?
Set a relative path for this message?
Managing members
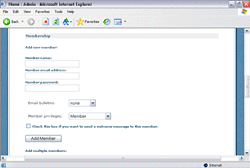
From the Admin page of your Manila site you can add and block members from your site. Click the Admin link in the Editors Only menu to open the Admin page.
Or if you don't know the email address of the member, you can also do the same functions from the members list page.
Add a new member
To add a single member, enter the name, email address and password for the member. Then choose if they should receive email bullets (including the format) and their member privileges.
If you want the member to be notified of their new membership, check the box to send the welcome email. Then click the Add Member button.
Add multiple members
You can signup mulitple new members to your site by entering a list of email addresses into the text area, choosing their member privileges and then clicking the Add Members button.
Email addresses can be separated with spaces, carriage returns, tabs or commas.
Each member will automatically be assigned a random password that they will receive in a welcome message sent to each email address that is signed up.
To block or unblock a member
Blocking a Member denies them access to any part of your site. When they try to view any page, they see a message telling them they have been blocked. They will have access to any areas of your site available to the public if they log out.
Enter the email address of the member you want to block and then click the Block Member button.
To unblock a member, enter their email address and click the Unblock Member button.
To delete a member
To delete a member from your site, enter their email address and click the Delete Member button.
Members profile
The member profiles can be called up at the following address:
http://www.mysite.com/profiles/
You will only see an email address displayed on the profiles page if you are logged in as a managing editor. Other members and visitors can click the envelope icon on the page to send an email using a form on the site.
Members list
You can view a list of all members of your Manila site using the members list stats page at the following address:
http://www.mysite.com/stats/members/
To block or un-block a member
1. Make sure you're logged on as the managing editor of your site.
2. Go to your site's member list page. Its URL is your site's URL plus stats/members. For example if your site is at http://www.mysite.com/ then your member list page is at http://www.mysite.com/stats/members
3. Check the box next to the name of the member you want to block or unblock, scroll to the bottom of the page, and click the Block Member or Un-block Member button.
Blocked members are listed with the word "blocked" in the member list.
You can block or un-block multiple members at the same time by checking the box next to each member, and then clicking the appropriate button at the bottom of the page.
To delete a member
1. Make sure you're logged on as the managing editor of your site.
2. Go to your site's member list page.
3. Check the box next to the name of the member you want to delete, and click the Delete Member button at the bottom of the page.
4. In the confirmation page that loads, make sure that the correct member is listed, and click the Delete button to confirm, or the Cancel button to return to the member list.
Bulletins
Bulletins provide an easy method for a Managing Editor to send email to Members. When people sign up as Members of a Manila site, they choose whether to receive Bulletins and whether they want the plain text or HTML version. Manila has a simple Web interface to create, preview and send a Bulletin, and a way to check the recipients.
Steps
1. Click the Bulletins link in the Editors Only menu at the top of the page.
2. Enter the Subject and Text information.
3. Click the Preview button to see what the plain text and HTML Bulletins will look like.
4. Click the Edit button to change the Bulletin content, or click the Send button to send it.
Advanced
You can pre-populate the subject and text fields with the Title and Description of a news item, or the Subject and Body/Text of any discussion group message (stories and pictures included) by adding the message number to the URL for the bulletins page.
For example if your site is at http://www.mysite.com/ and you want to send the contents of News Item 23 as a bulletin, go to:
http://www.mysite.com/bulletins/?msgnum=23
Then Preview or Send just like you would with any other bulletin created from scratch.
Site Structure
The Site Structure area is where you can create a kind of map between virtual folders or files and actual Messages. This feature can be used to complement Manila's built-in system for assigning URLs to Stories, Message and Pictures.
Standard Manila URLs look like these:
http://yourdomain.com/discuss/msgReader$123
http://yourdomain.com/stories/storyReader$123
http://yourdomain.com/pictures/viewer$123
These URLs, combined with Shortcuts and Navigation, are often all that's needed on a site. In cases where more meaningful or memorable URLs are needed, the Site Structure feature is the answer.
Redirects
Manila's site structure feature also supports redirects which are specified in the following formats:
<redirect pathname="pathToRedirectFrom" url="http://www.example.com/" />
<redirect pathname="pathToRedirectFrom" url="/pathWithinMySite" />
A Simple Example
The example below shows a simple Site Structure.
		<hierarchy>

			<story pathname="faq" msgNum="3"/>

			<story pathname="feedback" msgNum="2"/>

			</hierarchy>
This effectively tells Manila to act as follows:
- If a browser asks for "/faq", show Message number 3
- If a browser asks for "/feedback", show Message number 2
If our example site were located at http://192.168.0.1/, the Site Structure above would enable the following URLs:
http://192.168.0.1/faq (display Message number 3 as a Story)
http://192.168.0.1/feedback (display Message number 2 as a Story)
Site Structure XML
The Site Structure is created with a simple XML document. There's one XML element, <hierarchy>, that contains all of the structure information. It begins with a <hierarchy> tag and ends with a </hierarchy> tag. If more than one <hierarchy> element appears, all but the first one are ignored.
Inside the <hierarchy> element, you can have the following elements:
<story>
<category>
<description>
A <story> element maps a file name to a particular Message, while a <category> element maps a directory name to a set of Messages. You can have as many <story> and <category> elements as you need, and <category> elements can be nested (appear inside on another). If a <description> element appears inside a <story> element, Manila will use it when building automatic Story lists.
A <story> element can work with only one tag by using a closing "/" before last angle bracket (e.g., <story/>). If there's a <description> element inside the <story>, then a closing </story> tag is required instead. All <category> elements need a closing </category> tag, and <description> elements must be closed in the same way.
A <story> describes a virtual file using the following format:
<story name="abc" pathname="def" msgnum="xyz"/>
name Optional text describing the Story (with or without spaces)
pathname The virtual name of the Story (no spaces, with or without an extension such as ".html")
msgnum The number of the Message to display (Story or Picture)
A <category> describes a virtual folder using the following format:
		<category name="abc" pathname="def" msgnum="xyz">

		...

		</category>
name Optional text describing the Category (with or without spaces)
pathname The virtual name of the Category (no spaces)
msgnum The optional number of the Message (Story or Picture) to display as a default page for the folder
A <description> adds explanatory text (displayed in automated Story lists built by Manila) in this format:
		<story name="abc" pathname="def" msgnum="xyz">

		<description>

		This is a great story!

		</description>

		</story>
Reserved Names
Manila reserves certain names for its own use, so it's best to avoid using any of the following for a top level Category or Story:
2002 (and any other past calendar year the site was in use)
accessControl
admin
aggregator
bulletins
comments
default
directory
discuss
downloadDiscussTheme
downloadMySite
downloadTheme
editHomePage
faq
feedback
gems
mail
member
newsItems
picture
pictures
prefs
profiles
random
search
slides
stats
stories
wap
xml
XML Syntax Errors
When there's a syntax error in your XML, Manila returns the form with the error shown above it. No changes are made to the Site Structure when this happens. The most common errors include unnecessary or missing </story> and <story/> tags, leaving out the closing </category> tag and omitting the <hierarchy> element.
Syndicating your home page
Manila can syndicate your homepage by creating an RSS feed that users can subscribe to using a news aggregator like Radio UserLand.
Steps
1. Log in as a Managing Editor.
2. Click on Prefs in the Editors Only menu bar.
3. Click on Syndication to call up the Syndication Prefs page.
4. Scroll to the Enable or Disable Syndication area.
5. Select Yes after "Do you want to syndicate your home page?".
6. You can then go through and fill in the settings for your RSS feed.
Enter a Title for your channel.
Enter a Description for your channel.
Enter the Managing Editor's email address and name (such as you@yourSite.com (The Editor) ) as a contact for your channel.
Select an optional Graphic to accompany your channel (it must be a Picture from your site).
Enter a Graphic Caption to display with the Graphic.
7. Scroll to the bottom of the Syndication Prefs page and click Submit to send the changes to the server.
Linking to your RSS feed
You can view the RSS feed for your site by adding "/xml/rss.xml" to the URL of your Manila site:
eg. http://yourdomain.com/xml/rss.xml
Or you can use the rssLink macro in your template to create a link to your RSS feed using an orange XML button. You can also use the xmlCoffeeMug macro that allows Radio UserLand users to easily subscribe to your site's RSS feed.
Notes
Manila also supports the scriptingNews2 format to be backward compatible to any aggregators that used that format, an early syndication format that merged with RSS in version 0.91.
See also
See this page for a list of news aggregators which can read Manila's RSS feeds.
Radio.UserLand.Com: What Is a News Aggregator?
Technology at Harvard Law: RSS 2.0 Specification
Syndicating your discussion group
Manila can now generate an RSS feed for your site's discussion group. Your discussion group's RSS feed makes it easy for you and your readers to follow discussion on your site using any news aggregator which supports RSS.
Steps
1. Go to your site's Syndication prefs page: Click the Prefs link in the Editors Only menu, and then click the Syndication link.
2. In the first section, enable or disable syndication, click Yes to syndicate your discussion group.
3. Click the Submit button at the bottom of the page.
Linking to your RSS feed
Verify that your discussion group RSS feed is working. Your discussion group's RSS feed is the URL of your discussion group plus "rss.xml".
For example if your discussion group is at http://www.example.com/discuss/, then your discussion group's RSS feed will be here:
http://www.example.com/discuss/rss.xml
Notes
If your site's template includes the rssLink macro, then the XML icon on your site's discussion group pages will link to your discussion group's RSS feed, when the feature is enabled.
Manila supports Etag/If-None-Match HTTP headers for discussion group RSS feeds.
Site News Aggregator
The News Aggregator feature for Manila allows server managers to offer a community aggregator for all of the sites on the server.
Depending on how your server manager has configured your Manila server, you can be automatically subscribed to the news feeds of all the Manila sites on this server, subscribe from a selected list of news feeds or subscribe to any feed by URL.
Steps
1. Go the Subscriptions Preferences page for your site. (Click the Prefs link in the Editors Only menu, and then click the Subscriptions link.)
2. Check the box next to each news feed that you want to include on your site's aggregator page, and click the Submit button at the bottom of the page.
If enabled on the server, you can enter a URL to an RSS feed in the field at the top of the Subscriptions page and then click the Add button to subscribe to it.
3. Go to your site's aggregator page. Its URL will be your site's URL plus the word aggregator, for example: http://www.mysite.com/aggregator
The most recent items in all of the subscribed news feeds will be displayed on this page.
Robots.txt
Details on configuring the settings on the Advanced preferences page.
Robots.txt
Manila's robots.txt feature makes it easy for Managing Editors to edit the restricted paths in their site's robots.txt file.
How to
Here's how to edit the restricted paths listed in your site's robots.txt file:
1. Go to your site's Advanced Prefs page -- Click the Prefs link in the Editors Only menu, and then click the Advanced link.
2. Scroll down to the Robots.txt section by clicking the Robots.txt link at the top of the Advanced Prefs page.
3. To add a path, type the path into the Path to Add box, and click the Add Path button. For example, to block crawlers from indexing your site's discussion group, add the path, /discuss/ to your robots.txt file.
4. To remove a path, check the box to its left, and click the Delete button.
By default, the referer stats page is blocked to discourage spammers.
Notes for server managers
Manila's robots.txt feature supports sub-sites. Paths which are restricted in a sub-site are automatically added to the robots.txt file for the top-level site, since search engines will only look for a robots.txt file at the top-level for a given domain.
For sub-sites' paths to be included in the top-level robots.txt file, the sub-site must be included in the domain's siteTree. Sub-sites created after the release of this feature are automatically added to the siteTree.
To support sub-sites created previously, run the following script in Frontier's QuickScript window:
manilaSuite.hosting.addInstalledSitesToSiteTrees ()
See also
Search Engine World: Robots.txt Validator
HTML 4.01 specification: The robots.txt file
Site access restrictions
You can restrict access to areas of your Manila site based on membership and/or editorial status: Members, Editors, Contributing Editors, Content Editors, Managing Editors.
For example, if you choose to restrict acess to members to a path then it would be restricted to members who signed up to the site and all editors. Managing Editors always have access to all paths, so if you restrict access to Contributing or Content Editors then the Managing Editors will still have access.
How to
Here's how to edit the site access restrictions:
1. Go to your site's Admin page.
2. Scroll down to the Access Restrictions section.
3. To add an access restriction, type the path into the Path to Add box, choose an access level and click the Add button. For example, to restrict only members from viewing your about page, add the path, /about and choose members in the drop down box.
4. To remove a restriction, check the box to its left, and click the Delete button.
Notes
If you are creating a private site where everyone has some editorial function, you should set the site up as an editors only site (instead of configuring it through the site access restrictions feature). This will also allow you to have access to features like password protected RSS feeds.
The feature can be enabled or disabled on a per-site basis by setting the boolean named flEnabled in the pathPermissions sub-table of the site's #newsSite table. The default is for the feature to be enabled.
Searching a site
If you have enabled the search engine on your server and setup the Searching preferences page, your Manila site will automatically be setup with a search page.
Steps
1. You can view the built-in search page for your site by adding "/search" to the URL of your Manila site:
eg. http://yourdomain.com/mysite/search
searchThisSite macro
If you want to add a search box to another page on your site, you can use the {searchThisSite ()} macro.
How to call it
{searchThisSite (buttontext:"Search", flThisSiteOnly:true, thisSiteOnlyCheckText:"This site only")}
buttontext is a string that sets the text of the button in the search form.
flThisSiteOnly is a boolean that includes a checkbox in the search form that restricts the search to the site.
thisSiteOnlyCheckText is a string that sets the text beside the checkbox.
Static rendering of your site
Static rendering means creating .html files from your Manila website and saving them to disk. This creates a traditional website, the kind that can be served by non-Manila servers such as Apache, WebSTAR, and IIS, servers that are optimized for serving static files from disk. Your static server doesn't know about Manila -- it doesn't need to.
Manila does the static rendering for you. It's a feature you can turn on and configure. What you end up with is two websites: the Manila site where you work on your site, and the static site that exists as files on disk.
Why static rendering?
There are two main reasons to use the feature. One or both may apply to you -- or you may have other reasons.
1. Performance
There is a simple reason why a site that's been rendered to disk will often load faster than the Manila version. In a static site, the pages have been pre-built. In Manila, pages are built on the fly, for every request. This means a static server is doing much less work than a Manila server: all it has to do is read a file and return the contents to the browser. Latency -- the time it takes before the server starts returning data to the browser -- is thus lower.
2. Staging
You may want a private and a public site. You can use the Manila site as your private site and the static site as your public site. When a page is ready to "go live" -- when it's ready to be rendered to the static server -- you can tell Manila to render the page.
This allows you to iterate over your copy without making all your edits public. You can create a new page and edit it until it's the way you want it, then render it. Later you can edit again, and re-render it once you're finished editing.
What gets rendered
The Manila version of your site may or may not be public. So rather than talk about public and private sections of your site, this document refers to the render-able sections of your site.
There are three types of pages that can be rendered: home pages, former home pages (back issues) available through the home page calendar, and pages defined in your site structure.
Other pages -- your discussion group, your prefs pages, and so on -- are not rendered. Some of these don't make sense on a static server, some are highly dynamic and can't be rendered.
This division between render-able pages and non-render-able pages allows you to define what goes onto the static server and what doesn't. Remember that any piece of content can be added to the site structure, so you have control over what gets rendered to the static server.
Static rendering preferences
Static rendering is a feature the server manager can enable or disable for the entire server. If static rendering is enabled on the server, then you the managing editor of a Manila site can choose whether or not to use it.
In the site prefs section of your site is a new link called Rendering. Click it to go to the prefs page for static rendering.
If you want to use static rendering, check the box at the top of the page.
The second question asks if you want pages rendered when they're new or changed. If you're using this feature for performance reasons, then choose Yes. This way the static version of your site will always be in synch with the Manila version.
The third question asks if you want a Render this Page button on render-able pages. If you're using Manila as a staging server, then this is your best choice. This way you control when pages are rendered -- you can edit pages without triggering a static rendering. Pages get rendered only when you click the Render this Page button.
You can choose Yes for both options: you may want pages to be automatically rendered, but also have the option to re-render a page at will.
Manila supports static rendering of Manila sites to disk or to a remote server, using FTP. Depending on which options are enabled on the server, you can select from the dropdown box in the Where to render section of the page.
If the FTP option is enabled, you can enter in your FTP account settings into the page.
url -- Url of where the contents of the FTP directory can be viewed over the Web. eg. "http://www.yourdomain.com/workspace/". Requires a trailing slash and may be case-sensitive on some servers.
hostname -- IP address or hostname of FTP server.
username -- May be case-sensitive on some servers.
password -- May be case-sensitive on some servers.
path -- It can be an absolute path from the root directory eg. "/usr/www/users/mydocs/workspace/" or a relative path from your home directory eg. "~/public_html/workspace/". Requires a trailing slash and may be case-sensitive on some servers.
Using a FTP client, you can find the path to your directory by finding the folder you want to publish to and typing "PWD" which asks the server to tell you which directory you are in.
Rendering an entire site
When you first turn on static rendering, you will probably want to render your entire site at once.
To do so, go to the Admin page. The top item in the page is labelled Static Rendering: click the Render this Site button.
The next page is a confirmation page, which makes sure you really want to render the entire site. The confirmation page also reminds you of the URL of your static site.
Depending on the size of your site, it may take from a few seconds to a few minutes to render the entire site. The page doesn't return until the entire site has been rendered. It's much like sending bulletins -- if you have lots of subscribers, it may take a little while before the page returns telling you who bulletins went to. In this case, the returned page is a report listing all the pages that were rendered to disk. You can click on any URL to visit the static version of the page.
You of course want to render your entire site when you first set up static rendering. But there are other times, too -- such as when you make a major change to your template. The static version of your site will need to be re-rendered to use the edited template.
Workflow
You've got two versions of your site. The Manila site has Edit this Page buttons, the static version does not.
You also have two URLs -- perhaps the static version is at www.mysite.com and the Manila version is at editorial.mysite.com.
It's a good idea to bookmark both sites.
There's a new feature in your Manila site designed to make it easier to work on the home page -- the editHomePage page.
In your Manila site is a new /editHomePage page -- at http://editorial.mysite.com/editHomePage, for instance. When you go to this page you have your standard editing box. It's the same thing you see when you click Edit this Page.
This page always allows you to edit the current home page. It's another good page to bookmark -- or put in your browser's toolbar, so it's always one click away.
When you click the Post Changes button, one of two things happen, depending on your prefs. Either the Manila version only of your home page is updated, or the Manila version and the static version are both updated.
If you have automatic rendering turned on, then the static version is updated. The next page you see is the static version of your home page.
If you don't have automatic rendering turned on, the next page you see is the Manila version of your home page.
Render this Page
If you're using Manila as a staging server, then you want pages rendered only at your command. That's what the Render this Page button is for.
It appears only on pages that are render-able. (Home pages, old home pages, site structure pages.)
When you click the Render this Page button, the static version of the page gets rendered, and the next page you see in your browser is the static version. You can use the back button to get back to the Manila version of the page.
More about automatic rendering
Automatic rendering has some additional features designed to ensure that the static version of your site is in synch.
When you update your home page, the calendar version of your home page and RSS feed are also re-rendered.
Even when you use Manila Express your home page is automatically re-rendered.
Posting a Gem
The Gems feature allows you to upload files of any type -- movies, sound files, zip files, spreadsheets, etc. -- to your Manila website.
From the Gems page you can find a list of posted gems -- that shows the size and type of the file on disk. It also shows you the URL, so you can link to the file from other pages in your site.
If you're a managing editor, you also get a checkbox and a Delete button. You can delete gems by checking one or more to delete, then clicking the Delete button. This removes the gem from your list and deletes the file on disk.
There is a limit to the space on disk you may use. The gems list page tells you how much free space you have left in your folder.
How to post a gem
1. Log in as a Managing Editor.
2. Click on Gems in the Editors Only menu bar.
3. Click the Create a New Gem link to upload a new file.
4. You can give it a title -- the title is optional, as with pictures. The title will be the name of the shortcut that's created. If you don't supply a title, the name of the file will be used as the title.
5. Click the Browse... button to choose a file on your hard drive to upload.
6. When you're ready, click the Post New Gem button. Then you'll be returned to the gems list page, and your new gem will be listed at the top.
How to link to a gem
You can either copy the link on the Gems page after you have posted a new Gem.
Or if your site is configured to create Shortcuts for new gems, you'll normally use the Title of the Gem in Stories and Messages to link to the Gems.
The Title is optional for a Gem. If you don't provide one, Manila will create it based on the name of the file you upload.
Notes
You can't restrict access to download gems posted to your site by using the Site Access preference for your Manila site.
Mail-to-Weblog
The Mail-to-Weblog feature makes it easy to post to your weblog by simply sending an email to your site.
When this feature is enabled, Manila periodically checks for new messages in a POP email account that you specify, and posts new messages whose subject matches your "secret subject" to your weblog.
Messages which are posted to your weblog will be deleted from your POP account. All non-matching messages will be left on your mail server.
Steps
1. Go to the Mail-to-Weblog prefs page in your Manila site: Click the Prefs link in the Editors Only menu, then click the Mail-to-Weblog link.
2. Click Yes next to "Enable the Mail-to-Weblog feature?" (Screenshot.)
3. Enter your POP account information in the Account Information section. If possible, you should use a separate email account from your regular account, in order to prevent conflicts when checking for new mail. (Screenshot.)
3. Click the Submit button at the bottom of the page.
Manila is now configured to check your email account for new messages. When an email is received whose subject matches your secret subject, it will automatically be posted to your site.
Note: UserLand's servers check for new mail every 15 minutes, so you may need to wait up to 15 minutes for your email to be posted. Server managers can edit this time interval via the Frontier Admin Site.
Authorization options
You can configure how Mail-to-Weblog authorizes incoming email messages to be posted to your weblog using the Secret Subject and Authorized Senders sections of the Mail-to-Weblog prefs page. (Screenshot.)
There are three options for verifying emails by their subject:
1. You can require that the subject exactly match the secret subject. This is the most secure but least flexible option.
2. You can require that the subject begin with the secret subject. With this option enabled, you can have Manila generate news item titles using the portion of the subject after the secret subject.
3. You can have Manila ignore the subject, posting all messages to your weblog. This option should only be used if you have a separate email account for Mail-to-Weblog, since it will consume all messages sent to the account. You might use this option to post all messages from a mailing list to a website.
In addition to the secret subject options, you can restrict Mail-to-Weblog postings to only allow email messages from authorized email addresses, using the Authorized Senders prefs. By default, messages are posted only if they come from the managing editor(s) of the site.
Titles
Manila can create titles for Mail-to-Weblog posts using the date, the subject of the email, the first sentence of the email, or no title at all.
If you choose to use the subject of the email, the secret subject part will be removed from the title of the post.
Notes
If your site is a news-items site, Mail-to-Weblog can be configured to post as pending news items, rather than posting immediately to the home page.
The Mail-to-Weblog feature assumes that email messages are in plain-text format, and you should use the plain-text option in your email program when sending email to your weblog.
Mail-to-Weblog will attempt to preserve simple text formatting like line-breaks and paragraph breaks. If you want to do additional formatting, you can embed HTML markup in the plain-text of your email message, but Mail-to-Weblog will not recognize formatting in HTML-formatted messages.
Attachments in incoming Mail-to-Weblog messages are ignored (and deleted from the POP server along with the message).
Mail-to-Weblog current only supports POP mail accounts that don't require a secure connection to retrieve mail.
There is limited support for traditional (non-news-items) Manila sites. For these sites, incoming emails will be posted at the top of the current home page. If there's no home page for the day when the email is received, Mail-to-Weblog will automatically flip the home page and post the email on the new home page.
Print-Friendly versions of Manila pages
A common feature on news sites is print-friendly versions of their articles and pages. These pages have a less complex template with simpler colors and fewer graphics -- they're designed to be printed. Manila includes a built-in feature to allow you to have this on all the pages in your Manila site.
The printFriendlyLink macro
To add a link to a print-friendly version of pages in your site, use the printFriendlyLink macro. You can put it in your template or in particular stories.
Use it like this: {printFriendlyLink ("Print-friendly version of this page")} -- where the text in quotes is anything you want it to be. You can even make it an image if you want, as in {printFriendlyLink (pictureRef ("somePicture"))}.
Viewing print-friendly pages
If you want to view a print-friendly version of a page on someone else's Manila site, and they're not using the printFriendlyLink macro, you can still view a print-friendly version.
Just take the URL and add ?print-friendly=true to the end of it.
For instance, a URL like http://www.server.com/ would become http://www.server.com/?print-friendly=true.
If there already are search args -- if there already is a ?xxx in the URL, add a &print-friendly=true to the end of the URL.
For instance, a URL like http://www.server.com/?a=6&foo=yes would become http://www.server.com/?a=6&foo=yes&print-friendly=true.
Here's the print friendly version of this page.
Notes
You can edit the printer-friendly template on the Advanced Prefs page, just below the Home Page Template form.
See also
Macros.UserLand.Com: printFriendlyLink
Using Radio with your Manila site
You can configure your Manila site to use Radio UserLand's outliner to edit your site, directories and slides.
You can find a directory of documentation on setting this up on the Radio.Outliners.Com site.
Manila-Blogger Bridge Tool
You can mirror posts to your Radio weblog to your Manila site using the Manila-Blogger Bridge tool.
See Also
Radio UserLand
Editors Only site
You can create a private Manila site limiting access to view the site to only the site editors. This is useful when a site is in development, before you're ready to show it to the world. It's also useful for sites that should remain private.
With this setup, only two Web pages are available to anyone other than Editors who have logged in. One is a plain Web page informing the visitor that site access is restricted to Editors only (the name and content of this page can be changed). The second accessible page is the standard Manila login page. This is so that editors can log in and get to the rest of the site.
Steps
1. Go to the Editorial prefs page in your Manila site: Click the Prefs link in the Editors Only menu, then click the Editorial link.
2. You can turn editors only access on and off.
You can also edit the title and text of the Editors Only page. This page is seen by people who aren't editors. It's also seen by editors who aren't logged in.
Password-protected RSS feeds
This feature makes it possible to subscribe to RSS feeds in Editors-Only Manila sites using any RSS news reader which supports HTTP authentication.
This is especially useful for people who run private sites for a workgroup or project, or for people who run Manila sites in educational environments where the sites are required to have restricted access.
How to test
Here's how to verify that HTTP authentication works with your Editors-Only site's RSS feed:
1. In your web browser, make sure that you're *not* logged into your Editors-Only site.
2. Enter the site's RSS URL into the browser's address bar -- the RSS URL is your site's URL plus xml/rss.xml. Here are a couple of examples:
http://www.mysite.com/xml/rss.xml
http://www.myserver.com/MySite/xml/rss.xml
The browser should present you with a username/password dialog.
3. Click the Cancel button, or enter an invalid username/password combination. You should get an error page in the browser.
4. Click the browser's Refresh button, and enter the email address and password that you use to log into your Manila site into the username/password dialog, and click OK.
You should now see the RSS feed displayed in the browser.
Subscribing to password-protected feeds
Some RSS readers support the use of HTTP authentication for reading password-protected RSS feeds. Radio UserLand and NetNewsWire, for example, both do.
In these RSS readers, the username and password are part of the URL used to subscribe to the password-protected RSS feed.
To subscribe to a password-protected RSS feed in Radio UserLand or NetNewsWire, use the following format for the RSS URL:
http://[username]:[password]@[domain]/[path]
For example, if the RSS feed is here:
http://www.example.com/xml/rss.xml
...and your username/password is me@foo.com, and xYz, then use this URL to subscribe to the feed:
http://me%40foo.com:xYz@www.example.com/xml/rss.xml
Note that the '@' character in the username must be replaced with %40 (the URL-encoding for the '@' character). This is important for Manila sites, since members use their email addresses as their logins, and email addresses contain '@' characters.
Make sure that when using this URL format, that you replace the '@' character in your email address with %40.
Notes
The password-protected RSS feeds feature also works with the recently released discussion group RSS feeds and news item department RSS feeds.
If your site's has either feature enabled, then you can use the same URL formatting to subscribe to the discussion group or to a department, that you use to subscribe to the site's home page.
Gems aren't included in the password protection of the editor's only site.
Custody
Manila keeps track of the Stories, Messages and Pictures being edited so each item can only be edited by one person at a time.
Checked Out Items
As soon as someone clicks Edit This Page, Manila marks that item as being "checked out", meaning someone is working on it. Manila keeps a list of checked out items that includes the Message number, the name of the person editing each one and the time they started editing. A Managing Editor can see this list in the Custody area of the Admin page, which looks like this:
If someone tries to edit an item on the checked out list, they see a Message explaining that it's already being edited. As soon as the person working on it posts their changes, Manila removes the item from the checked out list and it's available to the whoever who wants it.
Manila also tracks the time spent editing an item and will automatically check it back in again after a certain time. This is in case someone starts to edit and changes their mind, or perhaps goes home for the day after starting to edit!
A Managing Editor can change the editing time limit using the Editorial Preferences; by default it's 240 minutes (4 hours). A Managing Editor can also force items to be checked in via the Custody area of the Admin page.
You can see which messages and advanced items are checked out, and you can force a check-in of any message or advanced item.
When a message or advanced item is being edited, the editor has custody of that item. You can specify how many minutes must elapse before custody of a message or advanced item expires.
Downloading a copy of your Manila site
A Managing Editor can download a copy of their Manila site as a Frontier guest database.
As well as creating a backup file, you can use this feature to move your site to another Manila server.
Steps
1. Log in as the Managing Editor.
2. Enter an address (URL) of the form http://yourdomain.com/downloadMySite/MySite.root, changing "yourdomain.com" to match your site.
3. Select a location for the file on your computer.
(Note to Macintosh Classic users: you will need to set the type to 'TABL' and creator to 'LAND' -- see the script below.)
Notes
If, after you've downloaded your site, you continue to work on your site at its original location, the two copies will be out of synch.
For privacy reasons, member passwords are removed from the copy before it's downloaded.
How to install the site on another copy of Frontier
1. Open your downloaded Manila site file in Frontier.
2. Copy your website's table by selecting Copy from the Edit menu.
3. Next, open the table where you want to install your website, and paste your website table into that table (eg. manilaWebsites.root). You may rename your website table at this point, if you wish.
4. Select Install Site in the Server menu. You'll see a dialog asking you what URL your website should have.
If you want to change the site's URL, type the new URL into this dialog. If you want to leave the URL the same as it was before, just click OK.
How to change the type and creator
As mentioned above, here's a short script for changing the type and creator of your downloaded site. (This is for Macintosh Classic users.)
local (f = "Macintosh HD:Desktop Folder:MySite.root")


	file.setType (f, 'TABL')


	file.setCreator (f, 'LAND')
Edit the first line to match the path on disk to the guest database on your computer.
Server Administration
Frontier Admin website
The Status Center flows down the right edge of the Admin site home page. It lets you see at a glance what kind of traffic the server is getting, and what disk and memory resources Frontier is using. In addition, Tools from UserLand and other developers can add their own information to this display.
The Admin website includes a site-level overview which you can use to get detailed information about any Manila site on the server.
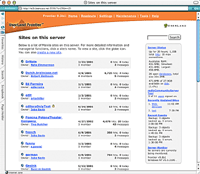
The site-level administrative pages also include managerial functions for making backups, moving sites around, installing and un-installing sites, and managing the search engine index for a given site.
The Settings pages in the Admin site are for managing global settings that apply at a server-wide level. You can add or remove administrative users, set security settings, configure the search engine, set up virtual domain hosting, manage WebEdit users and objects, and configure backups and logging functions.
The Readouts page provides an overview of server activity. It includes recent log entries for all enabled server logs, an overview of open databases, and hard disk status. From the Readouts page, you can click through to the full version of any log.
The Maintenance page provides commonly used server-maintenance functions: You can update your software, make immediate backups of your sites, and reset or re-index the search engine.
Site-level administrative pages
From the Frontier Admin site home page, you can get a site-level overview to find out detailed information about each Manila site on the server.
The manage site pages also include managerial functions for making backups, moving sites around, installing and un-installing sites, and managing the search engine index for a given site.
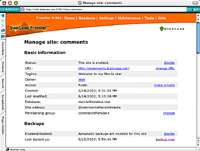 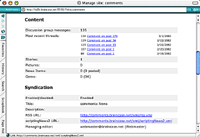 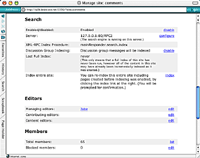
Disable site
You can disable a site so the server will stop serving the site, but it will still be listed on the Frontier Admin site home page. Disabled sites can be enabled at any time, by clicking the enable link on the Manage site page. You also have the option of deleting a site from your server.
Change URL
Sometimes you might make a change on a server that requires changing the URL of an existing Manila site. You can change the URL the site is served using this command.
Say, for instance, there was a DNS change. Your server is no longer abc.myserver.com, it's now xyz.myserver.com. But the Manila site you're running still thinks it's on abc.myserver.com.
In other words, the site was at http://abc.myserver.com/MyFirstSite/, but now it's at http://xyz.myserver.com/MyFirstSite/.
You want your Manila site to know that its base URL has changed. You want all the links fixed.
Make private
You can restrict a Manila site to just Contributing, Managing and Content Editors. With this setup, only two Web pages are available to anyone other than Editors who have logged in. One is a plain Web page informing the visitor that site access is restricted to Editors only (the name and content of this page can be changed). The second accessible page is the standard Manila login page.
You can make an Editors Only site public again, by clicking the make public link on the Manage site page.
Move site to new database
You can use the move command to move the site to an existing database or create a new one to move the site to.
Change membership group
Normally when a new Manila site is created, it gets its own membership group. This means that for every site, you have to become a member and login.
You can setup a site to use an existing membership group so that you can login once and your a member of all the sites that share that membership group.
Note: Changing the membership group of an existing site doesn't attempt to reconcile the membership data between the two sites.
Backups
You can enable/disable the nightly backup of the Manila site from this page. Even if you don't enable the nightly backup the site, you can do a one time backup by clicking the backup now link.
Hosting
You can configure the setting to enable hosting to create new Manila sites.
Enable search
After you have enabled the search engine from the Settings page on the Admin site, you can enable searching for your Manila site on the manage site page. Editors of the site can also enable search from the Search prefs page for the site.
On the manage site page, you can also enable indexing of the discussion group and run a manual index of the entire site if the search engine hasn't always been running.
Editors/Members
The Editors and Members section of the manage site page allow you to jump to the Editorial Prefs and Admin page for the site to manage editors and members of the site. You need to be signed up as a Managing Editor to view the page and make any changes.
Plugins
You can check what plugins are installed and if they are enabled/disabled on the site.
Stats
Listing of hits all-time and today and most read messages.
Getting updates to Frontier and Manila
In between releases of Manila, we release new features and bug fixes via the root updates process. Only those parts that have changed since the last updated will be installed.
If you want to update, go to the Frontier Admin site and open the Updates page and click the Update Now button.
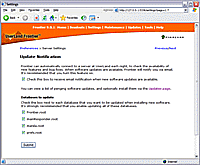
When Manila receives notification of new updates, you can configure the server to send an email to the webmaster email address with a list of new features and bug fixes. This is configured on the Update Notification settings page in the Frontier Admin site.
Reviewing new updates
If you have logging of root updates enabled, you can view all root updates downloaded today on the Root Updates Log page on the Frontier Admin site.
Major versions
When we release a new version, we also release a package that upgrades an existing installation of Frontier to the new version. You can follow the UserLand Product News website for notice of these releases.
Backups
Frontier includes a built-in backups system to make nightly backups of your Manila sites, guest databases and discussion groups.
You can configure the backup settings on the Backups settings page in the Frontier Admin site.
Manila site backup
The Manila site backup feature lets you choose important sites to be backed up nightly, using the same backup system used at UserLand.
Backups are incremental: Sites for which backups are enabled will have any new or changed parts backed up every night, and an email report will be sent to the server administrator(s).
| Manila Backup Notification |
|
| Website |
The name of the website that is being backed up. |
| Files |
The total number of files in the Manila site backup folder. |
| Backed up |
The number of files backed up for new or changed objects in the Manila site table. |
| Size |
The size of the backed up files. |
| Errors |
The number of errors encountered during the Manila site backup process. |
Any site, even ones which aren't set for automatic backups, can be backed up at any time through the administrative page for the site.
By default, the Manila site backup are saved to a sub-folder of the Manila program folder called "Manila Backups" and can be changed on the Backup settings page. You can also configure the email address where backup notifications are sent to and when the backups process should start.
Guest Databases backup
Manila uses guest databases to store information about your server and Manila sites. There's a preference to save all changed databases every minute, it's strong recommended that you leave this backup option enabled.
You can also setup Manila to make a nightly backup of all the databases used on your server.
Any sub-folder from the Guest Databases\ops\backups folder can be deleted after you have backed it up to another location or to free up disk space.
Discussion group archives in XML
Manila will backup all discussion group messages in XML for your Manila sites to the Discussion group archives folder.
Unless you need to access the discussion archive files in the XML format, you can leave this feature disabled. Your discussion groups will be backed up if you enable the Guest Databases backup and will also be backed up for any Manila sites with backups enabled.
Server maintenance
There are a few maintenance tasks that you should follow with your Frontier/Manila server.
Compacting root files
As a Frontier object database file, Frontier.root, gets older, freed disk blocks are added to an internal list called the "avail list." As this list gets long, disk-based operations can slow down significantly.
You can periodically freshen your database with the Save A Copy command in the File Menu on a regular basis or when you notice a guest database is quite large (a few hundred MB).
First, shut down the Web server by choosing Web->Web Server->Stop while you compact the root files.
Make sure Frontier.root is the front most window by choosing Window->Frontier.root.
Then choose File->Save A Copy and save Frontier.fresh.root to the Frontier folder. Take a short break. When it's finished, quit Frontier, move Frontier.root to a safe place as a backup. Rename Frontier.fresh.root to Frontier.root. Relaunch Frontier and turn the Web server back on. Things should run faster now.
You can delete the original Frontier.root. The new one contains all the information in the old one. But if you have the drive space, you can just keep the compacted root as a backup.
To compact other root files in the Guest Databases folder, like the config.root file in the apps sub-folder. Follow the same instructions as compacting the Frontier.root file, but first choose Window->config.root.
Other common files that you should compact are aggregatorData.root in the /ops/datafiles/ folder, members.root and discuss.root in the /ops/ folder and any manilaWebsites.root files in the /www/ folder.
Tip
You can use this sample script to compact all open root files in the Guest Databases folder and save them to a sub-folder of the Frontier folder called "Saved Databases". Remember to turn off the Web server when compacting the root files.
You can then exit Frontier and replace the root files in the Guest Databases folders with the compacted root files. It also might be a good idea to make a backup of the existing Guest Databases folder before copying over the compacted root files.
If you want to get an idea of the condition of your object database, enter window.dbStats () into the Quick Script window. A report appears in a separate window. The third line in the stats window tells you how many nodes are on the avail list. The fewer the better.
Save A Copy will also compact the file, squeezing out all the unused space between disk blocks. The resulting file will be smaller than the original file.
Log and backup files
It's recommended that you leave enough free drive space on the drive Frontier is installed.
If you have enabled any of the logging and statistics or nightly backup of guest databases on your server and you have limited hard drive space where Frontier is installed, you may need to delete or move these files periodically.
Log files are by default saved to the Guest Databases\ops\logs folder. And backup of guest databases are saved to Guest Databases\ops\backups.
Backups
You should make periodic backups of your Frontier folder to save your server and Manila site data to another machine or other media. If you want to backup the entire Frontier folder, turn off the Frontier while you copy the contents of the folder.
If you have enabled the option to backup your guest databases nightly in the Frontier Admin site, Frontier will backup the databases in the Guest Databases folder (except for the Data Files sub-folder) to the Guest Databases\ops\backups folder. You can leave Frontier running, while backing up the contents of this folder.
You can also enable the Manila site level backup from the site-level administrative pages, which provides another layer of backups that saves the contents of a Manila site to a different folder. It exports the contents of the Manila site table to individual files for each object in the table. You can either have this happen nightly or just on a one-time basis.
Flipping the Manila Sites Database
Covered in the User's Guide, you should flip the Manila site database file periodically so your sites have room to grow (adding new stories, pictures etc.) before the file reaches the 2GB database size limit.
Membership
Normally when a new Manila site is created, it gets its own membership group. This means that for every site, you have to become a member and login.
When sites share a membership group, this means that you can join once, login once, and you're a member of all the sites that share that membership group.
Sharing a membership group
Perhaps you're building an intranet with Manila. You might create lots of sites, and give each department in your company control over their own site.
However, most people won't think of the intranet as lots of small sites, they'll think of it as one big site. They'd be right to think so. And they'd be right to not want to sign up again for each site.
Better to sign up just once -- but be a member of all the sites.
Or maybe you're hosting websites for a school, or you're hosting weblogs for all the people in your non-profit organization. Maybe your company's Web presence is made up of many Manila sites.
The idea is to make it so people don't have to sign up again every time they turn around. If you have such a need, then this feature is for you.
Steps
1. Open the Admin Site and at the top of the page click the Settings link.
2. Click the Hosting link.
3. Check the box so new sites to share their membership group with the hosting site.
Important: If you use shared membership, you should not disable or delete any site that is using shared membership.
Existing sites
If you open the manage site page for the site from the Frontier Admin site, you can change the membership group used by the site.
How it works
When a new site is created, it uses the same membership group as the site with the Create-a-Manila form.
In addition, the URLs for logging in and out, viewing preferences, and viewing membership profiles point to the site with the Create-a-Manila-Site form.
This way there's just one place for logging in and out, one place to set membership prefs, one place to view profiles, for all the new sites that are created.
This all happens automatically.
See also
members.root
Hosting
The hosting preferences let you choose the setup options for new sites on your server.
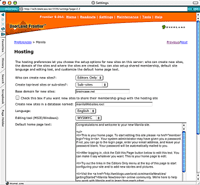
Who can create new sites
By default, anybody can create new Manila sites. But you may prefer to limit this to the editors of the Create a Manila Site.
If you'd rather restrict who can create sites even more, you can make it so that new sites can only be created via the Admin site. All you have to do is remove the Create a Manila Site macro from your hosting site. (Go there in your web browser, click Edit this Page, delete the macro.)
Top-level sites and sub-sites
If you want top-level sites -- sites of the form siteName.myserver.com -- then use the popup menu to switch to top-level sites.
Important note: top-level sites won't work unless you have a * DNS mapping pointing to your server. What this means is that anyName.myserver.com will resolve to the IP address of your server.
When changing from sub-sites to top-level sites, you must change the base domain.
It should be of the form .myserver.com. Sites will be created at siteName.myserver.com. Note the period in front of the name.
To switch from top-level sites back to sub-sites, it's important to switch the base domain back to a domain of the form www.myserver.com. (Use the actual domain name of your machine, of course.) Note that there is no period in front of the name.
Shared membership
When sites share a membership group, this means that you can join once, login once, and you're a member of all the sites that share that membership group.
If you only want a certain set of sites to share membership, you can change the membership for an individual site on the manage site page.
Create new site in a database named
When a new Manila website is created, it's stored in a database containing other Manila sites. By default, this database is manilaWebsites.root.
As manilaWebsites.root grows, it's a good idea to "flip" -- to start using another database for new Manila sites.
One of the reasons do this is that there's a 2GB limit on the size of databases. You should flip well before you reach that limit, so your sites have room to grow.
Create a new guest database via the File menu. Give it a name like manilaWebsites2.root.
With the new database in front, choose Add to user.databases... from the Server menu. This will ensure that the database is opened automatically when Frontier starts up.
Then change the name on the Hosting preferences page.
New site defaults
You can also set the default site language, editing tool and customize the home page text that will appear on all new sites.
News Items sites
You can also configure Manila to create News Items sites by default. In addition, you can edit the default text of the first news item in new News Items sites
Setting up additional hosting sites
You can configure additional hosting sites from the manage site page in the Frontier Admin site for any existing Manila sites.
Configuring hosting
In the manage site page for the Manila site, scroll down to the Hosting section of the page and click the "configure" link.
From this page you can enable hosting on the site and edit the hosting preferences. First, check the box at the top of the page to enable hosting.
You can also choose who has permission to create new sites: anyone that visits the form or only editors of the Manila site.
Where sites are created
You can either have Manila create new sites as sub-sites or top-level sites. Sub-sites whose URLs take the form http://www.myserver.com/mySite/ or top-level sites, whose URLs take the form http://mysite.myserver.com/.
You can also configure the base domain to use when creating sites using this hosting site.
Each hosting site can specify its own database in which to create new sites. This makes it easy to keep different communities separate in the event you need to move them from one server to another.
Appearance
You can select the default language and editing tool used for new sites created. You can also enable shared membership of the hosting site's membership group for new sites.
Email confirmation
Hosting sites can now optionally require email confirmation before new sites are created. Email addresses for site creators can also be restricted to a specific domain. These settings make it possible to validate the email addresses of site creators and create managed communities in which only people with email addresses in a given domain can create sites.
Default text
The default homepage title and text can be set for non-news items sites. The title and URL for the first news item on a page are also configurable which applies when news items are enabled by default for Hosted sites.
Add the Create a Site form to your site
In your web browser, open your site, and login as the managing editor, if you aren't already.
Click the Edit this Page button on the homepage.
Replace the text of the homepage with this macro:
{hostingSuite.createSiteForm ()}
This places the create-a-site form in the homepage.
Click the Post Changes button.
You should now see a create-a-site form on the homepage of your site.
Notes
You don't have to put the create-a-site form on the homepage. It can be on a story page, or even in a discussion group message.
Sub-sites may only be created at the top-level of a given domain. You can't use the create-a-site form to create sites with URLs like http://myserver.com/users/newSite/
Static rendering
Manila server managers have control over the static rendering feature which can render Manila site pages to disk or a FTP server. You can enable it or disable it, and you can specify where sites write their rendered pages.
Furthermore, you can also set up special cases, so that, for instance, one site may render to a different static server than the rest of the sites.
Setting up a static server (render to hard disk)
Setting up IIS isn't the same as setting up Apache, which isn't the same as setting up WebSTAR -- and so on. And different operating systems have different ways of doing file-sharing.
If you don't have a static server already, one of your main concerns should be file-sharing -- your Manila server needs to be able to mount the static server as a shared volume. If you're using all Macintoshes or all Windows, file-sharing should be pretty easy -- but note that it's possible to use mixed environments in just about any combination, though sometimes use of additional software such as Samba may be necessary.
On your Manila server, if it's Windows, you should do a Map Network Drive so the static server shows up as hard drive with a letter. If your Manila server is a Macintosh, you should set the machine to re-connect to the hard drive on start-up. The name of the hard drive should be unique on your Macintosh system -- if your Manila server's hard drive is named Macintosh HD, don't also name the static server's hard drive Macintosh HD.
Enabling static rendering
From the Frontier Admin site, choose Settings->Static Files, see the section on Static Rendering.
If you choose to enable static rendering for all sites on your server, check the box. If you're only going to enable it for special case sites, don't choose to enable it. You'll be able to enable it for those sites only. (See the headline below, "enabling for certain sites only.")
The next three items ask you to set the folder and URL used for static rendering to the file system. The actual folders and URLs used by Manila sites are calculated based on these folders and URLs. For instance, if your base URL is http://www.staticserver.com/, and you have a Manila site at http://my.manilaserver.com, then the URL of the static version will be http://www.staticserver.com/my/. Similarly, if your Manila site is at http://www.manilaserver.com/mysite/, then the URL of the static version will be http://www.staticserver.com/mysite/.
The last item allows you to enable static rendering to a FTP server. The FTP settings are configured on a per-site basis for each Manila site.
See the "Special cases" headline for instructions on over-riding the calculated URL and folder for individual sites.
Enabling for certain sites only
If you want to configure static rendering on a per-site basis instead of making it available to all sites on the server you can follow these instructions.
In this scenario, set up your static rendering server prefs as above, but choose not to enable it for all sites on your server. Instead, you can enable it for specific sites.
In Frontier, jump to the site that gets static rendering turned on. Expand the #newsSite table. Look for a boolean named flStaticRenderingAlwaysAvailable. If it's not there, create it.
The boolean should be set to true. This means that the static rendering feature for this site will always be available, even if you have it turned off for sites in general.
Special cases
It's entirely possible that the folder and URL for static rendering calculated by Manila is not what you want for a specific site. Here too you can make changes for individual sites.
To change the folder and URL for a site, first make sure the site has turned on static rendering via the Rendering site prefs page. Then jump to the site in Frontier. Expand the #newsSite table, then expand the staticSite table. Then expand the #ftpSite table that's inside the staticSite table.
Here you can edit the folder and URL. Remember that you're rendering to a static server, and what you type here must match reality. For instance, if you set the URL to be http://www.mysite.com/, and the folder to Server HD:WebSTAR:mysite:, then you need to have created a virtual host in WebSTAR for www.mysite.com, the virtual host must point to the Server HD:WebSTAR:mysite: folder, and the DNS entry for www.mysite.com must be the IP address of your WebSTAR server. Similar rules apply no matter what static server you use.
Notes
If you change the folder and URL preferences in the Frontier Admin site, existing sites are unaffected -- they retain their current folder and URL preferences. The reason for this is because you may have customized the folder and URL preferences for any given site, and Manila should not change your customized settings. Or you simply may want to switch to a different static server for new sites.
To change the folder and URL for sites that are already doing static rendering, it's necessary to follow the instructions above -- see the "Special cases" headline above.
You can also do write statically-rendered files via methods other than file-sharing. Using fileWriters in the terminology of Frontier's website framework -- are also available: you could write files directly to a Frontier object database. Or you might write a custom fileWriter that writes to a SQL database, or that writes via XML-RPC, and so on.
If you write macros for use on Manila sites you're hosting, you should be aware that your macros may be used in sites that get rendered to disk. During static rendering many of the parameters you expect in the page table may not be there. For instance, there is no adrMemberInfo, there is no client IP address, and so on. Your macros have a simple way of detecting whether or not they're running inside the context of a static rendering: just call manilaSuite.staticRendering.isStaticRendering (). If it returns true, this page is being built by the static rendering feature.
Static pictures
Some servers are optimized for brains -- they're good at serving dynamic sites. Frontier is such a server. Other servers are optimized for brawn -- they're good at serving static files from disk. Apache, WebSTAR, IIS, and others are examples.
When serving pictures, you don't want a smart server -- you want a server like Apache that excels at serving pictures.
You can tell Frontier to write pictures to disk, to a shared volume, where the pictures can be served by a server optimized for serving picture files.
It's easy to set up, too. If you have a static server already set up, and a file-sharing connection, all you have to do is tell Frontier where to store the pictures.
Enabling Static Pictures
From the Static Files settings page in the Frontier Admin site, the first setting asks if you want to write pictures to disk. If yes, then Frontier will write pictures to disk as they're uploaded to a Manila site.
The next setting asks for the location of the folder where pictures should go. Frontier will create a folder inside this folder for each site, so each site's pictures are stored separately.
The last setting asks for the URL of the folder specified above. The URL should begin with http:// and end with a /.
Try it out
You need to have a static server already set up, of course. And you need a file-sharing connection between the machine running Frontier and the machine running the static server. The details of setting up a server and a file-sharing connection vary -- if you have any trouble with either task, consult the documentation for your static server and for your operating system.
Then set up your prefs in the Frontier Admin site. Then go to a Manila site on your Frontier server and upload a picture. You can verify by looking on disk to see that the file was indeed written out. View the source of the pictureViewer page to see the URL to the image: it's not a /picture$ URL that you're used to, it's now a URL to a file on your static server.
The important thing to know that your users may not notice a change at all -- unless they notice that their site seems faster, or unless they actually notice that URLs for pictures are different. From the point of view of the Manila user, nothing fundamental has changed, one still uploads pictures the same as before and embeds pictures the same as before.
Gems
The Gems feature allows editors to upload files of any type -- movies, sound files, zip files, spreadsheets, etc. -- to their Manila websites. These files will be written to disk, and are intended to be served by a static server like Apache or IIS.
Configuring the Gems feature
Uploaded files are stored on disk. You specify the location of the files from the Static Files settings page in the Frontier Admin site.
It's much like static pictures, in that you can choose to enable it or disable it, set a global folder, set a global URL.
Unlike pictures, you also set a limit, how much space on disk an individual site may use. The number is in megabytes -- but you can use decimals. 1.0 is the default, but you could make this 3.75 or 10 or 135.28 or whatever you want.
Three options
There are three most common configurations. Before getting started, decide which one applies to you.
1. Gems will be served by Frontier, from a sub-folder, such as www.mydomain.com/files/.
2. Gems will be served by Frontier, using a virtual domain such as gems.mydomain.com.
3. Gems will be served by another webserver running on another machine.
If you're using a server running on another machine, you'll need to make sure file-sharing is set up, so Frontier can read and write files to that other machine's hard drive.
Serving Gems from a sub-folder of your website.
This is choice #1 -- you're serving Gems from a sub-folder, such as http://www.mydomain.com/files/.
In the Domains settings page in the Frontier Admin site, you can add a new path to /files/ and to the mydomain.com domain or default that has a path as the path to the files folder, for example, C:\Frontier\Guest Databases\www\myStaticSite\.
This tells Frontier that, when a URL begins with http://www.mydomain.com/files/, Frontier will look in C:\Frontier\Guest Databases\www\files\.
It's important to note that we used "files" instead of "gems" because using "gems" for the name would render the Gems feature unusable. This is because the URL for the Gems list page in the top-level Manila site is http://www.mydomain.com/gems/. When picking a name for your Gems folder, use a name that is not the path to any pages in your Manila site.
Serving Gems using a virtual domain
This is choice #2 -- serving Gems from Frontier using a virtual domain.
You can also set this up from the Domains settings page, just create a new domain and for the object use the path to the files folder. Examples might be gems.mydomain.com or files.mydomain.com.
This should be identical to the path you entered in the Static Files settins page in the previous section. Remember to include the trailing slash.
Serving gems using a server other than Frontier
This is choice #3 -- serving Gems from a server other than Frontier.
In this case, Gems are still uploaded via Manila, via Frontier -- but another server such as Apache, WebSTAR, or IIS serves the files. One reason to do this is that Frontier is optimized for serving data from the object database, rather than from disk, while many other servers are optimized for serving files from disk.
You will need to set up file-sharing: the hard drive of the external server should be mounted on the machine running Frontier. This is necessary because Frontier needs to be able to save incoming files to that server's hard drive.
For example, if you want to use IIS on a second machine, mount the IIS server's www folder as disk E:, and tell Frontier to save files to E:\\gems\\ instead of to the local disk.
In this case, you don't need to set up anything in the Domains settings page -- but you do need to configure your external server. Consult the documentation for that server.
Per-site gems settings
You can over-ride the global settings for an individual site. For instance, you might not want to enable gems for everybody, just for a specific site. Or you might want to give a specific site more space, or set a different folder and URL.
In the Frontier application, window go to the Manila site table. Expand the #newsSite table, expand the gems table, expand the prefs table.
If you want to specify whether or not gems are enabled for this independently of the global server setting, create a new boolean value in the table called "flEnabled" and set it to true.
If you want the site setting to over-ride the global setting, create a new value called "limit" to a number to use as the number of bytes (bytes in this case, not megabytes) that this site may use on disk. To create the value choose Table->New Scalar->Number
You can create new values called "folder" and "url" if you want to over-ride the global settings for folder and URL. When setting folder and URL for a site, they point to the actual folder and URL for this site. It's different from the global setting, where you set a folder and URL -- but then each site gets a subfolder that the server calculates. The values are both strings.
Notes
If you restrict site access for a Manila site using the editor's only preference, note that the files in the site's gems folder doesn't use the site's membership system so access to the files isn't restricted by this preference.
Domains
You can manage virtual domain hosting on the Domains page. Virtual Domain Hosting is a common feature of modern webservers. Here's how it works: When a web browser requests a page from the server, the request includes a header which specifies the domain name the page is being requested from.
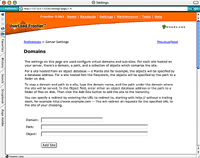 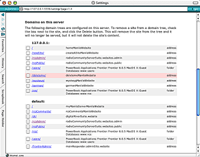
Since the browser sends the domain along with the request, it's possible to serve different content, based on what domain name the request is directed to. In short, one webserver can serve many different sites, even though all of the sites are served on the same IP address, over the same physical connection to the Internet, and using the same server software.
Adding a domain
Domain is the domain name for virtual hosting, for example if Frontier serves both mysite.myserver.com, and myothersite.myserver.com, then you can determine which domain will host the site by typing the relevant domain name. Another valid value is default, which means the site will be served for any virtual domain that's not explicitly defined in config.mainResponder.domains.
Path is the relative path for the site underneath the domain, so for example if you want to install a site at http://www.myserver.com/mysite/, then enter www.myserver.com for the domain, and /mysite/ for the path.
Object may be any of the following:
1) The address of a website in any database, for example myManilaSite, or myToolWebsite.
2) The path to a folder on disk, for example, C:\Frontier\Guest Databases\www\myStaticSite\
3) A redirect, which takes the format, http://www.userland.com -- Which would redirect to the UserLand hompg, for any request that comes in at the domain and path you specified.
See also
xml Site Tree
config.mainResponder.domains
Security
On this page, you can configure Frontier's global security settings -- what type of authentication to use for the Admin website, whether directory/script listings and running scripts are allowed by default (which can be overridden on a site-by-site basis), whether to restrict access by client IP address and to use an encrypted cookie format.
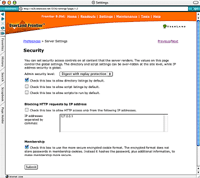
Admin security level
The Admin website uses HTTP Basic authorization. You can instead use varying levels of digest authentication, which is stronger. (For technical details, see HTTP Authentication Schemes.)
Not all browsers support digest authentication, so it's not enabled by default.
There are four security levels, Basic only, Basic or Digest, Digest Only, Digest with replay protection.
If you can't access the Admin site in your browser after changing the security level, you can reset the security level to Basic only. In the Frontier application, jump to config.mainResponder.prefs. Set securityLevel to 0.
Directory and Script Listings
Directory listings will render listings of tables and folders.
Script listings will display the source code of scripts that aren't rendered.
Scripts to run will run scripts when the request points to a script object that isn't rendered.
Blocking HTTP requests
You can choose to block all HTTP requests to your server except for the specific IP addresses listed in the text box.
Membership
The encrypted format does not store passwords in membership cookies. Instead it hashes the password, plus additional information, to make membership more secure. By default this setting is enabled (For technical details, see Encrypted Cookie Format.)
Themes
When you've found a Manila site with a theme you want to install on your server, first download the theme file, then use the Add File page in the Frontier Admin site to place it in the /ops/themes/ folder.
Or you can design a new theme using a Manila site and use the Import Theme form on the Themes Settings page in the Frontier Admin site.
About theme files
Theme files are Frontier files, they're exported tables. The themes loader first validates the table structure of the file to make sure it's a valid theme file.
Then it performs security checks. It makes sure there are no script objects in the theme file. It makes sure that all the macros called in the various templates are legal macros on your server. Any illegal macros are neutered.
config.manila.themes
Themes are stored in config.manila.themes. The name of the theme file matches the name of a table in config.manila.themes. (Minus the .fttb suffix.)
The name of a theme's table is usually similar to the name that's displayed in the themes site prefs page. However, it may not be the same. The theme's display name is stored at [theme].info.displayName.
You can edit your installed themes directly: config.manila.themes is your space.
Disabling a theme
You can disable a theme by going to the Manila > Themes preferences page in the Frontier Admin site. Then the theme won't appear on the change Themes pages on Manila sites on your server.
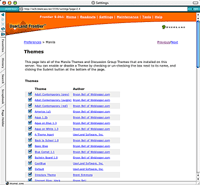
You can delete a theme entirely by deleting its table from config.manila.themes and the /ops/themes/ folder.
The Default theme
A theme named Default is required. If you want only one theme enabled, make it the Default theme. As with other themes, you're free to edit it. If you want every site on your server to start with the same theme, this is how you do it.
manilaData.themes
This table contains UserLand-supplied themes. Themes in this table are automatically copied to config.manila.themes.
Don't make changes to manilaData.themes, make changes in config.manila.themes. If you want to disable a UserLand-supplied theme, set flEnable to false for that theme's table in config.manila.themes.
Creating a theme
Any Manila site can be clone-able -- that is, you can make it a theme.
Making a site clone-able is a three step process. First edit your templates based on the guidelines below. Then give your theme a name and a description. Then let people know about your theme: put a download link on your site so people can download your theme file.
Guidelines for making a site clone-able
What follows is a list of changes to make in your template and sub-templates in order to make your site clone-able.
Pictures and Gems URLs
When referring to pictures, gems, or other external files in your templates, use hard-coded, absolute URLs rather than relative URLs or glossary entries. If your pictures reside on a static server (such as static.userland.com), use those URLs rather than picture$ URLs. The pictures and gem files are not themselves copied as part of your theme.
Also avoid using the pictureRef macro, again because your pictures are not copied as part of your theme.
Shortcuts
Like pictures, shortcuts are not copied as part of a theme. Use full URLs.
Home page links
When linking to the home page in your main template, use the homePageLink macro. The reason for this is that the home page URL needs to be calculated, it's not necessarily the same for every site. You can't count on / working as a relative URL, because some sites are sub-sites rather than top level sites.
The homePageLink macro takes four parameters, only the first of which is required. They are lineText, style, onmouseover, and onmouseout.
includeMessage and Modules
Avoid using the includeMessage macro in your template, as you wouldn't know what message number to use. Discussion group messages are not copied as part of a theme.
Instead, you can use the module macro in your template which allows you to use the includeMessage macro using a module name instead of a number.
After you create a theme, you can open the .fttb theme file in Frontier and create a new top-level table called Modules.
Each module is saved as a sub-table in the Modules table. The name of the sub-table is the module name. Each module table can specify the default text and title used for the module.
text -- wp text object which specifes the default text
title -- string that is the title of the message the stores the module text. You don't have to use the module name here.
Default pages
Theme can also be customized to include default pages that are automatically created for new sites along with customizing the navigator links and site structure when the theme is applied.
With a theme .fttb file, you can open it in Frontier and create a new top-level table called Pages.
Each default page is saved as a sub-table in the Pages table. The name of the sub-table is the page name. Each default page table can specify: flHomePage, flStory, text and title.
flHomePage -- boolean which is set to true if this page shoudl be used for the home page
flStory -- boolean if the page should be posted as a story or not
text -- wp text object which specifes the default text.
title -- string that is the title of the message the stores the page text. You don't have to use the page name here.
Default pages: custom navigator links and site structure
In the Pages table, you should create two new values: navigator and siteStructure.
navigator -- wp text object that stores the default navigator links XML outline.
siteStructure -- outline object that stores the default XML site structure .
In the navigator outline, you can include the siteUrlPrefix for items.
<item name=Home pagename="[siteUrlPrefix]/"/>
<item name="About" pagename="[siteUrlPrefix]/about"/>
In the site structure, you can include pseudo macros to point to the default pages. If you had a default page called About, you can link to it by using the following entry:
<story name="About" pathname="about" msgNum="[aboutPageMsgNum]"/>
The prefix for MsgNum should be the title of the default page. eg. if the story was called About Us the msgNum value would be About UsPageMsgNum. The page name isn't case sensitive.
Creating templates using WYSIWYG design tools
If you want to use a tool like DreamWeaver or GoLive, you can create a mockup of your Manila template in that tool and then come back and insert the different required Manila macros. eg. replace the section where with the mocked up page content with the corresponding {bodytext} Manila macro.
Other macros
See the list of Basic Macros to know what macros you can use in your template and which macros are non-standard. For instance, your site might run on a server that runs the affiliate software -- but your theme might be used somewhere where that's not available. So avoid using non-standard macros unless you know where your theme will be used.
Sub-templates such as the News Day Template have additional macros available not listed on the Basic Macros page. Refer to Manila's user interface and the User's Guide if you have questions about what macros are standard in the various sub-templates.
Validate HTML and CSS
Many people prefer standards-compliant HTML and CSS. In some organizations it's required. It's a very good idea to validate the HTML and CSS in your site once you're ready for it to be a theme. See the W3C's on-line validation service.
Tip
You may find that you don't want to make your existing site clone-able. Maybe you don't want to give up using the includeMessage macro, or maybe you're using the affiliate macros on your site.
If so, you might want to make a new Manila site turn that site into a theme.
Configure your theme
Now you're ready to make your theme available.
On the Advanced page is a new section called Theme.
Click Yes that you want your site to be clone-able.
Choose a Theme name. It can be the name of your site, or it can be something else. Shorter names are better, but try to choose a unique name.
Type the author's name and email address. By default it's the Managing Editor of the site.
Type a description for your theme. Answer, briefly but well, the main question people will have: What does your theme look like?
When you're ready, click the Submit button.
You can go back and edit this information any time you want to. You can even change your mind and say you no longer want your site to be clone-able.
Let people know about your theme
Some background: here's how your theme becomes available to other sites.
First, a Frontier server manager downloads your theme file from your site. Then the server manager installs the theme file on his or her server. At that point, your theme is available to all the Manila sites on that server.
So what you need to do is communicate with server managers who visit your site. You need to tell them where to download your theme file.
The downloadTheme macro is what you use: it creates a link to your theme file, so a server manager can download it.
Use it like this: You can download my theme {downloadTheme ("here")}. Whatever is in quotes is what appears as a link.
When someone downloads your theme file, that theme file is created on-the-fly from the current settings in your site.
HTTP logging
You can monitor HTTP traffic on your server and you can also setup Frontier to log to a text file using a format that can be analyzed by most logfile analysis programs.
The log is stored in a guest database. There's a new one each day. Look, in the Window menu, for a database whose name is the current date, something like 2000-08-01.root. Look for a table named mainResponder inside that database.
Steps
1. Open the Admin Site and at the top of the page click the Settings link.
2. Click the Logging and Statistics link.
3. Check the box to log every HTTP request.
4. With logging turned on, you can see the most recent requests on the Readouts page. You can click the HTTP Server Log link on the Readouts page to see more recent HTTP requests.
Logging to a text file
You can log to a text file instead, or also, if you prefer. Text file logs are in Common Log format, which can be read by stats analysis programs such as Analog.
To enable logging, from the Frontier Admin site open the Logging and Statistics settings page. Check the box to "log HTTP requests in common log format".
There are also preferences if you wish to use the common log date format (most log analysis programs will want this preference enabled) and if you want virtual hosts, referers and user-agents data saved to the log file.
The logs will be saved to a sub-folder of the /ops/logs folder called "Common Log"
There's a new file generated each day. The file name format is yyyy-mm-dd.txt (eg. 2000-07-11.txt).
Customization
You can generate logs in a custom format, any format you wish, even formats you invent, if you're willing to do some scripting. The user.webserver.postFilters table contains scripts that get called for every request. They run after the request has been handled, so you know everything about the request.
You'll note that, if you have Common Log logging on, there's a script there called commonLog, that calls webserver.postFilters.commonLog.
If you want to do custom logging, start by copying webserver.postFilters.commonLog to your workspace table. Edit it to output the log format you prefer. (You may also want to change the name of the folder it writes to.)
Add a script in that table that calls your custom logging script at user.webserver.postFilters.
Managing plug-ins
You can install Manila plug-ins to bring new features to the sites you host. Server managers can configure Manila plug-ins to be available or unavailable by default, to all or some sites on the server. Settings can be overridden either per-plug-in, or on an individial site-by-site basis.
Plug-ins Settings Page
This feature gives server managers more granular control over plug-in availability, and is especially useful on servers with users of varying degrees of experience. Experienced users can have full access to plug-in functionality, while more novice users can be limited at first to basic Manila functions.
On the Plug-ins settings page, you can configure two global settings: to make all plug-ins available by default and to enable #isVisible scripts for registered plug-ins.
You can also configure each installed plug-in: to Visible, Invisible or to use the global visibility preference.
Configuring plug-ins on a Manila site
In addition, server managers now have the ability to enable or disable plug-ins for a given site, via the Frontier Admin website, without having to first log in to the Manila site.
Scroll down to the Plug-ins section of the page and click the settings link to the right of the plug-in you want to configure.
Legal Macros
Most Manila sites are dynamic sites -- the pages are rendered from text, templates, and script code that resides on your Frontier server. When a web browser requests a page from the server, Manila pulls all the pieces together, and churns out a page of HTML which is returned to the browser.
Pages in Manila sites can contain macros. Macros make it possible to include calculated elements in your web pages and templates, and many of Manila's more powerful features build on macros.
Since Manila's deep scripting language has the ability to modify just about anything on your server, we provided a mechanism for specifying what macros are "safe". Any non-safe macros are automatically "neutered" -- their code won't be executed when the page is rendered.
[Macro error: Can't link to "macrosSettings.gif" because it doesn't exist in the list of shortcuts for this site.]
You can use the Legal Macros settings page to add to the list of safe macros through the admin website. To make a macro safe just type its name and click a button. To remove a safe macro, check a box and click a button. Safe macros are available to all Manila sites on your server.
See also
Safe Macros Guidelines
Database Subscriptions
Frontier has a pair of features which work together to make it easy for multiple to work together on changes to a single database: WebEdit and Subscribable Databases. WebEdit is a client-server application that runs in Frontier, which allows a group of people to work on a database -- a website or scripting project.
The Subscriptions feature allows you to publish a database and let other people to subscribe to changes made to the database. It uses the same mechanism as updates to Frontier.root.
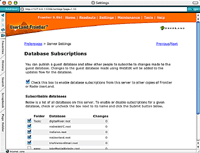
The two features work together -- when a change is checked in to a subscribable database using WebEdit, it's automatically added to the updates stream for the database.
The Database Subscriptions page lets you easily choose which databases you want to enable subscriptions for. Check the box next to the database's name, click the submit button, and you're done. Server administrators can also see at a glance how many parts are in the updates stream for a given database.
Home page updates and most-read sites
You might want to add pages that display the most read sites on your server and the most recent home page updates.
Updates
To create a page listing the most recently updated home pages on your server, create a new story, create a path for it like /updates (or whatever you want), and add this macro to the page: {hostingSuite.viewUpdates (20)}.
The number 20 is just an example -- this number specifies how many updates to show in the list.
Other ideas: you could include this macro on the same page with your Create a Manila Site form. Or you could put it in the template of that site.
See hostingSuite.viewUpdates at Macros.UserLand.Com for more about this macro.
Most Read Sites
Like the recent updates report, this report is generated by a macro.
There are two macros: one displays most read sites all-time, the other displays most read sites for the day before.
Create two new stories. In one, include the most read sites macro by typing {hostingSuite.viewMostReadSites ()}.
In the other, include the most read sites for the day before by typing {hostingSuite.viewMostReadSitesYesterday ()}.
For more about these macros, see Macros.UserLand.Com on hostingSuite.viewMostReadSites and hostingSuite.viewMostReadSitesYesterday.
MIME Types
You can add, edit, and delete MIME type entries used by Frontier when serving static files from disk (Manila Gems, for instance) from the Frontier Admin site.
How to add, edit or delete MIME type entries
From the Server Settings page, choose MIME types. The top section of the page allows you to add a new type. Type in the suffix and the type, then click Add New Type.
The bottom section of the page, the larger section, lists all the current types. To delete one or more, check the box to its left, then click the Delete button at the bottom of the page. (Note: the Delete button isn't shown in the screen shot linked to above.)
To edit an existing type, click the Edit link to its right. A new page will open with space for specifying for its MIME type.
keepFrontierRunning
Some system operators like to relauch all their server software every 24 hours, and it's actually a good practice with Frontier if a server application tends to run low on memory. There are certain policies in the Frontier kernel that cause large tables to remain in memory for the life of the program. So by quitting and relaunching Frontier, you can start fresh, and this can boost the performance of Frontier servers.
You can find the flaunch.exe and keepFrontierRunning.sit files in the \Extras\keepFrontierRunning\ sub-folder of the Frontier folder.
To create a script in the user.scheduler.everyMinute table, choose Main->Jump.
Enter user.scheduler.everyMinute and click OK.
Choose Table->New Script. Enter "keepFrontierRunning" for the script name and click OK.
Paste the code for the script and then click the Compile button.
On Windows, you know the script is running properly after one minute by checking that a flaunch.exe is running in Task Manager and Frontier should automatically relaunch if you quit out of Frontier. If you need to temporarily disable Frontier fron automatically relaunching, you should end the flaunch.exe task from Task manager.
flaunch.exe on Windows
In the keepFrontierRunning sub-folder is a Windows application, flaunch.exe. It's a faceless app that checks periodically to see if Frontier is running, if it's not, it launches it. With this app running, you can safely call fileMenu.quit, from a scheduled script, to cause Frontier to restart periodically.
Here's a script that runs from the user.scheduler.everyMinute table. It quits after 10,000 hits, and only when the server isn't busy executing hourly tasks or serving users. The basic design is to get Frontier to quit when it's not especially busy. No doubt more sophisticated algorithms are possible.
if system.environment.isWindows //make sure the flaunch app is running
	if not sys.appisrunning ("flaunch.exe")
		local (frontierPath = Frontier.getProgramPath ())
		local (frontierFolder = file.folderFromPath (frontierPath))
		local (flaunchPath = frontierFolder + "Extras\\keepFrontierRunning\\Windows\\flaunch.exe")
		launch.appWithDocument (flaunchPath, frontierPath)

if user.webserver.stats.hits > 10000
	if Frontier.countThreads () < 10
		local (day, month, year, hour, minute, second)
		date.get (clock.now (), @day, @month, @year, @hour, @minute, @second)
		if minute != 0 //don't quit while hourly tasks are running
			filemenu.save ()
			filemenu.quit ()
AppleScript on Macintosh
It's a very simple AppleScript that, once every 10 seconds, checks to see if Frontier is running. If not, it launches it.
Here's a script that runs from the user.scheduler.everyMinute table. It quits after 10,000 hits, and only when the server isn't busy executing hourly tasks or serving users. The basic design is to get Frontier to quit when it's not especially busy. No doubt more sophisticated algorithms are possible.
if user.webserver.stats.hits > 10000
	if Frontier.countThreads () < 10
		local (day, month, year, hour, minute, second)
		date.get (clock.now (), @day, @month, @year, @hour, @minute, @second)
		if minute != 0 //don't quit while hourly tasks are running
			filemenu.save ()
			filemenu.quit ()
Using Frontier alongside other web servers
Manila has a built-in web server. Since all web servers listen for requests on at least one IP address, usually on port 80, Manila 's web server will likely conflict with other web servers you have installed on the same computer.
If you're already running a web server you will have to work out the port conflict, since only one server can run on a given port.
There are a number of possible solutions to this problem.
Use separate computers
The easiest option is to run Manila and your other web server on separate machines.
Before you install Manila, make sure to disable any other web server running on the machine or install Manila on a machine on which no other web server is installed.
Use separate ports
Configure Manila to listen on a port other than port 80. This is the easiest solution, but your websites' URLs will have a port number in them, like http://www.yourdomain.com:8080/.
Open the Manila application and stop the web server if it's running, choose Web->Web Server->Stop. Then choose Web->Web Server->Set Port. A common alternate port is port 8080. Enter 8080 and then restart the server.
If you choose this option, you will need to change the URL of any of the default sites to include the new port. Also, update the base domain for new sites on the Hosting settings page in the Frontier Admin website so new Manila sites include the port number in the URL.
If you want friendlier URLs for your Manila sites, you can configure static rendering. This will make Manila write its web pages to a sub-directory of your other server's web folder, and your other web server will serve the sites.
You edit using the port 8080 URLs as above, and your readers see the sites as served by your non-Frontier web server on port 80.
There are disadvantages to this approach: you can't use macros to generate dynamic elements in your pages (elements that change with each page-load), and Frontier will not count page reads on the static server.
Serve static sites with Manila
You can use Manila instead of your other web server to serve your static websites. This approach assumes you're not using CGIs, or SSI.
On the Domains setting page, you can setup Manila to serve pages from disk.
Windows and IIS
Using two IP addresses, you can configure Manila to listen on one IP address and let Internet Information Server answer on the other one.
In Manila, open the user.inetd.config.http table. Create a new string value called ip that contains the IP address that you want Manila to listen on (something like 102.20.78.207). Then restart Manila to complete the setup.
Note: IIS 5.0 and newer releases introduced a new feature called socket pooling that requires some additional steps to get this working.
Mac OS X and Apache
There are two more solutions if your server is running MacOS X and Apache:
1. You can configure MacOS X to use two IP addresses, and then set up Apache to listen on one IP address on port 80, and Frontier to listen on the other IP address, also on port 80. This is a little complicated to set up, but will give nice results.
2. If multiple IP addresses are not an option, and you need to keep Apache running, then it's possible to configure Apache to act as a proxy for requests that are intended for Frontier/Manila. This requires that you do a little work in your apache.conf file (Apache's configuration file), to tell Apache how to forward the requests. There's some additional tips on this setup from the Frontier for Mac OS X site.
The advantage of the second approach is that you get seamlessness between Manila and Apache running on the same IP address (or domain name), but the disadvantage is that depending on how you'll use Frontier, you'll need to add a few lines to apache.conf for each new site you create.
Flipping the Manila Sites Database
When a new Manila website is created, it's stored in a database containing other Manila sites. By default, this database is manilaWebsites.root.
As manilaWebsites.root grows, it's a good idea to "flip" -- to start using another database for new Manila sites.
One of the reasons do this is that there's a 2GB limit on the size of databases. You should flip well before you reach that limit, so your sites have room to grow.
Create a new database
From the Frontier application, create a new object database via the File menu. Give it a name like manilaWebsites2.root and save it to the Guest Databases\www\ folder.
With the new database in front, choose Add to user.databases... from the Server menu. This will ensure that the database is opened automatically when Frontier starts up.
Edit your Manila hosting prefs
Go to the Frontier Admin site and in the Manila Hosting settings page, change the value for the "Create new sites in a database named" textbox t o the name of your new database; its value should now be manilaWebsites2.root (or whatever you named your new database).
Test
From the Frontier Admin site home page, go to the Create a New Site page. Create a new test site.
Then, back in Frontier, look at your new database from the Window menu. Does it contain a new table, with a name that contains the name of the site you just created? It should. You can also check the Manage Site page for the new site on the Frontier Admin site and check that it was saved to the new database.
If there were an errors in testing, go back and make sure you typed the name correctly on the settings page. Make sure the name matches the name of the database.
Moving a Manila website
Frontier stores some information about every Manila website you create. If you want to move a Manila website table from one location to another, you need to make sure that Frontier has up-to-date information about the site, or else the site won't work properly.
Manage site page
Open the Frontier Admin site and open the manage site page for the Manila site you want to move.
Click the "move" link under the Basic Information section of the page and follow the instructions to move the site to an existing database or to create a new database to move the site to.
Manual method
You can also manually move a Manila site table from the Frontier application window.
Find your website's table
From the Frontier application, the first thing you need to do is find the table which contains your website.
Use Control-J (Command-J on Macintosh) to open the jump dialog. Type config.manila.sites into the dialog, and click OK. This opens the table which keeps track of all of the Manila sites on your server.
Find an entry with a name similar to the name of your site. If your site is named mySite, you'd see something like mySiteManilaWebsite. (The name may be longer, but it will start with mySite -- or whatever site's name is -- and it will probably end with ManilaWebsite.)
Jump to the address this entry contains. You can use the Jump command to do this -- copy the address entry minus the leading @ character, and paste it into the jump dialog.
The table that opens is the table which contains your website.
Un-install the website
In the Server menu, select Uninstall Site. This command removes information Frontier may be storing about how to serve your site.
Copy the website to its new location
Open the parent table of your site -- on Windows, press the Backspace key, and on Macintosh, type Command-Shift-Enter. (Enter is the Enter key on the numeric keypad.)
Copy your website's table by selecting Copy from the Edit menu.
Next, open the table where you want to install your website, and paste your website table into that table. You may rename your website table at this point, if you wish.
Don't forget to delete the website from its old location.
Re-install the website
Select Install Site in the Server menu.
You'll see a dialog asking you what URL your website should have.
If you want to change the site's URL, type the new URL into this dialog. If you want to leave the URL the same as it was before, just click OK.
Deleting a Manila website
You can use the procedure above to also delete a Manila site from your server. When you get to the step to make a copy of the Manila website table, instead delete the site table and choose File->Save to finish.
Notes
When moving a site from one location in Frontier to another, always use the uninstall, move, and re-install procedure. This ensures that all the data which Frontier uses to serve your website remains intact.
It also ensures that links in your website will continue to work properly, even if you have changed the URL of the site itself.
Customizing Manila
Manila supports several different types of customization, from appearance to behavior. This page outlines the different approaches.
Why not edit manila.root
It's not a good idea to make changes to manila.root. Your changes may get over-written by our changes.
And if you do find a way to protect your changes from being over-written, other breakage is possible. We may change another script that depends on a change to a script you've changed.
There are other ways to customize Manila.
Themes
Themes specify the appearance of a Manila site -- but they're more powerful than just design, themes affect the user interface, particularly in discussion groups.
No scripting is required; you can create new themes and install them on your server at will. You're not limited to the themes that ship with Manila.
For more themes, see Themes.UserLand.Com.
Macros
You can make new features available to your users by writing new macros. Standard Manila macros do things like allow you to embed pictures in a page, including a rendering of an RSS channel, or display a create-a-site form.
Macros can be very simple -- a macro might just display the day of the week. But macros can be more complex and interactive. For instance, you can put up a search page using this sample macro.
See Macros.UserLand.Com for documentation on Manila's built-in macros.
Callbacks
The most powerful is config.manila.callbacks.finalFilter, which allows you to filter the rendered text of a page right before it's returned to the browser. In this context, everything about the page is changeable.
Other callbacks allow you to build on Manila's workflow. You can write scripts that get called when a home page is updated, when a message changes, when a News Item is posted, and so on.
See config.manila.callbacks for documentation on all the various callbacks.
Changing the site itself
Manila sites are website framework sites that build on mainResponder and call scripts in manila.root. You can customize a site by actually changing the site itself.
For instance, say you want to make a change to how storyReader pages work. You'll note that, in a Manila site, the storyReader page just calls manilaSuite.storyReader. You can change the object in a Manila site to call your script at, for instance, workspace.manilaCustomization.storyReader.
Other scripts, #filters for instance, work the same way.
To change all the sites on your server, write a script that loops through config.manila.sites, a table which lists all the sites on your server. You can use the config.manila.callbacks.newSite callback to automatically customize new sites when they're created.
Plug-ins
Plug-ins add objects, new pages, to a Manila website; those objects call scripts that you write. A plug-in may also add to the Editors only menu and may include XML-RPC handlers.
A simple interface is provided that allows Managing Editors to turn on and off plug-ins for their sites.
Plug-ins go beyond macros, though a plug-in may also implement macros.
See Plugins.UserLand.Com for examples and documentation.
Frontier and IIS, 2 IP Addresses (Windows)
Thanks to Jason Levine who wrote the original technote to address the issues with using two IP addresses with IIS 5.0.
There is a major change in functionality introduced in Internet Information Server 5.0 (the version of IIS that comes with Windows 2000) that may affect your ability to run Manila as a webserver.
The Feature
IIS 5.0 has a new feature named socket pooling which it uses on machines which have multiple IP addresses. Essentially, when socket pooling is turned on, IIS will grab every IP address on the machine, even if it is explicitly configured to not use one or more of those addresses. The reason that it does so is explained in a technology note about IIS:
"In IIS 4.0, each Web site was bound to a different IP address, which meant that each site had its own socket that was not shared with sites bound to other IP addresses. These sockets are created when the site starts, and they consume significant non-paged memory (RAM). This memory consumption limits the number of sites bound to IP addresses that can be created on a single machine.
For IIS 5.0, this process has been modified so that sites bound to different IP addresses, but sharing the same port number, share the same set of sockets. The end result is that more sites can be bound to an IP address on the same machine than in IIS 4.0. In IIS 5.0, these shared sockets are used flexibly among all of the started sites, thus reducing resource consumption."
The Problem
What does this mean for you, the Fronter web developer? If you intend to set up your IIS 5.0 machine with two or more IP addresses, and have IIS bound to port 80 on all but one address while putting Manila on port 80 on that remaining one, then socket pooling will prevent Frontier from being able to bind to that last IP address — IIS will still be bound to it. In order to allow Frontier to bind to that IP address, you have to turn off socket pooling, and you also have to set up Frontier to only bind to the intended address.
The IIS configuration side of things
First, you need to make sure that IIS is configured to leave the IP address alone that you want to use for Frontier.
Open up the Internet Services Manager (from your Administrative Tools program group), and go to the Default Web Site for your machine. Right click on it, and bring up the site Properties.
On the first tab (Web Site), under Web Site Identification, make sure that the IP Address is not set to "(All Unassigned)". (This gives IIS every IP address on the machine except those explicitly assigned to other IIS web sites.) Instead, from the pulldown list, choose a specific IP address, and not the IP address that you want Frontier to use.
If you want IIS to use multiple IP addresses, click on the Advanced button, and enter all of the IP addresses into the Multipl identities for this Web Site box.
Click OK to close all of the dialog boxes back to the Internet Services Manager, and then close the Internet Services Manager as well.
Now, you need to turn off IIS 5.0 socket pooling. There’s a Microsoft Knowledge Base article (Q238131) that describes how to do that; I’ll recap here. (Note the conditions at the top of the KB article that describe Microsoft’s recommendations for situations in which it is appropriate or inappropriate to disable socket pooling.)
Make sure that you’re logged into your machine as an administrator-level account, and bring up a command prompt. Change to the IIS adminscripts directory (default: C\:inetpub\adminscripts).
Type the following:
cscript adsutil.vbs set w3svc/disablesocketpooling true You should get back a reply:
disablesocketpooling : (BOOLEAN) True Open the Services… control window (from your Administrative Tools program group), and scroll down to the IIS Admin Service. Stop and start it. (It will tell you that it also has to stop your WWW and FTP services, if you’ve got them both running; let it do that.)
Restart your World Wide Web Publishing Service (and your FTP Publishing Service, if you had it running before).
Manila configuration
To configure Manila to only use the single intended IP address, first open the Frontier application window.
Open up the user.inetd.config.http table. Choose Main->Jump. Enter user.inetd.config.http and click OK.
Add a new object named ip, a string, and set its value to the IP address that you would like Manila to use. Choose Table->New Scalar->String and enter ip for the name of the object. Then click to the right of the new ip object and under the value column enter in the IP address.
Quit and restart Frontier.
That’s it — now, Manila should be using its IP address, and IIS 5.0 should be using the ones that you configured it to take. Check your Windows Event Logs for any errors, lest we messed something up here.
Using IIS 6.0
Under Windows Server 2003 and IIS 6.0, Microsoft has made a change to how the socket pooling can be configured using the new Httpcfg.exe utility.
You can find the instructions in this Microsoft Knowledge Base article (813368) Setting Metabase Property DisableSocketPooling Has No Effect.
Frontier and Apache, 2 IP Addresses (MacOS X)
Eric Soroos has a tutorial that you can use to get Frontier and Apache to listen on port 80 on two different IP addresses using Mac OS X.
Steps to setup
1. Setup the two addresses.
2. Setup Frontier on one address.
3. Test and make Step 1&2 permanent.
4. [Optional] Setup Apache on the other address.
Read the rest of the Frontier and Apache, 2 IP Addresses Tutorial.
Revision
Note: This document is being updated, the following text is still in progress/being revised.
New method
Thanks to Sam DeVore who wrote the original technote to use the Mac OS X firewall to handle port forwarding along with assistance from Eric Sooros who helped with the original port forwarding support.
(LL: Which versions of OS X support these docs? Panther and newer/server editions?)
The Server Admin tools included with Mac OS X provides built in tools to get the same result as using the port forwarding included with Manila.
Steps
1. Open the Server Admin tool and select the "Firewall" section for the server you want to run Manila on.
2. Click on the Advanced Tab.
3. Add a new rule and set like shown below. Replacing the IP address with the one you want Manila to listen on and the port that you have Manila actually listening to.
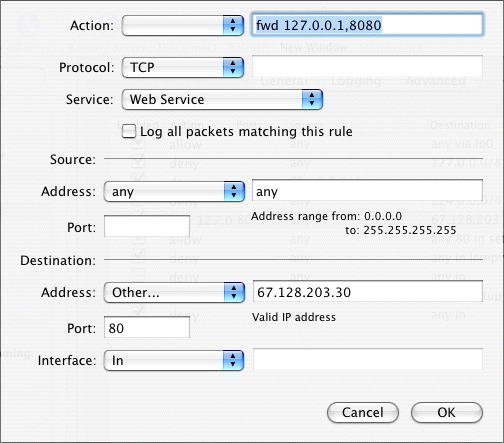
4. Add another rule to allow port 80 to go through like below:
5. Drag the rules around to get the ones that you have added higher in the list, similar to what you see below:
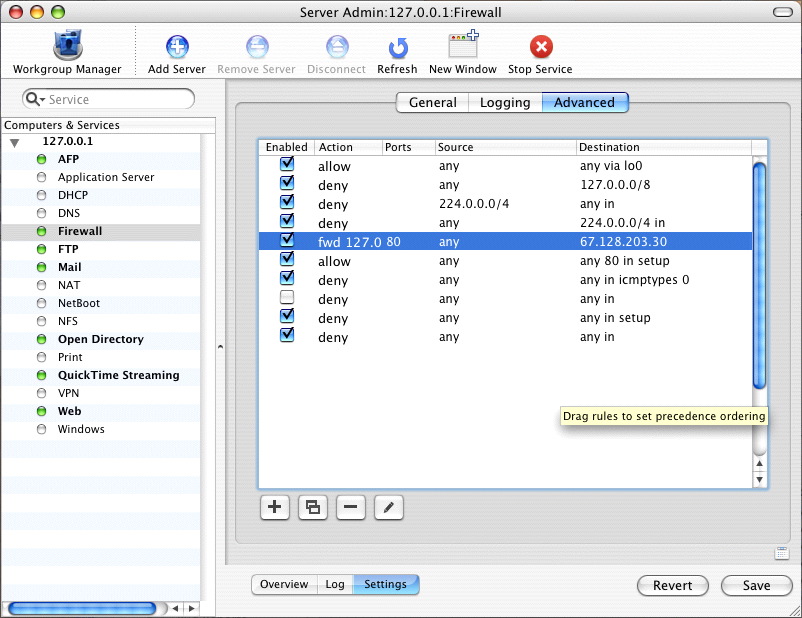
6. Save the new rules, and Manila should be getting traffic port forwarded from port 80.
Notes
(LL: Determine status of this and update multihoming notes)
This doesn't address needs for Multihoming, but I think Eric's startup script still works for that. I have two ethernet cards in my machine so I have not tested that part yet.
Troubleshooting
Check that performance caching in the web server settings is off. It seems that the performance caching is handled before the firewall rules and can cause all the rules to get disrupted. If you want to have the cache running you might try adding a rule to point port 16020 to port 8080 as well.
Migrating Frontier from Mac Classic to MacOS X
If you want to move your Frontier installation from a server running Mac Classic to one running MacOS X, you can use the following instructions to complete the setup.
Note
These instructions assume the file path where Frontier is installed is the same between the two machines (including the hard disk name).
Instructions
1. To run Frontier on MacOS X, you need to setup port forwarding. First open the Frontier application and change the Frontier Web server port to a number, 1024 and above. Choose Web->Web Server->Set Port. Enter the new port number (eg. 8080) and then click OK.
2. Create a new script at user.callbacks.startup.enablePortForwarding that reads:
userland.portForward (adminPassword:string (user.prefs.portForwardingAdminPassword))
3. Create a new binary value at user.prefs.portForwardingAdminPassword with the the MacOS X admin password (for the current user -- the one launching Frontier).
From a Quick Script window, you can set the value by running the following script.
user.prefs.portForwardingAdminPassword = binary ("adminPassword")
Notes
If Manila isn't responding after setting up port forwarding, you should check that the firewall is enabled on the new machine. If it's not running, then restart Manila and retest.
Advanced Features
Search Engine
Frontier includes a built-in search engine that you can easily configure using the Admin website. The search engine can index both Manila sites and Radio sites.
The admin website and the default Manila site each include a search field on their home page when the search engine is enabled, allowing you and your users to quickly find data stored on the server.
Search results are presented in a format similar to Google's results, with search terms hilighted in bold text if you store the full text of indexed pages.
It's also easy for editors to add a search field to their own home pages, so they or their readers can search content in the site, or across the entire server.
Turning on the server
1. Open the Admin Site and at the top of the page in the menu click Settings.
2. Under Server Settings, click Search Engine.
3. Check the first box to enable the search engine server.
ServerMonitor
The ServerMonitor Tool is useful for people who run more than one server. It monitors up-time and performance of all your servers, so you can quickly find out if all your servers are running and how well they are performing.
If a server goes down, email notification is automatically sent to the server manager(s) alerting them of the situation.
ServerMonitor can track uptime for any HTTP server. When monitoring another Frontier server which has ServerMonitor installed, additional information like the version of Frontier on the server, the number of requests in the RPC queue, and the amount of free disk space will be recorded and presented on the ServerMonitor home page.
For any of the Frontier servers you're monitoring, you can click the IP address to go to the admin site for that server.
How to add a server
1. Open the ServerMonitor tools home page.
2. Enter the domain or IP address and the port of the sever.
3. If you are connecting to another Frontier server, you can choose XML-RPC or SOAP. If you are connecting to another Web server, choose HTTP.
If it's a Frontier server, use "/RPC2" for the path or if you are using the HTTP protocol use a path to a page that ServerMonitor will retrieve to check the performance of the server.
Radio Community Server
Radio Community Server is a software application that makes it possible for individuals or organizations to host communities of Radio users.
Radio Community Server now ships with Frontier. As part of installing Frontier RCS is configured automatically with defaults that can be used 'out-of-the-box'.
RCS can optionally index all upstreamed pages, OPML documents and RSS files using Frontier's built-in search engine. A new prefs page enables or disables the feature.
Manila site statistics are optionally included in RCS' updates and rankings pages. Your Manila and Radio users all participate in a single community.
Radio Hosting
Any Manila site can act as a host for comments about posts on a Radio UserLand weblog. Since Radio UserLand sites are static files, a dynamic system is required for a feature like comments, and Manila makes good sense.
See also
RCS.UserLand.Com
WebEdit
WebEdit is an extensible client-server that allows remote access to your databases, from one copy of Frontier to another. It's a set of RPC handlers that that handles requests from the webEdit client suite.
WebEdit is built into Frontier.root, every Frontier user has both a WebEdit client and a WebEdit server. Neither the client or server is operational until you turn them on, for security reasons.
Common WebEdit operations include Get from Server, Check Out, Check In, Send to Server, and Delete Object.
Managing the WebEdit server
From the WebEdit settings page in the Frontier Admin site, you can enable the WebEdit server or add and remove WebEdit users. You can also view which objects have currently been checked out or to force check-in an object.
Using WebEdit
From the copy of Frontier acting as the client, open the WebEdit menu from your Suites menu. Choose "New Server" from the WebEdit menu.
A dialog box opens for you to type in the host name of the server, as in www.myserver.com.
The prefs for that server will open. Set the port if it's other than 80. Set your username to whatever your username on the remote server is.
You can set your password if you want, or leave it blank to be prompted every time.
Choose "Set Current Server..." from the WebEdit menu and choose the name of the server you just set. You can have multiple servers, and whenever you want you can switch between them with this command.
You can also see what the current server is by looking at the menu -- the current server has a checkmark next to it.
Whenever you want to change your server prefs, choose "Edit Server Prefs."
How to make the WebEdit menu permanent
Many people choose to make the WebEdit menu a permanent part of their Frontier menubar.
To do so, jump to user.menus. Add an item called WebEdit. It's value should be an address, @webEdit.menu.
To re-build your menubar and get the WebEdit menu to appear, type ctrl-minus on Windows or cmd-minus on Macs.
The #webEditServer attribute
You can put a #webEditServer attribute in your database. It works like website framework directives, it's inherited.
It should be a string, the name of the server to use when using WebEdit commands with this database. The #webEditServer attribute, when present, over-rides the current server setting.
This is designed to reduce the number of times it's necessary to manually switch servers via the WebEdit menu.
Getting an object from the server
Put your cursor on an object. Choose "Get From Server" to get the version of the object that's on the server.
If you don't have a copy of the object you want to get, create a dummy object in your root first, then choose "Get From Server."
Checking out an object
To mark an object as yours, put your cursor on the object and choose "Check Out." The server will then not allow anyone else to check out or update this object on the server.
When you check out an item, you get the version that's on the server. It over-writes the version you currently have.
Checking in an object
When you want to send an object to the server, use the "Check In" command. You can check in any object you've checked out. You can't check in an item that you didn't first check out.
The one time you can check in an item without first checking it out is when the item is new, it doesn't already exist on the server.
Send To Server
This command sends an object you've checked out back to the server without giving up your custody of the object.
Other commands
Render on Server is used for sites using the fileWriters framework, you can render individual pages on the server with the command. Returned will be the URL of the page, and that URL will be opened by your web browser.
Undo Check Out releases your lock on the object on the server without your having to check your copy back in.
Delete Object allows you to delete an object on the server. For safety reasons, deleted objects are stored in /Guest Databases/ops/WebEdit Deleted Objects/ sub-folder of the Frontier folder. (Note that this location may change.) This command presents a confirmation dialog box before sending the delete command.
Guest databases
You can check in and out objects, get objects, and render objects residing in guest databases on a server.
Your local guest database should have the same file path, relative to Frontier, that the guest database on the server has.
For example, if your guest database is at Macintosh HD:Apps:Frontier:databases:gdb.root, then the corresponding database on the server might be at D:\Frontier\databases\gdb.root.
Change note dialog
If you set flNotes to true for a server in the user.webEdit.servers table (creating the entry if necessary), then when you check in an item or do a Send To Server to that server a dialog box will prompt for a short change note.
If you're making changes to a guest database that has a #changes table, and mainResponder is installed, then the why field of each #changes table entry will contain the change note.
WebEdit callbacks
All WebEdit operations support callbacks. Each handler in webEditServer.rpcHandlers.webEdit now has two callbacks -- a callback for before the action is performed and one for after.
These callbacks all take the same parameters: adrObject, userName, time, and extraCallbackInfo. (The last may be anything, such as a description field, but it's currently unused.)
Also -- and this is important -- the paramtable is in scope for these callbacks, thanks to callScript. So you can get IP addresses, cookies, and other info about clients.
Any callback can generate a scriptError to prevent what would normally happen next from happening.
This set of callbacks can form the basis for customized source code control and notifications.
Here's an example of how to get the entire param table from within a callback script:
on testCallback (adrObject, username, time, extraCallbackInfo)
		local (pta)
		pta = parentOf (code)
		temp.params = pta^
		return (true)
A copy of the params table would be stored at temp.params.
Client verbs
In the first version of WebEdit, you couldn't call any of the verbs directly, they relied on getting the current cursor address. Now the menu commands have been separated from the actions, so you can call, from your own scripts, verbs such as webEdit.checkOutObject and so on. (Note: verb names and parameters may change before this new version of WebEdit is finalized.)
Notes
If the server is running the old version of WebEditServer, flNotes in the change note dialog must be false, as the old server doesn't expect this parameter.
The WebEdit client can present dialogs, which is the default, or display messages in the About Window instead. Toggle this by setting user.webEdit.prefs.flDialogs.
You can change the CheckOut timeout setting on your server by editing user.custody.prefs.timeOutMinutes.
Troubleshooting
Referer error
"Sorry! There was an error: Can't evaluate the expression because the name "referer" hasn't been defined."
Manila checks the referer of requests for security reasons when you try to post a message or configure your site.
If you are using the Opera Web browser or Internet security software like Zone Alarm Pro, you may see the referer error message since they can both be configured to prevent the referer from being sent. Some hardware proxy servers or firewalls may also remove or remove your referer.
To enable the referer data from being sent in Zone Alarm Pro, open the options and uncheck the Remove Private Header information in the Cookies tab.
In Opera, open the preferences and choose Privacy. Check the box for Enable referrer logging.
In Norton Internet Security or Norton Personal Firewall, you can follow the instructions on this page.
Can't login to a site
If you try to login to your Manila site as a member or editor, but don't receive a login screen and see the same page you would see if you weren't logged in you may need to enable cookies in your browser.
Manila uses cookies to identify if you are a member or editor of a site, you should check the browser's documentation on enabling the feature.
Note the password on the login field is also case-sensitive.
Restore default template
It's possible to edit a template in such a way that the site is unusable -- certain types of typos will make the HTML in the template un-renderable by a browser.
Since you use the site to edit the site, when there's a problem with the template, you can't fix the problem.
The template restoration page does not use your template, so it's always viewable. It's at a URL like this:
http://www.yourdomain.com/admin/restoreTemplate
Reset webmaster password for Frontier Admin site
You can reset the password for the webmaster by opening the Frontier application and choosing Server->Set Admin Password. Enter the new password and click the OK button.
Note: You can edit the password and other information for other administrators to the Frontier Admin site from the Administrators Settings page.
Buttons not appearing in the WYSIWYG editor
If you've used the WYSIWYG editor before, but after making a change to your template you no longer see the buttons (bold, italics, underline etc.) it might be due to a conflict with the document type declaration in your template.
You might try using the DOCTYPE declaration in the Template on the Advanced prefs page for your site and see if that fixes it:
<!DOCTYPE HTML PUBLIC "-//W3C//DTD HTML 4.01 Transitional//EN">
Troubleshooting server performance
First, ensure that the mainresponder debugging prefs are unchecked on the Debugging settings page in the Frontier Admin site. These features can degrade server performance, and cause Frontier to use more memory and disk space than normal, so you should only enable them if needed.
You might also try compacting the root files and see if that makes any improvement to the server performance.
Useful data to gather
If you are having a problem with server performance, there's some useful data when you ask for assistance in the discussion group or mailing list.
Click the Email Config link on the Settings page in the Frontier Admin site to email yourself a Frontier server configuration report.
When did it start to happen? Is the problem periodic or does it seem to be constant?
List the CPU, amount of memory and operating system installed on the server?
How much free disk space do you have on the drive?
Describe the CPU usage on the server?
Have there been any recent hardware/network/software changes that might have coincided with the performance problem?
Are there any error dialogs from Frontier?
Do you have any custom tools or scripts installed on the server?
Can you determine any specific request causing the problem using HTTP/RPC logging and/or page profiling?
Reference
Programming pointers
A simplified but useful way to look at Frontier is as a layer cake. On top is Manila, the easy-to-use, browser-based content management system -- Manila is the icing.
Here are the main layers underneath Manila:
mainResponder implements discussion groups, website membership, calendars, browser-based editing, and more. Manila relies on mainResponder heavily. mainResponder is implemented in mainResponder.root. (Look in the apps folder in your Guest Databases folder. Also note that manila.root is there, too.)
Manila's XML services implement the cross-platform, cross-network SOAP and XML-RPC protocols (both of which UserLand co-authored). Manila's preferences pages are implemented by prefs.root, an application that turns XML into HTML forms. (See the www folder.) Lower-level support for things like outline serialization and XML text parsing is present too. Manila stores some data as XML, and is itself scriptable via SOAP and XML-RPC.
The webserver framework is what makes Manila a Web server. Parts of the webserver framework, particularly the TCP networking, are handled by the kernel (the Manila application). The webserver framework has a plug-in architecture called "responders" -- and that's how mainResponder got its name. (It's the main responder.) SOAP and XML-RPC also have webserver framework responders, since HTTP is the main method of transmitting SOAP and XML-RPC messages.
The website framework implements templating, macros, automatic URL expansion, includes, outline rendering, and more. In a sense, Manila is a friendly front end to the website framework.
The kernel, the Frontier application itself, is the multi-threaded runtime for all of the above. It compiles and executes scripts, does TCP networking, manages database files, displays outlines, presents the user interface, and so on.
Reference
Manila Developer's Directory
| | All the documentation for Frontier and Manila is included in the Frontier directory.
|
Object database
| | The object database is the storage system for the scripts and data that power Manila.
|
Writing Scripts
| | How to write and debug scripts and where to store them.
|
Scripts are outlines
| | Like outlines and the object database, scripts are outlines too.
|
The UserTalk Language
| | An introduction to UserTalk, Manila's scripting language.
|
XML data storage
| | The object database stores XML data in compiled format.
|
Frontier: The Definitive Guide book
| | Read Matt Neuberg's Frontier book online.
|
Website Scripting Tutorial
| | This tutorial gets you up-and-running with the website framework and writing macros and outline renderers.
|
Frontier Discussion Group
| | A forum for asking questions about Frontier server management and software development.
|
Macros.UserLand.Com
| | Manila's built-in macros.
|
DocServer
Samples.UserLand.Com
| | Sample scripts and applications for Frontier.
|
Plugins.UserLand.Com
| | Documentation regarding the Manila plug-ins format and links to plug-ins created by Frontier developers.
|
Search
| | Search Frontier and Manila documentation.
|
Known Issues
We maintain a known issues section in the Frontier directory that links to common errors that you might encounter in the current release of the Frontier.
Text-editing cheat sheet
This page lists a set of tricks that help turn off some of the automatic text processing that Manila does when it displays your pages.
Strings with at-signs
The backslash character, \, is an escape character that over-rides most if not all of the automatic things Manila does when processing text.
For example, to keep Manila from making an email address into a link, put the escape character ("\") in front of the "@". That way you get webmaster@yourdomain.com instead of webmaster@yourdomain.com.
This also often comes up in code listings where you're using the address of something, which in UserTalk, is denoted with an at-sign. For example.
new (tabletype,@scratchpad.myTable)
That's not an email address. But if you type this instead:
new (tabletype,\@scratchpad.myTable)
Manila understands not to create a hyperlink and leaves the text alone.
new (tabletype,@scratchpad.myTable)
Strings with URLs
If you type in some code and it contains a UserTalk comment at the end of the line, Manila thinks this is a URL (it keys off the double-forward-slash), and you get a bit of text, with just the double-slash and the text immediately following it is made into a link. Again, if you put a backslash in front of the double-slash, Radio will not add the link.
if (clock.now () == eternity) //comment hotted up
if (clock.now () == eternity) \//comment not hotted up
Which renders as:
if (clock.now () == eternity) //comment not hotted up
Sometimes you enter a URL but don't want it to be turned into a link, for example when you're showing someone what a URL looks like, but it isn't a real URL, like this:
http://www.somemachine.com/that/doesnt/exist.html
If you put a backslash before the first forward-slash, Radio doesn't create the link:
http:\//www.somemachine.com/that/doesnt/exist.html
Renders like this:
http://www.somemachine.com/that/doesnt/exist.html
Automatic paragraph tags
When Manila sees two carriage returns in a row it automatically adds paragraph tags. Instead of typing two carriage returns, type carriage return-space-carriage return.
Automatic shortcut and glossary substitution
When Manila sees an item in double-quotes that's a shortcut or in the glossary, it substitutes the text in quotes for what's in the glossary. If Manila creates a link for something you don't think it should, the fix is to put a backslash before the first double-quote, and it's also a good idea to put one before the closing double-quote, and the glossary substitution will not happen.
An example -- if you type "Manila" you'll get Manila, but if you type \"Manila\" you get "Manila".
The complete list of all global shortcuts is here.
Notes
To get a single backslash chracter to appear, use two backslashes in a row.

|













 © Copyright 1992-2026 UserLand Software,
Inc..
© Copyright 1992-2026 UserLand Software,
Inc..