

The following article is an excerpt from PHP & MySQL: Novice to Ninja, 7th Edition, a hands-on guide to learning all the tools, principles, and techniques needed to build a professional web application. In this second tutorial in the series, you’ll learn the basics of PHP, including statements, variables, operators, comments, and control structures.
- Setting Up Your PHP Development Environment with Docker
- A Beginner’s Guide to PHP
- Introducing MySQL: A Beginner’s Guide
- Displaying Data from MySQL on the Web: an Introduction
Now that you have your server up and running, it’s time to write your first PHP script. PHP is a server-side language. This concept may be a little difficult to grasp, especially if you’ve only ever designed websites using client-side languages like HTML, CSS, and JavaScript.
A server-side language is similar to JavaScript in that it allows you to embed dynamically generated content into the HTML code of a web page, giving you greater control over what appears in the browser window than HTML alone can provide. The key difference between JavaScript and PHP is the stage at which the code is run.
Client-side languages like JavaScript are read and executed by the web browser after downloading the web page (embedded programs and all) from the web server. In contrast, server-side languages like PHP are run by the web server, before the web page is sent to the browser. Whereas client-side languages give you control over how a page behaves once it’s displayed by the browser, server-side languages let you generate customized pages on the fly before they’re even sent to the browser.
Once the web server has executed the PHP code embedded in a web page, the result takes the place of the PHP code in the page. All the browser sees is standard HTML code when it receives the page. That’s why PHP is called a “server-side language”: its work is done on the server.
Note: in the early days of the Web — and when the first edition of this book was published! — JavaScript was a client-side scripting language used mainly in the browser. Then along came technologies like Ajax, which allowed JavaScript to communicate with the server. And more recently still, JavaScript has been used both in the browser and on the server to create database-driven apps. While these new uses for JavaScript offer exciting possibilities, there’s still very much a place for PHP — as this book sets out to demonstrate!
PHP code is written in PHP tags. Like most HTML tags, PHP has a start tag and and end tag: <?php and ?> respectively. Anything inside these PHP tags is treated as PHP code and run on the server.
PHP code must be placed in a file with a .php extension. When someone connects to the server and asks it to load a file with a .php extension, the server then runs it as a PHP script. If you put PHP tags in a file with a .html or any extension other than .php, the web server won’t run any PHP code, and the PHP code will be sent directly to the browser — which doesn’t understand PHP code!
Let’s take a look at a PHP script.
Example: PHP-RandomNumber
<!DOCTYPE html>
<html lang="en">
  <head>
    <meta charset="utf-8">
    <title>Random Number</title>
  </head>
  <body>
    <p>Generating a random number between 1 and 10:
      <?php
      echo rand(1, 10);
      ?>
    </p>
  </body>
</html>
To run this code, save it as random.php in the public directory and navigate to https://v.je/random.php.
Most of this is plain HTML. Only the line between <?php and ?> is PHP code. <?php marks the start of an embedded PHP script and ?> marks its end. The web server is asked to interpret everything between these two delimiters and convert it to regular HTML code before it sends the web page to the requesting browser. If you right-click inside your browser and choose View Source (the label may be different depending on the browser you’re using) you can see that the browser is presented with something like this:
<!DOCTYPE html>
<html lang="en">
  <head>
    <meta charset="utf-8">
    <title>Random Number</title>
  </head>
  <body>
    <p>Generating a random number between 1 and 10:
      5
    </p>
  </body>
</html>
There’s no HTML file on the server that contains this exact code. This HTML is generated dynamically on the server before being sent to the browser.
Try running the script a couple of times and notice how the number changes. PHP code has been used to generate a random number, but all signs of the PHP code have disappeared when viewing the source in the browser. In its place, the output of the script has appeared, and it looks just like standard HTML. This example demonstrates several advantages of server-side scripting:
- Security. In the example above, we placed a random number generated by the web server into the web page. If we had inserted the number using JavaScript, the number would be generated in the browser and someone could potentially amend the code to insert a specific number.
- No browser compatibility issues. PHP scripts are interpreted by the web server alone, so there’s no need to worry about whether the language features you’re using are supported by the visitor’s browser.
- Access to server-side resources. The code on the server can do anything; it’s not limited to the capabilities of the browser. The resulting HTML could be generated from a database or an Excel file, or it could be the result of a calculation, such as the total of the user’s shopping cart.
- Reduced load on the client. JavaScript can delay the display of a web page significantly (especially on mobile devices!), since the browser must download and then run the script before it can display the web page. With server-side code, this burden is passed to the web server, which you can make as beefy as your application requires (and your wallet can afford).
- Choice. When writing code that’s run in the browser, the browser has to understand how to run the code given to it. All modern browsers understand HTML, CSS and JavaScript. To write some code that’s run in the browser, you must use one of these languages. By running code on the server that generates HTML, you have a choice of many languages — one of which is PHP.
Basic Syntax and Statements
PHP syntax will be very familiar to anyone with an understanding of JavaScript, C, C++, C#, Objective-C, Java, Perl, or any other C-derived language. But if these languages are unfamiliar to you, or if you’re new to programming in general, there’s no need to worry.
A PHP script consists of a series of commands, or statements. Each statement is an instruction that must be followed by the web server before it can proceed to the next instruction. PHP statements, like those in the aforementioned languages, are always terminated by a semicolon (;).
This is a typical PHP statement:
echo 'This is a <strong>test</strong>!';
This is an echo statement, which is used to generate content (usually HTML code) to send to the browser. An echo statement simply takes the text it’s given and inserts it into the page’s HTML code at the position where the PHP script was located.
In this case, we’ve supplied a string of text to be output: This is a <strong>test</strong>!. Notice that the string of text contains HTML tags (<strong>and </strong>), which is perfectly acceptable.
So, if we take this statement and put it into a complete web page, here’s the resulting code.
Example: PHP-Echo
<!DOCTYPE html>
<html lang="en">
  <head>
    <meta charset="utf-8">
    <title>Test page</title>
  </head>
  <body>
    <p><?php echo 'This is a <strong>test</strong>!'; ?></p>
  </body>
</html>
If you place this file on your web server and then request it using a web browser, your browser will receive this HTML code:
<!DOCTYPE html>
<html lang="en">
  <head>
    <meta charset="utf-8">
    <title>Test page</title>
  </head>
  <body>
    <p>This is a <strong>test</strong>!</p>
  </body>
</html>
The random.php example we looked at earlier contained a slightly more complex echo statement:
echo rand(1, 10);
You’ll notice that, in the first example, PHP is given some text to print directly, and in the second, PHP is given an instruction to follow. PHP tries to read anything that exists outside quotes as an instruction it must follow. Anything inside quotes is treated as text — or, to use the technical term, as a string. PHP doesn’t process strings as commands to follow. They’re treated as data in the application. You can do things with them, such as sending them to the browser, but PHP doesn’t treat one string differently from another.
So the following code will pass the string This is a <strong>test</strong>! directly to the echo command:
echo 'This is a <strong>test</strong>!';
A string is signified using a start quote and an end quote. PHP will see the first ' as the start of the string and find the next ' and use that as the end of the string.
Anything outside of quotes is treated as a series of commands to run. The following is not valid code:
echo This is a <strong>test</strong>!;
Because the quotes have been removed, PHP will first try to run the command This, then the command is, followed by the command a, and so on. As none of these are valid commands in PHP, the above code would produce an error message. If you want to treat something as text, remember to put quotes around it!
In contrast, the following code will run a valid command — the built-in “function” rand — to generate a random number and then pass the result to the echo command:
echo rand(1, 10);
A function is a special type of command that performs a specific task. Behind the scenes, PHP will do some processing and then generate a result. In this case, the rand function will produce a random number, but different functions perform different tasks.
You can quickly identify if something is a function because it’s followed by parentheses. PHP has many built-in functions that let you do all sorts of things, such as sending email and working with information stored in various types of databases.
PHP won’t try to run anything that’s inside a string. The following code won’t process the rand function:
echo 'rand(1, 10)';
PHP will see 'rand(1, 10)' as a string, and will send the text rand(1, 10) to the browser, which probably isn’t what you’d want to do. It’s important to understand the difference between a string and code. PHP will see any text outside quotes as a series of commands it should follow. Anything inside quotes is a string and is data that PHP will work with.
PHP doesn’t try to understand strings. They can contain any characters in any order. But code (anything not inside quotes) — which is essentially a series of instructions — must follow a rigid structure for a computer to understand it.
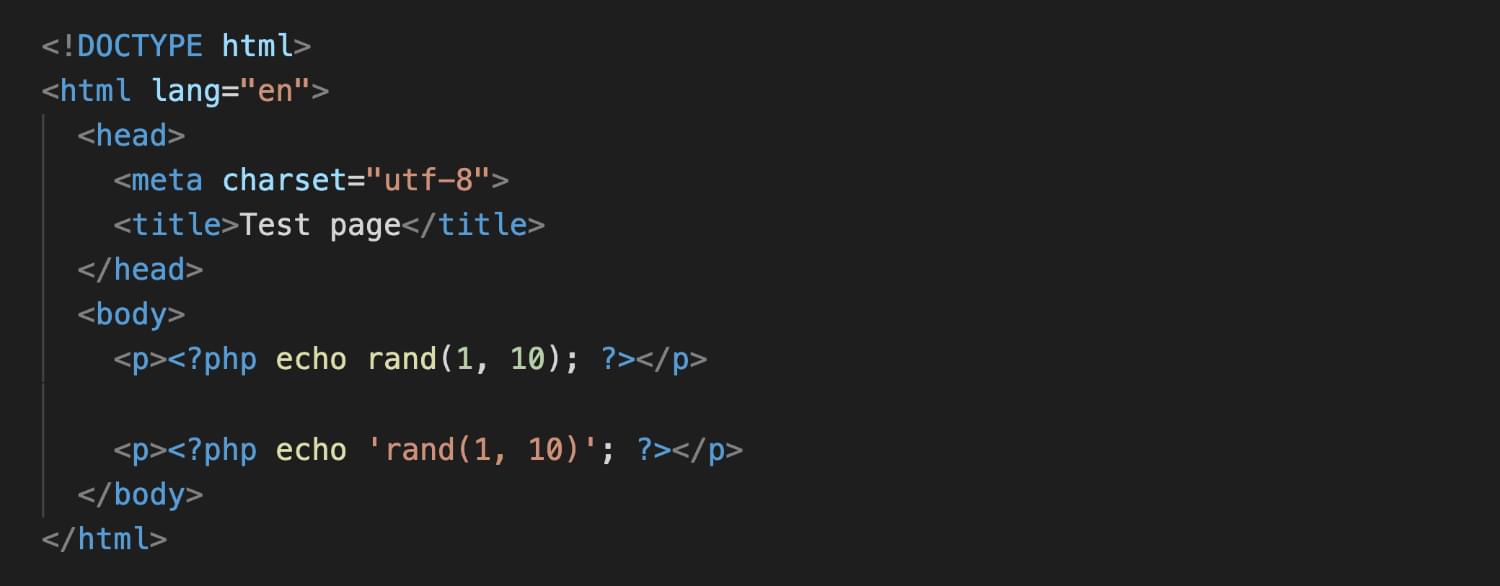
Note: using a code editor with syntax highlighting makes it easy to quickly see if something is a string or code. Strings will be a different color from code that needs to be processed.
The image below shows simple code highlighting in the Visual Studio Code editor.
PHP supports both single quotes (') and double quotes (") to encase strings. For most purposes, they’re interchangeable. PHP developers tend to favor single quotes, because we deal with HTML code a lot, which tends to contain a lot of double quotes. For example:
echo '<a href="http://www.sitepoint.com">Click here</a>';
If double quotes were used at each end here, we’d need to tell PHP that the quote after href= is not the end of the string by placing a \ before it (known as an escape character) and do the same with any double quotes we actually wanted to send to the browser as part of the HTML:
echo "<a href=\"http://www.sitepoint.com\">Click here</a>";
For this reason, PHP developers use single quotes, although there are some differences between single and double quotes. For our purposes here, though, they’re effectively interchangeable.
A function can be thought of as a miniature program within your program. You can instruct PHP to run the function by using its name (such as rand in our example earlier) followed by parentheses. The instruction rand(1, 10) tells PHP to run the function with the name rand. Running a function is also more commonly referred to as calling a function.
Most functions in PHP return a value when they’re called. Once the value is returned, PHP behaves as if you’d actually just typed that returned value in your code instead. In the echo rand(1, 10); example, our echo statement contains a call to the rand function, which returns a random number as a string of text. The echo statement then outputs the value that was returned by the function call.
Every function in PHP can have one or more arguments that allow you to make the function behave in a slightly different way. The rand function takes two arguments: a minimum and maximum random number. By changing the values that are passed to the function, you’re able to change the way it works. For example, if you wanted a random number between 1 and 50, you could use this code:
echo rand(1, 50);
We surround the arguments with parentheses ((1, 50)) for two reasons. First, they indicate that rand is a function that you want to call. Second, they mark the beginning and end of a list of arguments — PHP statements that you wish to provide — in order to tell the function what you want it to do. In the case of the rand function, you need to provide a minimum and a maximum value. Those values are separated by a comma.
Later on, we’ll look at functions that take different kinds of arguments. We’ll also consider functions that take no arguments at all. These functions will still need the parentheses, even though nothing will be typed between them.
Variables, Operators, and Comments
Variables
Variables in PHP are identical to variables in most other programming languages. For the uninitiated, a variable can be thought of as a name given to an imaginary box into which any value may be placed. The following statement creates a variable called $testVariable (all variable names in PHP begin with a dollar sign) and assigns it a value of 3:
$testVariable = 3;
PHP is a loosely typed language. This means that a single variable may contain any type of data — be it a number, a string of text, or some other kind of value — and may store different types of values over its lifetime. If you were to type the following statement after the statement shown above, it would assign a new value to the existing $testVariable. While the $testVariable variable used to contain a number, it would now contain a string of text:
$testVariable = 'Three';
Once you have data stored in a variable, you can send it to the browser using the echo command from earlier:
$testVariable = 3;
echo $testVariable;
When this code runs, the digit “3” will be sent to the browser to be displayed on the page.
In addition to specific strings or numbers, it’s possible to store the result of a function and then use it later on in the script:
$randomNumber = rand(1, 10);
echo $randomNumber;
Operators
The equals sign we used in the last two statements is called the assignment operator, as it’s used to assign values to variables. (There’s a different way to actually indicate “equals” in PHP, as we’ll see below.) Other operators may be used to perform various mathematical operations on values:
$testVariable = 1 + 1;  // assigns a value of 2
$testVariable = 1 - 1;  // assigns a value of 0
$testVariable = 2 * 2;  // assigns a value of 4
$testVariable = 2 / 2;  // assigns a value of 1
From these examples, you can probably tell that + is the addition operator, - is the subtraction operator, * is the multiplication operator and / is the division operator. These are all called arithmetic operators, because they perform arithmetic on numbers.
Note: each of the arithmetic lines above ends with a “comment” after the semicolon. Comments enable you to describe what your code is doing. They insert explanatory text into your code — text that the PHP interpreter will ignore.
Single-line comments begin with //. A single-line comment can be on its own line or, as in the example above, it can be placed at the end of a line of code.
If you want a comment to span several lines, start it with /*, and end it with */. The PHP interpreter will ignore everything between these two delimiters. I’ll be using comments throughout the rest of this book to help explain some of the code I present.
One operator that sticks strings of text together is called the string concatenation operator:
$testVariable = 'Hi ' . 'there!'; // Assigns a value of 'Hi there!'
Variables may be used almost anywhere you use a value. Consider this series of statements:
$var1 = 'PHP';          // assigns a value of 'PHP' to $var1
$var2 = 5;              // assigns a value of 5 to $var2
$var3 = $var2 + 1;      // assigns a value of 6 to $var3
$var2 = $var1;          // assigns a value of 'PHP' to $var2
$var4 = rand(1, 12);    // assigns a value to $var4 using the rand() function
echo $var1;             // outputs 'PHP'
echo $var2;             // outputs 'PHP'
echo $var3;             // outputs '6'
echo $var4;             // outputs the random number generated above
echo $var1 . ' rules!'; // outputs 'PHP rules!'
echo '$var1 rules!';    // outputs '$var1 rules!'
echo "$var1 rules!"     // outputs 'PHP rules!'
Note the last two lines in particular. If you place a variable inside single quotes, it will print the name rather than the contents of the variable. In contrast, when using double quotes, the variable in the string is replaced with the variable’s contents.
Placing variables inside double quotes works in simple situations, but for most of this book it won’t be usable, as we won’t be using such simple code. So it’s a good idea to get used to the practice of concatenation (shown in the third-from-last line: echo $var1 . ' rules!';).
Control Structures
The examples of PHP code we’ve seen so far have been either one-statement scripts that output a string of text to the web page, or a series of statements that were to be executed one after the other in order. If you’ve ever written programs in other languages (such as JavaScript, Objective-C, Ruby, or Python), you already know that practical programs are rarely so simple.
PHP, just like any other programming language, provides facilities that enable you to affect the flow of control. That is, the language contains special statements that you can use to deviate from the one-after-another execution order that has dominated our examples so far. Such statements are called control structures. Don’t understand? Don’t worry! A few examples will illustrate it perfectly.
If Statements
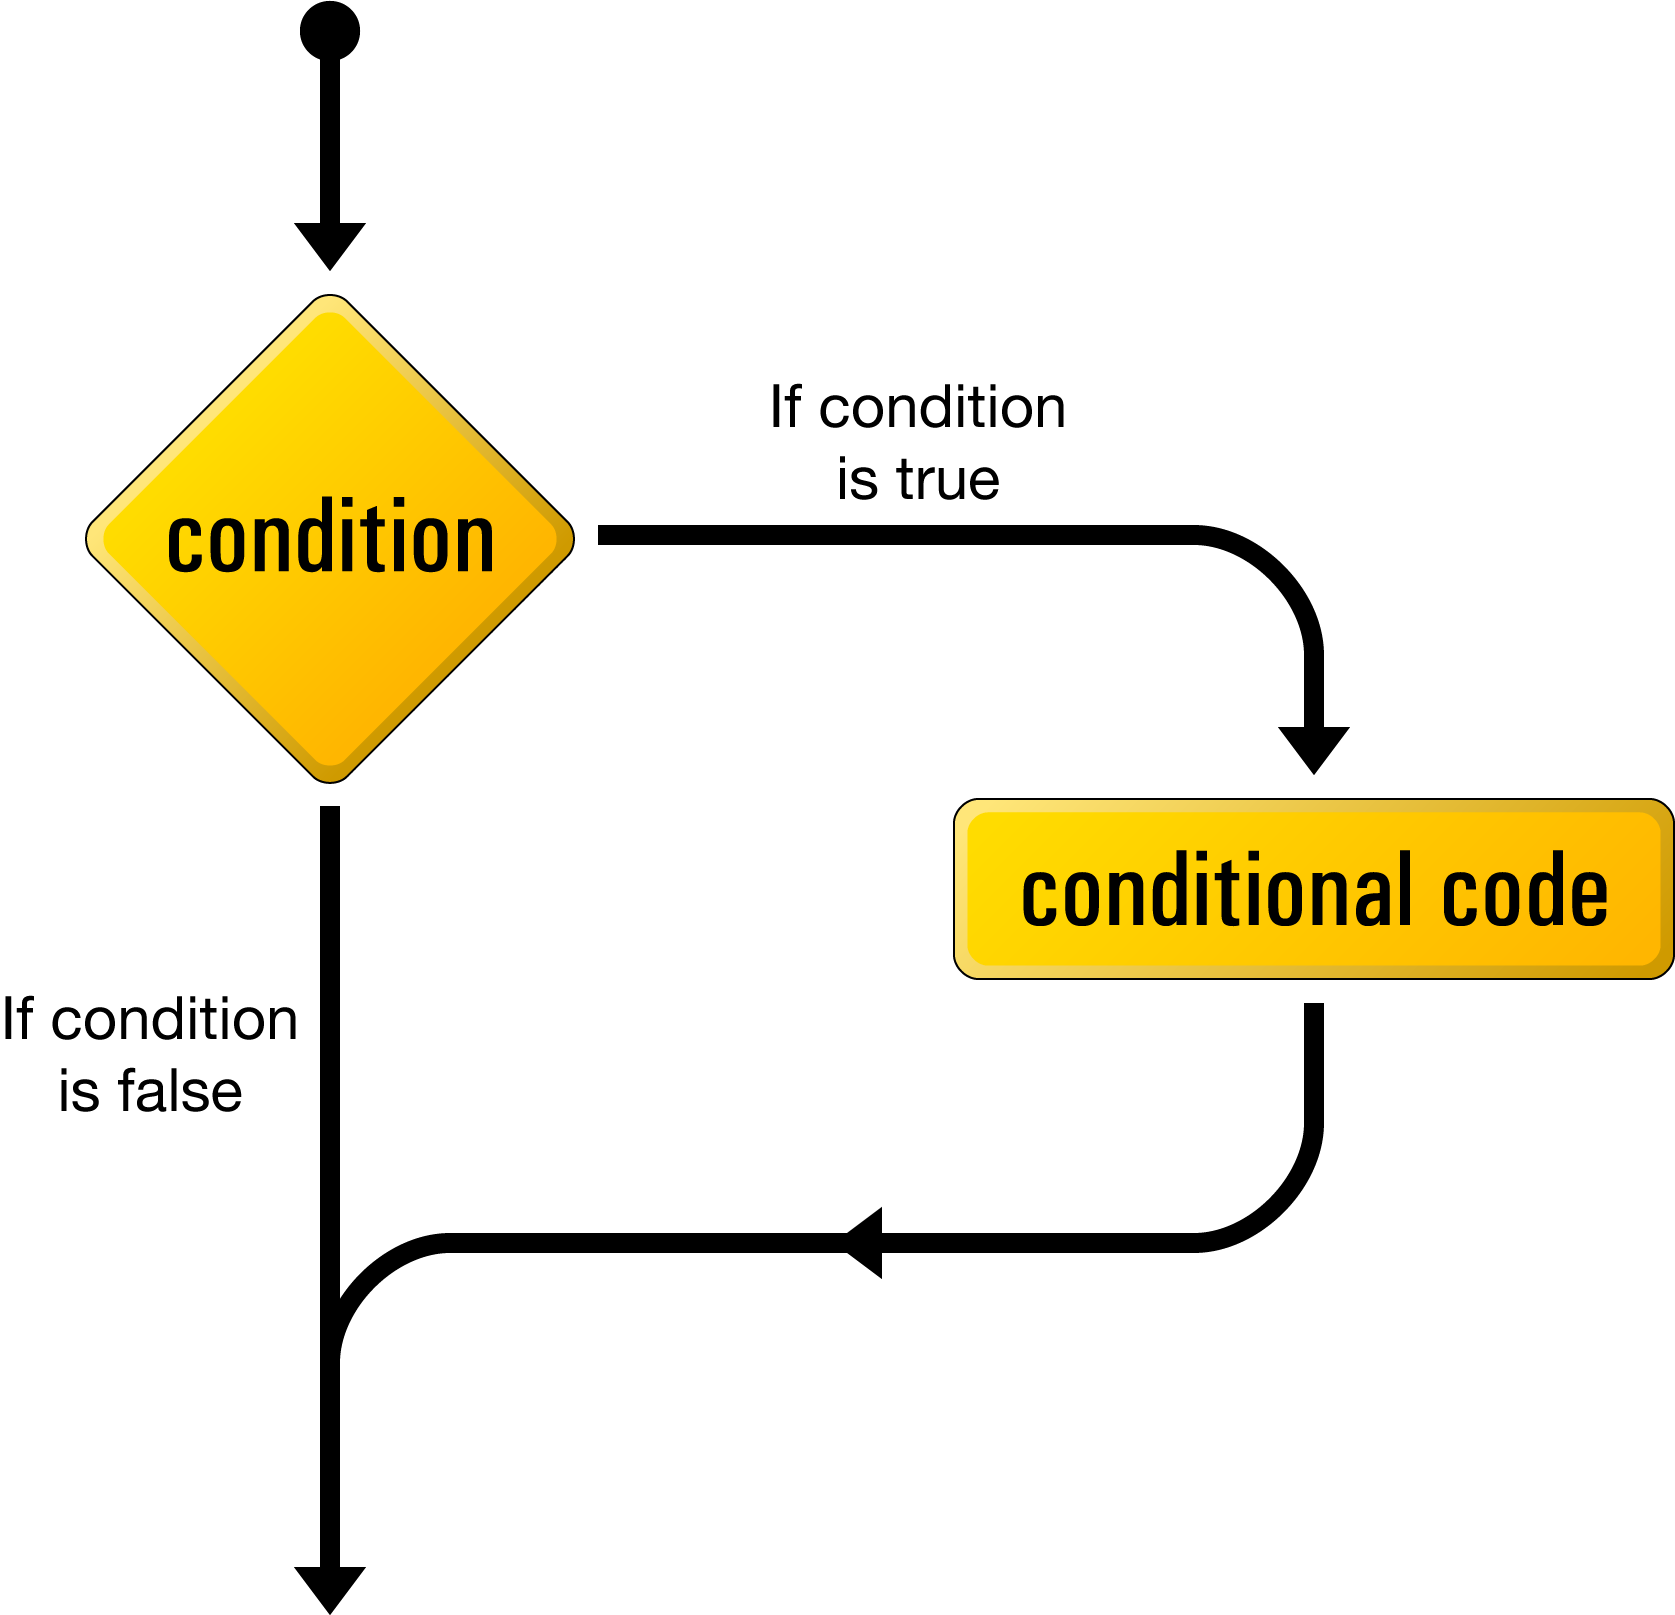
The most basic, and most often used, control structure is the if statement. The flow of a program through an if statement can be visualized as shown below.
Here’s what an if statement looks like in PHP code:
if (condition) {
  ⋮ conditional code to be executed if condition is true
}
This control structure lets us tell PHP to execute a set of statements only if some condition is met.
For example, we might want to create a game that mimics a dice roll and in which you have to roll a six to win. The dice roll can be modeled using the rand() function we used earlier, setting the minimum and maximum from 1 to 6:
$roll = rand(1, 6);

echo 'You rolled a ' . $roll;
To print out a message if the player rolls a six and wins, you can use an if statement.
Example: PHP-DiceRoll
$roll = rand(1, 6);

echo 'You rolled a ' . $roll;

if ($roll == 6) {
  echo 'You win!';
}
The == used in the condition above is the equals operator, which is used to compare two values to see whether they’re equal. This is quite different from using a single =, which is used for assignment, and can’t be used for comparison.
The if statement uses braces ({ and }) to surround the code you want to run only when the condition is met. You can place as many lines of code as you like between the braces; the code will only be run when the condition is met. Any code placed after the closing brace (}) will be run all the time:
$roll = rand(1, 6);

echo 'You rolled a ' . $roll;

if ($roll == 6) {
  echo 'You win!'; // This line will only be printed if you roll a 6
}

echo 'Thanks for playing'; // This line will always be printed
Note: remember to type the double-equals (==). A common mistake among beginner PHP programmers is to type a condition like this with a single equals sign:
if ($roll = 6) // Missing equals sign!This condition is using the assignment operator (=) instead of the equals operator (==). Consequently, instead of comparing the value of $roll to the number 6, it will actually set the value of $roll to 6. Oops!
To make matters worse, the if statement will use this assignment operation as a condition, which it will consider to be true, so the conditional code within the if statement will always be executed, regardless of what the original value of $roll happened to be.
If you save this as diceroll.php and run the code, you’ll see the random number being generated. If you run it until you win, you’ll see this in the browser:
You rolled a 6You win!Thanks for playing
This isn’t very pretty. But because PHP outputs HTML, you can add some paragraph tags in order to format the output.
Example: PHP-DiceRoll-Formatted
$roll = rand(1, 6);

echo '<p>You rolled a ' . $roll . '</p>';

if ($roll == 6) {
  echo '<p>You win!</p>';
}

echo '<p>Thanks for playing</p>';
If you run the updated code, you’ll see that it now prints this in the browser:
You rolled a 6

You win!

Thanks for playing
This is much more user friendly. To make the game itself more user friendly, you might want to display a different message to people who didn’t roll a 6 and didn’t win. This can be done with an else statement. The else statement must follow an if, and will be run if the condition isn’t met.
Example: PHP-DiceRoll-Else
$roll = rand(1, 6);

echo '<p>You rolled a ' . $roll . '</p>';

if ($roll == 6) {
  echo '<p>You win!</p>';
}
else {
  echo '<p>Sorry, you didn\'t win. Better luck next time!</p>';
}

echo '<p>Thanks for playing</p>';
Note: because the word didn't contains a single quote, it needs to be “escaped”. By preceding the single quote with a backslash (\), it tells PHP not to treat the ' in didn't as the end of the string.
With an else statement, one (and only one!) of the two blocks of code is guaranteed to run. Either the code in the if block will run if the condition is met, or the code in the else block will run if it isn’t.
Conditions can be more complex than a single check for equality. An if statement can contain more than one condition. For example, imagine if the game were adjusted so that both 5 and 6 were winning numbers. The if statement could be changed to the following.
Example: PHP-DiceRoll-Or
if ($roll == 6 || $roll == 5) {
  echo '<p>You win!</p>';
}
else {
  echo '<p>Sorry, you didn\'t win. Better luck next time!</p>';
}
The double pipe operator (||) means “or”. The condition above is now met if either condition is met. This can be read as “If you roll a 6 or you roll a 5”.
However, this can be expressed in an even better way. if statements aren’t limited to using the equals (==) operator. They can also utilize the mathematical greater than (>) and less than (<) operators. The if statement above could also be done with a single expression.
Example: PHP-DiceRoll-Greater
if ($roll > 4) {
  echo '<p>You win!</p>';
}
else {
  echo '<p>Sorry, you didn\'t win. Better luck next time!</p>';
}
The condition $roll > 4 will be met if the value stored in the $roll variable is greater than 4, allowing us to have 5 and 6 as winning numbers with a single condition. If we wanted 4, 5 and 6 as winning numbers, the condition could be changed to $roll > 3.
Like the “or” expression (||), there’s an “and” expression that’s only met when both conditions are met. We could expand the game to include two dice and require players to roll two sixes to win.
Example: PHP-DiceRoll-TwoDice
$roll1 = rand(1, 6);
$roll2 = rand(1, 6);

echo '<p>You rolled a ' . $roll1 . ' and a ' . $roll2 . '</p>';

if ($roll1 == 6 && $roll2 == 6) {
  echo '<p>You win!</p>';
}
else {
  echo '<p>Sorry, you didn\'t win. Better luck next time!</p>';
}

echo '<p>Thanks for playing</p>';
The condition $roll1 == 6 && $roll2 == 6 will only be met if $roll1 == 6 is true and $roll2 == 6. This means that the player has to roll a 6 on both dice to win the game. If we changed the and (&&) to an or (||) — that is, if ($roll1 == 6 || $roll2 == 6) — the player would win if they rolled a 6 on either dice.
We’ll look at more complicated conditions as the need arises. For the time being, a general familiarity with if … else statements is sufficient.
Note: PHP also allows the use of or in place of || and and in place of &&. For example:
if ($roll == 6 or $roll == 5) { … }There are some minor differences between the way or and || work that can lead to unexpected behavior. Generally speaking, avoid the “spelled out” operators. Sticking to the double pipe (||) and double ampersand (&&) will help prevent a number of confusing bugs.
Loops
Another type of control structure that’s very useful is a “loop”. Loops allow you to repeat the same lines of code over and over. Two important kind of loops are for loops and while loops. Let’s look at how they work.
For Loops
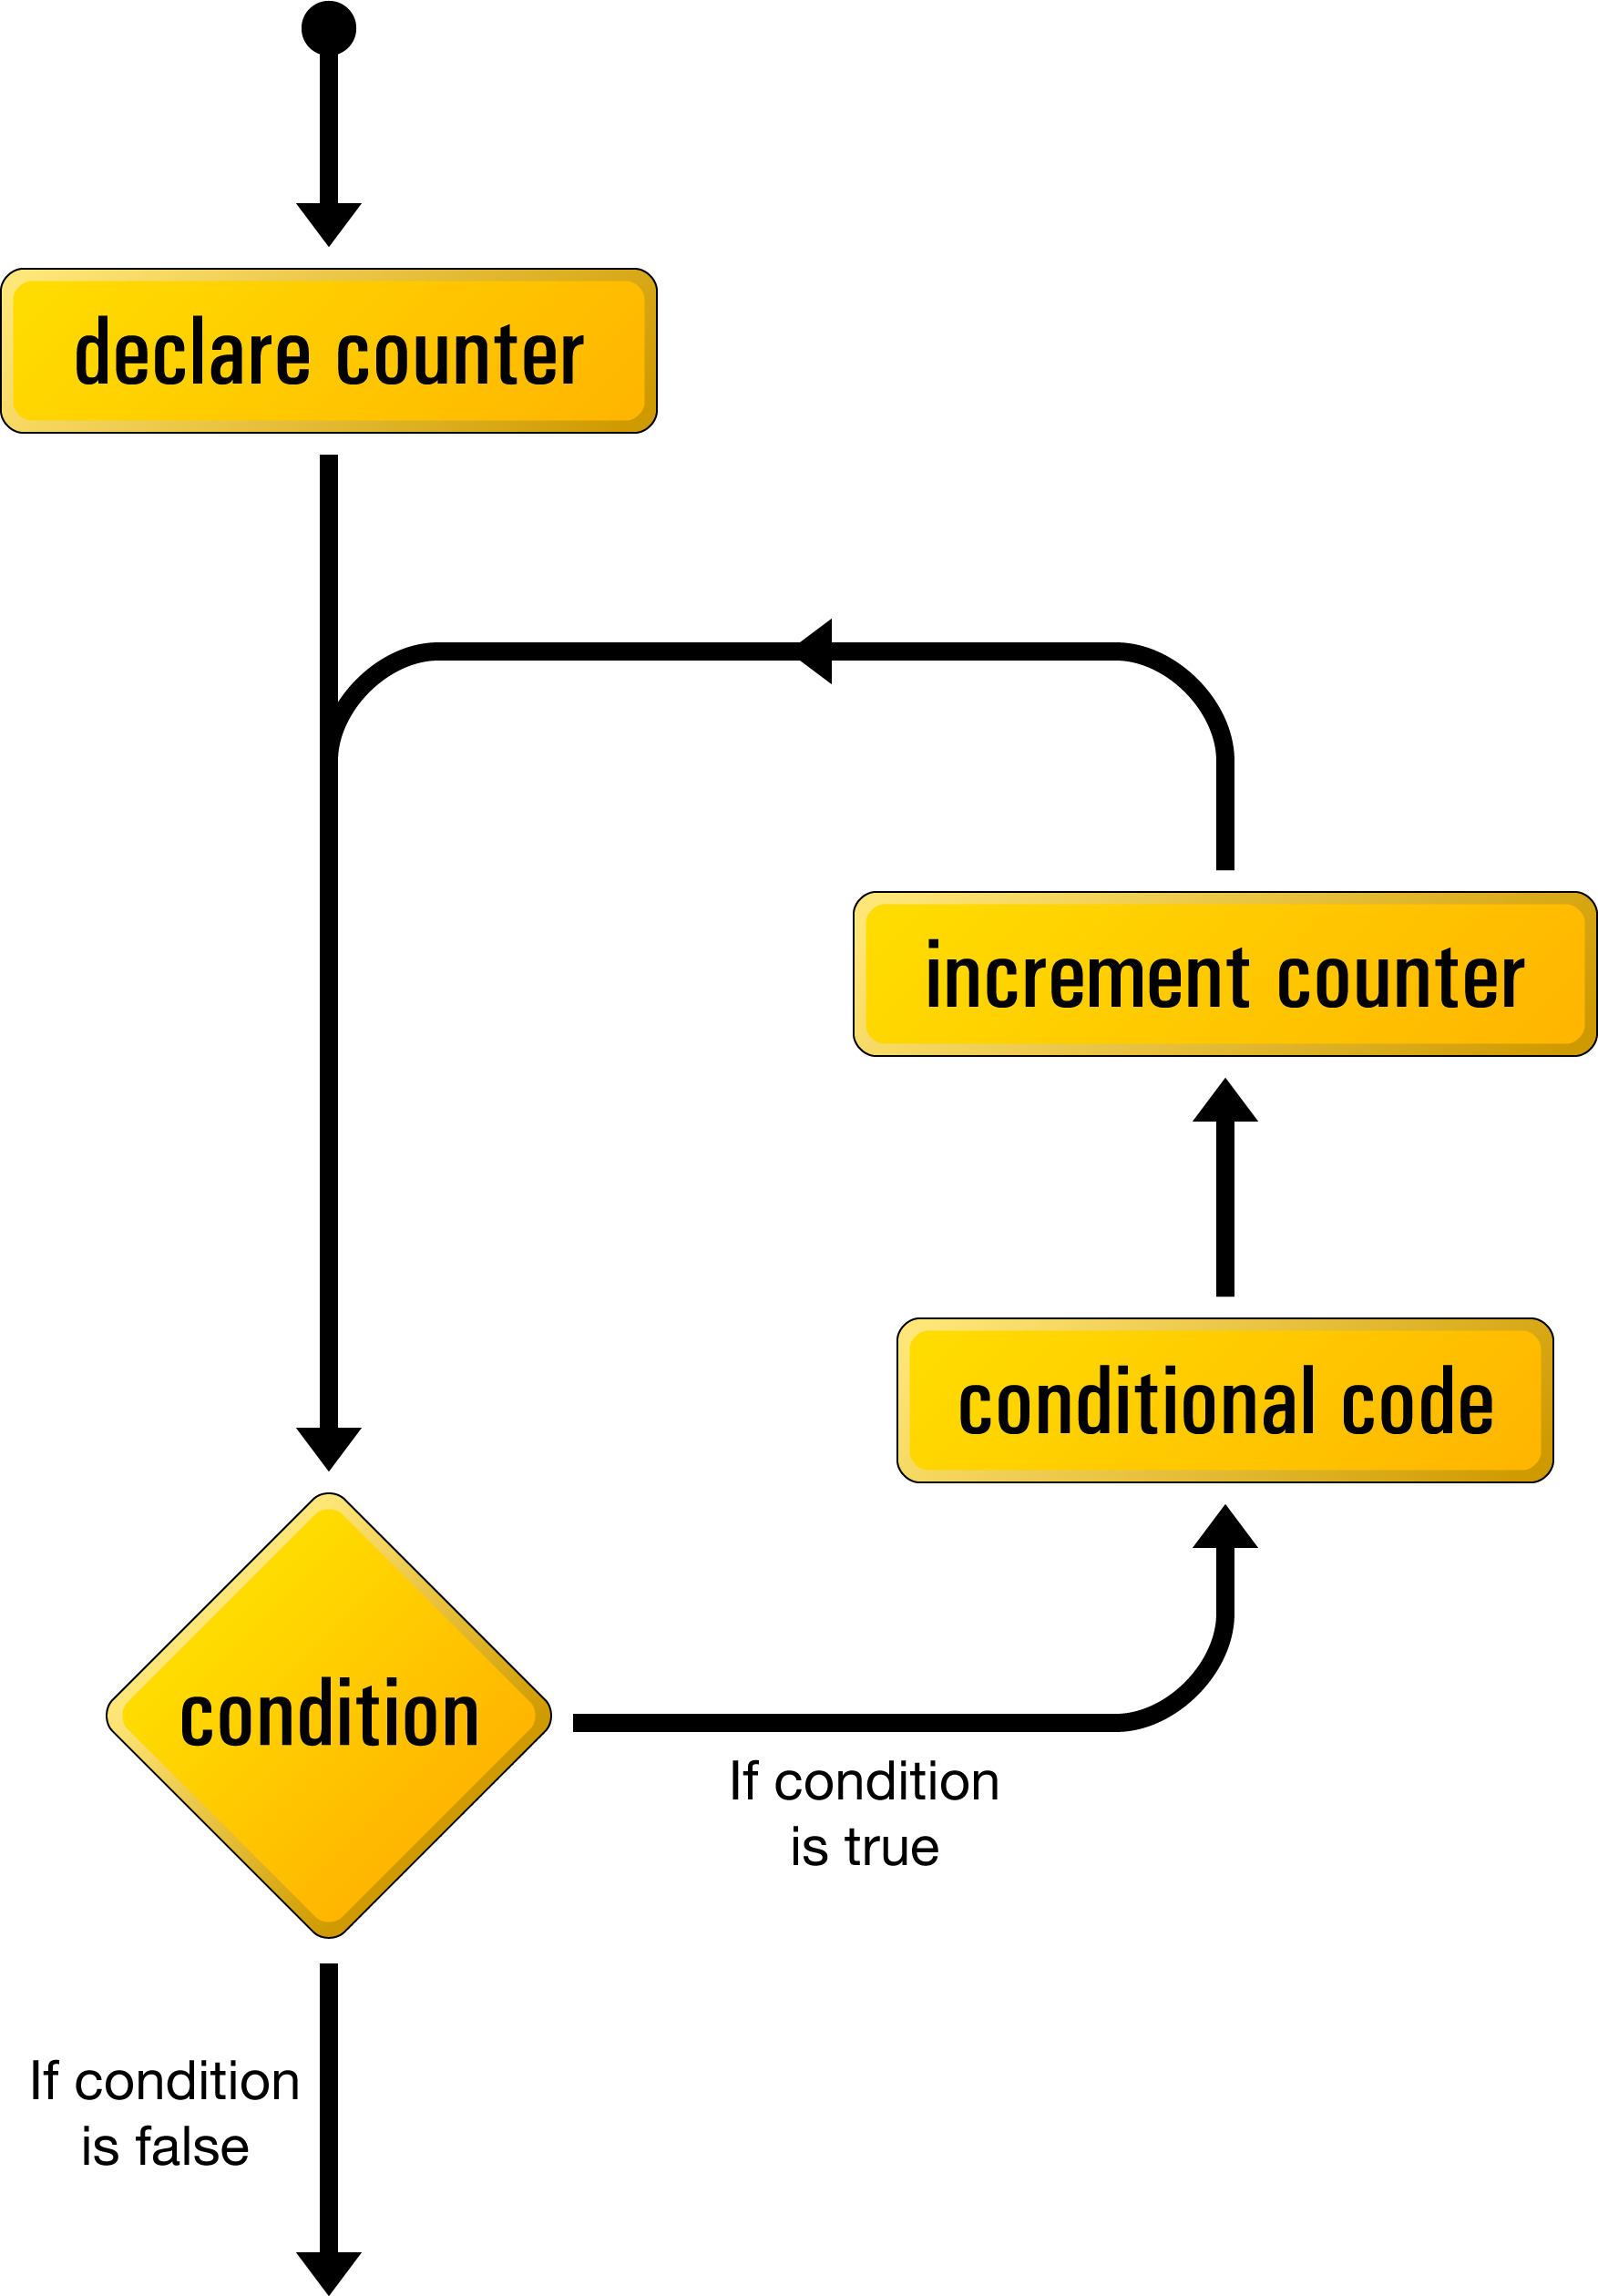
The for loop is used when you know up front how many times you need to run the same code. The image below shows the flow of a for loop.
Here’s what it looks like in code:
for (declare counter; condition; increment counter) {
  ⋮ statement(s) to execute repeatedly as long as condition is true
}
The declare counter statement is executed once at the start of the loop. The condition statement is checked each time through the loop before the statements in the body are executed. The increment counter statement is executed each time through the loop after the statements in the body.
To count to ten using a for loop, you can use the following code:
for ($count = 1; $count <= 10; $count++) {
  echo $count . ' ';
}
This looks quite scary, as there’s a lot going on, but let me break it down for you:
$count = 1;. You’re already familiar with this code. It’s creating a variable called$countand setting the value to1.$count <= 10;. This is the condition. It can be read as “keep looping while$countis less than or equal to 10”.$count++. This says “add 1 to the counter each time”. It’s identical to$count = $count + 1.echo $count . ' ';. This prints the value of the counter followed by a space.
The condition in this example uses the <= operator. This acts similarly to the less than operator (<), but evaluates to true if the number being compared is less than or equal to the second. Other available operators include >= (greater than or equal) and != (not equal).
All three parts of the for loop are combined to produce the complete loop. Although, at first glance, the code seems a little more difficult to read, putting all the code that deals with controlling the loop in the same place actually makes it easier to understand once you’re used to the syntax. Many of the examples in this book will use for loops, so you’ll have plenty of opportunities to practice reading them.
You can change each part of the for loop to have different results. For example, let’s look at how to add 3 each time you can change the for loop by amending the last part.
The final part of the loop, $count++, says add 1 to the value of $count, and it’s a short way of writing $count = $count + 1.
By changing $count++ to $count = $count + 3, the for loop can be used to count in threes.
Example: PHP-For
for ($count = 1; $count <= 10; $count = $count + 3) {
  echo $count . ' ';
}
This will result in the following:
1 4 7 10
for loops can be combined with other statements — such as if statements — to perform specific tasks on each iteration. For example, rather than refreshing the page on our dice game each time, we might want to roll the dice ten times and print the results.
Example: PHP-DiceRoll-ManyDice
for ($count = 1; $count <= 10; $count++) {
  $roll = rand(1, 6);
  echo '<p>You rolled a ' . $roll . '</p>';

  if ($roll == 6) {
    echo '<p>You win!</p>';
  }
  else {
    echo '<p>Sorry, you didn\'t win. Better luck next time!</p>';
  }
}

echo '<p>Thanks for playing</p>';
This lets us roll the dice ten times without needing to refresh the page each time. Using a loop is functionally identical to copying and pasting the code ten times, and will produce the exact same outcome as the following:
$roll = rand(1, 6);
echo '<p>You rolled a ' . $roll . '</p>';

if ($roll == 6) {
  echo '<p>You win!</p>';
}
else {
  echo '<p>Sorry, you didn\'t win. Better luck next time!</p>';
}

$roll = rand(1, 6);
echo '<p>You rolled a ' . $roll . '</p>';

if ($roll == 6) {
  echo '<p>You win!</p>';
}
else {
  echo '<p>Sorry, you didn\'t win. Better luck next time!</p>';
}

$roll = rand(1, 6);
echo '<p>You rolled a ' . $roll . '</p>';

if ($roll == 6) {
  echo '<p>You win!</p>';
}
else {
  echo '<p>Sorry, you didn\'t win. Better luck next time!</p>';
}

// and so on …
The computer doesn’t care which method you use: you can copy/paste or use a loop. It will just run the code. However, as a developer, you’ll quickly realize that a loop is the better choice. If you wanted to update the code to also allow 5 as a winning number, you’d need to update the condition in ten different places. Using a loop, you can change the code in one place and it will affect each iteration of the loop. If you ever find yourself copy/pasting code, there’s always a better way of achieving what you’re trying to do.
Note: given your new knowledge of loops, you should be able to start coding for yourself. Can you complete these challenges?
- Challenge 1: print all the odd numbers from 21 to 99.
- Challenge 2: print the nine times table up to 12 x 9 (
9 18 27… etc.) without using the multiplication operator (*) or anifstatement. - Challenge 3: print the nine times table in this format:
1x9 = 9
2x9 = 18
… etc.
This time, you’ll need to use the multiplication operator!
While Loops
Another often-used PHP control structure is the while loop. Where the if … else statement allows us to choose whether or not to execute a set of statements depending on some condition, the while loop allows us to use a condition to determine how many times we’ll execute a set of statements repeatedly.
The following image shows how a while loop operates.
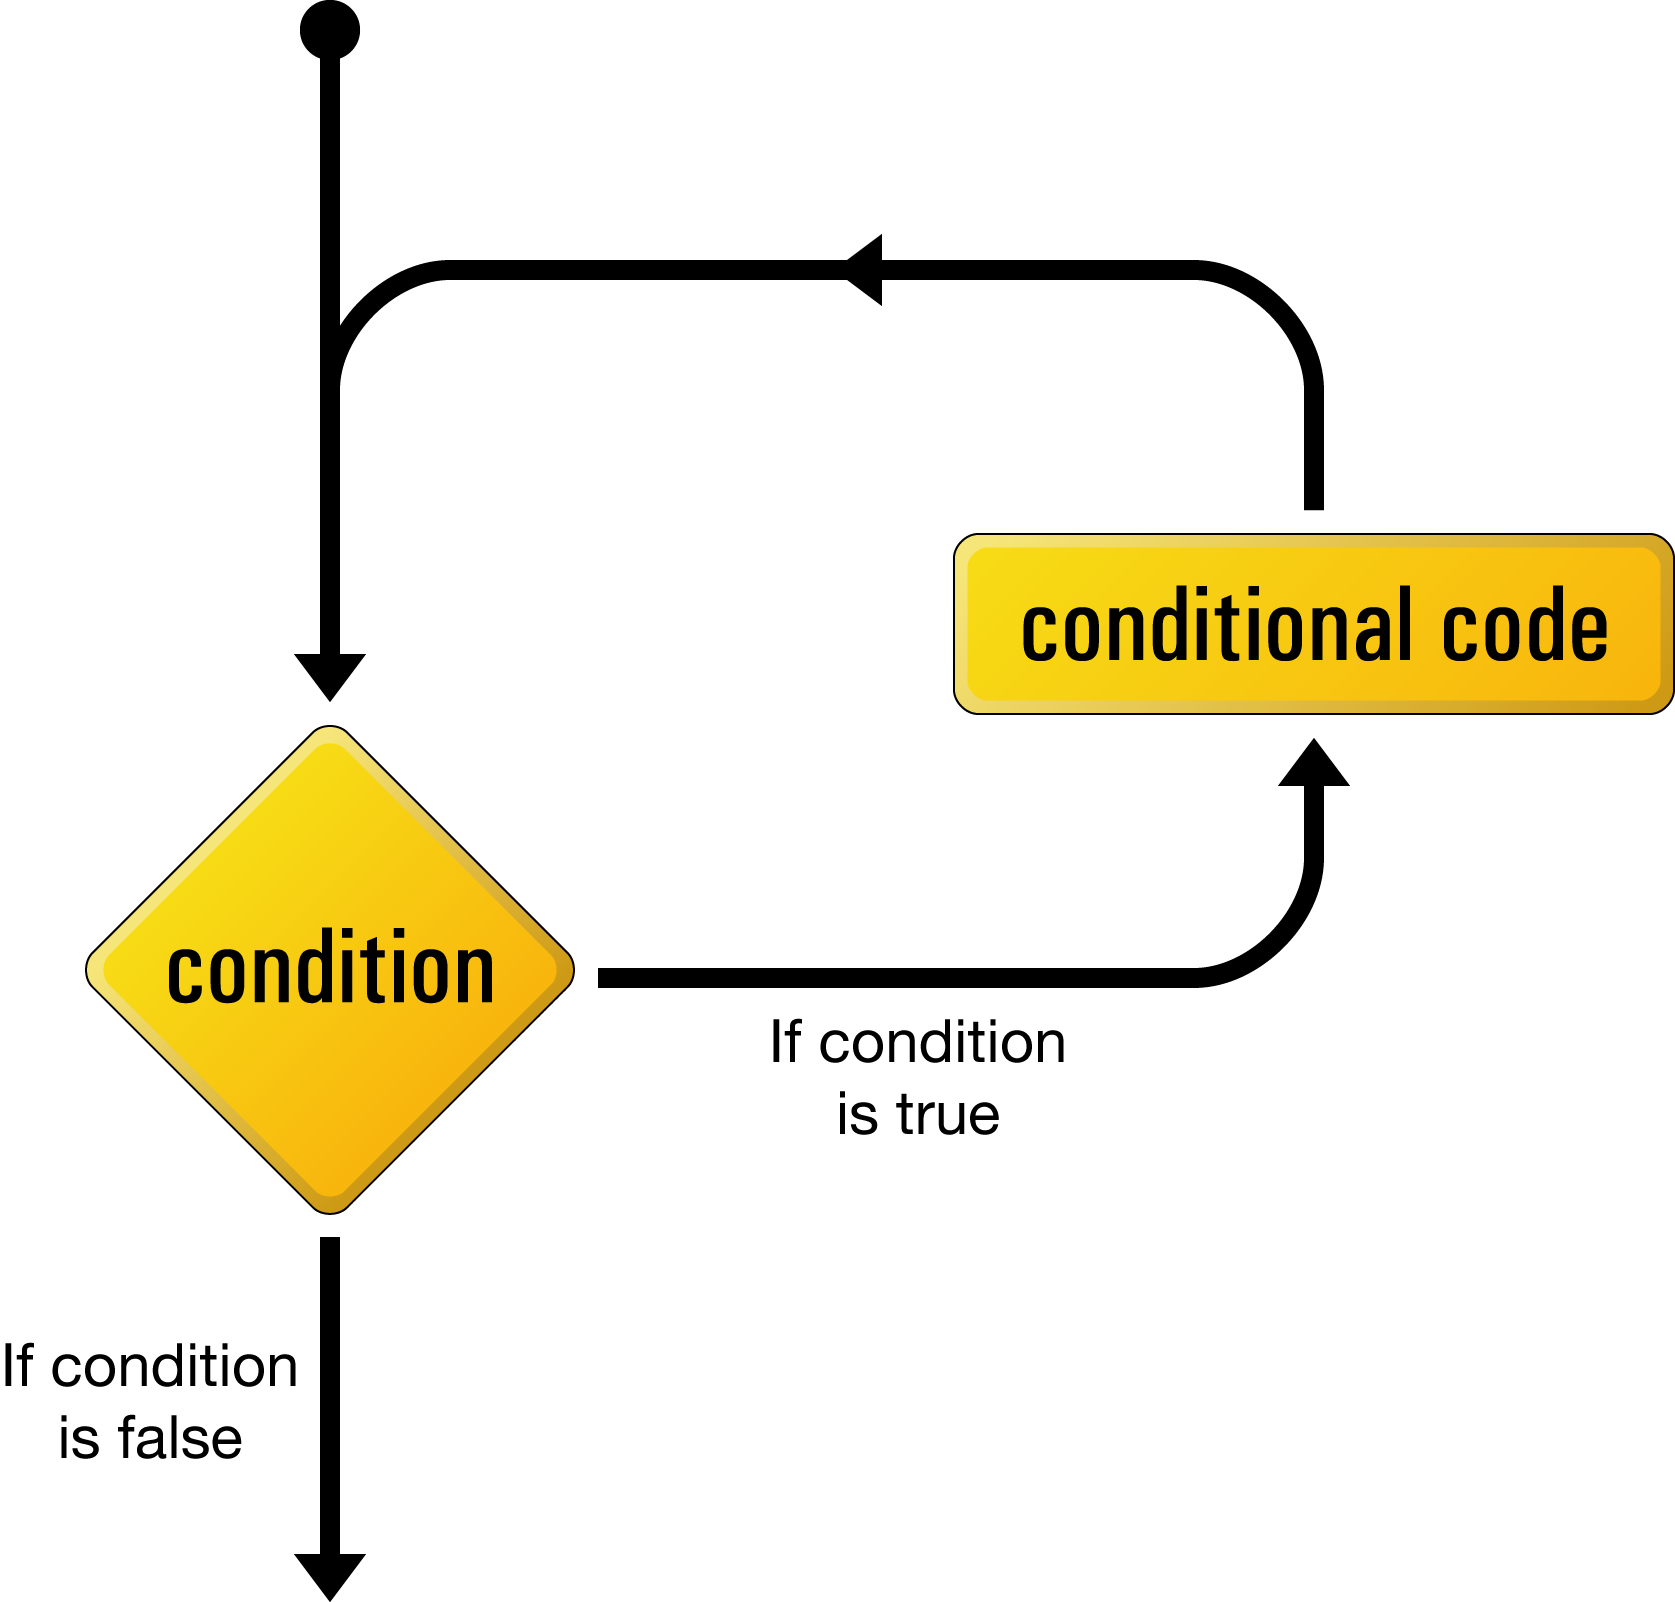
Here’s what a while loop looks like in code:
while (condition) {
  ⋮ statement(s) to execute repeatedly as long as condition is true
}
The while loop works very similarly to an if statement. The difference arises when the condition is true and the statement(s) are executed. Instead of continuing the execution with the statement that follows the closing brace (}), the condition is checked again. If the condition is still true, the statement(s) are executed a second time, and a third, and will continue to be executed as long as the condition remains true. The first time the condition evaluates false (whether it’s the first time it’s checked, or the hundredth), the execution jumps immediately to the statement that follows the while loop, after the closing brace.
You can use a while loop to create a counter that has a similar result to a for loop.
Example: PHP-WhileCount
$count = 1;
while ($count <= 10) {
  echo $count . ' ';
  ++$count;
}
This works in exactly the same way as a for loop, and you’ll notice a lot of the same statements in different places. This code may look a bit frightening, I know, but let me talk you through it line by line:
$count = 1;. The first line creates a variable called$countand assigns it a value of1.while ($count <= 10). The second line is the start of awhileloop, the condition being that the value of$countis less than or equal (<=) to 10.{. The opening brace marks the beginning of the block of conditional code for thewhileloop. This conditional code is often called the body of the loop, and is executed over and over again, as long as the condition holds true.echo $count . ' ';. This line simply outputs the value of$count, followed by a space.++$count;. The fourth line adds1to the value of$count.++$countis a shortcut for$count = $count + 1.$count++will also work here! The position of the++can be important, but in this case it doesn’t matter. If the++is before the variable name, the counter is incremented before the value is read. When$countis zero, the codeecho ++$count;will print1, whereasecho $count++;will print0. Be careful when using++, as putting it in the wrong place can cause bugs.}. The closing brace marks the end of thewhileloop’s body.
So here’s what happens when this code is executed. The first time the condition is checked, the value of $count is 1, so the condition is definitely true. The value of $count (1) is output, and $count is given a new value of 2. The condition is still true the second time it’s checked, so the value (2) is output and a new value (3) is assigned. This process continues, outputting the values 3, 4, 5, 6, 7, 8, 9, and 10. Finally, $count is given a value of 11, and the condition is found to be false, which ends the loop.
The net result of the code is shown in the following image.
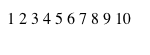
While loops aren’t generally used for simple counters like this; it’s normally the job of the for loop. Although you can create a counter with a while loop, usually they’re used to keep running code until something happens. For example, we might want to keep rolling the dice until we get a 6. There’s no way to know how many dice rolls will be needed when we write the code: it could take one roll or hundreds to get a six. So you can place the dice roll in a while loop.
Example: PHP-DiceRoll-While
$roll = 0;
while ($roll != 6) {
  $roll = rand(1, 6);
  echo '<p>You rolled a ' . $roll . '</p>';

  if ($roll == 6) {
    echo '<p>You win!</p>';
  }
  else {
    echo '<p>Sorry, you didn\'t win, better luck next time!</p>';
  }
}
This will keep rolling the dice until a 6 is rolled. Each time you run the code, it will take a different number of rolls before you win.
The while statement uses the condition $roll != 6. In order for the while loop to be run the first time, the $roll variable must be set to a value for the initial comparison. That’s the purpose of the $roll = 0; line above the while loop. By setting the value to zero initially, when the while loop runs the first time, the condition $roll != 6 is met, because $roll is equal to zero, not 6, and the loop will start. If the $roll variable isn’t created prior to starting the loop, you’ll get an error, because the $roll variable hasn’t been set to anything before it’s used.
There’s a variant of the while loop called do … while, which is useful in these kinds of cases. It allows you to run some code without a condition and then run it again if the code isn’t set. This takes the following structure:
do {
 statement(s) to execute and then repeat if the condition is true
}
while (condition);
For the dice-roll example above, this allows you to ignore the first line.
Example: PHP-DiceRoll-DoWhile
do {
  $roll = rand(1, 6);
  echo '<p>You rolled a ' . $roll . '</p>';

  if ($roll == 6) {
    echo '<p>You win!</p>';
  }
  else {
    echo '<p>Sorry, you didn\'t win, better luck next time!</p>';
  }
}
while ($roll != 6);
This time, because the condition is at the bottom, by the time the while statement is run, the $roll variable has been given a value, so you don’t need to give it an initial value of zero to force the loop to run the first time.
Note: PHP doesn’t mind how you format your code, and whitespace is ignored. You could write the previous example like this:
do {
  $roll = rand(
  1,
  6);

  echo '<p>You rolled a ' . $roll . '</p>';

  if (
      $roll == 6
  )
  {
    echo '<p>You win!</p>';
  }
  else
  {
    echo '<p>Sorry, you didn\'t win, better luck next time!</p>';
  }
}
while ($roll != 6);
The script will execute in the exact same way. Different programmers have different preferred styles, such as using tabs or spaces for indentation, or placing the opening brace on the same line as the statement or after it. There are even coding style guides that dictate where braces and brackets should be placed and how code should be formatted. But the computer doesn’t care whether a brace is on the same line or the next line, so use whatever style you feel most comfortable with.
Arrays
An array is a special kind of variable that contains multiple values. If you think of a variable as a box that contains a value, an array can be thought of as a box with compartments where each compartment is able to store an individual value.
To create an array in PHP, use square brackets ([ and ]) containing the values you want to store, separated by commas:
$myArray = ['one', 2, '3'];
Note: arrays in PHP can also be defined using the array keyword. The following code is equivalent to the square bracket notation above:
$myArray = array('one', 2, 3);The square bracket notation was introduced in PHP 5.4 and is preferred by PHP developers, as it’s less to type, and square brackets are more easily visible among round brackets in control structures like if statements and while loops.
This code creates an array called $myArray that contains three values: 'one', 2, and '3'. Just like an ordinary variable, each space in an array can contain any type of value. In this case, the first and third spaces contain strings, while the second contains a number.
To access a value stored in an array, you need to know its index. Typically, arrays use numbers as indices to point to the values they contain, starting with zero. That is, the first value (or element) of an array has index 0, the second has index 1, the third has index 2, and so on. Therefore, the index of the nth element of an array is n–1. Once you know the index of the value you’re interested in, you can retrieve that value by placing that index in square brackets after the array variable name:
echo $myArray[0];    // outputs 'one'
echo $myArray[1];    // outputs '2'
echo $myArray[2];    // outputs '3'
Each value stored in an array is called an element. You can use a key in square brackets to add new elements, or assign new values to existing array elements:
$myArray[1] = 'two';     // assign a new value
$myArray[3] = 'four';    // create a new element
You can also add elements to the end of an array using the assignment operator as usual, but leaving empty the square brackets that follow the variable name:
$myArray[] = 'five';
echo $myArray[4];    // outputs 'five'
Array elements can be used like any other variable, and in a lot of cases choosing to use an array or multiple variables will depend on the programmer’s preference. However, arrays can be used to solve problems that normal variables can’t!
Remember the dice game from the last section? It would be more user-friendly if it showed the English word rather than the numeral for the result. For example, instead of “You rolled a 3” or “You rolled a 6”, it might be nicer to read “You rolled a three” or “You rolled a six”.
To do this, we need some way of converting from a numeral to the English word for that number. This is possible with a series of if statements.
Example: PHP-DiceRoll-English-If
$roll = rand(1, 6);

if ($roll == 1) {
  $english = 'one';
}
else if ($roll == 2) {
  $english = 'two';
}
else if ($roll == 3) {
  $english = 'three';
}
else if ($roll == 4) {
  $english = 'four';
}
else if ($roll == 5) {
  $english = 'five';
}
else if ($roll == 6) {
  $english = 'six';
}

echo '<p>You rolled a ' . $english . '</p>';

if ($roll == 6) {
  echo '<p>You win!</p>';
}
else {
  echo '<p>Sorry, you didn\'t win. Better luck next time!</p>';
}*
This solution works, but it’s very inefficient, as you need to write an if statement for each possible dice roll. Instead, you can use an array to store each roll value:
$english = [
  1 => 'one',
  2 => 'two',
  3 => 'three',
  4 => 'four',
  5 => 'five',
  6 => 'six'
];
The => notation (known as a double arrow operator) allows you to define both the keys and the values when creating the array. This is equivalent to the following:
$english = [];
$english[1] = 'one';
$english[2] = 'two';
$english[3] = 'three';
$english[4] = 'four';
$english[5] = 'five';
$english[6] = 'six';
Although these are equivalent, the code required to use the shorthand notation is a lot quicker to type, and is arguably easier to read and easier to understand.
Now that the array is created, it’s possible to read each English word from it:
echo $english[3];    // Prints "three"
echo $english[5];    // Prints "five"
In PHP, a number like 3 can be replaced with a variable that contains that value. This is also possible with array keys. For example:
$var1 = 3;
$var2 = 5;

echo $english[$var1];    // Prints "three"
echo $english[$var2];    // Prints "five"
Knowing this, we can piece it all together and adjust the dice game to display the English word of the dice roll by reading the relevant value from the array using the $roll variable.
Example: PHP-DiceRoll-English-Array
$english = [
  1 => 'one',
  2 => 'two',
  3 => 'three',
  4 => 'four',
  5 => 'five',
  6 => 'six'
];

$roll = rand(1, 6);

echo '<p>You rolled a ' . $english[$roll] . '</p>';

if ($roll == 6) {
  echo '<p>You win!</p>';
}
else {
  echo '<p>Sorry, you didn\'t win, better luck next time!</p>';
}
As you can see, this is a lot cleaner and tidier than a long list of if statements. There are two big advantages here.
Firstly, if you wanted to represent a ten-sided dice, it’s a lot easier to add to the array than add an extra if statement for each number.
Secondly, the array is reusable. For the version with two dice, you can just reuse the $english array rather than repeating all the if statements for each dice roll.
Example: PHP-DiceRoll-English-If-TwoDice
$roll1 = rand(1, 6);
$roll2 = rand(1, 6);

if ($roll1 == 1) {
  $english = 'one';
}
else if ($roll1 == 2) {
  $english = 'two';
}
else if ($roll1 == 3) {
  $english = 'three';
}
else if ($roll1 == 4) {
  $english = 'four';
}
else if ($roll1 == 5) {
  $english = 'five';
}
else if ($roll1 == 6) {
  $english = 'six';
}

if ($roll2 == 1) {
  $englishRoll2 = 'one';
}
else if ($roll2 == 2) {
  $englishRoll2 = 'two';
}
else if ($roll2 == 3) {
  $englishRoll2 = 'three';
}
else if ($roll2 == 4) {
  $englishRoll2 = 'four';
}
else if ($roll2 == 5) {
  $englishRoll2 = 'five';
}
else if ($roll2 == 6) {
  $englishRoll2 = 'six';
}

echo '<p>You rolled a ' . $english . ' and a ' . $englishRoll2 . '</p>';
Instead, the array can be used for both rolls.
Example: PHP-DiceRoll-English-Array-TwoDice
$english = [
  1 => 'one',
  2 => 'two',
  3 => 'three',
  4 => 'four',
  5 => 'five',
  6 => 'six'
];

$roll1 = rand(1, 6);
$roll2 = rand(1, 6);

echo '<p>You rolled a ' . $english[$roll1] . ' and a ' . $english[$roll2] . '</p>';
While numbers are the most common choice for array indices, there’s another possibility. You can also use strings as indices to create what’s called an associative array. It’s called this because it associates values with meaningful indices. In this example, we associate a date (in the form of a string) with each of three names:
$birthdays['Kevin'] = '1978-04-12';
$birthdays['Stephanie'] = '1980-05-16';
$birthdays['David'] = '1983-09-09';
Like the numerical indexes, you can use the shorthand notation for associative arrays as well:
$birthdays = [
  'Kevin' => '1978-04-12',
  'Stephanie' => '1980-05-16',
  'David' => '1983-09-09'
];
Now, if we want to know Kevin’s birthday, we look it up using the name as the index:
echo 'Kevin\'s birthday is: ' . $birthdays['Kevin'];
This type of array is especially important when it comes to user interaction in PHP, as we’ll see shortly. I’ll also demonstrate other uses of arrays throughout this book.
Note: because Kevin's contains an apostrophe (single quote) and PHP would see this as the end of the string, it must be escaped with a \ so that PHP treats it as part of the string, rather than marking the end.
User Interaction and Forms
Database-driven websites often need to do more than dynamically generate pages based on database data. You also need to provide some degree of interactivity, even if it’s just a search box.
Because JavaScript code can live in the browser, it allows users to have all sorts of immediate interactions with a web page. Server-side scripting languages such as PHP have a more limited scope when it comes to support for user interaction. As PHP code is only activated when a request is made to the server, user interaction occurs solely in a back-and-forth fashion: the user sends requests to the server, and the server replies with dynamically generated pages.
The key to creating interactivity with PHP is to understand the techniques we can employ to send information about a user’s interaction, along with a request for a new web page. As it turns out, PHP makes this quite easy.
Note: as the Web has evolved, so too have the options for communication between the front and back ends of a web app. JavaScript allows for communication with a back end without page reloading. A JavaScript framework such as Vue.js, for example, can communicate with PHP frameworks like Laravel. For the purposes of this book, however, we’ll focus on what can be done with PHP alone.
Passing Variables in Links
The simplest way to send information along with a page request is to use the URL query string. If you’ve ever noticed a URL containing a question mark that follows the filename, you’ve seen this technique in use. For example, if you search for “SitePoint” on Google, it will take you to a search result page with a URL like this:
http://www.google.com/search?hl=en&q=SitePoint
See the question mark in the URL? The text that follows the question mark contains your search query (SitePoint). That information is being sent along with the request for http://www.google.com/search.
Let’s code up an easy example of our own. Create a regular HTML file called name.html (no .php filename extension is required, since there won’t be any PHP code in this file) and insert this link:
<a href="name.php?name=Tom">Hi, I’m Tom!</a>
This is a link to a file called name.php, but as well as linking to the file, you’re also passing a variable along with the page request. The variable is passed as part of the query string, which is the portion of the URL that follows the question mark. The variable is called name, and its value is Tom. So, you’ve created a link that loads name.php, and which informs the PHP code contained in that file that name equals Tom.
To really understand the effect of this link, we need to look at name.php. Create it as a new file, but this time, note the .php filename extension. This tells the web server that it can expect to interpret some PHP code in the file. In the body of this new web page, type the following.
Example: PHP-GET
<?php
$name = $_GET['name'];
echo 'Welcome to our website, ' . $name . '!';
?>
Now, put these two files (name.html and name.php) in the public folder, and load the first file in your browser. (The URL should be https://v.je/name.html.) Click the link in that first page to request the PHP script. The resulting page should say “Welcome to our website, Tom!”, as shown in the image below.
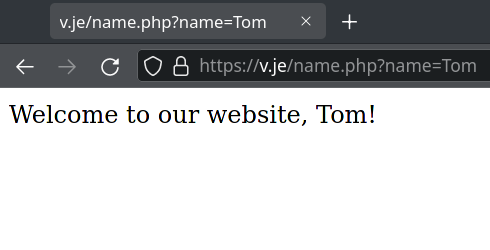
Let’s take a closer look at the code that made this possible. This is the most important line:
$name = $_GET['name'];
Using what you learned from the “Arrays” section above, you may be able to figure out what this line does. It assigns the value stored in the 'name' element of the array called $_GET to a new variable called $name. But where does the $_GET array come from?
It turns out that $_GET is one of a number of variables that PHP automatically creates when it receives a request from a browser. PHP creates $_GET as an array variable that contains any values passed in the URL query string. $_GET is an associative array, so the value of the name variable passed in the query string can be accessed as $_GET['name']. Your name.php script assigns this value to an ordinary PHP variable ($name), then displays it as part of a text string using an echo statement:
echo 'Welcome to our website, ' . $name . '!';
The value of the $name variable is inserted into the output string using the string concatenation operator (.) that we looked at in the “Variables, Operators, and Comments” section.
But watch out! There’s a security hole lurking in this code! Although PHP is an easy programming language to learn, it turns out it’s also especially easy to introduce security issues into websites using PHP if you’re unaware of what precautions to take. Before we go any further with the language, I want to make sure you’re able to spot and fix this particular security issue, since it’s probably the most common one on the Web today.
The security issue here stems from the fact that the name.php script is generating a page containing content that’s under the control of the user — in this case, the $name variable. Although the $name variable will normally receive its value from the URL query string in the link on the name.html page, a malicious user could edit the URL to send a different value for the name variable.
To see how this would work, click the link in name.html again. When you see the resulting page (with the welcome message containing the name “Tom”), take a look at the URL in the address bar of your browser. It should look similar to this:
https://v.je/name.php?name=Tom
Edit the URL to insert a <b> tag before the name and a </b> tag following the name:
https://v.je/name.php?name=<b>Tom</b>
Hit enter to load this new URL, and note that the name in the page is now bold, as shown in the following image.
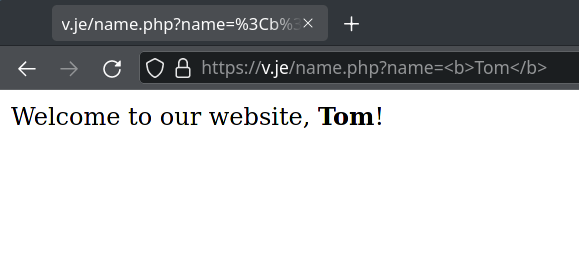
Note: you might notice that some browsers will automatically convert the < and > characters into URL escape sequences (%3C and %3E respectively), but either way, PHP will receive the same value.
See what’s happening here? The user can type any HTML code into the URL, and your PHP script includes it in the code of the generated page without question. If the code is as innocuous as a <b> tag, there’s no problem, but a malicious user could include sophisticated JavaScript code that performs some low action like stealing the user’s password. All the attacker would have to do is publish the modified link on some other site under the attacker’s control, and then entice one of your users to click it. The attacker could even embed the link in an email and send it to your users. If one of your users clicked the link, the attacker’s code would be included in your page and the trap would be sprung!
I hate to scare you with this talk of malicious hackers attacking your users by turning your own PHP code against you, particularly when you’re only just learning the language. The fact is that PHP’s biggest weakness as a language is how easy it is to introduce security issues like this. Some might say that much of the energy you spend learning to write PHP to a professional standard is spent on avoiding security issues. The sooner you’re exposed to these issues, however, the sooner you become accustomed to avoiding them, and the less of a stumbling block they’ll be for you in future.
So, how can we generate a page containing the user’s name without opening it up to abuse by attackers? The solution is to treat the value supplied for the $name variable as plain text to be displayed on your page, rather than as HTML to be included in the page’s code. This is a subtle distinction, so let me show you what I mean.
Open up your name.php file again and edit the PHP code it contains so that it looks like the code below.
Example: PHP-GET-Sanitized
<?php
$name = $_GET['name'];
echo 'Welcome to our website, ' .
  htmlspecialchars($name, ENT_QUOTES, 'UTF-8') . '!';
?>
There’s a lot going on in this code, so let me break it down for you. The first line is the same as it was previously, assigning to $name the value of the 'name' element from the $_GET array. But the echo statement that follows it is drastically different. Whereas previously we simply dumped the $name variable — naked — into the echo statement, this version of the code uses the built-in PHP function htmlspecialchars to perform a critical conversion.
Remember, the security hole occurs because, in name.php, HTML code in the $name variable is dumped directly into the code of the generated page, and can therefore do anything that HTML code can do. What htmlspecialchars does is convert “special HTML characters” like < and > into HTML character entities like < and >, which prevents them from being interpreted as HTML code by the browser. I’ll demonstrate this for you in a moment.
First, let’s take a closer look at this new code. The call to the htmlspecialchars function is the first example in this book of a PHP function that takes more than one argument. Here’s the function call all by itself:
htmlspecialchars($name, ENT_QUOTES, 'UTF-8')
The first argument is the $name variable (the text to be converted). The second argument is the PHP “constant” ENT_QUOTES, which tells htmlspecialchars to convert single and double quotes in addition to other special characters.
Note: a PHP constant is like a variable whose value you’re unable to change. Unlike variables, constants don’t start with a dollar sign. PHP comes with a number of built-in constants like ENT_QUOTES that are used to control built-in functions like htmlspecialchars.
The third parameter is the string 'UTF-8', which tells PHP what character encoding to use to interpret the text you give it.
Note: you may have discerned that all the example HTML pages in this book contain the following meta element near the top:
<meta charset="utf-8">This element tells the browser receiving this page that the HTML code of the page is encoded as UTF-8 text.
UTF-8 is one of many standards for representing text as a series of ones and zeros in computer memory, called character encodings. If you’re curious to learn all about character encodings, check out “The Definitive Guide to Web Character Encoding”.
In a few pages, we’ll reach the section on “Passing Variables in Forms”. By encoding your pages as UTF-8, your users can submit text containing thousands of foreign characters that your site would otherwise be unable to handle.
Unfortunately, many of PHP’s built-in functions, such as htmlspecialchars, assume you’re using the much simpler ISO-8859-1 (or Latin-1) character encoding by default. Therefore, you need to let them know you’re using UTF-8 when utilizing these functions.
If you can, you should also tell your text editor to save your HTML and PHP files as UTF-8 encoded text. This is only required if you want to type advanced characters (such as curly quotes or dashes) or foreign characters (like “é”) into your HTML or PHP code. The code in this book plays it safe and uses HTML entity references (for example, ’ for a curly right quote), which will work regardless.
Open up name.html in your browser and click the link that now points to your updated name.php. Once again, you’ll see the message “Welcome to our website, Tom!” As you did before, modify the URL to include <b> and </b> tags surrounding the name:
https://v.je/name.php?name=<b>Tom</b>
When you hit enter this time, instead of the name turning bold in the page, you should see the actual text you typed, as shown in the following image.
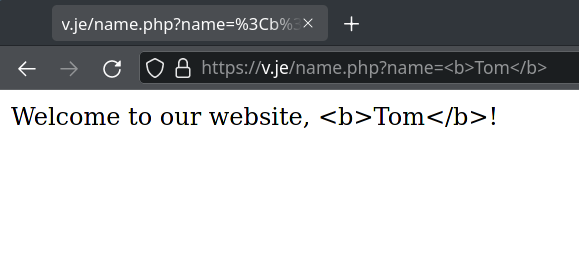
If you view the source code of the page, you can confirm that the htmlspecialchars function did its job and converted the < and > characters into the < and > entity references respectively. This prevents malicious users from injecting unwanted code into your site. If they try anything like that, the code is harmlessly displayed as plain text on the page.
We’ll make extensive use of the htmlspecialchars function throughout this book to guard against this sort of security hole. No need to worry too much if you’re having trouble grasping the details of how to use it just at the moment. Before long, you’ll find its use becomes second nature. For now, let’s look at some more advanced ways of passing values to PHP scripts when we request them.
Passing a single variable in the query string was nice, but it turns out you can pass more than one value if you want to! Let’s look at a slightly more complex version of the previous example. Open up your name.html file again, and change the link to point to name.php with this more complicated query string:
<a href="name.php?firstname=Tom&lastname=Butler">Hi,
  I’m Tom Butler!</a>
This time, our link passes two variables: firstname and lastname. The variables are separated in the query string by an ampersand (&, which should be written as & in HTML — yes, even in a link URL! … although, if you do wrongly use &, browsers will mostly fix it for you). You can pass even more variables by separating each name=value pair from the next with an ampersand.
As before, we can use the two variable values in our name.php file.
Example: PHP-GET-TwoVars
<?php
$firstName = $_GET['firstname'];
$lastName = $_GET['lastname'];
echo 'Welcome to our website, ' .
  htmlspecialchars($firstName, ENT_QUOTES, 'UTF-8') . ' ' .
  htmlspecialchars($lastName, ENT_QUOTES, 'UTF-8') . '!';
?>
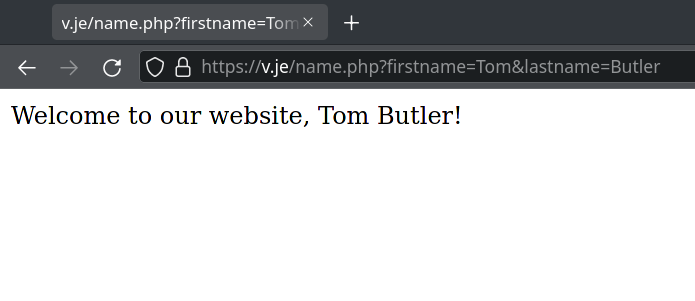
The echo statement is becoming quite sizable now, but it should still make sense to you. Using a series of string concatenations (.), it outputs “Welcome to our website”, followed by the value of $firstName (made safe for display using htmlspecialchars), a space, the value of $lastName (again, treated with htmlspecialchars), and finally an exclamation mark.
The result is pictured below.
This is all well and good, but we’re still yet to achieve our goal of true user interaction, where the user can enter arbitrary information and have it processed by PHP. To continue with our example of a personalized welcome message, we’d like to invite the user to type their name and have it appear in the resulting page. To enable the user to type in a value, we’ll need to use an HTML form.
Passing Variables in Forms
Remove the link code from name.html and replace it with this HTML code to create the form.
Example: PHP-GET-Form
<form action="name.php" method="get">
  <label for="firstname">First name:</label>
  <input type="text" name="firstname" id="firstname">

  <label for="lastname">Last name:</label>
  <input type="text" name="lastname" id="lastname">

  <input type="submit" value="GO">
</form>
The image below shows how the browser displays the form produced from this code.
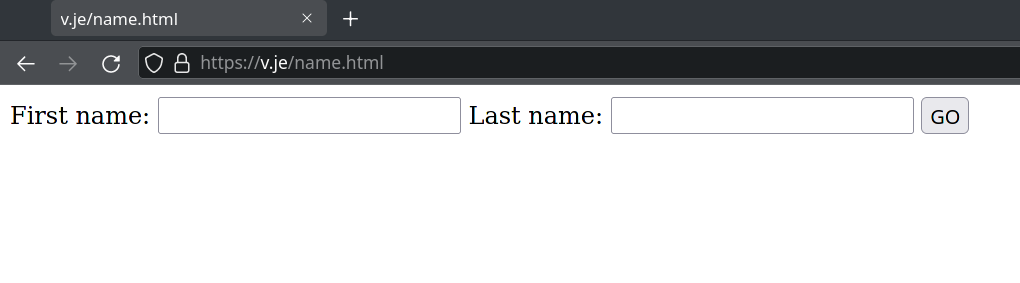
Note: I’ve added some CSS to the form (available in form.css in the sample code) to make it look a little prettier. The CSS I’ve used is very generic, and can be used to display any form in the format label-input-line break. I’ll be including this CSS file on any page that contains a form.
Since this is a book about PHP and MySQL, however, I won’t go into detail about how the CSS works. Check out SitePoint’s HTML5 & CSS3 for the Real World for advice on styling your forms with CSS.
This form has the exact same effect as the second link we looked at in the “Passing Variables in Links” section above (with firstname=Tom&lastname=Butler in the query string), except that you can now enter whichever names you like. When you click the submit button (labeled GO), the browser will load name.php and add the variables and their values to the query string for you automatically. It retrieves the names of the variables from the name attributes of the type="text" inputs, and obtains the values from the text typed into the text fields by the user.
The method attribute of the form tag is used to tell the browser how to send the variables and their values along with the request. A value of get (as used in name.html above) causes them to be passed via the query string (and appear in PHP’s $_GET array), but there’s an alternative. It can be undesirable — or even technically unfeasible — to have the values appear in the query string. What if we included a <textarea> element in the form, to let the user enter a large amount of text? A URL whose query string contained several paragraphs of text would be ridiculously long, and would possibly exceed the maximum length for a URL in today’s browsers. The alternative is for the browser to pass the information invisibly, behind the scenes.
Edit your name.html file once more. Modify the form method by setting it to post:
<form action="name.php" method="post">
  <label for="firstname">First name:</label>
  <input type="text" name="firstname" id="firstname">

  <label for="lastname">Last name:</label>
  <input type="text" name="lastname" id="lastname">

  <input type="submit" value="GO">
</form>
This new value for the method attribute instructs the browser to send the form variables invisibly as part of the page request, rather than embedding them in the query string of the URL.
As we’re no longer sending the variables as part of the query string, they stop appearing in PHP’s $_GET array. Instead, they’re placed in another array reserved especially for “posted” form variables: $_POST. We must therefore modify name.php to retrieve the values from this new array.
Example: PHP-POST-Form
<?php
$firstname = $_POST['firstname'];
$lastname = $_POST['lastname'];
echo 'Welcome to our website, ' .
  htmlspecialchars($firstname, ENT_QUOTES, 'UTF-8') . ' ' .
  htmlspecialchars($lastname, ENT_QUOTES, 'UTF-8') . '!';
?>
The image below shows what the resulting page looks like once this new form is submitted.
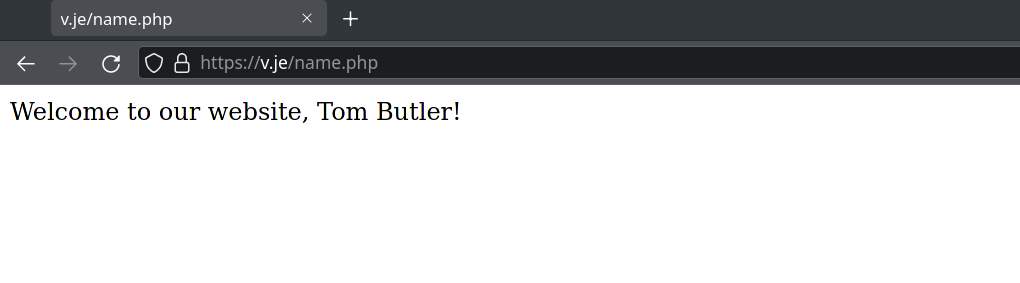
The form is functionally identical to the previous one. The only difference is that the URL of the page that’s loaded when the user clicks the GO button will be without a query string. On the one hand, this lets you include large values (or sensitive values such as passwords and credit card numbers) in the data that’s submitted by the form without them appearing in the query string. On the other hand, if the user bookmarks the page that results from the form’s submission, that bookmark will be useless, as it lacks the submitted values. This, incidentally, is the main reason why search engines use the query string to submit search terms. If you bookmark a search results page on Google, you can use that bookmark to perform the same search again later, because the search terms are contained in the URL.
Note: as a rule of thumb, you should only use GET forms if, when the form is submitted, nothing on the server changes — such as when you’re requesting a list of search results. Because the search terms are in the URL, the user can bookmark the search results page and get back to it without having to type in the search term again. But if, after submitting the form, a file is deleted, a database is updated, or a record is inserted, you should use POST. The primary reason for this is that if a user bookmarks the page (or presses the back button in their browser) it won’t trigger the form submission again and potentially create a duplicate record.
POST is also more secure. Anything sent via GET appears in the URL and is stored in the user’s history and bookmarks — which are very insecure locations for sensitive data such as passwords and credit card details.
That covers the basics of using forms to produce rudimentary user interaction with PHP. We’ll look at more advanced issues and techniques in later examples.
Hiding the Seams
You’re now armed with a working knowledge of the basic syntax of the PHP programming language. You understand that you can take any HTML web page, rename it with a .php file name extension, and inject PHP code into it to generate page content on the fly. Not bad for a day’s work!
Before we go any further, however, I want to stop and cast a critical eye over the examples we’ve discussed so far. Assuming your objective is to create database-driven websites that hold up to professional standards, there are a few unsightly blemishes we need to clean up.
The techniques in the rest of this chapter will help advance your programming skills beyond the beginner level, giving them a certain professional polish. I’ll rely on these techniques throughout the rest of this book to ensure that, no matter how simple the example, you can feel confident in the quality of the product you’re delivering.
PHP Templates
In the simple examples we’ve seen so far, inserting PHP code directly into your HTML pages has been a reasonable approach. As the amount of PHP code that goes into generating your average page grows, however, maintaining this mixture of HTML and PHP code can become unmanageable.
Particularly if you work in a team of web designers who aren’t especially PHP savvy, having large blocks of cryptic PHP code intermingled with the HTML is a recipe for disaster. It’s far too easy for designers to accidentally modify the PHP code, causing errors they’ll be unable to fix.
A much more robust approach is to separate out the bulk of your PHP code so that it resides in its own file, leaving the HTML largely unpolluted by PHP code.
The key to doing this is the PHP include statement. With an include statement, you can insert the contents of another file into your PHP code at the point of the statement. To show you how this works, let’s rebuild the “count to ten” for loop example we looked at earlier.
Start by creating a new file, count.php, in your public directory. Open the file for editing and type in this code:
<?php
$output = '';
for ($count = 1; $count <= 10; $count++) {
    $output .= $count . ' ';
}

include 'count.html.php';
Yes, that’s the complete code for this file. It contains no HTML code whatsoever. The for loop should be familiar to you by now, but let me point out the interesting parts of this code:
- Instead of
echoing out the numbers 1 to 10, this script will add these numbers to a variable named$output. At the start of this script, therefore, we set this variable to contain an empty string. - The line
$output .= $count . ' ';adds each number (followed by a space) to the end of the$outputvariable. The.=operator you see here is a shorthand way of adding a value to the end of an existing string variable, by combining the assignment and string concatenation operators into one. The longhand version of this line is$output = $output . $count . ' ';, but the.=operator saves you some typing. - The
includestatement instructs PHP to execute the contents of thecount.html.phpfile at this location. You can think of theincludestatement as a kind of copy and paste. You would get the same result by opening upcount.html.php, copying the contents and pasting them intocount.php, overwriting theincludeline. - Finally, you might have noticed that the file doesn’t end with a
?>to match the opening<?php. You can put it in if you really want to, but it’s not necessary. If a PHP file ends with PHP code, there’s no need to indicate where that code ends; the end of the file does it for you. The big brains of the PHP world generally prefer to leave it off the end of files like this one that contain only PHP code.
Note: outside of this book, you’ll sometimes see parentheses surrounding the filename in include code, as if include were a function like date or htmlspecialchars, which is far from the case. For example, instead of include 'count.html.php';, you might see include('count.html.php');. These parentheses, when used, only serve to complicate the filename expression, and are therefore avoided in this book. The same goes for echo, another popular one-liner.
Since the final line of our count.php file includes the count.html.php file, you should create that file next.
Example: PHP-Count-Template
<!DOCTYPE html>
<html lang="en">
  <head>
    <meta charset="utf-8">
    <title>Counting to Ten</title>
  </head>
  <body>
    <p>
      <?php echo $output; ?>
    </p>
  </body>
</html>
This file is almost entirely plain HTML, except for the one line that outputs the value of the $output variable. This is the same $output variable that was created by the count.php file.
What we’ve created here is a PHP template: an HTML page with only very small snippets of PHP code that insert dynamically generated values into an otherwise static HTML page. Rather than embedding the complex PHP code that generates those values in the page, we put the code to generate the values in a separate PHP script — count.php in this case.
Using PHP templates like this enables you to hand over your templates to front-end designers without worrying about what they might do to your PHP code. It also lets you focus on your PHP code without being distracted by the surrounding HTML code.
I like to name my PHP template files so that they end with .html.php. As far as your web server is concerned, though, these are still .php files; the .html.php suffix serves as a useful reminder that these files contain both HTML and PHP code.
To see how our pages work now, type https://v.je/count.php into your browser. You’ll see the results of the count.php script displayed in our count.html.php template.
Security Concerns
One problem with separating out the HTML and PHP code into different files is that someone could potentially run the .html.php code without having had it included from a corresponding PHP file. This isn’t a big problem, but anyone could visit count.html.php directly. If you type https://v.je/count.html.php into your web browser, instead of seeing the count from one to ten, you’ll see an error message: Notice: Undefined variable: output in /websites/default/public/count.html.php on line 9.
It’s better not to let people run code in a manner you’re not expecting. Depending on what the page is doing, this might let them bypass security checks you have in place and view content they shouldn’t have access to. For example, consider the following code:
if ($_POST['password'] == 'secret') {
  include 'protected.html.php';
}
Looking at this code, it appears that you need to submit a form and type secret in the password box to see the protected content in protected.html.php. However, if someone can navigate directly to protected.html.php and see the contents of the page, it makes the security check redundant. There are other potential security issues introduced by making all your files accessible via a URL. Avoiding security problems like these is easy. You can actually include files from a directory other than the public directory.
You may have wondered earlier why the development environment created a public directory inside the default directory and we then wrote all our files to the public directory. Well, this issue of security is the reason why. None of the files outside the public directory are accessible via a URL (by someone typing the file name into their web browser).
The include command can be tweaked to include files from another directory. In our case, that directory is going to be the default directory, which contains the public directory we’ve been writing our files to.
So the question is, when the include file is in a different directory, how does a PHP script find it? The most obvious method is to specify the location of the include file as an absolute path. Here’s how this would look on a Windows server:
<?php include 'C:/Program Files/Apache Software Foundation/Apache2.2/protected.html.php'; ?>
And here’s how it would look using the Docker environment we’re using:
<?php include '/websites/default/protected.html.php'; ?>
While this method will work, it’s undesirable because it ties your site’s code to your web server configuration. Because we’re using Docker, deploying the website would also use the same Docker environment, so this is not really an issue these days. However, you should ideally be able to drop your PHP-based website onto any PHP-enabled web server and just watch it run. That’s impractical if your code refers to drives and directories that are specific to one particular server. Even if you do have the luxury of working on a single server, you’ll be kicking yourself if you ever need to move your website to another drive/directory on that server.
A better method is to use a relative path — that is, the location of a file relative to the current file. When you use include 'count.html.php', this is actually a relative path: count.html.php is being included from the same directory as the script that was executed.
To include a file from the directory above, you can use the following code:
include '../count.html.php';
The ../ bit tells PHP to look for the file in the directory above the directory of the current script. It will look for count.html.php in the default directory instead of the public directory.
Go ahead and move count.html.php up a level into the default directory and amend count.php to reference the new location.
Example: PHP-Count-Template-Secured
<?php
$output = '';
for ($count = 1; $count <= 10; $count++) {
    $output .= $count . ' ';
}

include '../count.html.php';
If you run the code above, it will work. But there’s a potential problem when you include files in this way. Relative paths are relative to the script that was run, not to each file.
That is, if you open up default/count.html.php and add the line include 'count2.html.php'; you would expect count2.html.php to be included from the default directory. However, the path is relative to something called the current working directory, which, when you run a PHP script, is initially set to the directory that script is stored in. So running include 'count2.html.php'; from count.html.php will actually try to load count2.html.php from the public directory!
The current working directory is set at the start of the script and applies to all the include statements, regardless of what file they are in. To make things even more confusing, it’s possible to change the current working directory using the chdir() function.
Because of this, we can’t rely on the following:
include '../count.html.php';
It will work, but if the directory is changed, or count.php itself is an include file, it may not have the result we’re expecting.
To overcome this, we do actually need to use absolute paths. Luckily, PHP provides a constant called __DIR__ (that’s two underscores, before and after the word DIR) which will always contain the path that contains the current file.
For example, you could create a file called dir.php inside the public directory with the following code:
echo __DIR__;
This will display /websites/default/public, which is the full path to the directory containing dir.php. To read count.html.php from the directory above public, it’s possible to combine the /../ operator and the __DIR__ constant:
include __DIR__ . '/../count.html.php';
This will now include the file /websites/default/public/../count.html. That is, PHP will look in the public directory, then go up one level into default and include count.html.php.
This approach will work on any server, because __DIR__ will differ depending on where the file is stored, and it doesn’t depend on the changing current working directory. I’ll be using this approach for including files throughout this book.
From now on, we’ll only write files to the public directory that we actually want users to be able to access directly from their web browser. The public directory will contain any PHP scripts the user needs to access directly along with any images, JavaScript and CSS files required by the browser. Any files only referenced by an include statement will be placed outside the public directory so users can’t access them directly.
As the book goes on, I’m going to introduce you to several different types of include files. To keep things organized, it’s sensible to store different types of include files in different directories. We’ll store template files (with a .html.php extension) inside a directory called templates inside the default folder. We can then reference them in an include statement using include __DIR__ . '../templates/file.html.php';.
Many Templates, One Controller
What’s nice about using include statements to load your PHP template files is that you can have multiple include statements in a single PHP script, as well as have it display different templates under various circumstances!
A PHP script that responds to a browser request by selecting one of several PHP templates to fill in and send back is commonly called a “controller”. A controller contains the logic that controls which template is sent to the browser.
Let’s revisit one more example from earlier in this chapter — the welcome form that prompts a visitor for a first and last name.
We’ll start with the PHP template for the form. For this, we can just reuse the name.html file we created earlier. Create a directory templates inside default if you haven’t already, and save a copy of name.html called form.html.php into this directory. The only code you need to change in this file is the action attribute of the form tag.
Example: PHP-Form-Controller
<!doctype html>
<html>
  <head>
    <title>Enter your name</title>
    <link rel="stylesheet" href="form.css" />
    <meta charset="utf-8">
  </head>
  <body>
  <form action="" method="post">
    <label for="firstname">First name:</label>
    <input type="text" name="firstname" id="firstname">

    <label for="lastname">Last name:</label>
    <input type="text" name="lastname" id="lastname">

    <input type="submit" value="GO">
  </form>
  </body>
</html>
As you can see, we’re leaving the action attribute blank. This tells the browser to submit the form back to the same URL it received it from — in this case, the URL of the controller that included this template file.
Let’s take a look at the controller for this example. Create an index.php file inside the public directory that contains the following code:
<?php
if (!isset($_POST['firstname'])) {
    include  __DIR__ . '/../templates/form.html.php';
} else {
    $firstName = $_POST['firstname'];
    $lastName = $_POST['lastname'];

    if ($firstName == 'Tom' && $lastName == 'Butler') {
        $output = 'Welcome, oh glorious leader!';
    } else {
        $output = 'Welcome to our website, ' .
      htmlspecialchars($firstName, ENT_QUOTES, 'UTF-8') . ' ' .
      htmlspecialchars($lastName, ENT_QUOTES, 'UTF-8') . '!';
    }

    include  __DIR__ . '/../templates/welcome.html.php';
}
This code should look quite familiar at first glance. It’s a lot like the name.php script we wrote earlier. Let me explain the differences:
- The controller’s first task is to decide whether the current request is a submission of the form in
form.html.phpor not. You can do this by checking if the request contains afirstnamevariable. If it does, PHP will have stored the value in$_POST['firstname'].issetis a built-in PHP function that will tell you if a particular variable (or array element) has been assigned a value or not. If$_POST['firstname']has a value,isset($_POST['firstname'])will be true. If$_POST['firstname']is unset,isset($_POST['firstname'])will be false.For the sake of readability, I like to put the code that sends the form in my controller first. We need this
ifstatement to check if$_POST['firstname']isn’t set. To do this, we use the not operator (!). By putting this operator before the name of a function, you reverse the value that function returns — from true to false, or from false to true.Thus, if the request doesn’t contain a
firstnamevariable, then!isset($_POST['firstname'])will return true, and the body of theifstatement will be executed. - If the request isn’t a form submission, the controller includes the
form.html.phpfile to display the form. - If the request is a form submission, the body of the
elsestatement is executed instead.This code pulls the
firstnameandlastnamevariables out of the$_POSTarray, and then generates the appropriate welcome message for the name submitted. - Instead of
echoing the welcome message, the controller stores the welcome message in a variable named$output. - After generating the appropriate welcome message, the controller includes the
welcome.html.phptemplate, which will display that welcome message.
All that’s left is to write the welcome.html.php file into the templates directory. Here it is:
<!DOCTYPE html>
<html lang="en">
  <head>
    <meta charset="utf-8">
    <title>Form Example</title>
  </head>
  <body>
    <p>
      <?php echo $output; ?>
    </p>
  </body>
</html>
That’s it! Fire up your browser and point it at https://v.je/index.php. You’ll be prompted for your name, and when you submit the form, you’ll see the appropriate welcome message. The URL should stay the same throughout this process.
You’ll have noticed I asked you to name the file index.php instead of name.php or similar. The reason I used index.php is because it has a special meaning. index.php is known as a directory index. If you don’t specify a filename when you visit the URL in your browser, the server will look for a file named index.php and display that. Try typing just https://v.je into your browser and you’ll see the index page.
Note: web servers can have different configurations and specify a different file to be the directory index. However, index.php will work on most web servers without any further configuration.
One of the benefits of maintaining the same URL throughout this process of prompting the user for a name and displaying the welcome message is that the user can bookmark the page at any time during this process and gain a sensible result. Whether it’s the form page or the welcome message that’s bookmarked, when the user returns, the form will be present once again. In the previous version of this example, where the welcome message had its own URL, returning to that URL without submitting the form would have generated a broken welcome message (“Welcome to our website, !”), or a PHP error message if, like ours, the server is running with error reporting enabled.
Note: in Chapter 11, where we discuss “sessions”, I show you how to remember the user’s name between visits.
Bring On the Database
In this chapter, we’ve seen the PHP server-side scripting language in action as we’ve explored all the basic language features: statements, variables, operators, comments, and control structures. The sample applications we’ve seen have been reasonably simple, but we’ve still taken the time to ensure they have attractive URLs, and that the HTML templates for the pages they generate are uncluttered by the PHP code that controls them.
As you may have begun to suspect, the real power of PHP is in its hundreds (even thousands) of built-in functions that let you access data in a MySQL database, send email, dynamically generate images, and even create Adobe Acrobat PDF files on the fly.
In Chapter 3, we’ll delve into the MySQL functions built into PHP, and then create a database of jokes. Then, in Chapter 4, we’ll see how to publish that joke database to the Web. These tasks will set the scene for the ultimate goal of this book: to create a complete content management system for your website in PHP and MySQL.
Frequently Asked Questions (FAQs) about PHP for Beginners
What is the basic syntax of PHP?
PHP scripts start with . A PHP file normally contains HTML tags, and some PHP scripting code. Each line of PHP code must end with a semicolon (;) which is a way to separate PHP statements. Comments in PHP are lines that are not read/executed as part of the program. They are a way for programmers to leave notes for themselves or others, to explain what the code does.
How can I integrate PHP with HTML?
PHP can be easily integrated with HTML. You can start and end PHP codes with tags within your HTML file. The PHP code is executed on the server, and the plain HTML result is sent back to the browser.
How do I use PHP variables?
Variables in PHP are represented by a dollar sign followed by the name of the variable. The variable name is case-sensitive. Variables can store data of different types, such as string, integer, float, boolean, array or object.
What are PHP arrays and how can I use them?
An array in PHP is actually an ordered map. A map is a type that associates values to keys. This type is optimized for several different uses; it can be treated as an array, list (vector), hash table (an implementation of a map), dictionary, collection, stack, queue, and probably more.
How can I handle errors in PHP?
PHP has several functions to handle errors; die(), set_error_handler(), and trigger_error(). PHP sends an error report when an error occurs, and it also has functions to manually generate an error.
How can I use PHP for form handling?
PHP is a great scripting language for form handling. You can use the $_GET or $_POST array to collect data from HTML forms. The $_GET array collects data sent via the HTTP GET method, and the $_POST array collects data sent via the HTTP POST method.
How can I use PHP for file handling?
PHP has several functions for creating, reading, uploading, and editing files. For example, the fopen() function can be used to open a file, the fread() function can be used to read a file, and the fwrite() function can be used to write to a file.
How can I use PHP for database interaction?
PHP has several functions for interacting with databases. The most common way to interact with a database from PHP is by using the MySQLi extension.
How can I use PHP for session management?
PHP session management is a way to preserve certain data across subsequent accesses. A session is started with the session_start() function, and you can store data in the $_SESSION array.
How can I use PHP for sending emails?
PHP has a built-in function, mail(), for sending emails. This function allows you to send email directly from a script.
