

In this article, we will explore how to create a flip image animation in a React Native application using the react-native-flip-card library. This effect is commonly employed to showcase additional information or an alternate view when users tap on an image.
React Native, a popular platform used for developing native mobile apps for both iOS and Android, stands out due to its ability to utilize a single codebase. To get started with React Native, we need to configure their development setup and install Node.js. Additionally, utilizing Expo CLI comes in handy. This versatile framework greatly accelerates the process of app development, empowering developers to create captivating and high-performing applications seamlessly.
Pre-requisites:
- Introduction to React Native
- React Native Components
- React useState
- Expo CLI
- Node.js and npm (Node Package Manager)
Steps to Create React Native Application
Step 1: Create React Native Application With Expo CLI
Create a new React Native project for react-native-flip-card.
npx create-expo-app react-native-flip-cardStep 2: Change the directory to the project folder:
cd react-native-flip-cardProject Structure
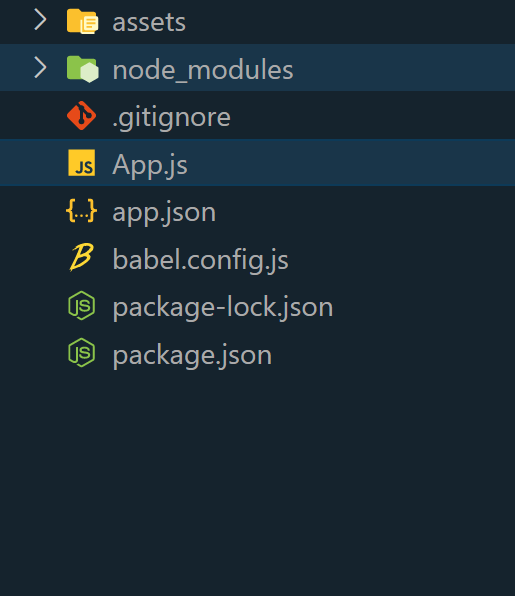
Step 3: Install Required Packages
Install necessary packages for flipcard implementation. Next, navigate to your project directory and install the react-native-flip-card library:
npm install react-native-flip-cardApproach
To create a flip image animation in React Native, we are using the react-native-flip-card library. The project setup and library installation are the initial steps to take. Managing the flip state can be done by utilizing useState hook. To define the front and back views of the FlipCard, nested View components can be used along with displaying images using the Image component. On pressing the "Flip" button, toggling the state is essential.
Example:
- App.js
import React, { useState } from 'react';
import { View, Text, Image, TouchableOpacity,
    StyleSheet } from 'react-native';
import FlipCard from 'react-native-flip-card';

const App = () => {
    const [isFlipped, setIsFlipped] = useState(false);

    const toggleFlip = () => {
        setIsFlipped(!isFlipped);
    };

    return (
        <View style={styles.container}>
            <Text style={styles.heading}> Geeksforgeeks </Text>
            <FlipCard
                style={[styles.card, styles.shadow]}
                friction={6}
                perspective={1000}
                flipHorizontal={true}
                flipVertical={false}
                flip={isFlipped}
                clickable={false}
            >
                {/* Front */}
                <View style={styles.imageContainer}>
                    <Image
                        source={{ uri:
'https://media.geeksforgeeks.org/wp-content/uploads/20230816223829/geeksgforgeeks-logo-1.png' }}
                        style={styles.image}
                    />
                </View>

                {/* Back */}
                <View style={styles.imageContainer}>
                    <Image
                        source={{ uri:
'https://media.geeksforgeeks.org/wp-content/uploads/20230816223732/geeksgforgeeks-logo.jpg' }}
                        style={styles.image}
                    />
                </View>
            </FlipCard>

            <TouchableOpacity
                style={styles.button}
                onPress={toggleFlip}
            >
                <Text style={styles.buttonText}>Flip</Text>
            </TouchableOpacity>
        </View>
    );
};

const styles = StyleSheet.create({
    container: {
        flex: 1,
        alignItems: 'center',
        justifyContent: 'center',
        margin: 30,
    },
    heading: {
        marginBottom: 30,
        color: "green",
        fontSize: 30,
        fontWeight: "bold",
    },
    card: {
        width: 300,
        height: 200,
        borderRadius: 30,
        backgroundColor: 'grey',

        // To prevent shadow from overflowing
        overflow: 'hidden',
    },
    shadow: {
        shadowColor: 'red',
        shadowOpacity: 1,
        shadowRadius: 15,
        shadowOffset: { width: 0, height: 0 },
    },
    imageContainer: {
        flex: 1,
        alignItems: 'center',
        justifyContent: 'center',
    },
    image: {
        width: "100%",
        height: "100%",
        borderRadius: 4,
    },
    button: {
        backgroundColor: 'green',
        padding: "10px 30px 10px 30px",
        borderRadius: 5,
        marginTop: 20,
    },
    buttonText: {
        fontSize: 20,
        fontWeight: 'bold',
        textAlign: 'center',
        color: "white",
    },
});

export default App;
Steps to Run
To run react native application use the following command:
npx expo start- To run on Android:
npx react-native run-android- To run on Ios:
npx react-native run-iosOutput:
