

In a microservices architecture, an API Gateway acts as a centralized entry point that receives client requests and routes them to the appropriate microservices. It simplifies client communication, hides internal service details, and provides centralized management of cross-cutting concerns such as security, logging, and monitoring.
- Provides a single entry point for all client requests in a microservices ecosystem.
- Supports centralized functionalities such as authentication, logging, rate limiting, and routing.
- Reduces client complexity by hiding internal microservice URLs and ports.
Why Use API Gateway in Microservices?
- Provides a single entry point for all client requests.
- Simplifies communication between clients and microservices.
- Allows central handling of concerns such as security, logging, and throttling.
- Eliminates the need for clients to track individual microservice ports.
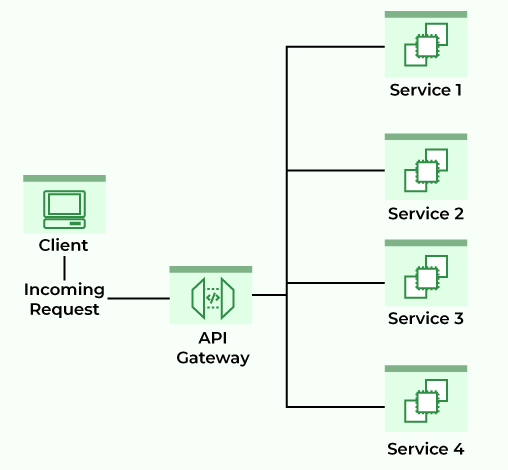
Spring Cloud Gateway
Spring Cloud Gateway is the recommended API Gateway solution in the Spring ecosystem. It provides flexible routing, filtering, service discovery integration, and reactive request processing for modern microservices applications.
- Flexible routing based on request attributes.
- Filters and predicates specific to routes.
- Integration with Circuit Breakers and DiscoveryClient.
- Support for path rewriting and other cross-cutting concerns.
Include Spring Cloud Gateway:
For Maven:
<dependency>
<groupId>org.springframework.cloud</groupId>
<artifactId>spring-cloud-starter-gateway</artifactId>
</dependency>
For Gradle:
implementation("org.springframework.cloud:spring-cloud-starter-gateway")
To disable the gateway, if needed:
spring.cloud.gateway.enabled=false
Steps to Implement of API Gateway Using Spring Cloud Gateway
Follow these below steps to implements API Gateway in our application
Step 1: Create a Spring Boot Project
- Project: Maven
- Language: Java
- Packaging: Jar
- Java Version: 17
- Dependency: Spring Cloud Gateway
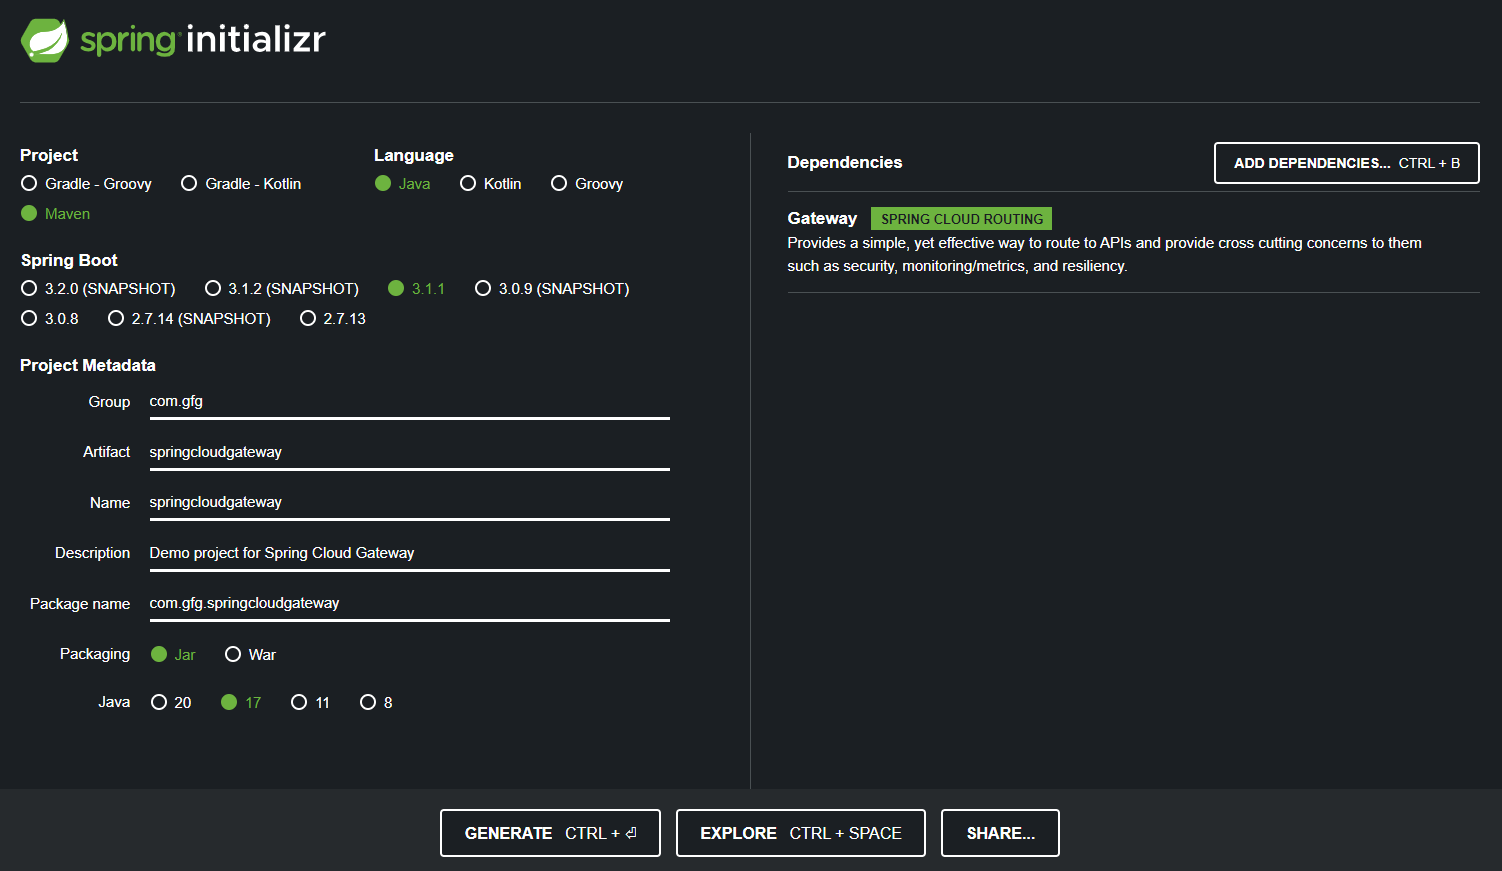
Add Dependencies:
- Spring Cloud Gateway
- Spring Boot DevTools
<dependencies>
    <dependency>
        <groupId>org.springframework.cloud</groupId>
        <artifactId>spring-cloud-starter-gateway</artifactId>
    </dependency>
    <dependency>
        <groupId>org.springframework.boot</groupId>
        <artifactId>spring-boot-starter-test</artifactId>
        <scope>test</scope>
    </dependency>
</dependencies>

<dependencyManagement>
    <dependencies>
        <dependency>
            <groupId>org.springframework.cloud</groupId>
            <artifactId>spring-cloud-dependencies</artifactId>
            <version>${spring-cloud.version}</version>
            <type>pom</type>
            <scope>import</scope>
        </dependency>
    </dependencies>
</dependencyManagement>
Step 2: Configure API Gateway Routes
Configure routing rules in application.yml.
server:
port: 8085
spring:
application:
name: API-GATEWAY-SERVICE
cloud:
gateway:
routes:
- id: DEMO-SERVICE
uri: http://localhost:9090
predicates:
- Path=/demo/**
- id: Unique identifier for the route.
- uri: Destination microservice URL
- predicates (Path): Defines which requests should be routed
Step 3: Create Demo Microservice (DEMO-SERVICE)
Create another Spring Boot application with the Spring Web dependency.
server.port=9090
spring.application.name=DEMO-SERVICE
Step 4: Create REST Controller(DemoController.java)
Create a controller to test API routing. This controller exposes a simple REST API endpoint.
package com.gfg.demo.controller;

import org.springframework.http.ResponseEntity;
import org.springframework.web.bind.annotation.GetMapping;
import org.springframework.web.bind.annotation.RequestMapping;
import org.springframework.web.bind.annotation.RestController;

@RestController
@RequestMapping("/demo")
public class DemoController {

    @GetMapping("/gfg")
    public ResponseEntity<String> getMessage() {
        return ResponseEntity.ok("Welcome to GeeksforGeeks");
    }
}
Step 5: Run the Microservice
- Right-click DemoApplication.java
- Select Run 'DemoApplication'
Using Maven:
mvn spring-boot:run
After the application starts successfully, the service will be available at:
http://localhost:9090
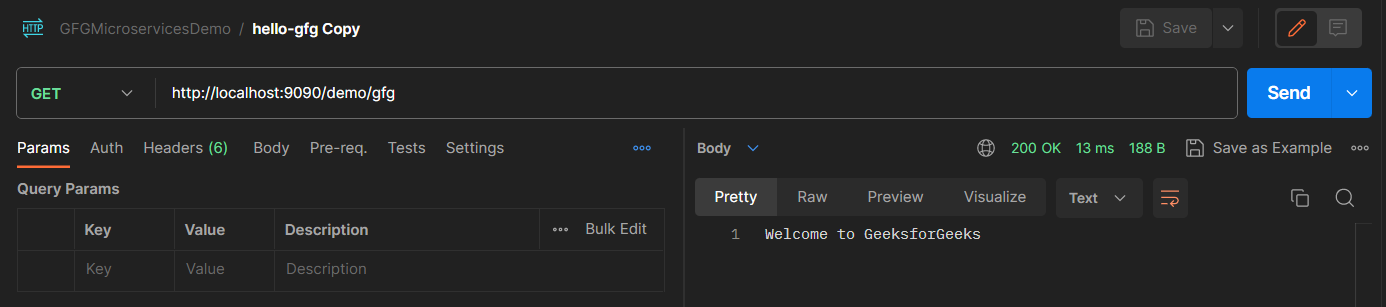
We can also Directly access the Api:
http://localhost:9090/demo/gfg
Output:
And you are going to get a response like this
Step 6: Test the API Gateway
Access the microservice directly:
The gateway starts on:
http://localhost:8085
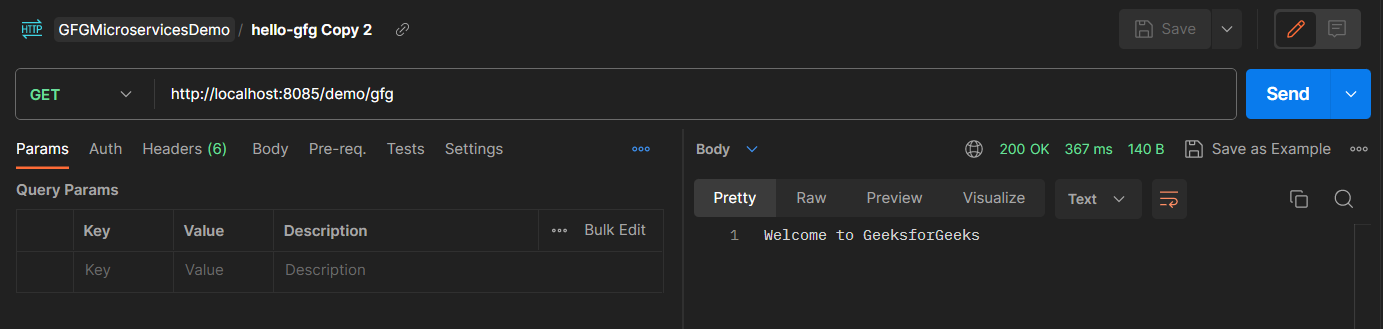
Now access the API through the gateway:
http://localhost:8085/demo/gfg
Output:
And you are going to get a response like this
Explanation: The API Gateway acts as an intermediary between clients and microservices by receiving incoming requests and routing them to the appropriate service instances. It centralizes cross-cutting concerns such as routing, security, logging, and load balancing, allowing clients to interact with multiple microservices through a single endpoint while hiding internal service details.
