You want to run a stack of VMs and containers at home without renting a cloud, and a Proxmox server is how you do it. The trick is building one that actually behaves: a NIC that does not drop under load, storage that survives a power cut, and enough room to pass a GPU straight through to a VM. This guide is three parts-verified Proxmox builds, entry to beast, each one a machine I would run in my own homelab. If you would rather buy used enterprise gear than build from parts, the first rackmount server guide weighs the Dell R730 against the R740 and HPE DL380 Gen9.
Every parts list here is checked as a working machine, not a wishlist, because the gotchas in a virtualization host are the ones a gaming build never hits: ECC support that depends on the exact board and CPU pairing, Realtek NICs that stall Proxmox under load, and IOMMU groups that decide whether passthrough works at all. The storage and RAM numbers come from a real Proxmox host, not a spec sheet. If you would rather buy than build, a prebuilt mini PC for a homelab is the no-assembly route.
Built around parts I verified this month, on the same Proxmox host I run in my homelab, September 2026.
The three builds at a glance
Pick the tier by how much you are running and whether you need ECC and serious passthrough. Each total is the approximate parts cost in September 2026, and DRAM prices are the swing factor this year, so check live before you order.
- Quiet entry homelab: an AM5 APU box for 5 to 10 light VMs, low idle watts, no ECC by design. Approx $1,160 to $1,375.
- Serious mid homelab: a 16-core AM5 host with ECC support, a ZFS boot mirror, a power-loss-protected datastore, and room to pass one GPU through. Runs 15 to 30 VMs. Approx $3,830 to $4,240.
- Beast with heavy passthrough: a used EPYC server platform with registered ECC and 128 PCIe lanes, so a GPU, an HBA, and a 10GbE NIC each pass to their own VM. Approx $2,445 to $2,635 for the new parts, before the used CPU, board, HBA and NIC, a case, and a GPU.
How we picked, and what the lab showed
The numbers behind these choices came off a live Proxmox host, not a datasheet. Two of them shaped the storage and RAM picks across every tier.
On ZFS, a SATA SSD managed 642 fsync operations per second while an NVMe drive hit 2024, and when we forced the pool to honor every sync write, a consumer drive collapsed from 334,000 IOPS to 2,041, a 160-fold drop. That gap is the entire reason the mid and beast builds add a power-loss-protected datastore SSD rather than running VMs off a consumer drive. The other lesson is RAM: ZFS ARC will quietly eat half your memory and look like a leak, so every tier is sized with headroom and the ARC capped. Where each tier lands on VM count tracks what we have seen per node in the how-many-VMs testing.
Build comparison: which Proxmox server fits you
| Quiet entry | Serious mid | Beast / passthrough | |
|---|---|---|---|
| CPU | Ryzen 5 8600G (6c) | Ryzen 9 9950X (16c) | EPYC 7313 (16c) |
| RAM | 32GB non-ECC | 64GB (ECC option) | 128GB RDIMM ECC |
| ECC | No (by design) | Yes, UDIMM | Yes, registered |
| NIC | Intel i226 card | Intel 2.5G + 10G | Dual 1G + Intel 10G |
| Passthrough | Single device | One GPU or HBA | GPU + HBA + NIC |
| Runs | 5-10 light VMs | 15-30 VMs | Multi-VM + storage |
| Approx total | $1,160-$1,375 | $3,830-$4,240 | $2,445-$2,635 new, plus the used parts |
Price these builds before you fall in love with them. Memory and enterprise flash went through a severe shortage over the northern summer, and the numbers below are nothing like the ones this guide carried in June 2026. A 96GB DDR5-6000 kit that cost around $300 then is $1,880 today. A 32GB kit that was near $100 now runs close to $500. Power-loss-protected enterprise flash went the same way. Memory and flash both moved, and flash moved more. Re-priced against its own June parts table, the mid build’s two storage lines added about $1,030 and its memory line about $715, most of what took that tier from $1,965 to $3,830 even after I dropped it from 96GB to 64GB to keep the total sane. Every price here was re-checked against live Amazon listings in September 2026, so they are real, but they are not normal. One consequence worth stating: with memory priced like this the mid and beast builds land in the same bracket, so the choice between them is about registered ECC and PCIe lanes rather than budget. If you are buying now, take the smallest memory kit that runs your VMs and add capacity later: every board in these builds has at least four DIMM slots. If you can wait, wait.
Quiet entry build: a low-power AM5 host for a first homelab
The entry build is small, quiet, and cheap, and it runs 5 to 10 light VMs or a stack of LXC containers without breaking a sweat. It is built on a Ryzen 5 8600G, an APU whose Radeon 760M graphics keep a console on the host, drawing 15 to 30 watts at idle, which matters on a box that never turns off. Build this if you are starting out and want to learn Proxmox on real hardware without a server-grade budget.
Skip it if you need ECC memory (this APU cannot use it, by design) or you plan heavy multi-device passthrough. Those are the mid and beast builds.
| Component | Pick | Approx price (Sep 2026) |
|---|---|---|
| CPU | AMD Ryzen 5 8600G (boxed, includes cooler) | $180-$200 |
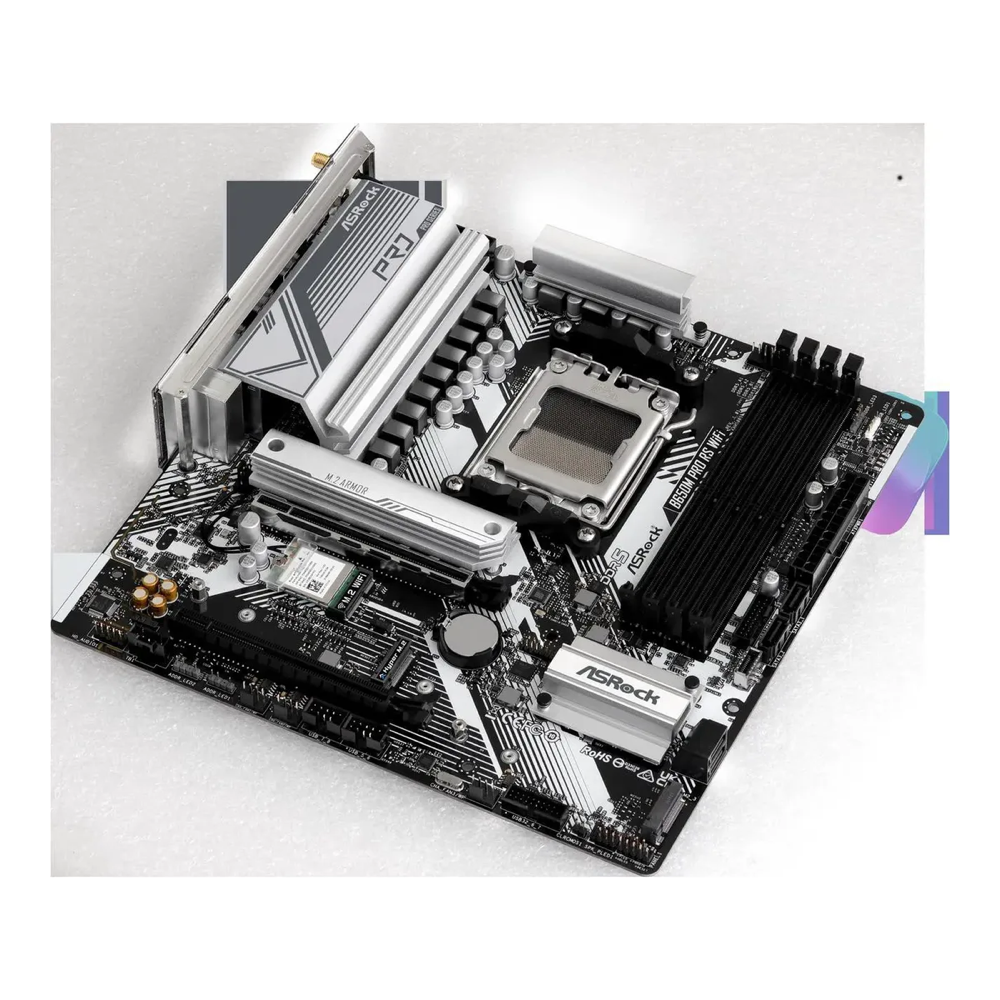
| Motherboard | ASRock B650M Pro RS (micro-ATX) | $105-$130 |
| NIC (the Realtek fix) | Intel i226-V 2.5GbE card | $15-$30 |
| RAM | Crucial 32GB (2×16) DDR5-5600 | $480-$560 |
| NVMe | WD Blue SN5000 1TB | $185-$215 |
| PSU | Seasonic CORE GX-650 | $95-$115 |
| Case | Fractal Design Pop Mini Air RGB | $100-$125 |
Two things on this build need a word. First, the ASRock board’s onboard NIC is a Realtek 2.5GbE chip, the one Proxmox users keep filing bug reports about, so the build adds a cheap Intel i226 card and uses that as the bridge instead. It is a $17 fix for a problem that otherwise stalls every VM at once. Second, the 8600G gives you a strong iGPU and a low idle, but it cannot use ECC. If ECC matters more to you than the iGPU at this price, swap to a non-G Ryzen 5 7600 and an ECC kit on the same board. For a first homelab, non-ECC is fine, and a UPS covers the consumer NVMe that lacks power-loss protection. One note on the supply: the 550W unit this build used to specify is out of stock everywhere, and the smallest current Seasonic ATX 3.1 unit is the 650W CORE GX, so the build is carrying more headroom than a 15 to 30W idle host needs.
Serious mid build: a 16-core AM5 host with ECC and passthrough
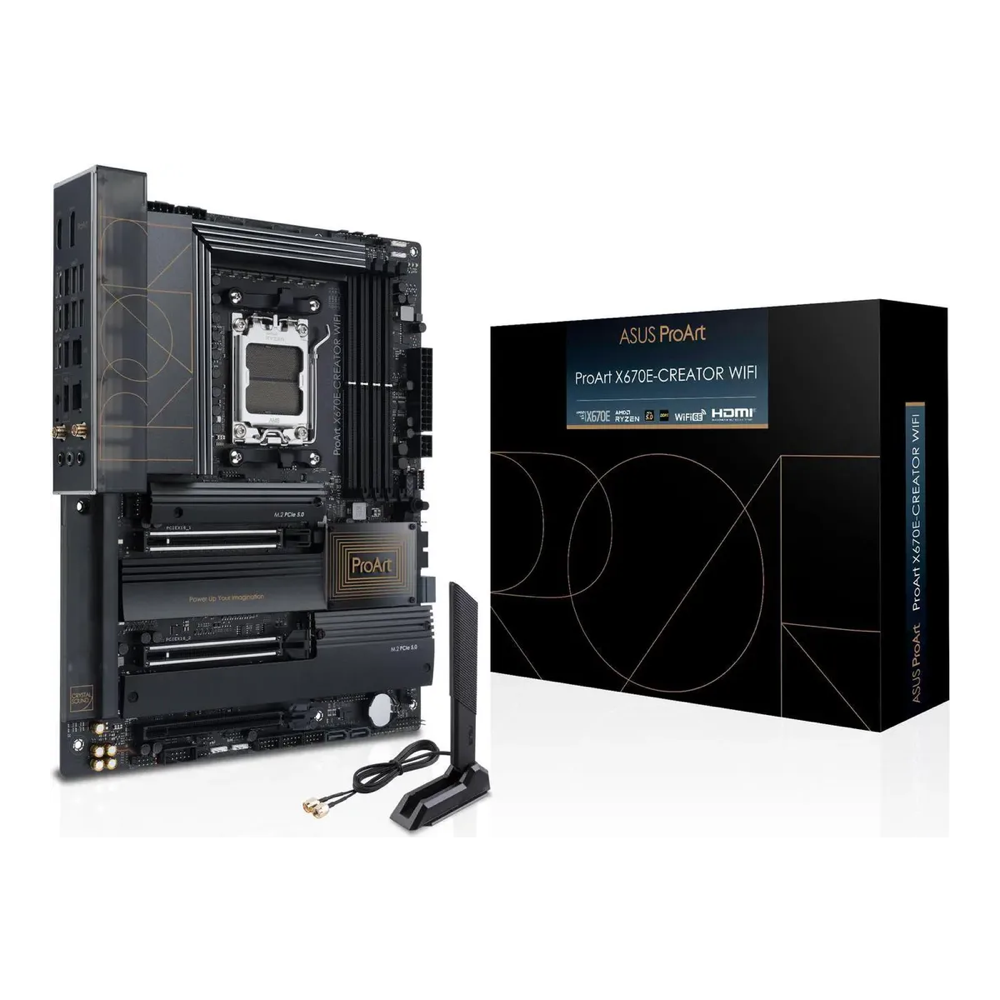
This is the build most homelabbers actually want: a 16-core Ryzen 9 9950X with its own iGPU for the host console, a board that genuinely validates ECC memory, a ZFS boot mirror, a power-loss-protected datastore, and a free x16 slot to pass one GPU or HBA into a VM. It runs 15 to 30 VMs comfortably. Build this if your homelab is doing real work and you want it to survive a bad shutdown with your data intact.
Skip it if you need to pass through several devices at once (AM5’s IOMMU grouping fights you there) or your VM count is small enough that the entry build covers it.
| Component | Pick | Approx price (Sep 2026) |
|---|---|---|
| CPU | AMD Ryzen 9 9950X (16c, iGPU) | $490-$560 |
| Motherboard | ASUS ProArt X870E-Creator WiFi | $455-$510 |
| RAM | Crucial Pro 64GB (2×32) DDR5-6000 | $975-$1,050 |
| Boot mirror | WD_BLACK SN850X 2TB, heatsink version (buy two) | $740-$800 |
| Datastore (PLP) | Micron 7450 PRO 960GB | $720-$790 |
| PSU | Corsair RM850e (2025, ATX 3.1) | $115-$140 |
| Case | Fractal Design North XL Charcoal Black | $185-$215 |
| Cooler | Noctua NH-D15 G2 | $150-$175 |
The ProArt earns its place here. Its onboard NIC is Intel, not Realtek, with a Marvell 10GbE port alongside an Intel 2.5GbE, so the networking is sorted on a clean install. ASUS validates unbuffered ECC on it, which is rare on a consumer board. The catch worth knowing: ECC UDIMM on Ryzen 9000 caps around 5200 MT/s, and there is no pre-paired ECC kit to buy, so you order two matched ECC modules. The default pick above is non-ECC memory at 6000; the ECC swap is a deliberate choice you make at order time. Buy this tier with your eyes open on stock: Amazon has no new-condition ProArt X870E-Creator right now, so the buy box is a single warehouse unit in like-new condition from Amazon Resale, and when it sells the price will not be the one in the table. The $1,000 memory kit is down to single-digit stock from a marketplace seller, and most of the rest of the tier is third-party or thin too, so price the whole list in one sitting rather than buying it over a fortnight. For storage, the two SN850X drives form the ZFS boot mirror, and the only 2TB SN850X in stock is the heatsink version, so leave the board’s own M.2 shrouds off that pair. The Micron 7450 is the power-loss-protected datastore that the fsync numbers argue for. The 9950X ships with no cooler, so the NH-D15 G2 is not optional. If you want to trim cost, the 12-core 9900X runs cooler and saves money with no real loss for this workload, and a smaller PSU is fine if you skip the GPU.
Beast build: used EPYC for ECC and heavy passthrough
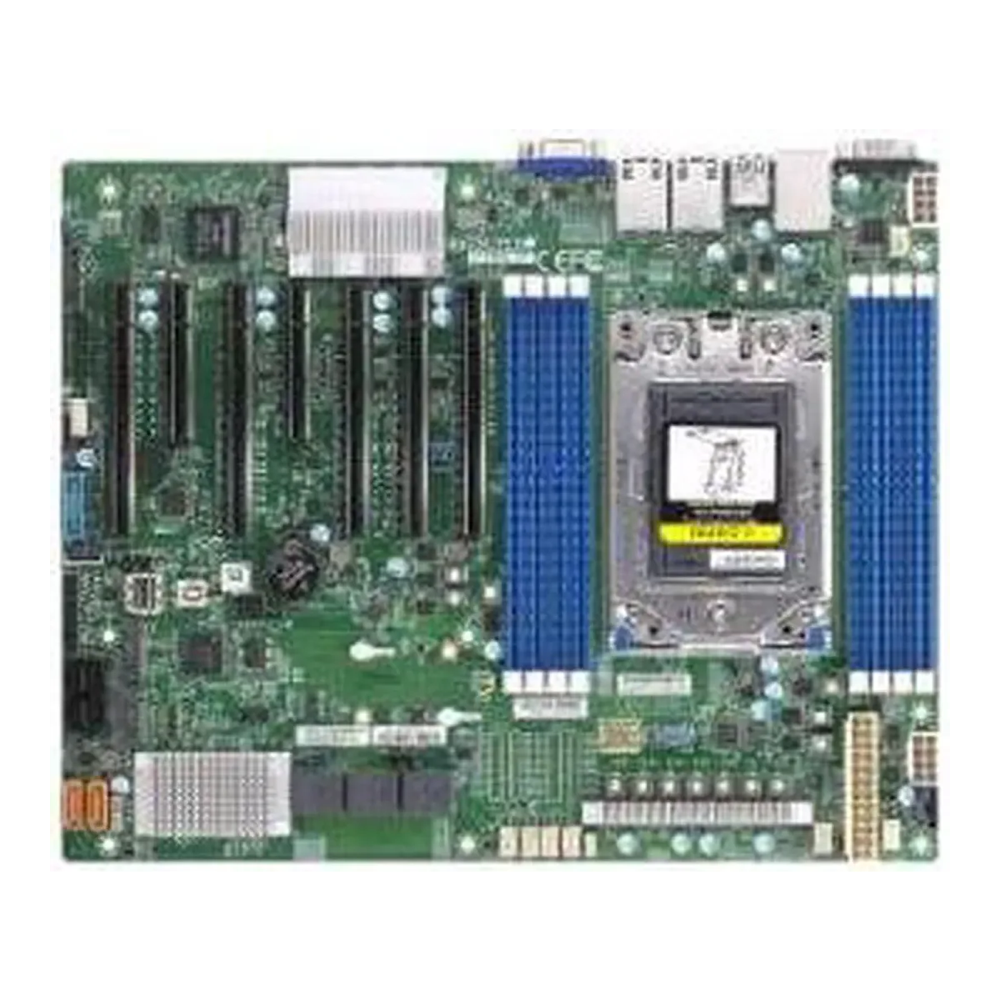
When you need to pass a GPU, a storage HBA, and a 10GbE NIC into three different VMs at once, consumer platforms run out of PCIe lanes and clean IOMMU groups. The answer is not a new high-end desktop, it is a used server platform. A used EPYC 7313 brings 128 PCIe Gen4 lanes and eight-channel registered ECC, and the Supermicro H12SSL-i exposes five x16 slots plus the ACS support that gives every slot its own IOMMU group. DDR4 and Zen 3 are old news, which is exactly why the used market makes this the value play. Build this if multi-device passthrough and real ECC are the point.
Skip it if you only ever pass one device through (the mid build does that, if you can live without registered ECC and the lane count) or you are not comfortable buying used server gear off eBay and flashing an HBA to IT mode.
| Component | Pick | Approx price (Sep 2026) |
|---|---|---|
| CPU | AMD EPYC 7313 (16c, 128 lanes) used, eBay | used market |
| Motherboard | Supermicro H12SSL-i (SP3) used, eBay | used market |
| RAM | A-Tech 128GB DDR4-3200 ECC RDIMM kit (8x16GB, fills all eight channels) | $1,340-$1,420 |
| Boot mirror | Samsung 990 PRO 1TB (buy two) | $470-$510 |
| Datastore (PLP) | Micron 5300 PRO 960GB (PLP) 1 DWPD, last-gen | $385-$415 |
| HBA (IT mode) | LSI 9300-8i, flashed to IT mode used, eBay | used market |
| 10GbE NIC | Intel X520-DA2 (dual SFP+) used, eBay | used market |
| PSU | Corsair RM850x 850W | $145-$165 |
| Cooler | Noctua NH-U14S TR4-SP3 | $105-$125 |
This tier lives and dies on three specifics. The memory must be registered (RDIMM) ECC, not the unbuffered ECC the AM5 build uses; an EPYC will not even POST on the wrong type, so do not carry a UDIMM kit over from the mid build. The cooler must be the SP3 version of the NH-U14S, not the visually similar SP6, because the socket is different. And the CPU, HBA, and 10GbE NIC are used-market parts: buy an EPYC listed as unlocked (not vendor-locked), an HBA explicitly flashed to IT mode so ZFS sees raw disks, and a genuine Intel X520. The RAM, SSDs, PSU, and cooler are current retail; the board has joined the used list, because new H12SSL-i stock has dried up. On memory, the H12SSL is fussy about off-list DIMMs: the A-Tech kit matches Supermicro’s stated spec, but if the board refuses to train it, the Supermicro-certified Hynix MEM-DR416L-HL01-ER32 is the known-good fallback at 16GB a module. A GPU is deliberately left off the list, because which one is your call; the 850W supply has room for one mid-range card, and you step up to a 1000W unit for a 5090-class GPU.
Lay out the storage before you install
The single decision that bites homelabbers later is storage layout, so settle it before Proxmox touches the disks. Two rules carry most of the weight.
First, boot from a mirror. Proxmox installs happily onto a single disk, but a homelab host you actually rely on should boot from two SSDs in a ZFS mirror (the installer offers RAID1 right in the disk step). Lose one drive and the host keeps running. Second, do not run VMs off a cheap consumer SSD as a ZFS datastore if writes matter. We measured this on a live host: a SATA SSD in a ZFS pool managed 642 fsync operations per second, an NVMe drive hit 2024, and forcing ZFS to honor every sync write (sync=always) collapsed a consumer drive from 334,000 IOPS to 2,041, a 160-fold drop. A drive with power-loss protection rides that out because it can safely acknowledge a sync write from its onboard cache. That is the whole case for a power-loss-protected datastore SSD, covered in depth in the NVMe-versus-SATA datastore test and the server SSD guide. A consumer boot drive is fine if you pair the host with a UPS for graceful shutdown.
Size the RAM for the VMs and for ZFS
Proxmox RAM math has two halves, and the second one surprises everyone. The first half is obvious: add up what your VMs and containers need and leave headroom. The second half is ZFS. The ARC (Adaptive Replacement Cache) defaults to using up to half your RAM, and on a busy host it and your VMs end up fighting over the same pages. The gotcha here is that an unconstrained ARC will look like a memory leak the first time you watch free -h.
So size generously and cap the ARC. A host running a handful of light VMs is comfortable at 32 to 64GB; a serious homelab with databases, a few always-on services, and ZFS wants 64 to 128GB. Set an explicit ARC ceiling so it cannot starve your guests. The full sizing logic, including the ARC cap command, is in the Proxmox RAM guide; for the modules themselves the DDR5 guide tracks the 2026 pricing.
Verify IOMMU and PCIe passthrough before you commit
If the plan is to pass a GPU, an HBA, or a NIC straight through to a VM, the board has to put that device in its own IOMMU group. This is the check that separates a board that passes through cleanly from one that fights you, and it is worth running on the actual hardware before you build the rest around it. On current Proxmox kernels, IOMMU is on by default for both AMD and recent Intel CPUs, so the real gate is the BIOS: enable IOMMU there, along with SVM on AMD or VT-d on Intel. If you are still choosing the platform itself, the AMD vs Intel for a homelab breakdown weighs cores, QuickSync, IOMMU, and idle power against each other.
If the groups still do not appear, the kernel command line is the next place to look. On AMD there is usually nothing to add, because IOMMU is on by default and amd_iommu=on is not a parameter the kernel accepts: reach for amd_iommu=force_enable only if a stubborn board refuses, and note the kernel’s own advice to use it with care. On Intel, kernels older than 6.8 need intel_iommu=on. Either way iommu=pt is a separate and useful passthrough performance option. Then confirm the IOMMU came up. An AMD host prints AMD-Vi lines and an Intel host prints DMAR:
dmesg | grep -e DMAR -e IOMMU -e AMD-ViOn an Intel host with it active you get a line like this. An AMD host prints AMD-Vi lines instead, which is why the grep above does not filter on the word enabled:
DMAR-IR: Enabled IRQ remapping in x2apic modeNow list the groups. The thing you are checking for is separation: the device you want to pass through should sit in a group by itself, with no chipset functions sharing it.
for g in /sys/kernel/iommu_groups/*/devices/*; do
  grp=$(echo $g | sed -E 's#.*/iommu_groups/([0-9]+)/.*#\1#')
  printf "IOMMU group %s: " "$grp"
  lspci -nns "$(basename $g)"
done | sort -V
On a board that separates cleanly, the network card and the NVMe controller each land in their own group, which means either can be handed to a VM without dragging a neighbor along.
Read the group numbers, not the device names. Each line prints the group followed by the device, so what you are looking for is the card you want to pass through sitting on a group number that no other line shares.
If instead your GPU shares a group with a pile of chipset devices, the board’s IOMMU grouping is too coarse, and you either enable the ACS override patch (with the security caveats that carries) or move the card to a slot wired directly to the CPU. This is exactly where the platforms diverge: a consumer AM5 board does single-device passthrough fine but needs the override hack for several devices, while the EPYC server board hands every slot its own group. Find this out before the parts are in the case, not after.
Install Proxmox and bring the host up
With the hardware sorted, the software is the easy part. Write the Proxmox VE ISO to a USB stick, boot it, and the installer walks you through the rest, including the ZFS mirror for the boot disks. The one screen worth slowing down on is storage: pick zfs (RAID1) and select both boot SSDs so the host survives a dead drive. The full walkthrough, including the post-install repository fix, is in the Proxmox VE install guide.
After the first boot, confirm the host sees the right NIC and the ZFS pool before you load it with VMs:
ip -br link
zpool status
The Intel NIC should show up as the bridge uplink and the boot pool should report ONLINE with both mirror members. From there it is the web UI at port 8006 and your first VM.
What actually matters in Proxmox host parts
A Proxmox box is not a gaming PC with a different sticker. The parts that matter are the ones a gaming build ignores, and the flashy ones barely move the needle.
The NIC: Intel, not Realtek
This is the cheapest mistake to avoid and the most common one. Realtek 2.5GbE chipsets are notorious for dropping under sustained load on Linux, which on a hypervisor means every VM on the box stutters at once. Intel NICs (the i210, i225, i226, or an onboard Intel chip) just work. If a board you like ships a Realtek NIC, budget for a cheap Intel card and pass the onboard one through to a VM or ignore it. A managed 2.5GbE or 10GbE switch finishes the network off.
ECC: worth it on the host that holds your data
ECC memory catches the bit flips that silently corrupt data, and on a host running ZFS, where RAM caches everything, that protection matters more than on a desktop. The catch is platform support. AMD AM5 supports unbuffered ECC, but only on specific boards that validate it, and only with ECC UDIMMs. Intel consumer boards need a W680 chipset for ECC. Threadripper and EPYC use registered (RDIMM) ECC, which is a different module entirely. Match the memory type to the platform or it simply will not post.
An iGPU keeps a passthrough build sane
If you plan to pass your only GPU to a VM, the host loses its display. A CPU with integrated graphics (a Ryzen with Radeon graphics, or an Intel chip with its iGPU) keeps a console on the host while the discrete card goes to the guest. On a server board like the Supermicro, the onboard BMC gives you remote KVM instead, which solves the same problem a different way.
Idle power, because it runs 24/7
A homelab host is on all the time, so idle draw matters more than peak. A tower that idles at 90W instead of 45W costs you real money over a year of always-on uptime. Favor an efficient platform, enable the C-states in the BIOS, and do not overbuy a power supply, because supplies are least efficient at the bottom of their range where an idle host actually sits. On a used enterprise rackmount host, the BIOS profile and fan tuning that cut that idle draw are in the iDRAC and iLO tuning guide.
The mistakes that bite first-time Proxmox builders
Most failed homelab builds trip on the same handful of things, and every one of them is cheaper to dodge than to fix after the parts arrive. The Realtek NIC that stalls under load. ECC memory bought for a CPU that cannot use it, or the wrong register type for the socket. A consumer SSD as a ZFS datastore that crawls the moment a database starts issuing sync writes. A GPU stuck in an IOMMU group it shares with half the chipset. None of them show up on a spec-sheet comparison, and all of them show up the first week you actually run the box.
So the order that works: pick the NIC and the memory type around the platform first, settle the storage layout before you install, and verify the IOMMU groups on the real hardware before you build everything else around a passthrough plan that the board cannot deliver. Get those right and the rest of a Proxmox build is just assembly.