Editor’s note: This guide to Remix was last updated on 3 November 2022 to include more information about state management in Remix and how Remix’s server-side rendering works for React apps. In addition, this update addresses whether Remix works with React Native and how to use Remix with Redux and other libraries.

Nowadays, it seems like there’s a React framework being introduced every other day. And while every React framework has something special to offer, Remix stands out. After initially being available on a paid subscription basis, Remix’s creators announced the framework was going open source in October 2021 .
Remix is a React framework used for server-side rendering (SSR). This means that both the backend and the frontend can be made using a single Remix app. Data is rendered on the server and served to the client side with minimum JavaScript. Unlike vanilla React, where data is fetched on the frontend and then rendered on the screen, Remix fetches data on the backend and serves the HTML directly to the user.
In this article, we will discuss some cool things about Remix, then move on to create an SSR weather app using this new framework. Finally, I’ll share my personal views on Remix and whether I plan to use Remix for my future projects.
Before moving on with the tutorial, let’s look at the requirements:
If you get stuck somewhere in the tutorial, here’s the GitHub repository.
Remix, just like other frameworks, has some special built-in features that make it convenient for developers. Here are some of my favorites:
Any page inside a route folder is nested in the route instead of being separate. This means you can embed these components into your parent page, which also means less loading time.
Another advantage of doing this is that we can enforce error boundaries to these embedded pages, which will help with error handling.
Suppose you get an error in a Remix component or a nested route. The errors are limited to the component, and the component will fail to render or simply show an error. In other frameworks, it will break the entire page, and you will see a huge error screen.
While error boundaries can be implemented in Next.js as well, Remix has this built in, and I think it’s a cool feature for production builds so that the user doesn’t get locked out of the entire page for a simple error.
Remix automatically handles all loading states for you; all you have to do is tell Remix what to show when the app is loading. In other frameworks like Next.js, you need to set the loading state using some state management library like Redux or Recoil. While there are libraries that can help you do the exact same thing in other frameworks, Remix has this built in.
Now, we are going back to when developers used PHP. We used to specify a form method and action with a valid PHP URL; we’ll use a similar approach in Remix.
I know this doesn’t sound fun because we are used to onClick, onSubmit, and HTTP calls. But Remix handles this situation completely differently by providing functions like action and loader to perform server-side operations. Form data is easily available in these functions. This means there’s absolutely no need to serve JavaScript to the frontend to submit a form.
Suppose you have a fairly simple website, and you don’t really need to serve JavaScript to the frontend. This traditional form method works the best in these situations. In other frameworks, you might need to serve JavaScript to make a fetch or an axios call, but you don’t need to do that in Remix. It helps keep things simple.
While Remix has plenty of benefits, some aspects of using the framework might give you pause:
Remix was only recently open-sourced. Because of this, there still aren’t many people currently using Remix in production projects.
If you get stuck with a problem while using Remix, finding a solution on the internet might be difficult, and you may need to post questions on forums and wait for a while to get a response.
When I started out with Remix, I found the routing system confusing. I couldn’t understand the nested routes concept. That is because I’m used to other frameworks without this specific routing system, which means Remix has a bit of a learning curve.
At first glance, there doesn’t seem to be much of a difference between Remix and Next.js because both of them support SSR. However, while Next.js supports SSG and other awesome tools, Remix only focuses on SSR.
Navigate to a safe directory and use the following command in the terminal to initialize the installation of our Remix app:
npx create-remix@latest weather-app
Of course, you can replace weather-app with whatever project name suits you. Once you hit Enter, you will see an interactive menu to help you make a Remix app:
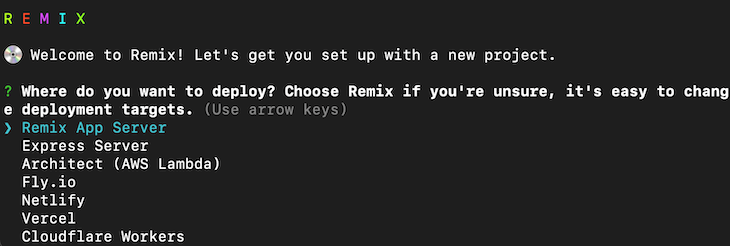
Just like the picture above, you will be asked where you want to deploy. We are just experimenting and won’t cover deployment in this tutorial, so we will be using Remix App Server:
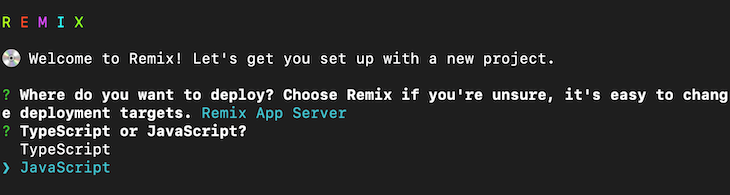
Next, you will be asked whether you want to use JavaScript or TypeScript. I’ll be using JavaScript for the sake of simplicity in this tutorial:
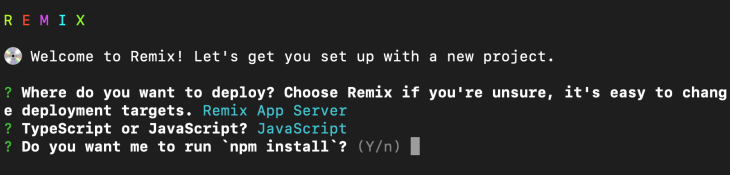
Then, you will be asked if Remix should use npm install. Type y. This will install the required dependencies for Remix to run.
Now, navigate into the project directory and use the following commands to install some dependencies you will need for this project:
npm install axios dotenv
We are installing axios so that we can send HTTP requests from our app to the OpenWeatherMap API. We will use dotenv to store our API key in an environment variable.
Now, let’s edit package.json so we can use environment variables in the development mode of Remix. Replace the dev script with the following:
"dev": "node -r dotenv/config node_modules/.bin/remix dev"
This will enable environment variables for your projects. Now, create a new file .env for our environment variables and store the API key in the following format:
WEATHER_API_KEY={api key here}
Now, let’s have a look at the Remix folder structure:
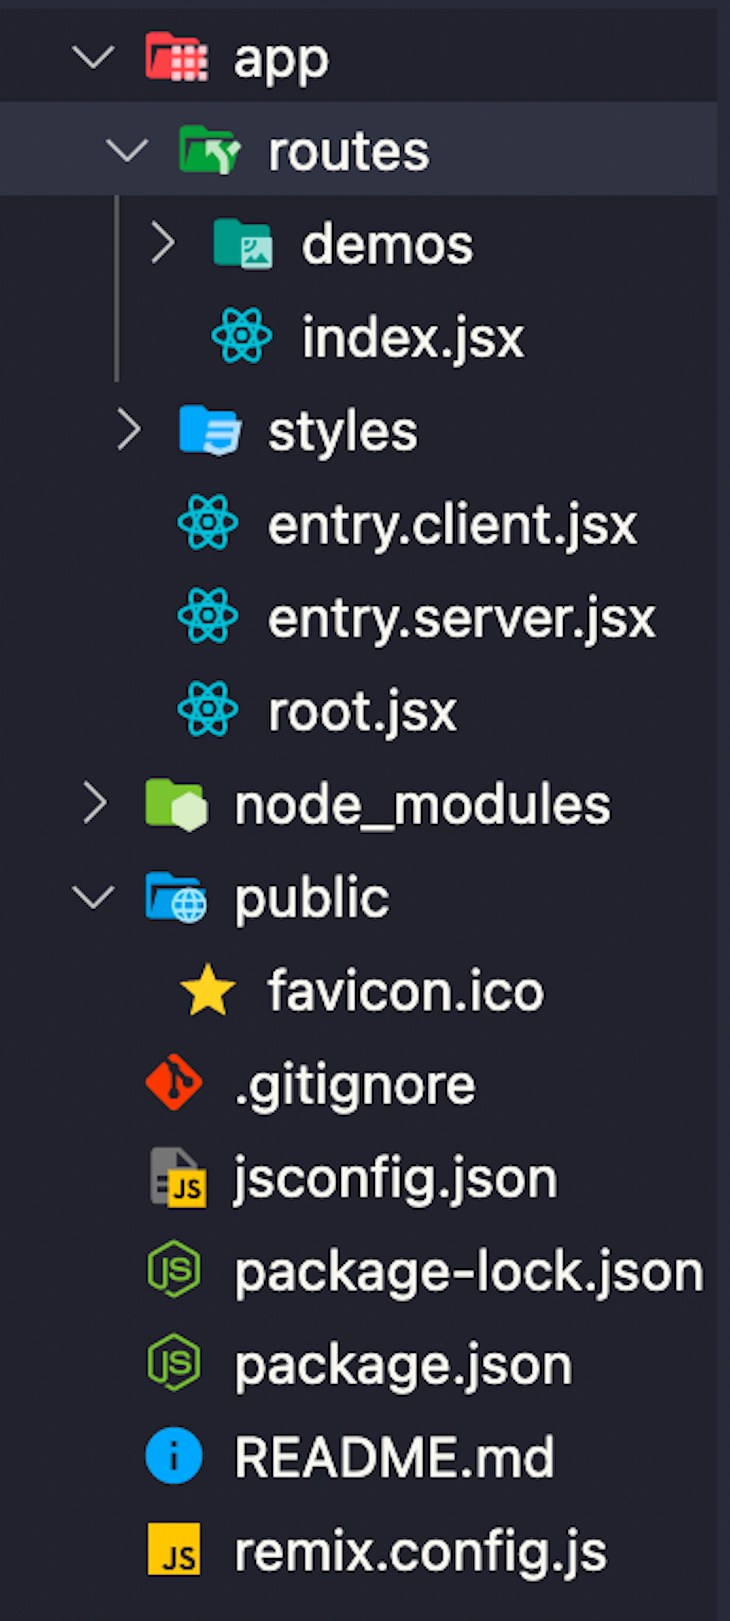
The app folder contains our main app logic. All the folders and files under the routes folder are exposed to the public and can be accessed with a URL. The styles folder contains all the CSS files, which are stored in a similar fashion as routes.
entry.client.jsx and entry.server.jsx are managed by Remix, and it’s better not to touch entry files. Instead, create new files and work on them. The root.jsx file contains our general page layout.
The public folder contains our public assets like static images and favicons, and the remix.config.js file contains the basic configuration for our Remix app, such as the port it should run on in development mode.
When you first set up a Remix app, it’s not blank; Remix has some tutorials and demos built into the app. Let’s first clean them up so we can work on our weather app.
Go to root.jsx and empty the default Layout component so that it looks like this:
function Layout({ children }) {
  return <div>{children}</div>;
}
Now, go to the styles folder, remove the demos folder, and empty the contents of dark.css and global.css. This will clean up all the styling for us.
Delete the demos folder in the routes directory as well because we don’t need it.
Then, go to index.jsx and empty everything. Just make sure it has a default exported component just like this:
export default function Index() {
  return <div></div>;
}
Now, let’s create a form in index.jsx with the following layout:
export default function Index() {
  return (
    <div>
      <form action="/weather" method="get">
        City: <input type="text" name="city" />
        <input type="submit" value="Fetch weather" />
      </form>
    </div>
  );
}
Here, we created a form with the method get, and we have a name associated with the input field, which will be appended to the URL when the form gets submitted.
Now, let’s see how to use route nesting. Create a new file named weather.jsx in the routes folder; it will handle the /weather route:
import { Outlet } from "react-router";
export default function Weather() {
  return (
    <>
      <h1>Weather App</h1>
      <Outlet />
    </>
  );
}
The Outlet component will look for the weather folder inside the routes folder and embed the pages inside the main page. This should give you an idea of how page nesting works in Remix.
Then, create a new folder in routes named weather, and create a new file index.jsx inside the weather folder. Let’s make a loader function that will run on the server side whenever the page is requested:
export async function loader({ request }) {
  try {
    const url = new URL(request.url);
    const search = new URLSearchParams(url.search);
    if (!search.get("city")) return redirect("/");
    const city = search.get("city");
    const res = await axios.get(
      `https://api.openweathermap.org/data/2.5/weather?q=${city}&appid=${process.env.WEATHER_API_KEY}&units=metric`
    );
    console.log(res.data);
    return { city, type: res.data.weather[0].main, temp: res.data.main.temp };
  } catch (err) {
    console.error(err);
    redirect("/");
    return {};
  }
}
Here, we extract the city name from the URL query sent using a GET request. Then we make a request to the OpenWeatherMap API to get the weather in that city. Remember, we should return the data we need in our frontend so that the data is available to render on the screen.
Now, let’s work on the layout of the result screen:
export default function Index() {
  const data = useLoaderData();
  return (
    <div>
      <h1>{data.city}</h1>
      <h2>{data.type}</h2>
      <h3>Temperature: {data.temp} °C</h3>
    </div>
  );
}
The useLoaderData hook gets the data that was returned using the loader function so that we can render it on the frontend. If you did everything correctly, you should get your weather rendered like this:
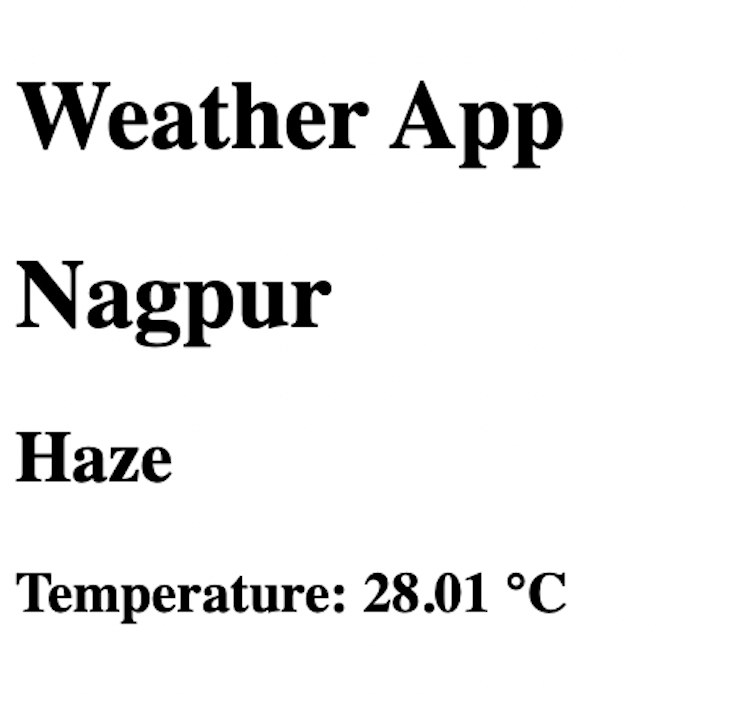
Congrats! You’ve made your first weather app using Remix!
Remix, unlike vanilla React, renders your React code to plain HTML on the server side, thus reducing the amount of JavaScript significantly. Whenever you visit a page, the server performs any server-side actions provided by you and then proceeds with rendering the React code to plain HTML and sends it back to the client browser.
Remix is a web framework and cannot be used with React Native. Unlike web apps, mobile apps are completely client-sided and cannot be rendered server-side.
Different operating systems have different native languages for apps. For example, Android uses Kotlin and Java, whereas iOS uses Swift and Objective C. The server cannot render this code, and the current technologies don’t allow on-demand compiling of code on the device as there might be exploits that attackers can use to steal a lot of information.
Since Remix is a framework based on React, all React libraries can be used on Remix, including state management libraries like Redux and Recoil. You can use Redux Toolkit, which is used in Create React App, and it should work in Remix just fine.
Although since Remix is server-side rendered, you will experience page refreshes or complete transition of pages, losing all the state in the Redux store. The best practice should be to use Redux Persist to save the states in the local storage.
However, using state management is often avoided in server-side rendered apps because data such as user tokens are typically saved in cookies and sent to servers that send back user data through props to the page. This is because the server cannot read the browser’s local storage.
Can you use Redux with Remix? Yes. Should you use Redux with Remix? Not so fast… Think about your use case. Server-side rendering with cookies solves most of the problems with state management.
I think Remix is powerful and should gain further popularity moving forward. Will I use Remix instead of Next.js? Probably not, because Next.js has a huge community to back me up as compared to Remix. Although, this is understandable because it is just newly open sourced.
This doesn’t mean I didn’t like this framework. I might use this for my personal or fun projects. I want to experiment more with the error boundary features.
In my opinion, Next.js would be a great option as of this writing, because when I tried to Google some of the problems I faced with Remix, I couldn’t find a solution easily. Maybe in a few years, things will change, and Remix will be a more powerful framework with a huge community backing.
Are you excited about trying out Remix now that it’s open source? Let me know in the comments below.
Install LogRocket via npm or script tag. LogRocket.init() must be called client-side, not
server-side
$ npm i --save logrocket

// Code:

import LogRocket from 'logrocket';
LogRocket.init('app/id');
// Add to your HTML:

<script src="https://cdn.lr-ingest.com/LogRocket.min.js"></script>
<script>window.LogRocket && window.LogRocket.init('app/id');</script>

Learn how to set up Meilisearch, index documents, and build keyword, semantic, and hybrid search with AI-powered retrieval.
Compare pnpm and npm across security defaults, disk usage, dependency strictness, and workspace policy to decide which package manager fits your project.

I migrated 20 production-style components from Tailwind to StyleX. Here’s what the data showed about LOC, CSS bundle size, build time, and type safety.

A guide for using JWT authentication to prevent basic security issues while understanding the shortcomings of JWTs.
Would you be interested in joining LogRocket's developer community?
Join LogRocket’s Content Advisory Board. You’ll help inform the type of content we create and get access to exclusive meetups, social accreditation, and swag.
Sign up now


 Learn more →