



 本文介绍基于JWT实现SSO单点登录,以淘宝和天猫为例说明其应用。详细阐述创建工程项目,包括父模块和子模块的搭建,在sso-server和client1中加入依赖、创建启动类等操作。还提及启动测试中遇到的问题及解决办法,如去掉启动信息、配置token-value等,最后给出项目代码地址。
文章目录
介绍
基于jwt实现sso单点登录
举例
两个独立的网站 淘宝 和 天猫
只要一方登录上,另一方也就登录上
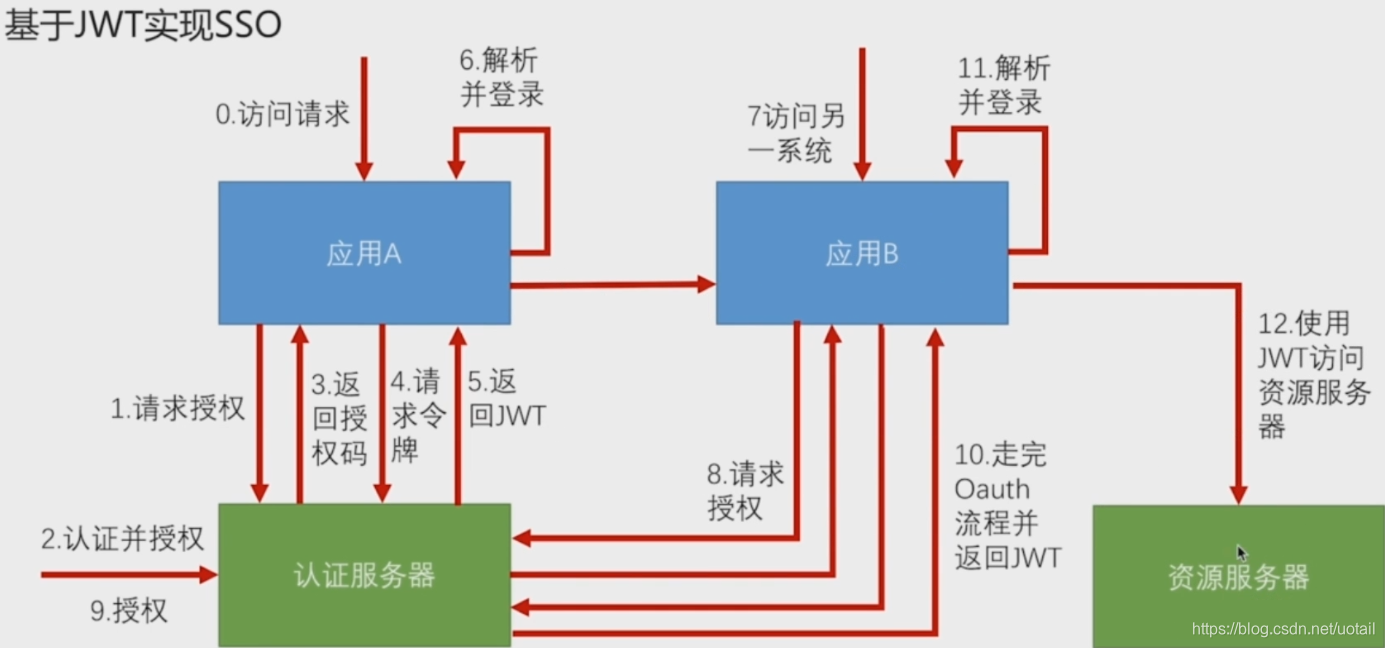
注意应用a和应用b所获取的jwt token 不是相同的字符串,但通过这个jwt token 解析出来的数据都是一样的
创建工程项目
父模块 sso-demo
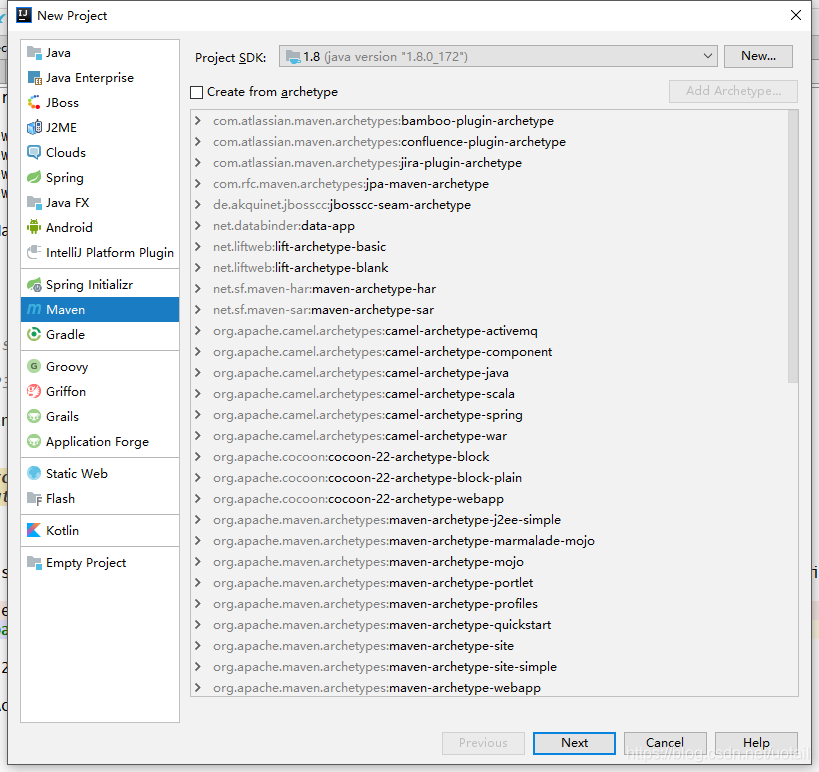

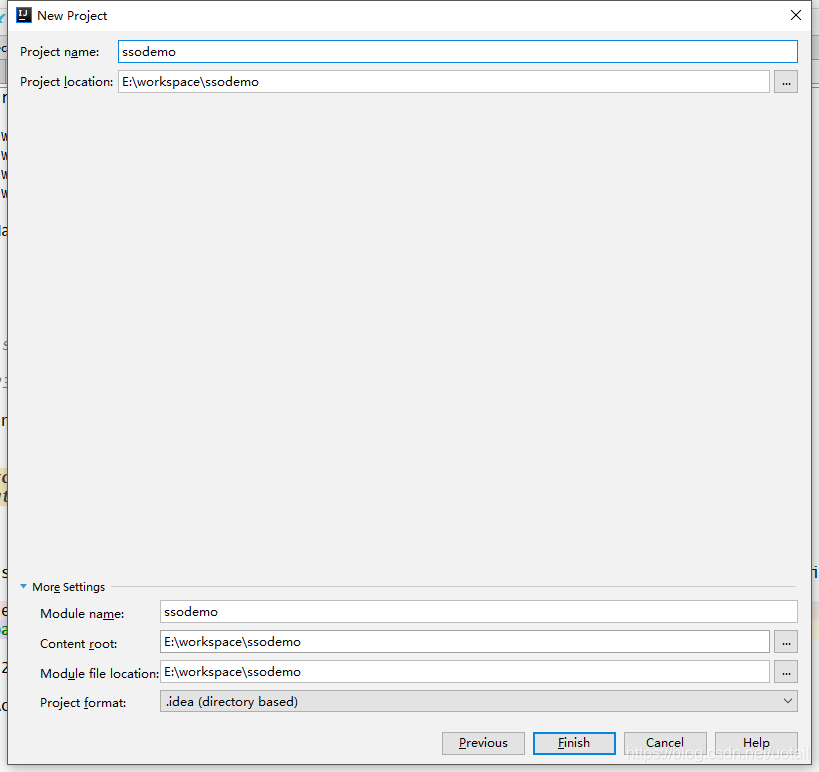
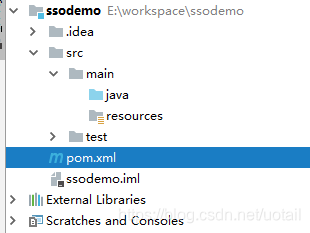
删除src目录
将之前的 whale-security 父pom文件原封不动的考进来
ok
踩坑:一个"、"引发的 Element ‘properties’ cannot have character [children],because the type’s content type
pom 文件中出现了没在 标签内的 字符
子模块 sso-server
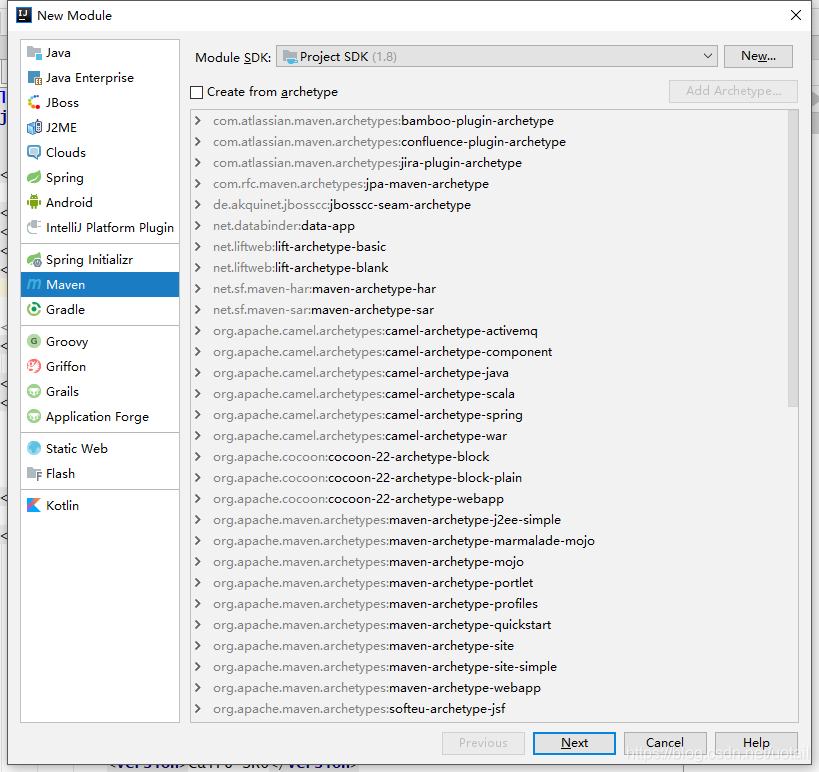
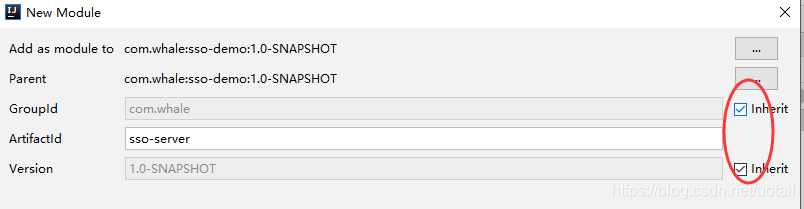

子模块客户端 client1 client2
接着依次创建子模块sso-client1 和 sso-client2
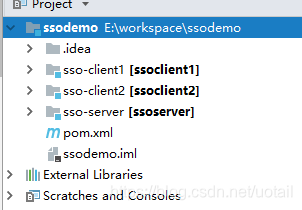
工程结构如下
sso-server
pom中加入依赖
  <parent>
        <artifactId>sso-demo</artifactId>
        <groupId>com.whale</groupId>
        <version>1.0-SNAPSHOT</version>
    </parent>
    <modelVersion>4.0.0</modelVersion>

    <artifactId>sso-server</artifactId>
    <!--<packaging></packaging> 默认为jar-->

    <dependencies>
        <!--在父pom的 dependencyManagement 中已引入-->
        <!--<dependency>-->
            <!--<groupId>org.springframework.security.oauth</groupId>-->
            <!--<artifactId>spring-security-oauth2</artifactId>-->
            <!--<version>2.3.3.RELEASE</version>-->
        <!--</dependency>-->
        <dependency>
            <groupId>org.springframework.boot</groupId>
            <artifactId>spring-boot-starter-web</artifactId>
        </dependency>
        <dependency>
            <groupId>org.springframework.cloud</groupId>
            <artifactId>spring-cloud-starter-oauth2</artifactId>
        </dependency>
        <dependency>
            <groupId>org.springframework.security</groupId>
            <artifactId>spring-security-jwt</artifactId>
        </dependency>
    </dependencies>
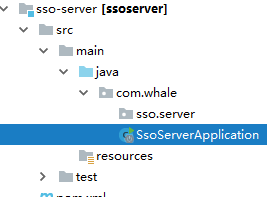
创建包和启动类 SsoServerApplication
@SpringBootApplication
public class SsoServerApplication{

    public static void main(String[] args) {

        SpringApplication.run(SsoServerApplication.class,args);

    }
}
AuthorizationServerConfigurerAdapter的配置实现
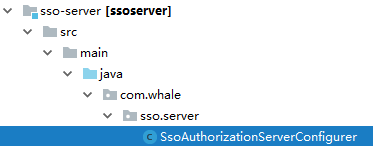
@Configuration
@EnableAuthorizationServer
public class SsoAuthorizationServerConfigurer extends AuthorizationServerConfigurerAdapter {

    @Override
    public void configure(ClientDetailsServiceConfigurer clients) throws Exception {

        clients.inMemory()
                .withClient("whale1")
                .secret("whale1secret")
                .authorizedGrantTypes("authorization_code","refresh_token")
                .scopes("all")

            .and()
                .withClient("whale2")
                .secret("whale2secret")
                .authorizedGrantTypes("authorization_code","refresh_token")
                .scopes("all");
    }

    /**
     * 生成令牌的配置 ,使用jwt生成
     * @param endpoints
     * @throws Exception
     */
    @Override
    public void configure(AuthorizationServerEndpointsConfigurer endpoints) throws Exception {
        endpoints.tokenStore(jwtTokenStore())
                .accessTokenConverter(jwtAccessTokenConverter());
    }

    /**
     * 认证服务器的安全配置
     * @param security
     * @throws Exception
     */
    @Override
    public void configure(AuthorizationServerSecurityConfigurer security) throws Exception {
        /**
         * 这个是授权表达式
         * 意思是在访问 tokenKey的 时候 需要进行身份认证
         *
         * tokenKey 就是 signingKey 签名秘钥
         *
         */

        security.tokenKeyAccess("isAuthenticated()");
    }

    //jwt token 配置
    //token 的存储
    @Bean
    public TokenStore jwtTokenStore(){
        return new JwtTokenStore(jwtAccessTokenConverter());
    }

    //token生成处理
    @Bean
    public JwtAccessTokenConverter jwtAccessTokenConverter(){
        JwtAccessTokenConverter jwtAccessTokenConverter = new JwtAccessTokenConverter();
        jwtAccessTokenConverter.setSigningKey("whale");
        return  jwtAccessTokenConverter;
    }
}
创建配置文件
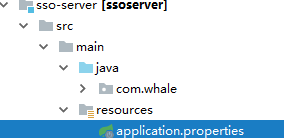
server.port=9999
#因为我们一个服务器要启动多个应用 加前缀以区分
server.servlet.context-path=/server

#用户认证是在登录服务器时完成的
#所以我们认证服务器也要有一个用户的信息
#应用a 跳到 认证服务器上面 用户登录时需要输入这个密码
spring.security.user.password=123456
测试启动 及 CONDITIONS EVALUATION REPORT的标准处理
配置spring boot的启动设置 并选择启动类
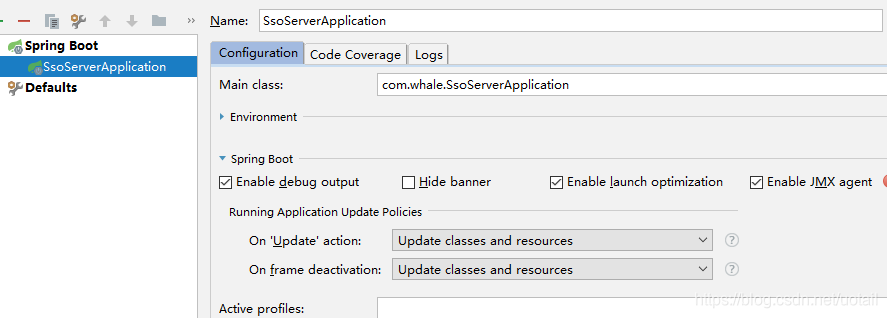
启动后打印信息
============================
CONDITIONS EVALUATION REPORT
============================


Positive matches:
-----------------
spring boot 启动信息去掉不需要的CONDITIONS EVALUATION REPORT
解决
启动设置去掉 debug out

ok
还有一种方法
https://blog.csdn.net/QAQ_666666/article/details/83414719
在你的 application.yml 中 配置
logging.level.org.springframework.boot.autoconfigure: ERROR
集成git版本控制
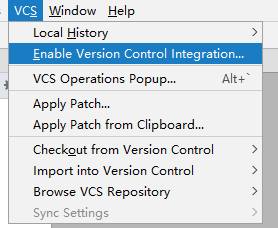
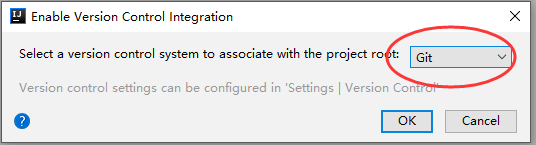
ok
再看vs菜单
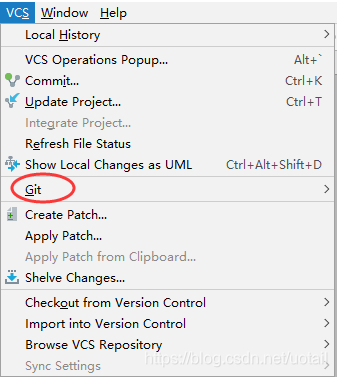
git到远程仓库
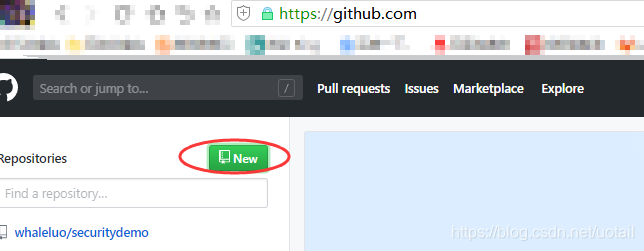
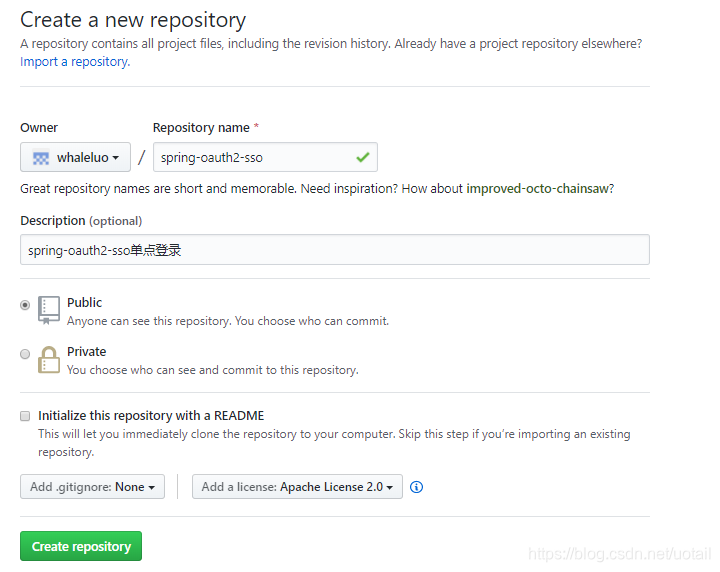
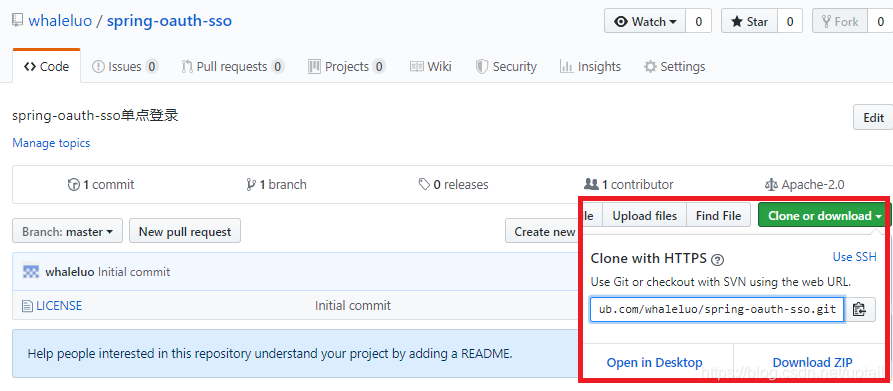
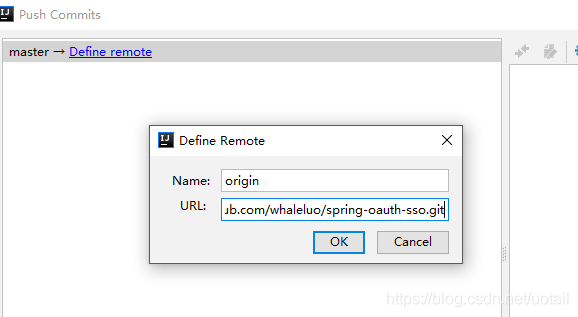
git地址为
https://github.com/whaleluo/spring-oauth-sso.git
本地提交代码后 push
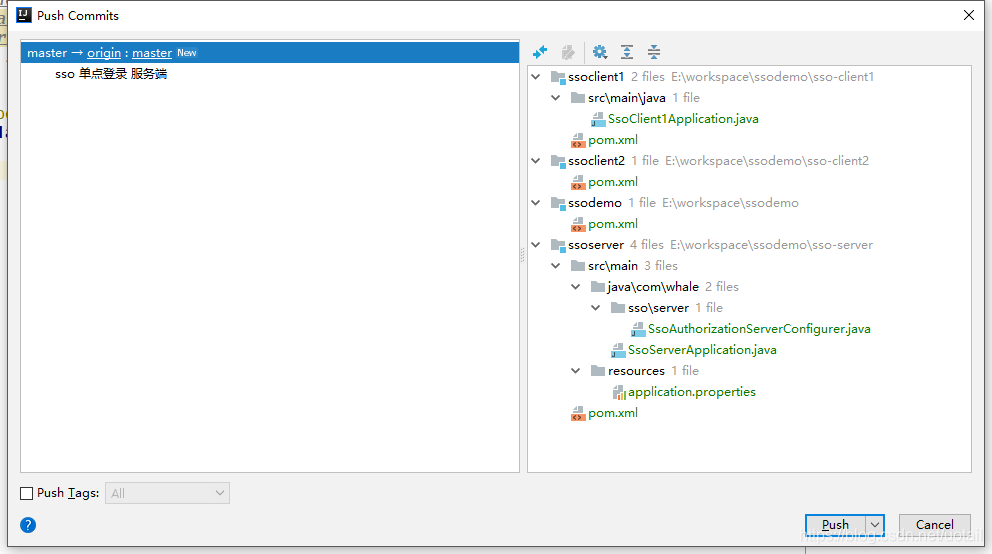
push 报错 push to origin/master was rejected
解决
打开git 控制台
依次执行
git pull origin master
git pull origin master --allow-unrelated-histories
在idea中重新push自己的项目,成功!!!
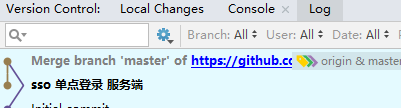
git log如下
client1
加入依赖
和 sso-server的依赖一样
创建包和启动类
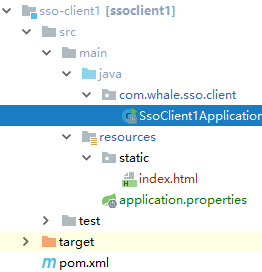
@SpringBootApplication
@RestController
@EnableOAuth2Sso
public class SsoClient1Application  {

    public static void main(String[] args) {
        SpringApplication.run(SsoClient1Application.class,args);
    }

    @GetMapping("/user")
    public Authentication user(Authentication user){
        return user;
    }

}
index
<!DOCTYPE html>
<html lang="en">
<head>
    <meta charset="UTF-8">
    <title>sso demo client1</title>
</head>
<body>
<h1>sso demo client1</h1>
<a href="http://127.0.0.1:8060/client2/index.html">访问client2</a>
</body>
</html>
application.properties
security.oauth2.client.client-id=whale1
security.oauth2.client.client-secret=whale1secret

#客户端跳转到认证服务器申请授权的路径
security.oauth2.client.user-authorization-uri=http://127.0.0.1:9999/server/oauth/authorize
#去认证服务器获取token的路径
security.oauth2.client.access-token-uri=http://127.0.0.1:9999/server/oauth/token
#获取token 签名秘钥的地址 这个认证服务器配置为需要认证 请求的时候要加上 client-id client-secret
security.oauth2.resource.jwt.key-uri=http://127.0.0.1:9999/server/oauth/token_key
security.oauth2.resource.jwt.key-value=whale

server.port=8080
server.servlet.context-path=/client1
#server.context-path=
主意
配置文件如果没有配置
security.oauth2.resource.jwt.key-value=whale
会报错
Error creating bean with name ‘jwtTokenServices’ …
报这个错是因为我们没有在客户端的 application.properties里配置token-value
https://blog.csdn.net/qq_42459181/article/details/89851349
测试启动
访问
http://127.0.0.1:8080/client1/index.html
认证服务器报错
There was an unexpected error (type=Internal Server Error, status=500).
User must be authenticated with Spring Security before authorization can be completed.
就是上此说的那个问题
@EnableAuthorizationServer 认证服务器加了这个注解
spring security 原有的basic认证就失效了,需要自己配置一下
重启启动 访问 报错
error=“invalid_request”, error_description=“At least one redirect_uri must be registered with the client.”
还是上次的问题
这次认证服务器如下配置
@Configuration
@EnableAuthorizationServer
public class SsoAuthorizationServerConfigurer extends AuthorizationServerConfigurerAdapter {

    @Override
    public void configure(ClientDetailsServiceConfigurer clients) throws Exception {

        clients.inMemory()
                .withClient("whale1")
                .secret("whale1secret")
                .authorizedGrantTypes("authorization_code","refresh_token")
                .scopes("all")
                .redirectUris("http://127.0.0.1:8080/client1/login")

            .and()
                .withClient("whale2")
                .secret("whale2secret")
                .authorizedGrantTypes("authorization_code","refresh_token")
                .scopes("all")
                .redirectUris("http://127.0.0.1:8080/client2/login");
    }
认证服务器会拿应用请求参数中的redirectUris与这里配置的进行比较,如果不符合就报错
这样安全性更高一些
再次重新启动认证服务器 请求 http://127.0.0.1:8080/client1/index.html
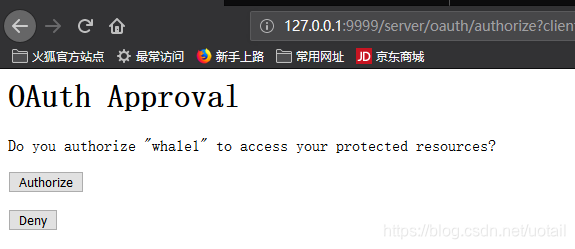
但点击授权却不进行跳转
查看原因
从这个方法进去
@RequestMapping(value = “/oauth/authorize”)
org.springframework.security.oauth2.provider.endpoint.AuthorizationEndpoint#authorize
// We intentionally only validate the parameters requested by the client (ignoring any data that may have
// been added to the request by the manager).

// Ensure that the client has requested a valid set of scopes.
oauth2RequestValidator.validateScope(authorizationRequest, client);


// Some systems may allow for approval decisions to be remembered or approved by default. Check for
// such logic here, and set the approved flag on the authorization request accordingly.
authorizationRequest = userApprovalHandler.checkForPreApproval(authorizationRequest,
					(Authentication) principal);
org.springframework.security.oauth2.provider.approval.TokenStoreUserApprovalHandler#checkForPreApproval
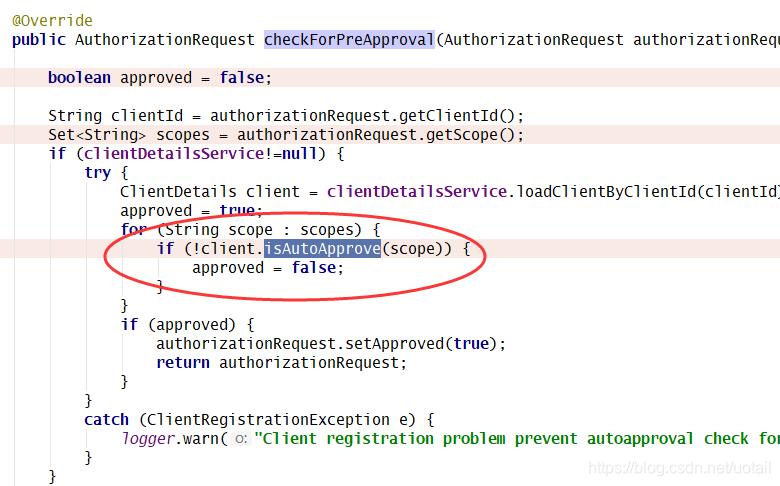
org.springframework.security.oauth2.provider.client.BaseClientDetails#isAutoApprove
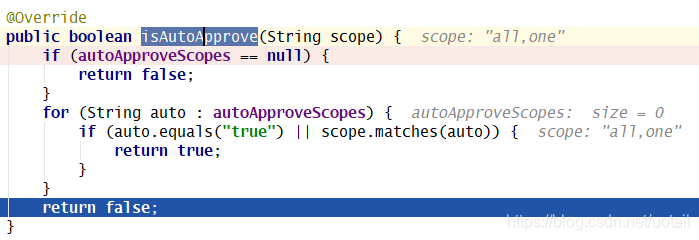
这里认证服务器可以配置自动认证
authorizationRequest.setApproved(approved);
// TODO: is this call necessary?
boolean approved = userApprovalHandler.isApproved(authorizationRequest, (Authentication) principal);
			authorizationRequest.setApproved(approved);
authorizationRequest.isApproved();
// Validation is all done, so we can check for auto approval...
			if (authorizationRequest.isApproved()) {
				if (responseTypes.contains("token")) {
					return getImplicitGrantResponse(authorizationRequest);
				}
				if (responseTypes.contains("code")) {
					return new ModelAndView(getAuthorizationCodeResponse(authorizationRequest,
							(Authentication) principal));
				}
			}

// Place auth request into the model so that it is stored in the session
// for approveOrDeny to use. That way we make sure that auth request comes from the session,
// so any auth request parameters passed to approveOrDeny will be ignored and retrieved from the session.
model.put("authorizationRequest", authorizationRequest);

return getUserApprovalPageResponse(model, authorizationRequest, (Authentication) principal);
org.springframework.security.oauth2.provider.endpoint.AuthorizationEndpoint#getUserApprovalPageResponse

使其自动认证 但试了一下又说不能正确重定向,循环认证
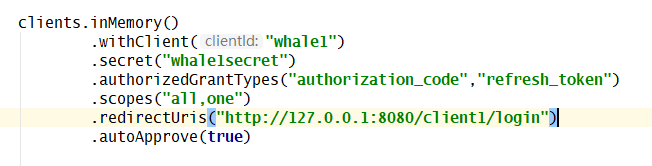
现在有点问题,后面再弄吧
oauth 这块原理还等再屡一下
单点登录
已解决掉
最简单的一次sso单点登录
https://github.com/whaleluo/spring-oauth-sso.git
注释和原理都在代码里面
持续更新


 扫一扫
扫一扫


 4009
4009

 被折叠的 条评论
为什么被折叠?
被折叠的 条评论
为什么被折叠?
 到【灌水乐园】发言


