


编译安装最新版的httpd
1、先在网页里找出源码包


用最新的1.7.0这个源码包(如果用bz2的需要安装bzip来解压)

util也是用最新的(用gz可以直接解压)


2、使用wget下载源码包(对于curl来说太大了,所以用wget)
[root@localhost ~]# yum -y install wget      //先安装wget命令
正在更新 Subscription Management 软件仓库。
无法读取客户身份

本系统尚未在权利服务器中注册。可使用 subscription-manager 进行注册。

上次元数据过期检查:22:30:29 前,执行于 2022年04月14日 星期四 16时02分29秒。
软件包 wget-1.19.5-10.el8.x86_64 已安装。
依赖关系解决。
无需任何处理。
完毕!
[root@localhost ~]# ls
公共                好看的手机充值单页.zip  视频  文档  音乐  anaconda-ks.cfg
好看的手机充值单页  模板                    图片  下载  桌面  initial-setup-ks.cfg
[root@localhost ~]# wget https://downloads.apache.org/apr/apr-1.7.0.tar.gz     //用wget命令下载
--2022-04-15 14:36:01--  https://downloads.apache.org/apr/apr-1.7.0.tar.gz
正在解析主机 downloads.apache.org (downloads.apache.org)... 88.99.95.219, 135.181.214.104
正在连接 downloads.apache.org (downloads.apache.org)|88.99.95.219|:443... 已连接。
已发出 HTTP 请求,正在等待回应... 200 OK
长度:1093896 (1.0M) [application/x-gzip]
正在保存至: “apr-1.7.0.tar.gz”

apr-1.7.0.tar.gz         100%[===============================>]   1.04M  72.8KB/s  用时 17s

2022-04-15 14:36:34 (63.9 KB/s) - 已保存 “apr-1.7.0.tar.gz” [1093896/1093896])
[root@localhost ~]# wget https://downloads.apache.org/apr/apr-util-1.6.1.tar.gz
--2022-04-15 14:40:38--  https://downloads.apache.org/apr/apr-util-1.6.1.tar.gz
正在解析主机 downloads.apache.org (downloads.apache.org)... 135.181.214.104, 88.99.95.219, 2a01:4f8:10a:201a::2, ...
正在连接 downloads.apache.org (downloads.apache.org)|135.181.214.104|:443... 已连接。
已发出 HTTP 请求,正在等待回应... 200 OK
长度:554301 (541K) [application/x-gzip]
正在保存至: “apr-util-1.6.1.tar.gz”

apr-util-1.6.1.tar.gz    100%[===============================>] 541.31K   279KB/s  用时 1.9s

2022-04-15 14:40:41 (279 KB/s) - 已保存 “apr-util-1.6.1.tar.gz” [554301/554301])


[root@localhost ~]# wget https://downloads.apache.org/httpd/httpd-2.4.53.tar.gz
--2022-04-15 14:44:19--  https://downloads.apache.org/httpd/httpd-2.4.53.tar.gz
正在解析主机 downloads.apache.org (downloads.apache.org)... 88.99.95.219, 135.181.214.104, 2a01:4f9:3a:2c57::2, ...
正在连接 downloads.apache.org (downloads.apache.org)|88.99.95.219|:443... 已连接。
已发出 HTTP 请求,正在等待回应... 200 OK
长度:9726558 (9.3M) [application/x-gzip]
正在保存至: “httpd-2.4.53.tar.gz”

httpd-2.4.53.tar.gz      100%[===============================>]   9.28M   118KB/s  用时 83s

2022-04-15 14:45:43 (114 KB/s) - 已保存 “httpd-2.4.53.tar.gz” [9726558/9726558])
编译httpd完整过程
//完整编译过程(最新版本)

//下载wget命令
[root@localhost ~]# yum -y install wget make

//下载源码包
[root@localhost ~]# wget https://downloads.apache.org/apr/apr-1.7.0.tar.gz
[root@localhost ~]# wget https://downloads.apache.org/apr/apr-util-1.6.1.tar.gz
[root@localhost ~]# wget https://downloads.apache.org/httpd/httpd-2.4.53.tar.gz

//安装开发环境
[root@localhost ~]# yum groups mark install "Development Tools"
[root@localhost ~]# rpm -qa | grep gcc
libgcc-8.5.0-3.el8.x86_64
[root@localhost ~]# useradd -r -M -s /sbin/nologin apache
useradd:用户“apache”已存在
[root@localhost ~]# id apache
uid=48(apache) gid=48(apache) 组=48(apache)
[root@localhost ~]# grep apache /etc/group
apache:x:48:
[root@localhost ~]# yum -y install openssl-devel pcre-devel expat-devel libtool    //安装依赖包

//解压
[root@localhost ~]# tar xf apr-1.7.0.tar.gz
[root@localhost ~]# tar xf apr-util-1.6.1.tar.gz
[root@localhost ~]# tar xf httpd-2.4.53.tar.gz

//编译apr-1.7.0
[root@localhost ~]# cd apr-1.7.0
[root@localhost apr-1.7.0]# vim configure
$RM "$cfgfile"   //把这个删掉
[root@localhost apr-1.7.0]# ./configure --prefix=/usr/local/apr
[root@localhost apr-1.7.0]# make
[root@localhost apr-1.7.0]# make install

//编译apr-util-1.6.1
[root@localhost ~]# cd apr-util-1.6.1
[root@localhost apr-util-1.6.1]# ./configure --prefix=/usr/local/apr-util --with-apr=/usr/local/apr
[root@localhost apr-util-1.6.1]# make
[root@localhost apr-util-1.6.1]# make install

//编译httpd-2.4.53
[root@localhost ~]# cd httpd-2.4.53/
[root@localhost httpd-2.4.53]#  ./configure --prefix=/usr/local/apache \
--enable-so \
--enable-ssl \
--enable-cgi \
--enable-rewrite \
--with-zlib \
--with-pcre \
--with-apr=/usr/local/apr \
--with-apr-util=/usr/local/apr-util/ \
--enable-modules=most \
--enable-mpms-shared=all \
--with-mpm=prefork
[root@localhost apr-1.7.0]# make
[root@localhost apr-1.7.0]# make install

//设置环境变量
[root@localhost ~]# echo 'export PATH=/usr/local/apache/bin:$PATH' > /etc/profile.d/apache.sh
[root@localhost ~]# source /etc/profile.d/apache.sh
[root@localhost ~]# which httpd
/usr/local/apache/bin/httpd

//映射
[root@localhost ~]# ln -s /usr/local/apache/include/ /usr/include/apache

//man文档
[root@localhost ~]# vim /etc/man_db.conf
MANDATORY_MANPATH                       /usr/man
MANDATORY_MANPATH                       /usr/share/man
MANDATORY_MANPATH                       /usr/local/share/man
MANDATORY_MANPATH                       /usr/local/apache/man
启动服务
//怎么来启动使用这个服务
//关闭防火墙
[root@localhost ~]# systemctl disable --now firewalld
[root@localhost ~]# setenforce 0
[root@localhost ~]# getenforce
Permissive
[root@localhost ~]# vim /etc/selinux/config
SELINUX=disabled   //把这个改为disabled
//启动服务
[root@localhost ~]# ss -antl
State      Recv-Q     Send-Q         Local Address:Port         Peer Address:Port    Process
LISTEN     0          128                  0.0.0.0:111               0.0.0.0:*
LISTEN     0          128                  0.0.0.0:22                0.0.0.0:*
LISTEN     0          5                  127.0.0.1:631               0.0.0.0:*
LISTEN     0          128                     [::]:111                  [::]:*
LISTEN     0          128                     [::]:22                   [::]:*
LISTEN     0          5                      [::1]:631                  [::]:*
[root@localhost ~]# which apachectl
/usr/local/apache/bin/apachectl
[root@localhost ~]# apachectl start      //用这个来启动
AH00558: httpd: Could not reliably determine the server's fully qualified domain name, using localhost.localdomain. Set the 'ServerName' directive globally to suppress this message       //这是个警告,不用管
[root@localhost ~]# ss -antl      //查看到这个已经启动了,可以去用ip地址来搜
State      Recv-Q     Send-Q         Local Address:Port         Peer Address:Port    Process
LISTEN     0          128                  0.0.0.0:111               0.0.0.0:*
LISTEN     0          128                  0.0.0.0:22                0.0.0.0:*
LISTEN     0          5                  127.0.0.1:631               0.0.0.0:*
LISTEN     0          128                     [::]:111                  [::]:*
LISTEN     0          128                        *:80                      *:*
LISTEN     0          128                     [::]:22                   [::]:*
LISTEN     0          5                      [::1]:631                  [::]:*
//关闭服务
[root@localhost ~]# apachectl stop


//如果想关掉这个提醒,可以以下操作
[root@localhost ~]# apachectl start
AH00558: httpd: Could not reliably determine the server's fully qualified domain name, using localhost.localdomain. Set the 'ServerName' directive globally to suppress this message       //这是个警告,不用管
//操作
[root@localhost ~]# cd /usr/local/apache/conf/    //放配置文件的
[root@localhost conf]# cd
[root@localhost ~]# cd /usr/local/apache/
[root@localhost apache]# ls
bin  build  cgi-bin  conf(配置文件)  error  htdocs (源码安装的放网站的) icons  include  logs(放日志的)  man  manual  modules
[root@localhost apache]# cd conf/
[root@localhost conf]# ls
extra  httpd.conf  magic  mime.types  original
[root@localhost conf]# vim httpd.conf
#ServerName www.example.com:80    //把#删掉,也就是取消掉注释,这样就不会有那个警告显示出了

//如果想设置成systemctl来控制启动,并且设置开机自启
[root@localhost ~]# cd /usr/lib/systemd/system
[root@localhost system]# ls sshd.service
sshd.service
[root@localhost system]# cp sshd.service httpd.service
cp:是否覆盖'httpd.service'? y
[root@localhost system]# vim httpd.service     //配置修改

[Unit]
Description=httpd server daemon
After=network.target sshd-keygen.target

[Service]
Type=forking
ExecStart=/usr/local/apache/bin/apachectl start
ExecStop=/usr/local/apache/bin/apachectl stop
ExecReload=/bin/kill -HUP $MAINPID

[Install]
WantedBy=multi-user.target
[root@localhost system]# systemctl daemon-reload
[root@localhost system]# cd
[root@localhost ~]# systemctl status httpd    //查看一下这个服务,有了
[root@localhost ~]# systemctl start httpd    //现在可以用systemctl来控制启动了
[root@localhost ~]# systemctl enable httpd       //设置开机自启
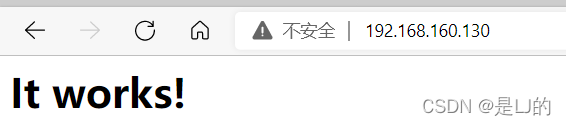
显示出来代表成功了
httpd常用配置
访问控制法则:
| 法则 | 功能 |
|---|---|
| Require all granted | 允许所有主机访问 |
| Require all deny | 拒绝所有主机访问 |
| Require ip IPADDR | 授权指定来源地址的主机访问 |
| Require not ip IPADDR | 拒绝指定来源地址的主机访问 |
| Require host HOSTNAME | 授权指定来源主机名的主机访问 |
| Require not host HOSTNAME | 拒绝指定来源主机名的主机访问 |
注意:httpd-2.4版本默认是拒绝所有主机访问的,所以安装以后必须做显示授权访问
示例:
<Directory /var/www/html/www>
    <RequireAll>
        Require not ip 192.168.1.20
        Require all granted
    </RequireAll>
</Directory>
虚拟主机:
虚拟主机有三类:
- 相同IP不同端口
- 不同IP相同端口
- 相同IP相同端口不同域名
//一个主机跑多个网站需要的配置(相同ip不同端口号)
[root@localhost ~]# ls /usr/local/apache/
bin  build  cgi-bin  conf  error  htdocs  icons  include  logs  man  manual  modules
[root@localhost ~]# cd /usr/local/apache/htdocs
[root@localhost htdocs]# ls
index.html
[root@localhost htdocs]# mkdir test.example.com
[root@localhost htdocs]# ls
index.html  test.example.com
[root@localhost htdocs]# mkdir blog.example.com
[root@localhost htdocs]# ls
blog.example.com  index.html  test.example.com
//配置虚拟主机(如果只用一个网站就不需要配置,但是如果跑多个网站就需要配置)
[root@localhost ~]# cd /usr/local/apache/conf/
[root@localhost conf]# ls
extra  httpd.conf  magic  mime.types  original
[root@localhost conf]# ls extra/
httpd-autoindex.conf  httpd-info.conf       httpd-mpm.conf                 httpd-userdir.conf
httpd-dav.conf        httpd-languages.conf  httpd-multilang-errordoc.conf  httpd-vhosts.conf
httpd-default.conf    httpd-manual.conf     httpd-ssl.conf                 proxy-html.conf
[root@localhost conf]# cd
[root@localhost ~]# vim /usr/local/apache/conf/extra/httpd-vhosts.conf   //修改

<VirtualHost *:80>
    DocumentRoot "/usr/local/apache/htdocs/test.example.com"
    ServerName test.example.com
    ErrorLog "logs/test-host.example.com-error_log"
    CustomLog "logs/test-host.example.com-access_log" common
</VirtualHost>

~
~
[root@localhost ~]# vim /usr/local/apache/conf/httpd.conf
#Include conf/extra/httpd-vhosts.conf    //把#删掉,取消注释
 [root@localhost ~]# systemctl restart httpd     //重启


//访问
[root@localhost ~]# cd /usr/local/apache/htdocs
[root@localhost htdocs]# cd test.example.com/
[root@localhost test.example.com]# ls
[root@localhost test.example.com]# echo "test page" > abc.html
[root@localhost test.example.com]# ls
abc.html     //这样用ip访问网页,进去后还要点才能看到,是因为首页网站必须叫index
[root@localhost test.example.com]# mv abc.html index.html    //改一下名字
[root@localhost test.example.com]# ls
index.html   //这样就可以直接访问到
[root@localhost test.example.com]# cd ..
[root@localhost htdocs]# ls
blog.example.com  index.html  test.example.com
[root@localhost htdocs]# cd blog.example.com/
[root@localhost blog.example.com]# ls
[root@localhost blog.example.com]# echo "blog page" > index.html
[root@localhost blog.example.com]# ls
index.html       //这样之后只能看到最先的网站(所以需要以下操作),因为只配置了一个

//操作,继续配置
[root@localhost ~]# vim /usr/local/apache/conf/extra/httpd-vhosts.conf     //修改配置
<VirtualHost *:80>
    DocumentRoot "/usr/local/apache/htdocs/test.example.com"
    ServerName test.example.com
    ErrorLog "logs/test-host.example.com-error_log"
    CustomLog "logs/test-host.example.com-access_log" common
</VirtualHost>
Listen 81
<VirtualHost *:81>
    DocumentRoot "/usr/local/apache/htdocs/blog.example.com"
    ServerName blog.example.com
    ErrorLog "logs/blog-host.example.com-error_log"
    CustomLog "logs/blog-host.example.com-access_log" common
</VirtualHost>
[root@localhost ~]# systemctl restart httpd
[root@localhost ~]# ss -antl
State      Recv-Q     Send-Q         Local Address:Port         Peer Address:Port    Process
LISTEN     0          128                  0.0.0.0:111               0.0.0.0:*
LISTEN     0          128                  0.0.0.0:22                0.0.0.0:*
LISTEN     0          5                  127.0.0.1:631               0.0.0.0:*
LISTEN     0          128                     [::]:111                  [::]:*
LISTEN     0          128                        *:80                      *:*
LISTEN     0          128                        *:81                      *:*
LISTEN     0          128                     [::]:22                   [::]:*
LISTEN     0          5                      [::1]:631                  [::]:*

//192.168.160.130:81   就可以访问到blog
//不同ip相同端口
[root@localhost ~]# vim /usr/local/apache/conf/extra/httpd-vhosts.conf
<VirtualHost *:192.168.160.130:80>
DocumentRoot "/usr/local/apache/htdocs/test.example.com"
ServerName test.example.com
ErrorLog "logs/test-host.example.com-error_log"
CustomLog "logs/test-host.example.com-access_log" common
</VirtualHost>
<VirtualHost *:192.168.160.131:80>
DocumentRoot "/usr/local/apache/htdocs/blog.example.com"
ServerName blog.example.com
ErrorLog "logs/blog-host.example.com-error_log"
CustomLog "logs/blog-host.example.com-access_log" common
</VirtualHost>
[root@localhost ~]# ip a
1: lo: <LOOPBACK,UP,LOWER_UP> mtu 65536 qdisc noqueue state UNKNOWN group default qlen 1000
link/loopback 00:00:00:00:00:00 brd 00:00:00:00:00:00
inet 127.0.0.1/8 scope host lo
valid_lft forever preferred_lft forever
inet6 ::1/128 scope host
valid_lft forever preferred_lft forever
2: ens160: <BROADCAST,MULTICAST,UP,LOWER_UP> mtu 1500 qdisc fq_codel state UP group default qlen 1000
link/ether 00:0c:29:d8:4a:24 brd ff:ff:ff:ff:ff:ff
inet 192.168.160.130/24 brd 192.168.160.255 scope global noprefixroute ens160
valid_lft forever preferred_lft forever
inet6 fe80::20c:29ff:fed8:4a24/64 scope link
valid_lft forever preferred_lft forever
3: virbr0: <BROADCAST,MULTICAST> mtu 1500 qdisc noqueue state DOWN group default qlen 1000
link/ether 52:54:00:6e:03:e4 brd ff:ff:ff:ff:ff:ff
4: virbr0-nic: <BROADCAST,MULTICAST> mtu 1500 qdisc fq_codel state DOWN group default qlen 1000
link/ether 52:54:00:6e:03:e4 brd ff:ff:ff:ff:ff:ff
[root@localhost ~]# ip addr add 192.168.160.131/24 dev ens160
[root@localhost ~]# ip a s ens160
2: ens160: <BROADCAST,MULTICAST,UP,LOWER_UP> mtu 1500 qdisc fq_codel state UP group default qlen 1000
link/ether 00:0c:29:d8:4a:24 brd ff:ff:ff:ff:ff:ff
inet 192.168.160.130/24 brd 192.168.160.255 scope global noprefixroute ens160
valid_lft forever preferred_lft forever
inet 192.168.160.131/24 scope global secondary ens160
valid_lft forever preferred_lft forever
inet6 fe80::20c:29ff:fed8:4a24/64 scope link
valid_lft forever preferred_lft forever
[root@localhost ~]# systemctl stop httpd
[root@localhost ~]# systemctl start httpd
//相同端口相同ip不同域名(平时我们用的)
[root@localhost ~]# vim /usr/local/apache/conf/extra/httpd-vhosts.conf
<VirtualHost *:*:80>
    DocumentRoot "/usr/local/apache/htdocs/test.example.com"
    ServerName test.example.com
    ErrorLog "logs/test-host.example.com-error_log"
    CustomLog "logs/test-host.example.com-access_log" common
</VirtualHost>
<VirtualHost *:*:80>
    DocumentRoot "/usr/local/apache/htdocs/blog.example.com"
    ServerName blog.example.com
    ErrorLog "logs/blog-host.example.com-error_log"
    CustomLog "logs/blog-host.example.com-access_log" common
</VirtualHost>
[root@localhost ~]# systemctl stop httpd
[root@localhost ~]# systemctl start httpd
在真机上加
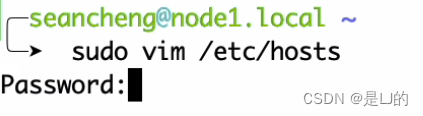
加一个blog

https的配置
//ssl启动模块
[root@localhost ~]# cd /usr/local/apache
[root@localhost apache]# ls
bin  build  cgi-bin  conf  error  htdocs  icons  include  logs  man  manual  modules
[root@localhost apache]# cd conf/
[root@localhost conf]# vim httpd.conf
#LoadModule ssl_module modules/mod_ssl.so    //搜mod_ssl,将#去掉,取消注释
配置https步骤:
- 生成证书(参考博客linux运维系列第6章)
//生成证书
//CA生成一对密钥
[root@localhost conf]# cd /etc/pki
[root@localhost pki]# ls
ca-trust  entitlement  fwupd-metadata  nssdb    product-default  rsyslog  tls
consumer  fwupd        java            product  rpm-gpg          swid
[root@localhost pki]# mkdir CA
[root@localhost pki]# ls
CA        consumer     fwupd           java   product          rpm-gpg  swid
ca-trust  entitlement  fwupd-metadata  nssdb  product-default  rsyslog  tls
[root@localhost pki]# cd CA/
[root@localhost CA]# pwd
/etc/pki/CA
[root@localhost CA]# mkdir private
[root@localhost CA]# (umask 077;openssl genrsa -out private/cakey.pem 2048)
Generating RSA private key, 2048 bit long modulus (2 primes)
.............+++++
..........................................+++++
e is 65537 (0x010001)
[root@localhost CA]# ls
private
[root@localhost CA]# ls private/
cakey.pem
//CA生成自签署证书
[root@localhost CA]# openssl req -new -x509 -key private/cakey.pem -out cacert.pem -days 365
You are about to be asked to enter information that will be incorporated
into your certificate request.
What you are about to enter is what is called a Distinguished Name or a DN.
There are quite a few fields but you can leave some blank
For some fields there will be a default value,
If you enter '.', the field will be left blank.
-----
Country Name (2 letter code) [XX]:CN
State or Province Name (full name) []:HB
Locality Name (eg, city) [Default City]:WH
Organization Name (eg, company) [Default Company Ltd]:runtime
Organizational Unit Name (eg, section) []:runtime
Common Name (eg, your name or your server's hostname) []:test.example.com
Email Address []:1@2.com
[root@localhost CA]# ls
cacert.pem  private
[root@localhost CA]# mkdir certs newcerts crl
[root@localhost CA]# ls
cacert.pem  certs  crl  newcerts  private
[root@localhost CA]# touch index.txt && echo 01 > serial
[root@localhost CA]# ls
cacert.pem  certs  crl  index.txt  newcerts  private  serial
[root@localhost CA]# cd
[root@localhost ~]# cd /usr/local/apache/
[root@localhost apache]# ls
bin  build  cgi-bin  conf  error  htdocs  icons  include  logs  man  manual  modules
[root@localhost apache]# cd conf/
[root@localhost conf]# ls
extra  httpd.conf  magic  mime.types  original
[root@localhost conf]# mkdir ssl
[root@localhost conf]# pwd
/usr/local/apache/conf
[root@localhost conf]# ls
extra  httpd.conf  magic  mime.types  original  ssl
[root@localhost conf]# cd ssl/
//httpd服务器生成密钥
[root@localhost ssl]# (umask 077;openssl genrsa -out httpd.key 2048)
Generating RSA private key, 2048 bit long modulus (2 primes)
................................+++++
............................+++++
e is 65537 (0x010001)
[root@localhost ssl]# ls
httpd.key
//httpd服务器生成证书签署请求
[root@localhost ssl]# openssl req -new -key httpd.key -days 365 -out httpd.csr
Ignoring -days; not generating a certificate
You are about to be asked to enter information that will be incorporated
into your certificate request.
What you are about to enter is what is called a Distinguished Name or a DN.
There are quite a few fields but you can leave some blank
For some fields there will be a default value,
If you enter '.', the field will be left blank.
-----
Country Name (2 letter code) [XX]:CN
State or Province Name (full name) []:HB
Locality Name (eg, city) [Default City]:WH
Organization Name (eg, company) [Default Company Ltd]:runtime
Organizational Unit Name (eg, section) []:runtime
Common Name (eg, your name or your server's hostname) []:test.example.com
Email Address []:1@2.com

Please enter the following 'extra' attributes
to be sent with your certificate request
A challenge password []:
An optional company name []:
[root@localhost ssl]# ls
httpd.csr  httpd.key
//CA签署客户端提交上来的证书
[root@localhost ssl]# openssl ca -in httpd.csr -out httpd.crt -days 365
Using configuration from /etc/pki/tls/openssl.cnf
Check that the request matches the signature
Signature ok
Certificate Details:
        Serial Number: 1 (0x1)
        Validity
            Not Before: Apr 17 11:47:17 2022 GMT
            Not After : Apr 17 11:47:17 2023 GMT
        Subject:
            countryName               = CN
            stateOrProvinceName       = HB
            organizationName          = runtime
            organizationalUnitName    = runtime
            commonName                = test.example.com
            emailAddress              = 1@2.com
        X509v3 extensions:
            X509v3 Basic Constraints:
                CA:FALSE
            Netscape Comment:
                OpenSSL Generated Certificate
            X509v3 Subject Key Identifier:
                37:2B:78:43:06:72:5D:5B:DF:95:4D:20:60:B6:6B:94:B7:3E:0F:22
            X509v3 Authority Key Identifier:
                keyid:0D:1B:E9:6C:35:A7:3E:27:33:D7:89:26:1F:22:FD:6F:E1:05:6F:67

Certificate is to be certified until Apr 17 11:47:17 2023 GMT (365 days)
Sign the certificate? [y/n]:y     //要不要签名


1 out of 1 certificate requests certified, commit? [y/n]y     //要不要提交申请
Write out database with 1 new entries
Data Base Updated
[root@localhost ssl]# ls
httpd.crt  httpd.csr  httpd.key
[root@localhost ssl]# rm -rf httpd.csr
[root@localhost ssl]# ls
httpd.crt  httpd.key
//因为是在一台虚拟机上,所以不用传输给客户端- 配置httpd.conf,取消以下内容的注释
    LoadModule ssl_module modules/mod_ssl.so
    Include /etc/httpd24/extra/httpd-vhosts.conf
    Include /etc/httpd24/extra/httpd-ssl.conf
[root@localhost conf]# vim httpd.conf
[root@localhost conf]# ls extra/
httpd-autoindex.conf  httpd-info.conf       httpd-mpm.conf                 httpd-userdir.conf
httpd-dav.conf        httpd-languages.conf  httpd-multilang-errordoc.conf  httpd-vhosts.conf
httpd-default.conf    httpd-manual.conf     httpd-ssl.conf                 proxy-html.conf
[root@localhost conf]# vim extra/httpd-ssl.conf

#   General setup for the virtual host
DocumentRoot "/usr/local/apache/htdocs/test.example.com"     //124行
ServerName test.example.com:443       //125行
ServerAdmin you@example.com
ErrorLog "/usr/local/apache/logs/error_log"
TransferLog "/usr/local/apache/logs/access_log"

SSLCertificateFile "/usr/local/apache/conf/ssl/httpd.crt"     //144行
#SSLCertificateFile "/usr/local/apache/conf/server-dsa.crt"
#SSLCertificateFile "/usr/local/apache/conf/server-ecc.crt"

#   Server Private Key:
#   If the key is not combined with the certificate, use this
#   directive to point at the key file.  Keep in mind that if
#   you've both a RSA and a DSA private key you can configure
#   both in parallel (to also allow the use of DSA ciphers, etc.)
#   ECC keys, when in use, can also be configured in parallel
SSLCertificateKeyFile "/usr/local/apache/conf/ssl/httpd.key"      //154行
- 在httpd-vhosts.conf中配置虚拟主机
- 在httpd-ssl.conf中配置证书的位置
- 检查配置文件是否有语法错误
[root@localhost ~]# httpd -t
[Sun Apr 17 20:07:08.970911 2022] [core:error] [pid 111970] (EAI 2)Name or service not known: AH00547: Could not resolve host name *:* -- ignoring!
[Sun Apr 17 20:07:08.971029 2022] [core:error] [pid 111970] (EAI 2)Name or service not known: AH00547: Could not resolve host name *:* -- ignoring!
AH00526: Syntax error on line 92 of /usr/local/apache/conf/extra/httpd-ssl.conf:
SSLSessionCache: 'shmcb' session cache not supported (known names: ). Maybe you need to load the appropriate socache module (mod_socache_shmcb?).
[root@localhost ~]# vim /usr/local/apache/conf/httpd.conf
#LoadModule socache_shmcb_module modules/mod_socache_shmcb.so   //删掉#,取消注释
[root@localhost ~]# httpd -t
[Sun Apr 17 20:09:10.856896 2022] [core:error] [pid 112021] (EAI 2)Name or service not known: AH00547: Could not resolve host name *:* -- ignoring!
[Sun Apr 17 20:09:10.856977 2022] [core:error] [pid 112021] (EAI 2)Name or service not known: AH00547: Could not resolve host name *:* -- ignoring!
Syntax OK
- 启动或重启服务
[root@localhost ~]# systemctl restart httpd
[root@localhost ~]# ss -antl
State      Recv-Q     Send-Q         Local Address:Port         Peer Address:Port    Process
LISTEN     0          128                  0.0.0.0:111               0.0.0.0:*
LISTEN     0          128                  0.0.0.0:22                0.0.0.0:*
LISTEN     0          5                  127.0.0.1:631               0.0.0.0:*
LISTEN     0          128                        *:443                     *:*
LISTEN     0          128                     [::]:111                  [::]:*
LISTEN     0          128                        *:80                      *:*
LISTEN     0          128                     [::]:22                   [::]:*
LISTEN 0 5 [::1]:631 [::]:* - 设置hosts以便用域名访问(仅学习阶段,企业实际工作中无需做此步。
 1212
1212


 扫一扫
扫一扫


 被折叠的 条评论
为什么被折叠?
被折叠的 条评论
为什么被折叠?
 到【灌水乐园】发言


