


 本文详细介绍了如何在SpringBoot项目中整合Mybatis,包括项目文件结构、依赖引入、Entity、Mapper及XML文件编写、Service和Controller的实现。通过实例展示了如何查询数据库并返回结果。最后给出了配置文件和启动应用的步骤。
1. 文件结构
1.1 项目文件结构
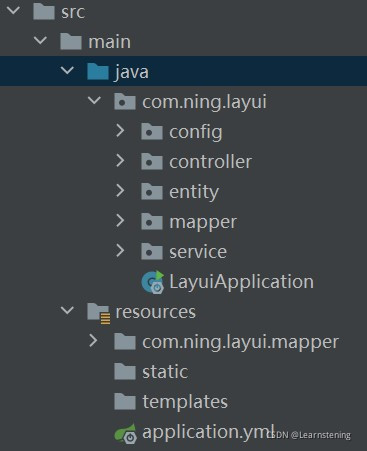
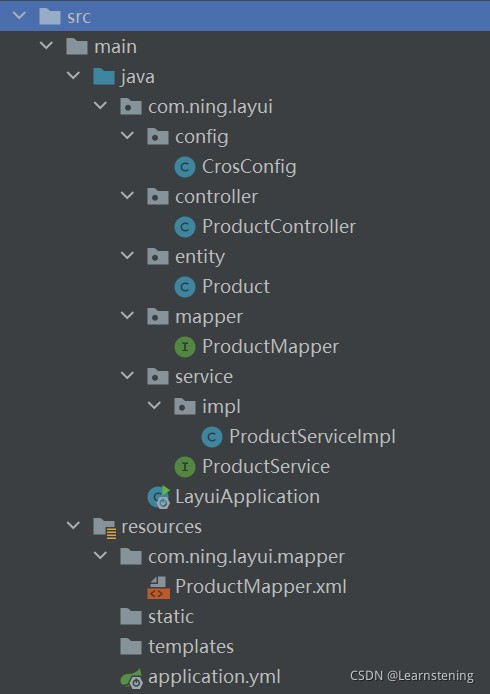
1.2 数据库表结构
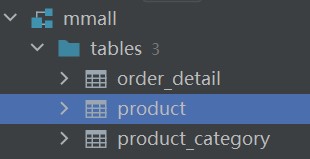
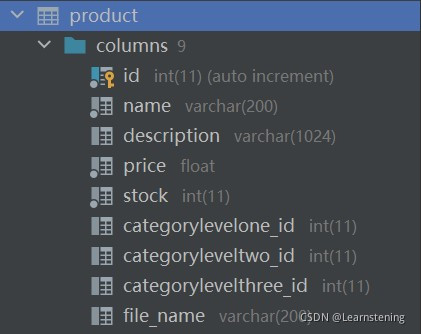
2. 导入依赖
在用idea建立springboot项目时,勾选;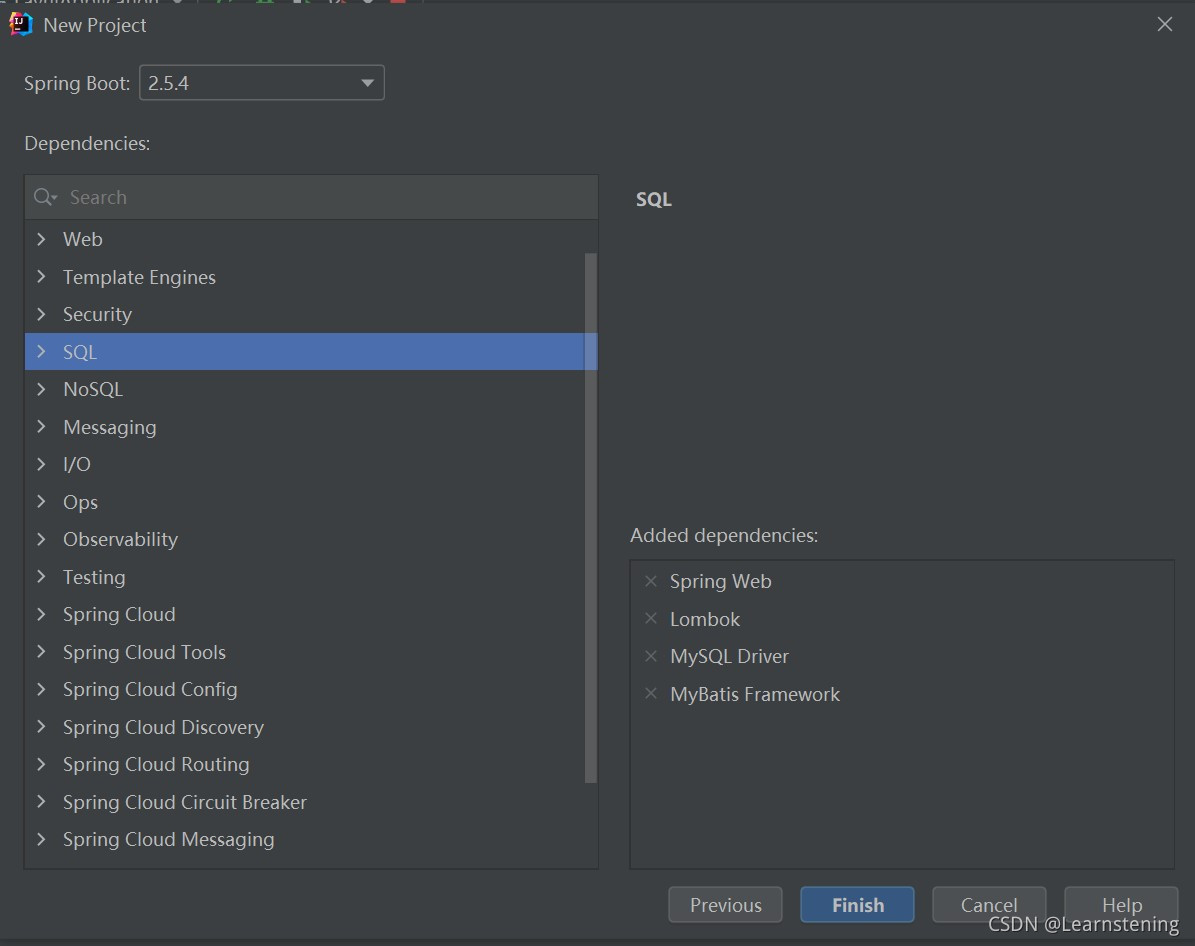
或者创建项目后pom文件中导入依赖;
<?xml version="1.0" encoding="UTF-8"?>
<project xmlns="http://maven.apache.org/POM/4.0.0" xmlns:xsi="http://www.w3.org/2001/XMLSchema-instance"
         xsi:schemaLocation="http://maven.apache.org/POM/4.0.0 https://maven.apache.org/xsd/maven-4.0.0.xsd">
    <modelVersion>4.0.0</modelVersion>
    <parent>
        <groupId>org.springframework.boot</groupId>
        <artifactId>spring-boot-starter-parent</artifactId>
        <version>2.5.4</version>
        <relativePath/> <!-- lookup parent from repository -->
    </parent>
    <groupId>com.ning</groupId>
    <artifactId>layui</artifactId>
    <version>0.0.1-SNAPSHOT</version>
    <name>layui</name>
    <description>layui</description>
    <properties>
        <java.version>1.8</java.version>
    </properties>
    <dependencies>
        <dependency>
            <groupId>org.springframework.boot</groupId>
            <artifactId>spring-boot-starter-web</artifactId>
        </dependency>

        <dependency>
            <groupId>mysql</groupId>
            <artifactId>mysql-connector-java</artifactId>
            <scope>runtime</scope>
        </dependency>
        <dependency>
            <groupId>org.springframework.boot</groupId>
            <artifactId>spring-boot-starter-test</artifactId>
            <scope>test</scope>
        </dependency>

        <dependency>
            <groupId>org.projectlombok</groupId>
            <artifactId>lombok</artifactId>
            <version>1.18.20</version>
            <scope>provided</scope>
        </dependency>
        <dependency>
            <groupId>org.mybatis.spring.boot</groupId>
            <artifactId>mybatis-spring-boot-starter</artifactId>
            <version>2.2.0</version>
        </dependency>


    </dependencies>


</project>
3. 编写entity
Product.java
package com.ning.layui.entity;

import lombok.Data;

@Data
public class Product {
    private Integer id;
    private String name;
    private String description;
    private Double price;
    private Integer stock;
    private Integer categoryleveloneId;
    private Integer categoryleveltwoId;
    private Integer categorylevelthreeId;
    private String fileName;
}
4.编写mapper及其xml文件
Product.java
package com.ning.layui.mapper;

import org.springframework.stereotype.Repository;
import org.apache.ibatis.annotations.Param;

@Repository
public interface ProductMapper {
    public String getProductNameById(@Param("id") Integer id);
}
@Repository注解修饰哪个类,则表明这个类具有对对象进行CRUD(增删改查)的功能。
@Repository是@Component注解的一个派生品,所以被@Repository注解的类可以自动的被@ComponentScan 通过路径扫描给找到。因此@Repository注解的类也能@Autowired实现自动装配。
ProductMapper.xml
<?xml version="1.0" encoding="UTF-8" ?>
<!DOCTYPE mapper
        PUBLIC "-//mybatis.org//DTD Config 3.0//EN"
        "http://mybatis.org/dtd/mybatis-3-mapper.dtd">
<mapper namespace="com.ning.layui.mapper.ProductMapper">
    <select id="getProductNameById" resultType="String">
        select name from mmall.product where id=#{id}
    </select>
</mapper>
使用 @Param 进行传参,当映射器方法需要多个参数时,这个注解可以被用于:给映射器方法中的每个参数来取一个名字。这里有两点好处:
在 xml 文件中不需要再指定参数类型 parameterType
当传递对象时,使用 #{对象.属性} 可以更清晰地提示自己
如果不使用 @Param,多参数将会以它们的顺序位置和SQL语句中的表达式进行映射,这是默认的。
在application.yml中指定xml文件路径以及实体类路径
- mybatis.mapper-locations:用于将配置路径下的 * .xml 文件加载到 mybatis 中
- type-aliases-package:指定POJO扫描包来让 mapper.xml 文件的 resultType 自动扫描到自定义POJO,这样就不用每次指定完全限定名
mybatis:
  mapper-locations: classpath:com/ning/layui/mapper/*.xml
type-aliases-package: com.ning.layui.entity使用配置文件版时,我们还需要在主程序中(LayuiApplication.java)通过使用@MapperScan可以指定要扫描的Mapper类的包的路径。
@MapperScan是要spring启动时,扫描到所有的Mapper文件,并生成代理类交给spring容器管理;
LayuiApplication.java
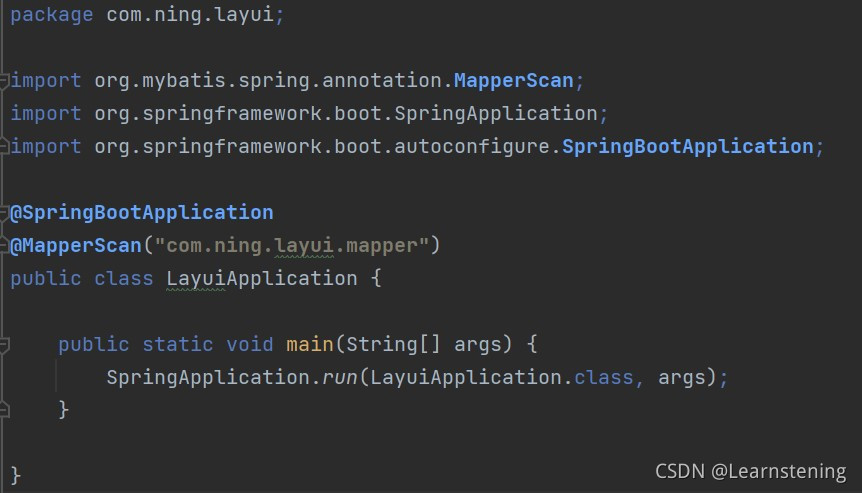
编写 Mapper.xml 文件主要注意三点:
- namespace相对应
- id相对应
- resultType相对应
5.编写service
ProductService.java
package com.ning.layui.service;

public interface ProductService {
    public String findProductNameById(Integer id);
}
ProductServiceImpl.java
package com.ning.layui.service.impl;

import com.ning.layui.mapper.ProductMapper;
import com.ning.layui.service.ProductService;
import org.springframework.beans.factory.annotation.Autowired;
import org.springframework.stereotype.Service;

@Service("ProductServiceImpl")
public class ProductServiceImpl implements ProductService {

    @Autowired
    private ProductMapper productMapper;

    @Override
    public String findProductNameById(Integer id) {
        String productName = productMapper.getProductNameById(id);
        return productName;
    }
}
我们需要在实现类中使用 @Service 注解,才能被 SpringBoot 扫描,在 Controller 中使用 @Autowired 注入
使用 @Autowired 注解自动装配 UserDao。调用 dao 层接口设计逻辑应用
6.编写controller
package com.ning.layui.controller;

import com.ning.layui.service.ProductService;
import org.springframework.beans.factory.annotation.Autowired;
import org.springframework.web.bind.annotation.GetMapping;
import org.springframework.web.bind.annotation.RestController;

@RestController //restcontroller 只返回结果不返回视图
public class ProductController {

    @Autowired
    private ProductService productService;

    @GetMapping("/getProduct")
    public String getProduct(int id){
        String productName = productService.findProductNameById(id);
        System.out.println(productName);
        return productName;
    }
}
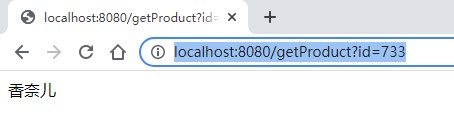
7. 启动应用,在浏览器地址栏输入
http://localhost:8080/getProduct?id=733得到结果:
8. 后记
application.yml
spring:
  datasource:
    url: jdbc:mysql://localhost:3306/mmall?useUnicode=true&characterEncoding=utf-8&useSSL=false&serverTimezone=UTC
    username: root
    password: 123xyz
    driver-class-name: com.mysql.cj.jdbc.Driver

mybatis:
  mapper-locations: classpath:com/ning/layui/mapper/*.xml
type-aliases-package: com.ning.layui.entity https://blog.csdn.net/qq_42582489/article/details/107500836?spm=1001.2014.3001.5506


 扫一扫
扫一扫


 2万+
2万+

 被折叠的 条评论
为什么被折叠?
被折叠的 条评论
为什么被折叠?
 到【灌水乐园】发言


