


To Get Various Fonts on Linux, the following two methods should be performed. We will first discuss the method by which you can Install Fonts Manually on Linux.
[Method 1]: Install Fonts on Linux using Google Downloaded File
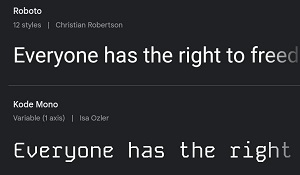
Step 1: Browse to the Google Fonts & download any Font File.
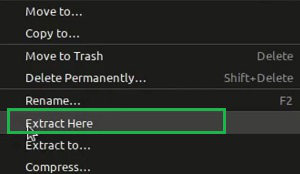
Step 2: Go to the option Extract Here to option the downloaded file.
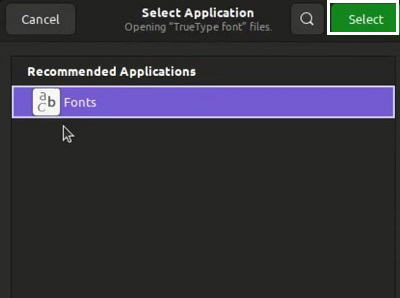
Step 3: Now, execute the downloaded file with the Fonts Application. Go for the Select Option.
Step 4: Click on the Install Button. When the Font is installed, you will get the Installed Message.
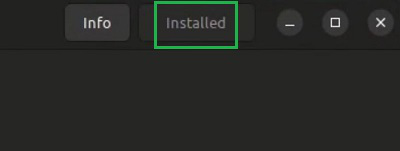
Congratulation! You have successfully installed the Fonts & Configure Linux Font on the device using Manual Approach.
Note: Font File Location (Where to Place .TTF Files in Linux)
1. For all users (system-wide installation):
- Place the font files in:
/usr/share/fonts/truetype/
- You’ll need sudo privileges for this.
2. For a single user only:
- Create or use this directory:
~/.local/share/fonts/
3. Refresh the font cache to apply changes:
fc-cache -f -v
- Once done, your newly added fonts will appear in applications like LibreOffice, GIMP, or your text editor.
[Method 2]: Install Fonts on Linux using Terminal
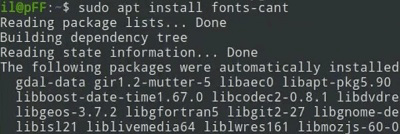
Open Terminal & execute the following Linux Command. It will Download & Install Fonts on Linux without moving for any other steps.
sudo apt install fonts-<Name>
- Installing fonts in Linux is a straightforward process that can significantly enhance your system's aesthetics and usability.
- By following the steps outlined in this guide, you can easily add custom fonts to your Linux system, allowing you to personalize your workspace and improve your productivity.
- Enjoy the enhanced visual appeal and functionality that custom fonts bring to your Linux environment.


 扫一扫
扫一扫


 344
344

 被折叠的 条评论
为什么被折叠?
被折叠的 条评论
为什么被折叠?
 到【灌水乐园】发言


