Oracle Linux 5 Installation

This article provides a pictorial guide for performing a default installation of Oracle Linux 5.

As you would expect, the installation is almost entirely the same as the Red Hat Enterprise Linux 5 installation.

  1. Boot from the CD or DVD. At the boot screen, press the "Enter" key.
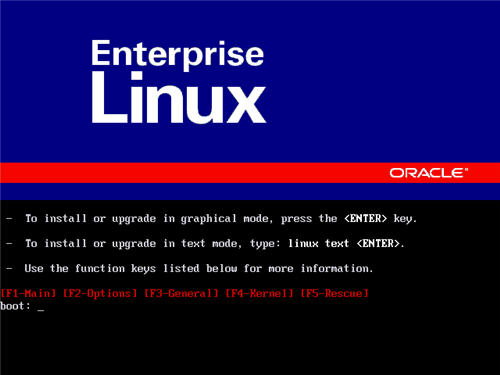
    Boot

  2. Press the "tab" key to move focus to the "Skip" key, then press the "Enter" key to continue.
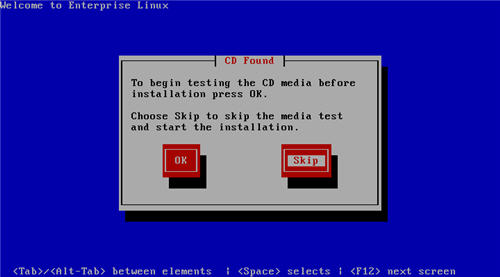
    Test Media

  3. On the "Welcome" screen, click the "Next" button.
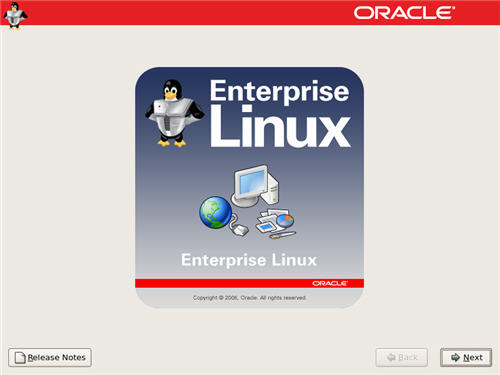
    Welcome

  4. Select the appropriate language, then click the "Next" button.
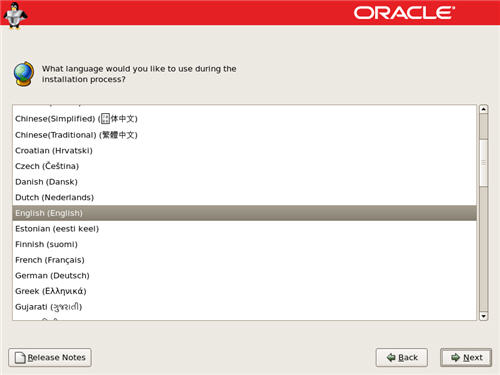
    Language

  5. Select the relevant keyboard setting, then click the "Next" button.
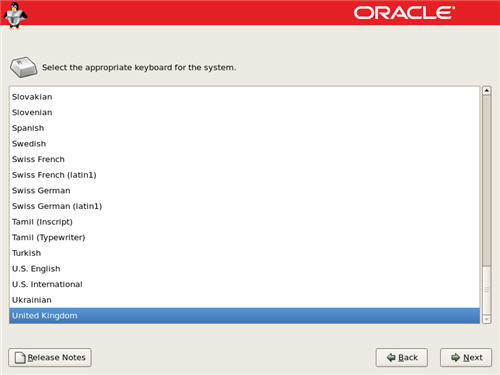
    Keyboard

  6. Click the "Yes" button on the disk partitioning warning dialog.
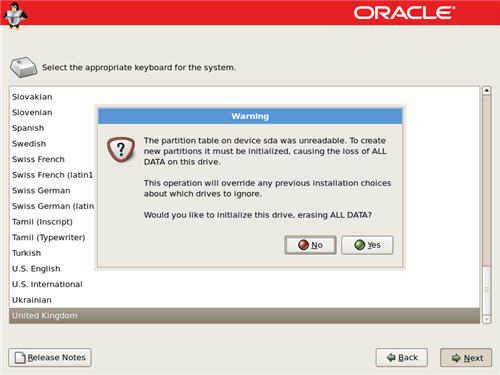
    Disk Partitioning Warning

  7. Check the "Review and modify partitioning layout" option, then allow the installer to automatically partition the disk by clicking on the "Next" button.
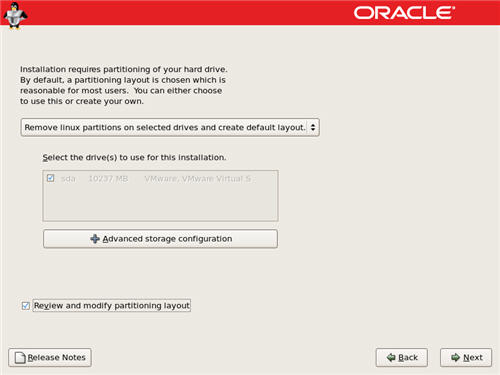
    Disk Partitioning

  8. Click the "Yes" button on the subsequent warning dialog.
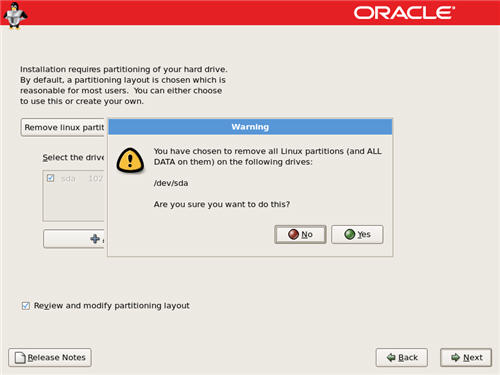
    Disk Partitioning Warning

  9. The installer will list the default partitioning scheme for your size disk.
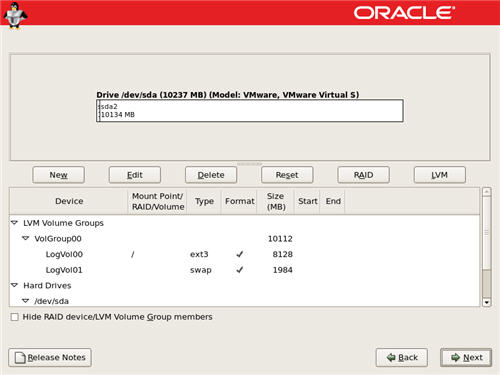
    Disk Setup

    The following screen shots show the actions I take for small test installations

  10. Edit the "/boot" partition, setting it to "150M" and "Fixed size", then click the "OK" button.
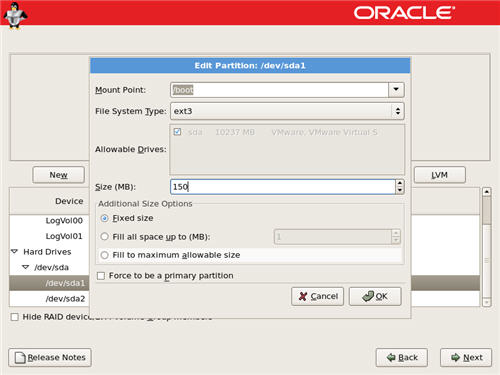
    Disk Setup Boot

  11. The "/root" and "/swap" partitions are part of a volume group.
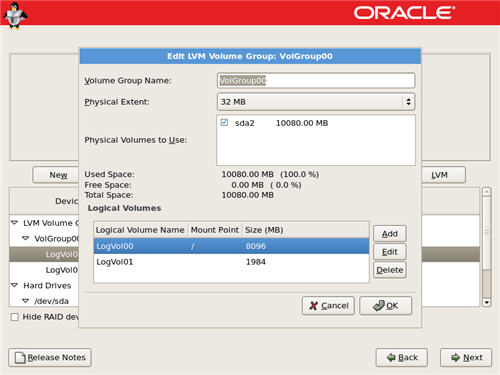
    Disk Setup Volume Group

  12. Edit the "/root" partition, setting it to "8000 MB", then click the "OK" button.
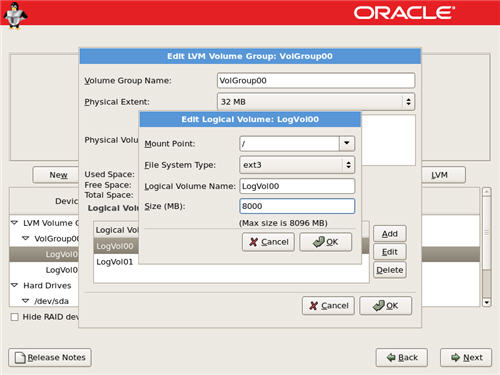
    Disk Setup Root

  13. Edit the "swap" partition, setting it to "2048M", then click the "OK" button.
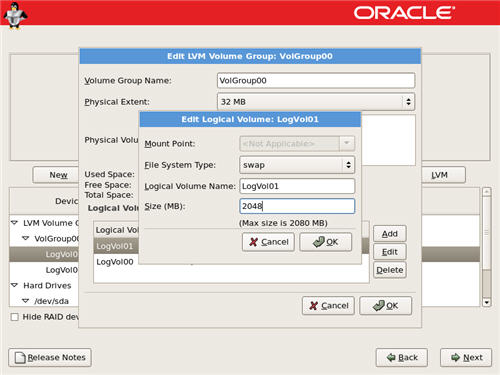
    Disk Setup Swap

    If you need additional swap space, simply make this partition bigger.

  14. The partitions screen should now looks something like the following picture, then click the "Next" button.
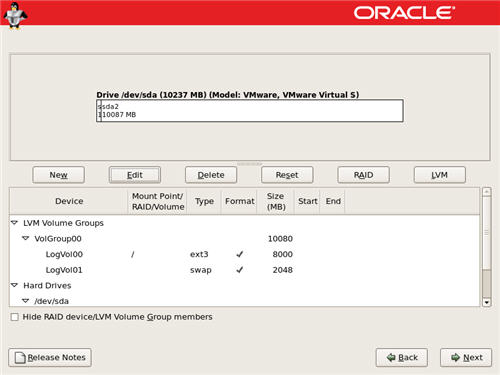
    Disk Setup

  15. Accept the boot loader settings by clicking the "Next" button.
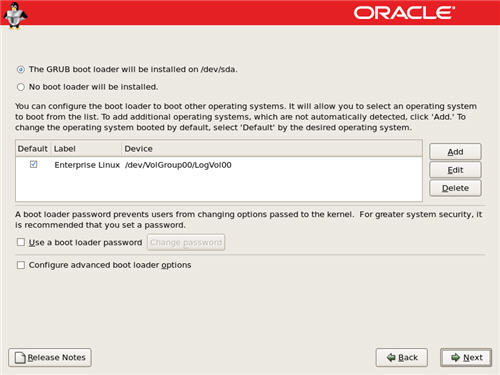
    Boot Loader

  16. Configure the network interface with the apropriate settings. This can be done automatically using DHCP, or manually.
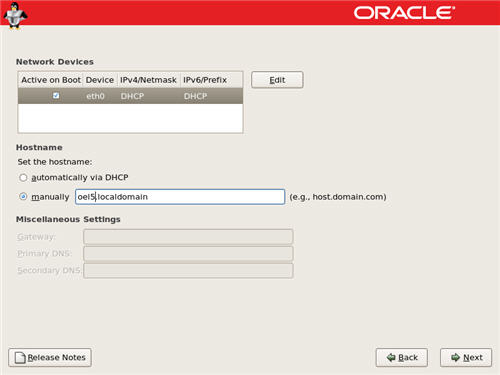
    Network Configuration

  17. If you are not using DHCP, enter the appropriate IP addess and subnet mask, then click the "OK" button.
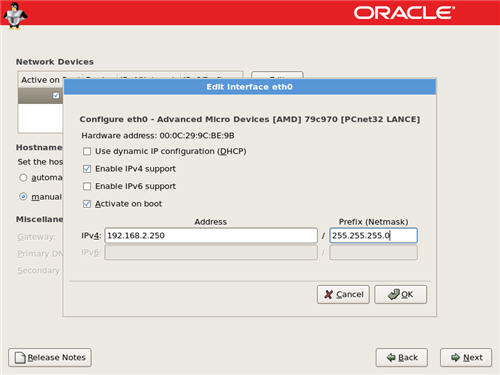
    Edit Interface

  18. If you are not using DHCP, enter the host name, gateway and DNS information, then click the "Next" button.
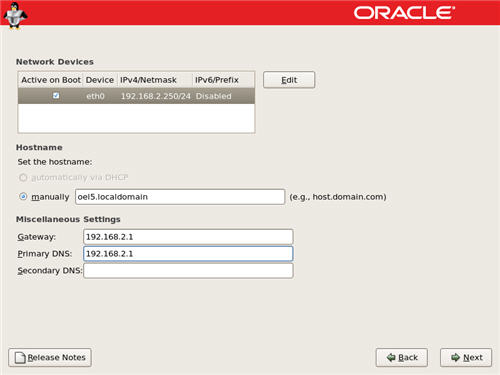
    Network Configuration

  19. Select the relevant region by clicking on the map.
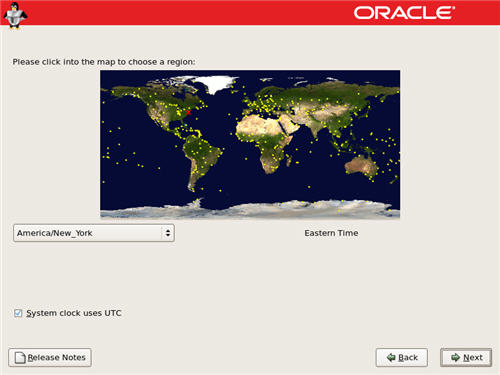
    Region

  20. Select the relevant city by clicking on the map. Click on the "Next" button to proceed.
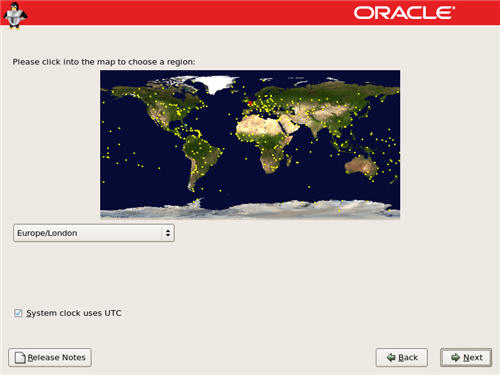
    Region

  21. Enter a root password for the server, then click the "Next" button to proceed.
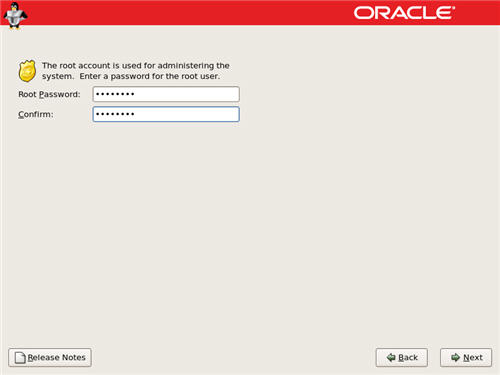
    Root Password

  22. Select the "Customize now" option and the appropriate installation type and click the "Next" button.
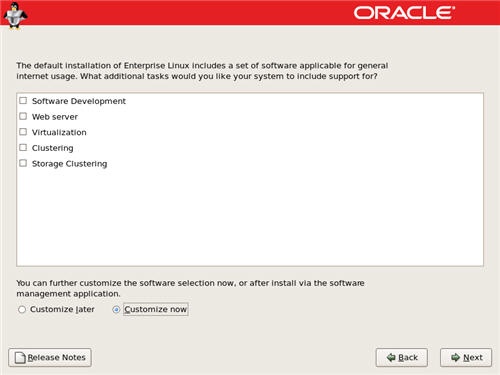
    Package Installation Defaults

  23. The "Package Group Selection" screen allows you to select the required package groups, and individual packages within the details section. When you've made your selection, click the "Next" button.
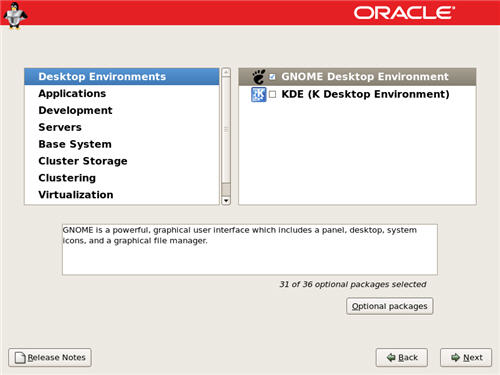
    Package Group Selection

  24. On the "About to Install" screen, click the "Next" button.
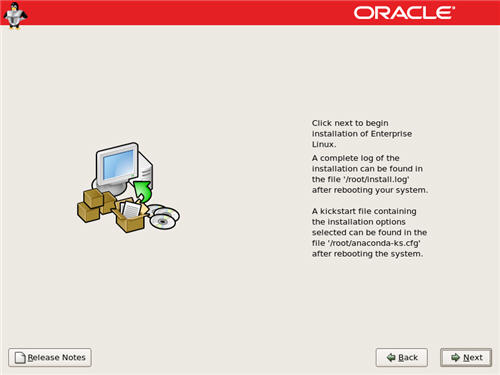
    About To Install

  25. Click the "Continue" button on the "Required Install Media" screen.
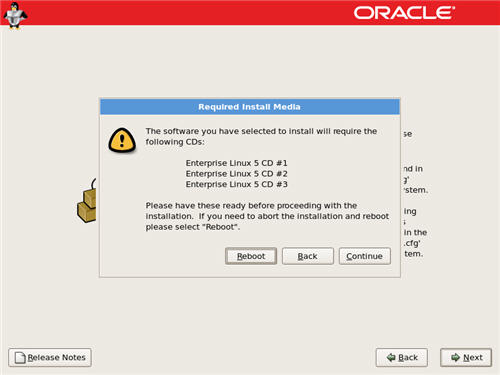
    Required Media

  26. During the installation phase, enter the appropriate CDs as requested.
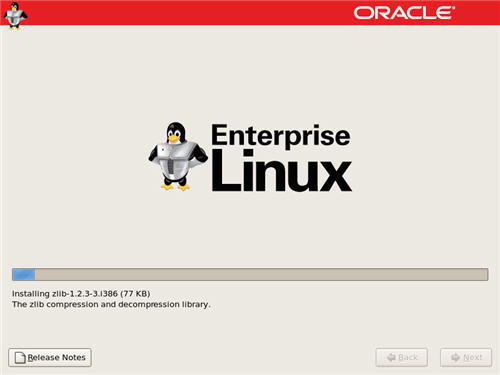
    Installing Packages

  27. Click the "Reboot" button to complete the installation.
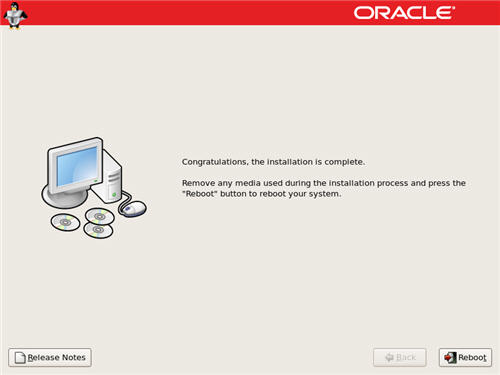
    Congratulations

  28. On the "Welcome" screen, click the "Forward" button.
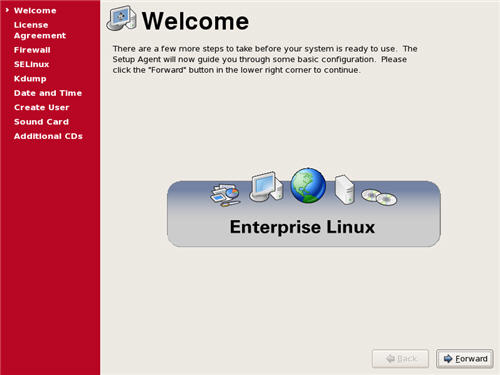
    Welcome

  29. Accept the license agreement and click the "Forward" button.
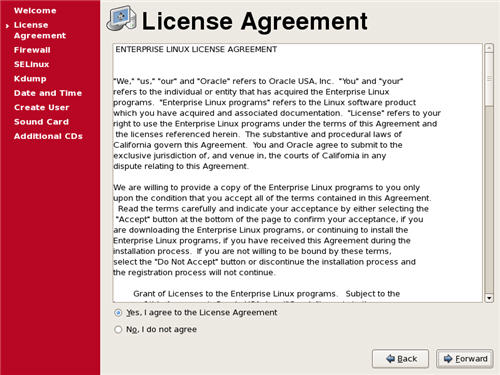
    License Agreement

  30. On the Firewall screen, choose the "Disabled" option and click the "Forward" button.
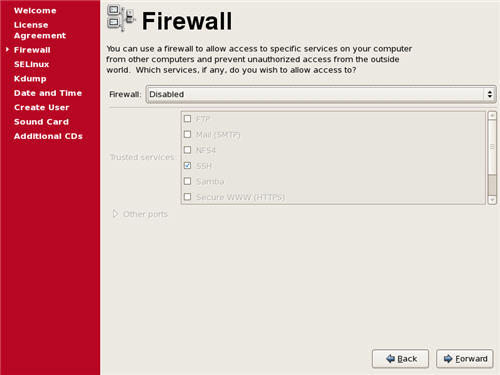
    Firewall

  31. Click the "Yes" button on the subsequent warning screen.
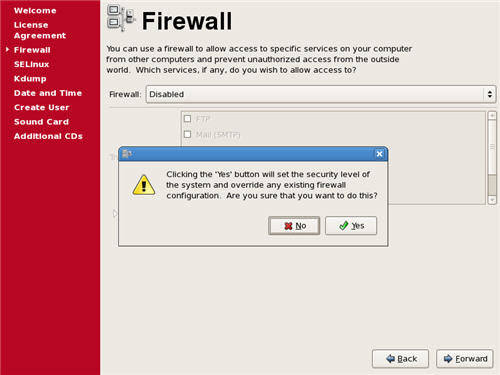
    Firewall Warning

  32. On the SELinux screen, choose the "Disabled" option and click the "Forward" button.
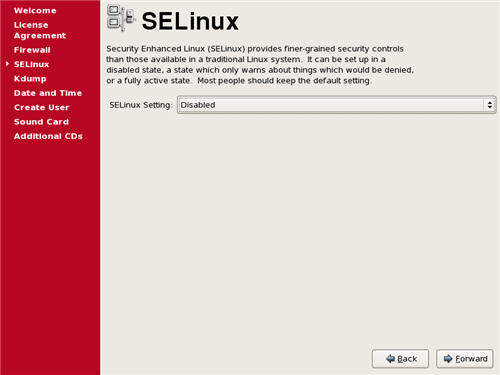
    SELinux

  33. Click the "Yes" button on the subsequent warning screen.
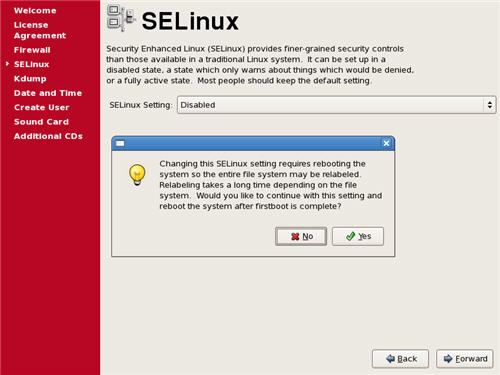
    SELinux Warning

  34. Accept the default setting on the Kdump screen by clicking the "Forward" button.
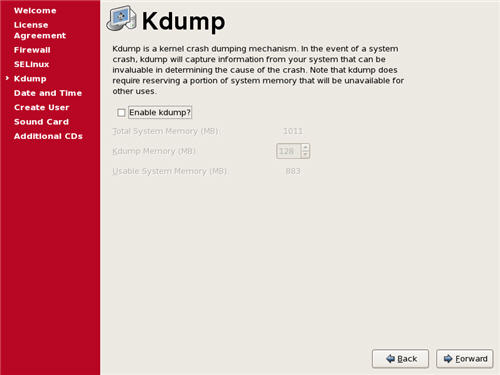
    Kdump

  35. Adjust the Date and Time settings if necessary, and click the "Forward" Button.
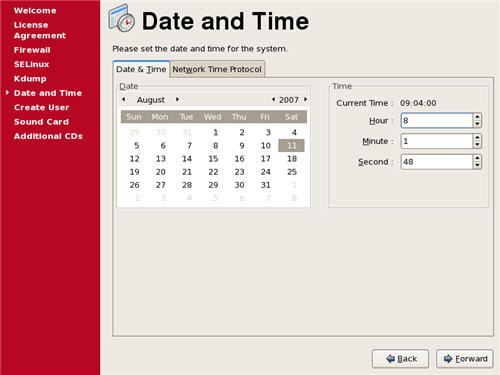
    Date Time

  36. If you have an Unbreakable Linux Support account, you can enter it here and register your system. Alternatively, you can pick the "No, I prefer to register at a later time" option and click the "Forward" button to avoid this step.

    Software Updates

  37. Create an additional system user if required, and click the "Next" button.
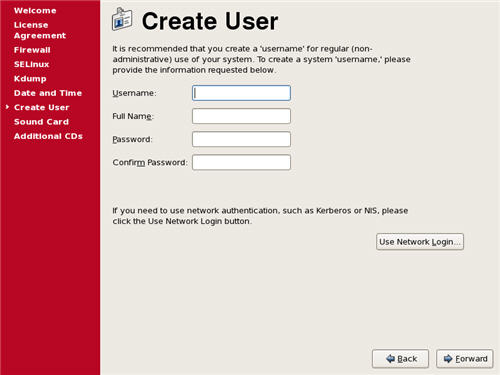
    System User

  38. If you chose not to define an additional system user, click the "Continue" button on the resulting warning dialog.
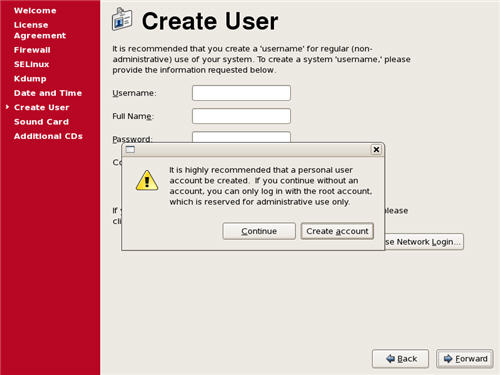
    System User Warning

  39. On the sound card screen, click the "Forward" button.
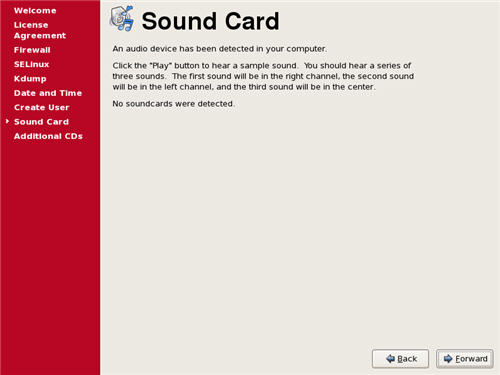
    SoundCard

  40. On the "Additional CDs" screen, click the "Finish" button.
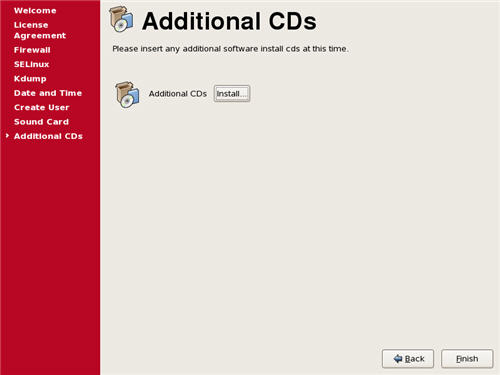
    Additional CDs

  41. Click the "OK" button on the reboot request dialog.
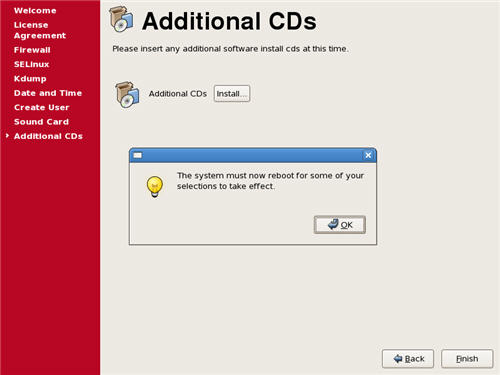
    Finish Setup

  42. Once the system has rebooted, you are presented with the login screen.
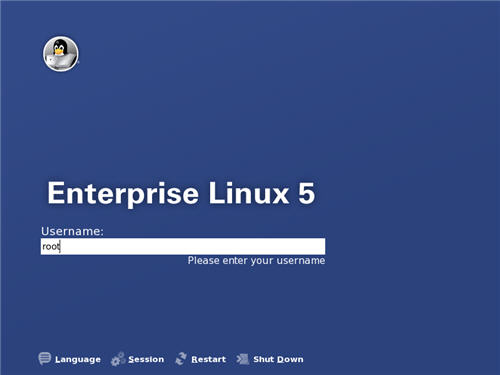
    Login

  43. Once logged in, you are ready to use the desktop.
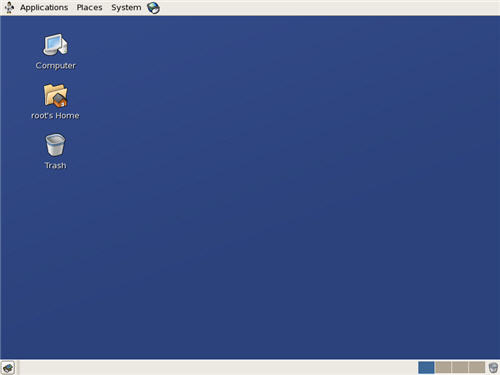
    Desktop

For more information see:

Hope this helps. Regards Tim...

Back to the Top.

转载于:https://www.cnblogs.com/vipsoft/archive/2012/04/26/2472781.html

24、水下传感器网络中混合LEACH协议与遗传算法获取路由节点 本文提出了一种结合遗传算法与LEACH协议的混合路由方案,用于提升水下无线传感器网络(UWSN)的能量利用效率和数据传输稳定性。通过遗传算法优化簇头选择与路径规划,有效避免节点过早死亡,减少能量消耗,在200个节点场景下显著提升网络寿命。相比传统LEACH协议,该方案具有更高的能量利用率、更强的环境适应性,并支持传输历史记录与并行传输序列。实验结果显示,该方案在总能量为2000焦耳时剩余能量达75.6%,远优于LEACH的34.8%能耗表现。适用于海洋监测、石油平台监控及水下灾害预警等复杂环境应用。 阅读详情

相关推荐

YOLOv8【第十二章:数据增强与数据工程篇·第10节】主动学习(Active Learning):如何挑选最有价值的样本进行标注!

🏆 本文收录于 《YOLOv8实战:从入门到深度优化》 专栏。该专栏系统复现并梳理全网各类 YOLOv8 改进与实战案例(当前已覆盖分类 / 检测 / 分割 / 追踪 / 关键点 / OBB 检测等方向),坚持持续更新 + 深度解析,质量分长期稳定在 97 分以上,可视为当前市面上 覆盖较全、更新较快、实战导向极强 的 YOLO 改进系列内容之一。

**My Coding Family** 441

Linux5.5安装64位oracle

Linux5.5安装64位oracle详细介绍

Vmware和Linux 5环境下Oracle 10G RAC部署全程图解指南

本文还有配套的精品资源,点击获取 简介:本教程详细讲解了如何在Vmware虚拟环境中安装Linux 5操作系统,并配置Oracle 10G Real Application Clusters (RAC)。内容覆盖从基础环境搭建到高可用数据库集群配置的整个流程,特别强调了关键配置步骤和实践应用。图解说明帮助读者更好地理解和执行安装配置过程,提升系统管理员和数据库管理员的技术能...

weixin_36431145的博客 1676

重要!当打开MMC或者inetmgr时提示“Cannot Open xxx.msc”,就用以下解决方法,安装至少MSXML3SP4然后重起就解决问题。...

http://www.ozzu.com/ftopic29639.htmlhttp://www.computing.net/windowsxp/wwwboard/forum/135452.htmlHave you installed the latest msxml parser? > > Try the following: > > > &gt...

weixin_30346033的博客 302

Solaris培训第三章:安装Solaris操作系统(转)

Solaris培训第三章:安装Solaris操作系统(转)[@more@]   基本   包含系统运行所需的最基本的软件和设备驱动。不包括图形界面和手册页。   最终用户   除了基本软件外,还包括图形界面。   开发...

ciya3282的博客 247

linux5怎么安装Oracle,Linux5安装oracle

1、 选择语言,最好选择ENGLISH。一切从英文开始,是个很好的习惯。其实也省了乱码问题。2、 磁盘分区。如果你磁盘很大,而且不用考虑机器崩溃后的修复,你可以选择自动分区。我虚拟机的磁盘也就20G,所以分7.9G给根分区,1G给/boot,2G给交换分区,剩下10G给/oracle。当然你有更大的硬盘就欢喜了,本人比较穷没办法了。关于交换分区的大小,有oracle官网专家给出这样的建议:所需最小...

weixin_39943101的博客 154

select the appropriate stylesheet according to the user's screen resolution

   // select_css.js  // -------------  // select the appropriate stylesheet according to the users screen resolution  document.write("  if (window.screen.height     //resolution is 800x600 or les

mrwu9902的专栏 426

linuxoracle操作

select * from dba_role_privs where grantee='用户名';比如: SQL>select * from dba_sys_privs where grantee='TOM';

LuoGJ的博客 1万+

linux上配置oracle9,【InstallationOracle9i在Oracle Linux 5 32bit上的成功安装

Report ContentIssue: *Copyright InfringmentSpamInvalid ContentsBroken LinksYour Name:*Your Email:*Details:*Submit Report1 工作描述9i由于版本过老,导致很难在Oracle Linux 5 64bit上安装成功。虽然有人说安装成功,但由于操作过于复杂,还需要找9.2.0.4...

weixin_42395669的博客 310

Oracle Enterprise Manager Cloud Control 13c Release 5 (13.5) Silent Installation on Oracle Linux 9

19cSTARTUP;exit;EOFEOFEOF/bin/bash/bin/bash。

sqlora的专栏 297

MySql 5.5.20 Installation on Oracle Linux Server release 5.7

安装环境:  操作系统: Oracle Linux Server release 5.7 MySql 版本: MySql5.5.20 安装方式: 源码安装 安装用户: 普通用户安装   一、下载mysql http://dev.mysql.com/download

lwei_998的专栏 2211

Oracle Database 11g Release 2 (11.2) Installation On Oracle Linux 5

Oracle Database 11g Release 2 (11.2) Installation On Oracle Linux 5 This article describes the installation of Oracle Database 11g Release 2 (11.2) (64-bit) on Oracle Linux 5 (64-bit). The article i

huyangg的专栏 961

Oracle Enterprise Manager Cloud Control 12c Release 1 Installation on Oracle Linux 5.7 and 6.1

Oracle Enterprise Manager Cloud Control 12c Release 1 Installation on Oracle Linux 5.7 and 6.1 Enterprise Manager Cloud Control is the new name for what was previously know as Enterprise M...

weixin_34407348的博客 103

Installation of Oracle 11g Release 2 (11.2.0.1.0) on RedHat EL 5, (Oracle) Enteprise Linux 5 and Cen

http://ivan.kartik.sk/oracle/install_ora11gR2_elinux.html Installation of Oracle 11g Release 2 (11.2.0.1.0) on RedHat EL 5, (Oracle) Enteprise Linux 5 and Centos 5 This paper (HOWTO) d

Welcome to Feng.Chang's Blog 1152

oracle linux5安装步骤,Oracle 11g for Linux CentOS 5.2 详细安装步骤分享(图解教程)

首先在oracle官方上下载一个oracle 11g(特别说明一下在安装CentOS 5.2时尽量是把开发包装全一些,这样您在安装包检测的时候就会少装一些包。还有一点:安装大概需要5G多的空间,空间不够就老是出错。)1、用unzip解压Oracle 11g文件unzip linux_x86_11gR1_database.zip(这个您也可以在Windows下面解压,不过您要加载过来,如果你的分区是...

weixin_39830323的博客 297

使用Microsoft数据迁移助手在Oracle数据库和SQL Server之间迁移的具体示例

介绍 (Introduction) Intended audience 目标听众 This document is intended for application developers and database administrators who plan to migrate an Oracle Database to Microsoft SQL Server. ...

culuo4781的博客 535

Oracle Linux5.5 10.2.0.1带库升级到10.2.0.5

1、升级crs 不停集群,解压升级补丁 [oracle@rac1 soft]$ unzip p8202632_10205_Linux-x86-64.zip [oracle@rac1 soft]$ cd Disk1/ 执行安装 [oracle@rac1 Disk1]$ ./runInstaller 在1节点执行提示脚本 停机群 [root...

whb234174124的博客 342

飞机外表缺陷识别yolo模型,七千多张原始图片,识别率84.4%,可识别裂缝,划痕,凹陷,腐蚀,螺头缺失,掉漆等问题

训练模型的数据集和训练代码来自 https://backend.blog.csdn.net/article/details/158345792

上一篇: SQLServer中批量插入数据方式的性能对比
下一篇: CentOS 6.0 图形(图解)安装教程、基本配置、网络配置、软件源配置、安装压...
adbc12256
博客等级 码龄12年 12粉丝 0原创
评论
添加红包

请填写红包祝福语或标题

红包个数最小为10个

红包金额最低5元

当前余额3.43前往充值 >
需支付:10.00
成就一亿技术人!
领取后你会自动成为博主和红包主的粉丝 规则
hope_wisdom
发出的红包
实付
使用余额支付
点击重新获取
扫码支付
钱包余额 0

抵扣说明:

1.余额是钱包充值的虚拟货币,按照1:1的比例进行支付金额的抵扣。
2.余额无法直接购买下载,可以购买VIP、付费专栏及课程。

余额充值