


1.点击按钮(按钮的点击事件在此不在赘述,接下来直接写底部弹框的实现方式和样式的设计)
2.弹框
Dialog  dialog = new Dialog(context, R.style.ActionSheetDialogStyle);
                //填充对话框的布局
                inflate = LayoutInflater.from(context).inflate(R.layout.dialog_layout, null);
               // setCancelable(iscancelable);//点击外部不可dismiss
                //setCanceledOnTouchOutside(isBackCanCelable);
                //初始化控件
                spinner = (Spinner) inflate.findViewById(R.id.sp);
                beizhu = (TextView) inflate.findViewById(R.id.beizhu);
                btn_cancel = (Button) inflate.findViewById(R.id.btn_cancel);
                btn_ok = (Button) inflate.findViewById(R.id.btn_ok);
                //将布局设置给Dialog
                taskProgress.setContentView(inflate);
                //获取当前Activity所在的窗体
                Window dialogWindow = taskProgress.getWindow();
                //设置Dialog从窗体底部弹出
                dialogWindow.setGravity(Gravity.BOTTOM);
                //获得窗体的属性
                WindowManager.LayoutParams lp = dialogWindow.getAttributes();
                //如果没有这行代码,弹框的内容会自适应,而不会充满父控件
                lp.width = WindowManager.LayoutParams.MATCH_PARENT;
                lp.y = 40;//设置Dialog距离底部的距离

                //将属性设置给窗体
                dialogWindow.setAttributes(lp);
                dialog .show();//显示对话框

             在需要消失地方直接
             dialog.dismiss();
3.窗口的样式
<style name="ActionSheetDialogStyle" parent="@android:style/Theme.Dialog">

        <!-- 背景透明 -->
        <item name="android:windowBackground">@android:color/transparent</item>
        <item name="android:windowContentOverlay">@null</item>
        <!-- 浮于Activity之上 -->
        <item name="android:windowIsFloating">true</item>
        <!-- 边框 -->
        <item name="android:windowFrame">@null</item>
        <!-- Dialog以外的区域模糊效果 -->
        <item name="android:backgroundDimEnabled">true</item>
        <!-- 无标题 -->
        <item name="android:windowNoTitle">true</item>
        <!-- 半透明 -->
        <item name="android:windowIsTranslucent">true</item>
        <!-- Dialog进入及退出动画 -->
        <item name="android:windowAnimationStyle">@style/ActionSheetDialogAnimation</item>
    </style>
    <!-- ActionSheet进出动画 -->
    <style name="ActionSheetDialogAnimation" parent="@android:style/Animation.Dialog">
        <item name="android:windowEnterAnimation">@anim/actionsheet_dialog_in</item>
        <item name="android:windowExitAnimation">@anim/actionsheet_dialog_out</item>
    </style>
4.窗口出现和消失的效果
对话框出现动画代码:
<?xml version="1.0" encoding="utf-8"?>
<translate xmlns:android="http://schemas.android.com/apk/res/android"
    android:duration="200"
    android:fromYDelta="100%"
    android:toYDelta="0" />

对话框消失的代码:

<?xml version="1.0" encoding="utf-8"?>
<translate xmlns:android="http://schemas.android.com/apk/res/android"
    android:duration="200"
    android:fromYDelta="0"
    android:toYDelta="100%" />
5.弹框的整体布局
<?xml version="1.0" encoding="utf-8"?>
<LinearLayout xmlns:android="http://schemas.android.com/apk/res/android"
    xmlns:tools="http://schemas.android.com/tools"
    android:id="@+id/activity_task_progress"
    android:layout_width="match_parent"
    android:layout_height="match_parent"
    android:gravity="center"
    android:orientation="vertical">

    <LinearLayout
        android:layout_width="match_parent"
        android:layout_height="wrap_content"
        android:layout_margin="20dp"
        android:background="@drawable/lin_style"
        android:gravity="center_vertical"
        android:orientation="vertical">

        <LinearLayout
            android:layout_width="match_parent"
            android:layout_height="wrap_content"
            android:layout_margin="20dp"
            android:layout_marginLeft="10dp"
            android:layout_marginRight="10dp"
            android:orientation="horizontal">

            <TextView
                android:layout_width="0dp"
                android:layout_height="match_parent"
                android:layout_weight="1"
                android:gravity="center"
                android:text="任务进度"
                android:textSize="17sp" />

            <Spinner
                android:id="@+id/sp"
                android:layout_width="0dp"
                android:layout_height="wrap_content"
                android:layout_weight="2"></Spinner>

        </LinearLayout>

        <LinearLayout
            android:layout_width="match_parent"
            android:layout_height="wrap_content"
            android:layout_marginBottom="10dp"
            android:layout_marginTop="20dp"
            android:focusable="true"
            android:focusableInTouchMode="true"
            android:orientation="horizontal">

            <TextView
                android:layout_width="0dp"
                android:layout_height="match_parent"
                android:layout_weight="1"
                android:gravity="center"
                android:text="备注"

                android:textSize="17sp" />

            <EditText
                android:id="@+id/beizhu"
                android:layout_width="0dp"
                android:layout_height="wrap_content"
                android:layout_weight="2"
                android:hint="请输入备注" />
        </LinearLayout>

    </LinearLayout>


    <LinearLayout
        android:layout_width="match_parent"
        android:layout_height="wrap_content"
        android:layout_marginBottom="10dp"
        android:layout_marginTop="5dp"
        android:orientation="horizontal">

        <Button
            android:id="@+id/btn_cancel"
            android:layout_width="0dp"
            android:layout_height="wrap_content"
            android:layout_gravity="center_vertical"
            android:layout_marginLeft="50dp"
            android:layout_marginRight="50dp"
            android:layout_weight="1"
            android:background="@drawable/button_style"
            android:minHeight="0dp"
            android:minWidth="0dp"
            android:paddingBottom="8dp"
            android:paddingLeft="10dp"
            android:paddingRight="10dp"
            android:paddingTop="8dp"
            android:text="取消"
            android:textColor="#fff" />

        <Button
            android:id="@+id/btn_ok"
            android:layout_width="0dp"
            android:layout_height="wrap_content"
            android:layout_gravity="center_vertical"
            android:layout_marginLeft="50dp"
            android:layout_marginRight="50dp"
            android:layout_weight="1"
            android:background="@drawable/button_style"
            android:minHeight="0dp"
            android:minWidth="0dp"
            android:paddingBottom="8dp"
            android:paddingLeft="10dp"
            android:paddingRight="10dp"
            android:paddingTop="8dp"
            android:text="确定"
            android:textColor="#fff" />
    </LinearLayout>
</LinearLayout>
6.lin_style样式
<?xml version="1.0" encoding="utf-8"?>
<shape xmlns:android="http://schemas.android.com/apk/res/android">
    <corners android:radius="10dp"></corners>
    <solid android:color="#fff" />
</shape>
7.button_style样式
<?xml version="1.0" encoding="utf-8"?>
<shape xmlns:android="http://schemas.android.com/apk/res/android">
    <corners android:radius="5dp"></corners>
    <solid android:color="#46b5e9" />
</shape>
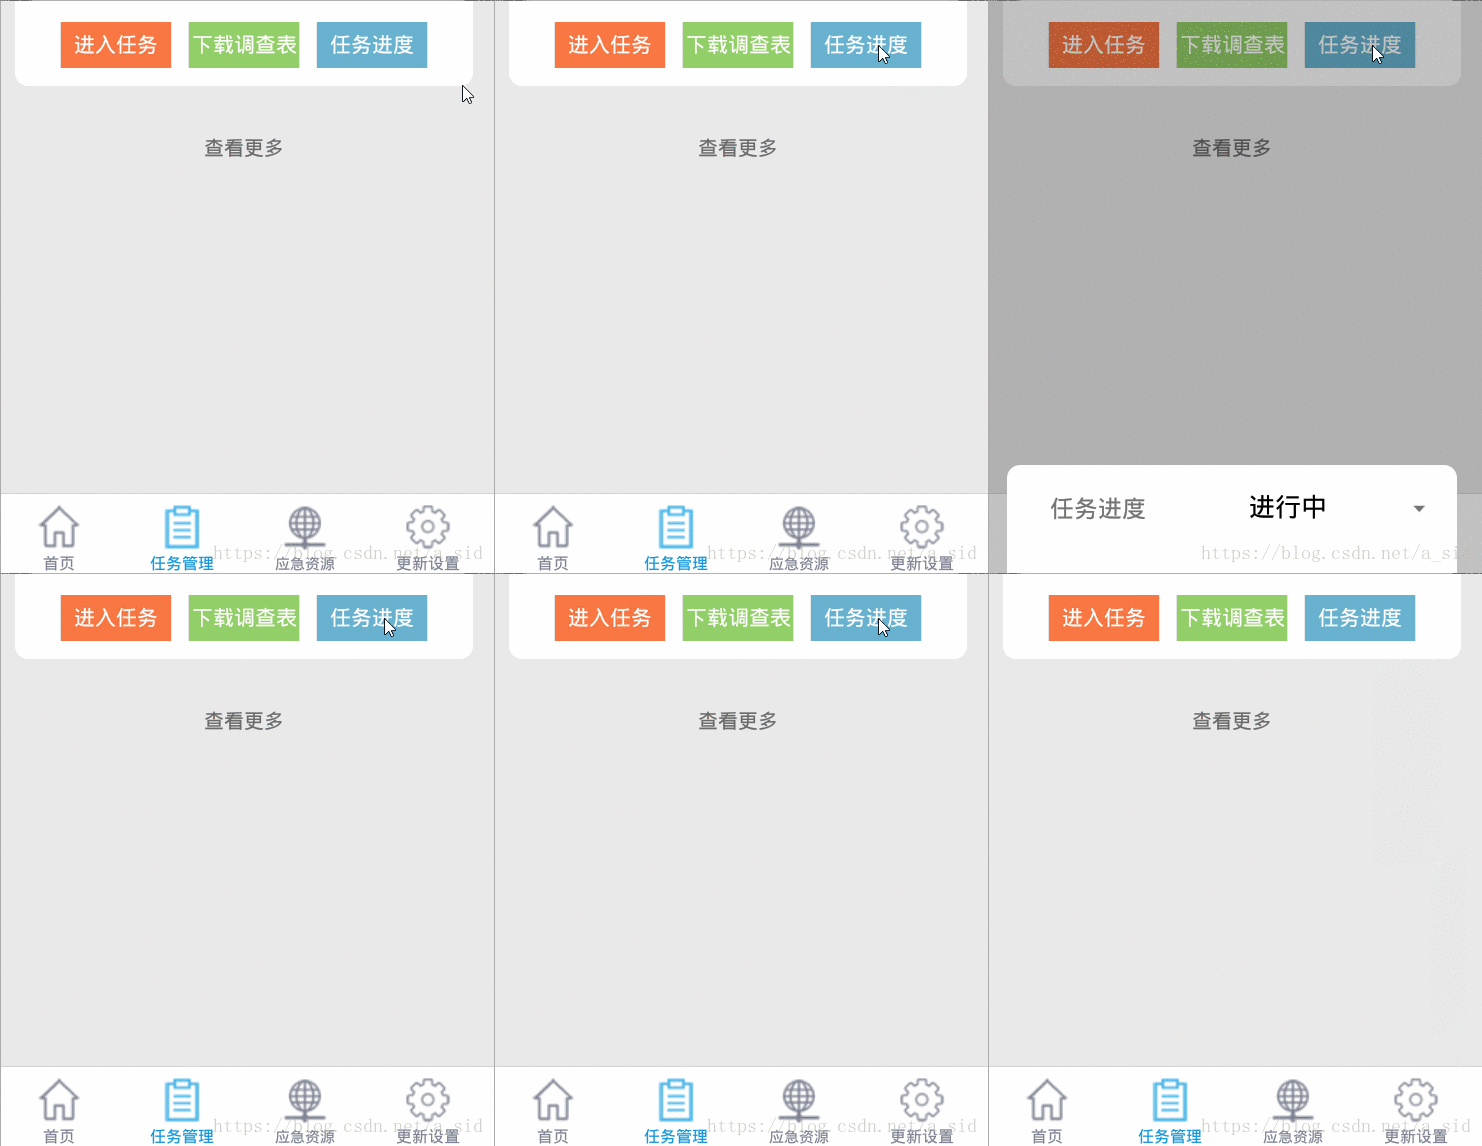
6.效果图

 4729
4729


 扫一扫
扫一扫


 被折叠的 条评论
为什么被折叠?
被折叠的 条评论
为什么被折叠?
 到【灌水乐园】发言


